msi old motherboard sets u disk boot
php editor Zimo will introduce to you how to set up U disk boot on the old MSI motherboard. USB boot is a convenient and fast way to install the operating system, repair system problems, etc. Setting up USB boot on old MSI motherboards is also very simple, just follow the steps below. First, enter the BIOS setting interface of the motherboard, which can generally be entered by pressing the DEL or F2 key. In the BIOS setup interface, find the "Boot" or "Boot" option, and then select "Boot Device Priority" or "Boot Device Priority". In the boot device priority, move the USB flash drive device to first place, then save the settings and exit the BIOS. In this way, the motherboard will automatically boot from the USB flash drive the next time you turn it on. With such a simple setting, you can easily use a USB flash drive to boot on an old MSI motherboard.
The earliest installation of the Windows system was done through the original CD, which requires a CD-ROM drive and CD, as well as certain computer technical knowledge. However, installation is very slow. Once the installation is completed, the system is blank and drivers and commonly used software need to be installed one by one. Therefore, a complete system installation takes approximately more than an hour.
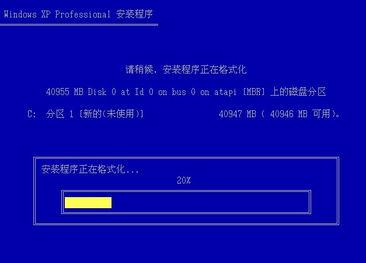
The core of the second generation system installation is Ghost technology, including the earliest "Ghost one-click installation DOS version" and the later WinPE system. Ghost technology has completely changed the limitations of using CD-ROM installation systems. It packages customized native systems, commonly used application software and hardware drivers to achieve quick installation. The entire installation process is fully automatic and unattended and very fast. It only takes about 10 minutes to complete the entire system installation, including drivers and commonly used software. However, it also has some problems. Most of the downloaded systems are not original, and many images contain promotional software, so the security of the system cannot be guaranteed.
Today, Xiaoyu will introduce to you the latest U disk installation system tutorial. The tutorial is very simple, just follow the steps to install the software. What's more, you don't need to download Windows images everywhere, because this tutorial allows you to download the system image directly from Microsoft's official website. After the download is complete, you only need to insert the USB flash drive into your computer and it will immediately be converted into the latest version of Windows 10 system disk.
1. PreparationBefore installing the system, you need to prepare a USB flash drive with a capacity of no less than 5G and a Windows computer that can access the Internet normally. It is recommended to use Windows 7 or Windows 10 system to improve installation efficiency.
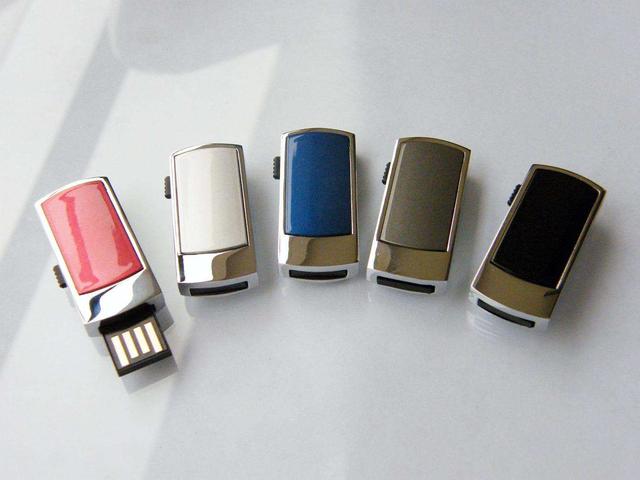 2. Preparation before installation - making system USB disk tool
To start installing Windows 10, you need to go to the "Download Windows 10" page of Microsoft's official website. On this page, you will find a USB flash drive creation tool that can help you with the installation process. Just click the "Download Tool Now" button at the bottom of the page to download the official USB flash drive creation tool.
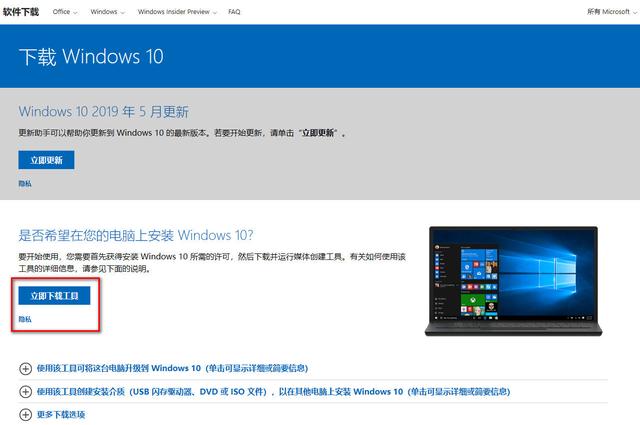
Download Windows 10 page
After the download is completed, please run the tool immediately and make sure that the USB flash drive is correctly inserted into the USB interface of the computer. Please back up the contents of the USB flash drive in advance because the next operation will automatically format the USB flash drive. Remember! Remember!
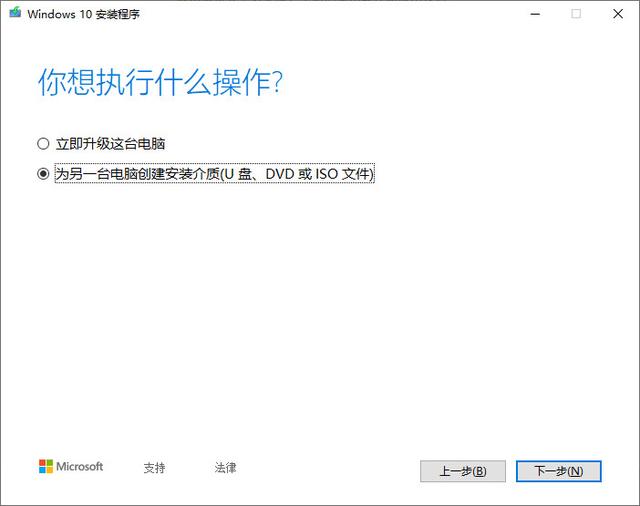
Run the Windows creation tool you just downloaded and follow the prompts to select "Create installation media (U disk, DVD or ISO file) for another computer.
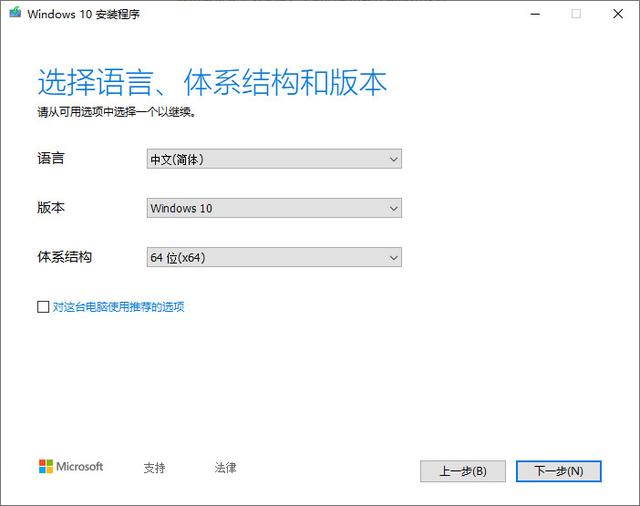
Then, Select the system language and version you want to install. If there are no special requirements, just use the default options here.
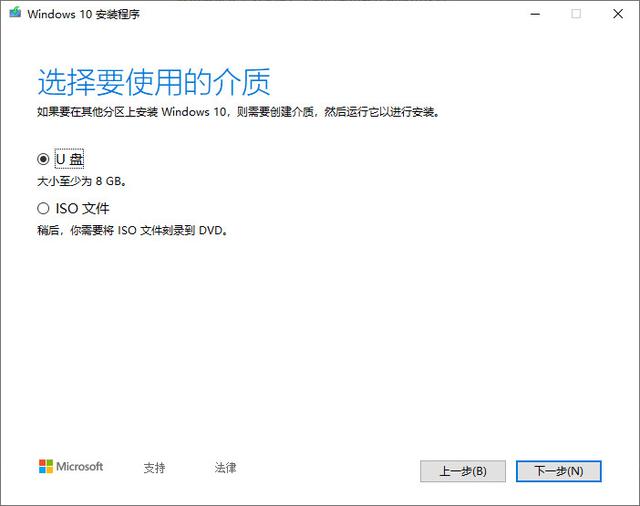
In this step, select the media to be used as a U disk. Then click Next Start creating Windows 10 media.
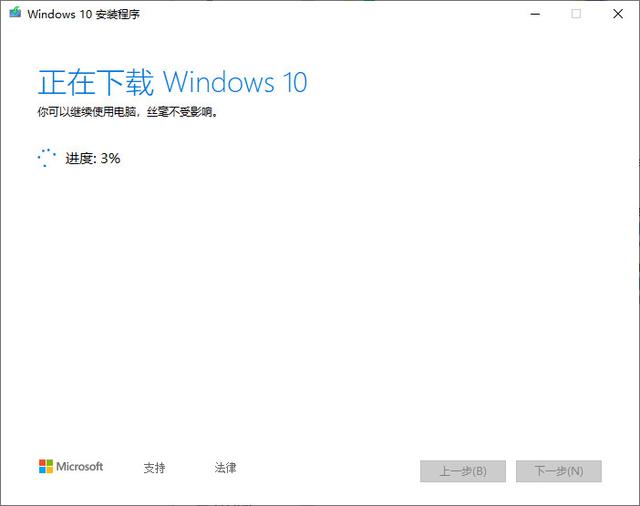
During this process, the program will automatically download the latest Windows 10 system version. Depending on your network environment and the performance of the USB disk, it will take about half an hour. At this time , you can drink a cup of coffee or browse Douyin, and wait patiently.
3. Boot the USB diskThis step is not difficult, but many people get stuck at this step when installing the system The reason is that I don’t know which key to press to enter the USB boot interface. However, there is no fixed key for this. Different computer brands and different motherboard models have different keys. You can customize it according to your own needs. Search for the computer model in detail. Generally speaking, there are F2, F12, F11, ESC and other keys. After finding the key to enter the shortcut startup of your computer, you can enter the U disk by continuously pressing that key when inserting the U disk to boot. in the system.
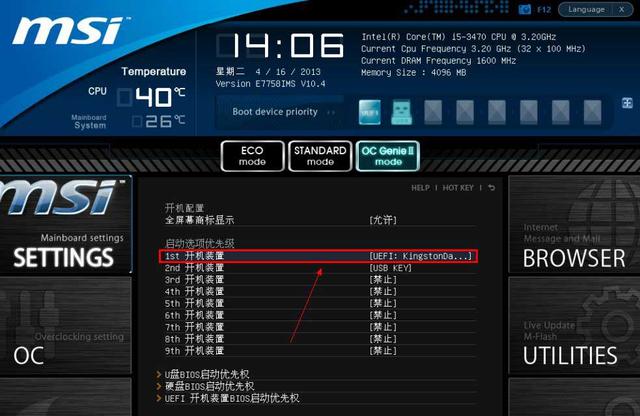
If you really can’t find it, you can also directly enter the BIOS and change the first place in the system startup sequence to a U disk, and then start again. The picture above is the interface for setting the system startup sequence for the msi motherboard. It is similar for other motherboards.
4. Install Windows systemAfter the system starts from the USB disk, the next operation is very simple, just like installing ordinary software. The whole process only requires clicking on Agree, Next and other operations. The process is also very simple.
Summary:
The Windows systems installed through this method are the latest official original systems, ensuring the security of the system. And only one USB flash drive is needed in the whole process, which is a fool-proof installation process. As long as you can install the software, you can install the system.
Have you learned it?
The above is the detailed content of msi old motherboard sets u disk boot. For more information, please follow other related articles on the PHP Chinese website!

Hot AI Tools

Undresser.AI Undress
AI-powered app for creating realistic nude photos

AI Clothes Remover
Online AI tool for removing clothes from photos.

Undress AI Tool
Undress images for free

Clothoff.io
AI clothes remover

AI Hentai Generator
Generate AI Hentai for free.

Hot Article

Hot Tools

Notepad++7.3.1
Easy-to-use and free code editor

SublimeText3 Chinese version
Chinese version, very easy to use

Zend Studio 13.0.1
Powerful PHP integrated development environment

Dreamweaver CS6
Visual web development tools

SublimeText3 Mac version
God-level code editing software (SublimeText3)

Hot Topics
 MSI\'s new X870 motherboards tackle the next-gen power crunch with supplemental PCIe connector
Sep 12, 2024 pm 06:08 PM
MSI has officially announced its next-generation AM5 motherboards, the X870 series, which are compliant with the ATX 3.1 standard. The standout feature here is the “Supplemental PCIe Power” feature – it’s a neat new power connector that'll pump extra
 CAMM2 for desktop PCs: MSI explains the benefits of the new RAM standard for gaming towers
Aug 17, 2024 pm 06:47 PM
The first LPCAMM2 modules for laptops are already being delivered, and desktop mainboards are also expected to be equipped with CAMM2 in future. CAMM2 and LPCAMM2 are not compatible with each other, and even on desktop PCs, customers need to be caref
 MPG 321CURX: MSI reveals specs and launch pricing for new Dell Alienware AW3225QF rival
Aug 17, 2024 am 06:53 AM
MSI has expanded its QD-OLED gaming options once again, two weeks after releasing the MAG 321UP in the UK and the US. For reference, the company's new gaming monitor is another 32-inch option, just like theMAG 321UP. However, the MPG 321CURX utilises
 ai tool recommendation
Nov 29, 2024 am 11:08 AM
This article introduces six popular AI tools, including Douyin Doubao, Wenxin Yige, Tencent Zhiying, Baidu Feipiao EasyDL, Baidu AI Studio and iFlytek Spark Cognitive Large Model. These tools cover different functions such as text creation, image generation, video editing, and AI model development. Choosing the right AI tool requires consideration of factors such as functional requirements, technical level, and cost budget. These tools provide convenient and efficient solutions for individuals and businesses in need of AI assistance.
 How to enable Douyin's beanbao function
Nov 28, 2024 pm 07:39 PM
The AI assistant "Doubao" launched by ByteDance, the parent company of TikTok, has attracted attention for its powerful generation capabilities. This guide provides simple steps to help you start your bean bag journey with ease. You can log in to Doubao through the web version (doubao.com) or Android App. You need to use your Douyin account for the first time. After logging in, you can try functions such as text creation, image generation, and voice interaction (Android App only) to explore the fun of AI creation.
 Deal | Beastly MSI Raider GE78 HX gaming laptop with RTX 4080, Core i9 and 32GB DDR5 goes on sale
Sep 05, 2024 pm 09:36 PM
For gamers who are primarily using their gaming laptop as a desktop replacement, a large notebook like the MSI Raider GE78 HX might be the best choice since the big 17-inch chassis usually offer more space for the airflow that is necessary to efficie
 JD.com, Taobao, Pinduoduo, Douyin, and Kuaishou jointly signed the 'Self-discipline Convention on Compliance and Operation of Online Transactions'
Aug 23, 2024 am 12:05 AM
Signatories of the "Convention on Self-Discipline in Compliance and Operation of Online Transactions": Beijing Jingdong Century Trading Co., Ltd. Taotian Co., Ltd. Shanghai Xunmeng Information Technology Co., Ltd. Shanghai Gewuzhipin Network Technology Co., Ltd. Beijing Kuaishou Technology Co., Ltd. Main contents: 1. Implementation of platform responsibilities Establish a credit evaluation mechanism, a product quality spot check mechanism, an advertising release management mechanism, strengthen the management of online live broadcasts and short video marketing activities, short video content management, and regulate competition within the platform. 2. Protection of consumer rights and interests. Adhere to social ethics and operate with integrity to protect the smooth flow of consumers' personal information. Channels for Consumer Complaints 3. Strictly prohibit unfair competition and healthy competition within the legal framework. Prevent malicious behavior from exploiting rules for profit. Prevent abuse of rules from causing unreasonable losses to operators within the platform. 4. Regulate price behavior. Clearly mark prices and prohibit profit.
 Anbi app official download v2.96.2 latest version installation Anbi official Android version
Mar 04, 2025 pm 01:06 PM
Binance App official installation steps: Android needs to visit the official website to find the download link, choose the Android version to download and install; iOS search for "Binance" on the App Store. All should pay attention to the agreement through official channels.


