

Spell check not working in Microsoft Edge

php editor Xiaoxin found that some users reported that the spell check function did not work properly when using the Microsoft Edge browser. The importance of spell check for correct writing is self-evident, as it helps us avoid spelling errors and grammatical problems. However, there seem to be some issues with this feature in Microsoft Edge. Users hope this issue can be resolved to improve their writing experience in this browser. In this article, we will explore the causes of this problem and provide some solutions to resolve this obsession.
Spell check isn't working in Microsoft Edge
If Spell check isn't working in Microsoft Edge on your system, use these fixes to resolve the issue.
Check the writing accessibility settings in Edge Add your preferred language Clear cache and cookies Reset Edge settings to defaults Install third-party extensionsLet’s take a look at all these fixes in detail.
1]Check the writing assist settings in Edge
The first step you should do is to check the writing assist settings in Edge. Microsoft Edge Writing Help includes the following two types of editors:
Microsoft Editor Basic EditorThe Basic Editor only provides basic spell checking functions, while Microsoft Editor provides more grammar, style and Spelling suggestions. Therefore, it is recommended to use Microsoft Editor.
If spell check assistance is turned off, spell check will not work in Edge. Follow these steps:
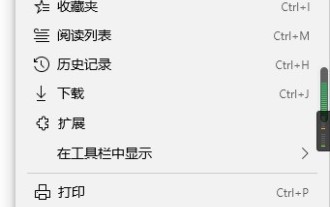
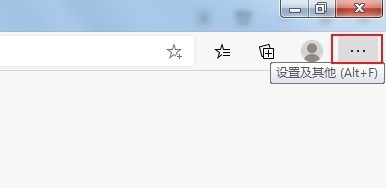
Open Microsoft Edge. Click the three dots in the upper right corner and select "Settings." Select a language category from the left. Turn on the "Enable grammar and spelling help" button. Choose a recommended Microsoft editor for best results.Restart Edge and see if the issue is resolved.
2] Add your preferred language
Your language should also be added to the Microsoft Edge spell checker. Use the following steps to add your language to Microsoft Edge spell checker.
Open the edge. Open its settings. Choose a language. If your preferred language is not available under the Languages section, click Add language. Select your language from the list and click Add.Follow the steps above and your preferred language will automatically appear in the Writing Help section. You can expand the language and enable enhanced spell checking under this section.
Now, restart Edge. Once you've done this, spell check should work as expected.
3]Clear cache and cookies
If spell check still doesn’t work in Edge, clearing cache and cookies may help. You can launch the Clear Browsing Data popup in Edge by pressing the Ctrl Shift Delete key. After that, select the following two options and click on Clear Now.
Cookies and other website data cached items and files4]Reset Edge settings to defaults
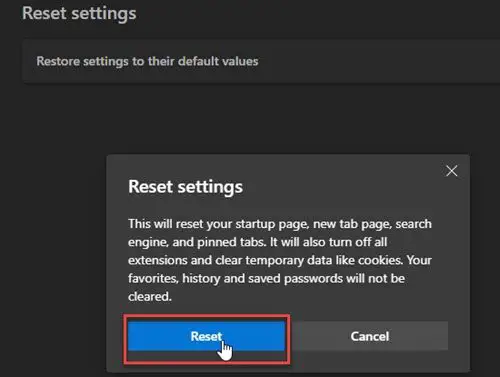
You can also try resetting Edge settings is the default value. This will reset your startup page, new tab page, search engine, and pinned tabs. Before continuing, be sure to log in to Edge with your Microsoft account to save all your bookmarks to the cloud.
5]Install a third-party extension
If the problem persists, you can install a third-party extension for spell checking. Grammarly is a very popular extension that checks for spelling and grammatical errors. You can install it by opening the Google Chrome Store in Edge. All Chrome extensions also work in Edge.
Grammarly only supports English. You can search for spell checker extensions that support multiple languages, including your preferred language.
That's it. I hope this helps.
How do I make Microsoft Word spell check again?
To make Microsoft Word spell-check again, you must enable it in settings. Open Word and go to File > Options > Proofing. Enable the "Check spelling as you type" option and click OK to save the settings.
How to turn on AutoCorrect on Windows?
You can turn on AutoCorrect in Windows 11 through Settings. Open Settings and go to Time & Language >Typing. Now, turn on the Automatically correct misspelled words option.
The above is the detailed content of Spell check not working in Microsoft Edge. For more information, please follow other related articles on the PHP Chinese website!

Hot AI Tools

Undresser.AI Undress
AI-powered app for creating realistic nude photos

AI Clothes Remover
Online AI tool for removing clothes from photos.

Undress AI Tool
Undress images for free

Clothoff.io
AI clothes remover

Video Face Swap
Swap faces in any video effortlessly with our completely free AI face swap tool!

Hot Article
Hot Tools

Notepad++7.3.1
Easy-to-use and free code editor

SublimeText3 Chinese version
Chinese version, very easy to use

Zend Studio 13.0.1
Powerful PHP integrated development environment

Dreamweaver CS6
Visual web development tools

SublimeText3 Mac version
God-level code editing software (SublimeText3)
Hot Topics
 1386
1386
 52
52

 How to set up automatic refresh in Edge browser
Apr 15, 2024 pm 02:55 PM
How to set up automatic refresh in Edge browser
Apr 15, 2024 pm 02:55 PM
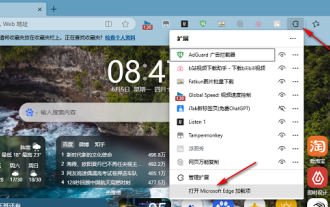
Some friends need the Edge browser to automatically refresh itself, so how to set up the automatic refresh of the Edge browser? Below, the editor will bring you a tutorial on setting up automatic refresh in Edge browser. Friends who need it can take a look. 1. Double-click to open the software, click the "Extension" icon in the upper toolbar, and then click "Open Microsoft Edge Add-in" in the option list below. 2. After entering the new window interface, enter "RefreshlessforMicrosoftEdge" in the search box in the upper left corner and press Enter to search. 3. Then find the program and click the "Get" button
 How does IDM extend to the browser? How to add IDM extension to browser
Apr 10, 2024 pm 04:19 PM
How does IDM extend to the browser? How to add IDM extension to browser
Apr 10, 2024 pm 04:19 PM
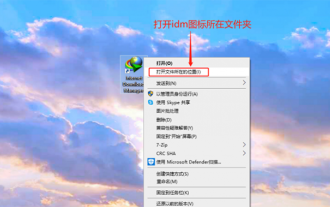
How to extend IDM to browser? In fact, generally speaking, if the user installs the IDM software in the default path, the IDM extension plug-in can be automatically installed on the default browser. However, if the plug-in cannot be installed, then you need to do it manually. Here I will introduce the browser to my friends. How to add IDM extension plug-in, I hope it will be helpful to you. Manually install the idm extension If the idm plug-in is not successfully installed in the browser due to operational errors, you can also install it manually through the following methods. Right-click the idm icon on the desktop and click "Open the location of the folder". In the installation directory of idm. Find ".crx" and ".ldq"
 How to add trusted sites in edge browser? How to set up a trusted site in edge
Apr 25, 2024 pm 05:30 PM
How to add trusted sites in edge browser? How to set up a trusted site in edge
Apr 25, 2024 pm 05:30 PM
How to add trusted sites in edge browser? When you surf the Internet, you may encounter the problem that some sites are not trusted and cannot be accessed normally. You want to know how to make the website trusted. If users can really ensure that the URL is trustworthy, then share edge with friends here How to set up a trusted site, I hope it will be helpful to everyone. How to set up a trusted site on edge 1. First, we double-click the edge browser directly on the computer desktop to enter the browser interface. 2. Click the three-dot icon button in the upper right corner of the interface and select [Internet Options] in [More Tools]. 3. After clicking to open it, we switch to the [Security] tab and click [Trusted
 How to set full screen in Edge browser How to set full screen in Edge browser
May 09, 2024 am 10:40 AM
How to set full screen in Edge browser How to set full screen in Edge browser
May 09, 2024 am 10:40 AM
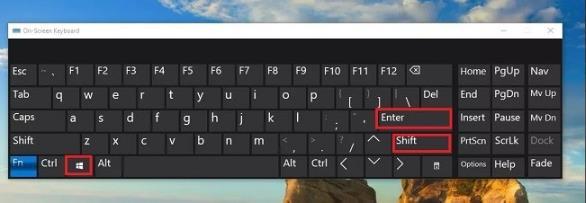
1. Use the shortcut key [Win+Shift+Enter]. 2. After entering full screen, click F11 to exit. Method 2: 1. Enter the browser and click the three dots in the upper right corner. 2. Click the magnification arrow behind zoom. 3. Press F11 after entering full screen to exit.
 How to set up microsoft edge autofill_microsoft edge autofill setting tutorial
May 09, 2024 pm 01:22 PM
How to set up microsoft edge autofill_microsoft edge autofill setting tutorial
May 09, 2024 pm 01:22 PM
1. First open Microsoft Edge, click the [...] button, and then click the [Settings] option button. 2. Then click the [Password and Autofill] button. 3. The last step is the Microsoft Edge auto-fill setting area.
 How to enable microphone permission in Edge browser How to enable microphone permission
May 09, 2024 pm 04:40 PM
How to enable microphone permission in Edge browser How to enable microphone permission
May 09, 2024 pm 04:40 PM
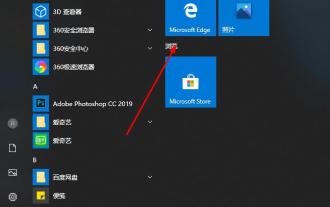
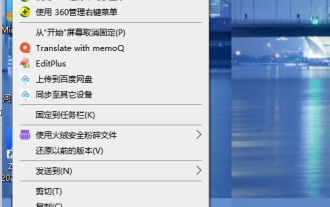
1. First, click Start, right-click and select [Microsoft Edge]. 2. Then, click [More] to open [App Settings]. 3. Next, find and enter [Application Permissions]. 4. Then, find [Microphone] in the permissions below. 5. Finally, turn on the switch behind the microphone.
 How to set the Edge browser to open in full screen by default
Apr 20, 2024 pm 12:43 PM
How to set the Edge browser to open in full screen by default
Apr 20, 2024 pm 12:43 PM
Some friends want to know how to set the default full-screen opening of the Edge browser. For this reason, the editor will bring you the method of setting the default full-screen opening of the Edge browser. Friends in need can take a look. 1. Find the software icon on the desktop, right-click and select "Properties" in the option list. 2. In the window interface that opens, find the "Run Mode" column and click the drop-down button of the option box. 3. Then select "Maximize" in the option list below, and finally click "OK" to save.
 How to close the desktop search bar in Microsoft Edge browser_How to close the desktop search bar in Microsoft Edge browser
Apr 02, 2024 pm 06:46 PM
How to close the desktop search bar in Microsoft Edge browser_How to close the desktop search bar in Microsoft Edge browser
Apr 02, 2024 pm 06:46 PM
1. Double-click to enter the software and click the [...] icon button at the top of the page (as shown in the picture). 2. Then click [Settings] in the menu options below to open it (as shown in the picture). 3. In the entered interface, click the [Privacy, Search and Services] option on the left (as shown in the picture). 4. Then find the [Address Bar and Search] option under [Services] (as shown in the picture). 5. Finally, turn off the switch button on the right side of [Use the characters I type to display search and site suggestions] (as shown in the picture).
