 Software Tutorial
 Computer Software
 How to configure TVbox address TVbox source configuration address method
How to configure TVbox address TVbox source configuration address method
php editor Youzi will introduce to you how to configure the TVbox address. TVbox is a smart TV box that allows users to obtain more resources and functions by configuring the address. There are many ways to configure the address, which can be done through network settings, app stores, or third-party tools. Different TVbox brands and models may have different configuration methods, but generally speaking, as long as you follow the corresponding steps, you can successfully configure the address and enjoy more film and television resources and applications. Let’s learn how to configure the TVbox address!
1. Open TVBox and find the interface configuration option
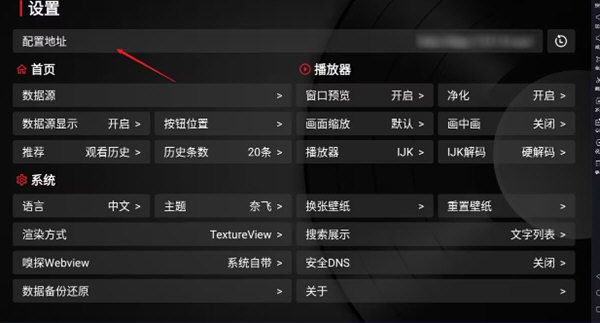
First, open your TVBox and enter the main menu. Find the "Settings" option in the main menu. After clicking to enter, you will see various configuration options. Find the option called "Configuration" and click to enter.

2. Enter the latest interface address
After clicking the "Configure" option, you will enter a new page. On this page, you will see an input box for entering the interface address. In this input box, enter your latest interface address and click Save or OK. You can also push by scanning the QR code.
3. Test whether the interface address is valid
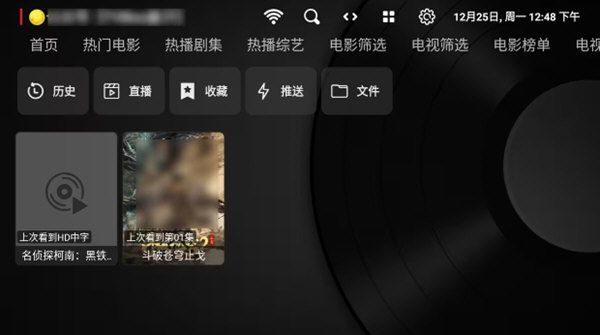
After entering the interface address, you can confirm whether the address is valid by testing. Return to the homepage, the system will automatically load the data, and there will be corresponding prompts for success or failure. If it fails, just modify the new configuration address again.

4. Enjoy your TVBox
Once the interface address is configured successfully, you can return to the main menu and start enjoying the functions of TVBox. You can watch a variety of video content, including movies, TV series, variety shows, and more. Keep in mind that if you are unable to watch something, it may be because the interface address has changed. In this case, you need to reconfigure the interface address.
The above is the detailed content of How to configure TVbox address TVbox source configuration address method. For more information, please follow other related articles on the PHP Chinese website!

Hot AI Tools

Undresser.AI Undress
AI-powered app for creating realistic nude photos

AI Clothes Remover
Online AI tool for removing clothes from photos.

Undress AI Tool
Undress images for free

Clothoff.io
AI clothes remover

AI Hentai Generator
Generate AI Hentai for free.

Hot Article

Hot Tools

Notepad++7.3.1
Easy-to-use and free code editor

SublimeText3 Chinese version
Chinese version, very easy to use

Zend Studio 13.0.1
Powerful PHP integrated development environment

Dreamweaver CS6
Visual web development tools

SublimeText3 Mac version
God-level code editing software (SublimeText3)

Hot Topics
 1378
1378
 52
52
![[PROVEN] Steam Error e87 Fix: Get Gaming Again in Minutes!](https://img.php.cn/upload/article/202503/18/2025031817560457401.jpg?x-oss-process=image/resize,m_fill,h_207,w_330) [PROVEN] Steam Error e87 Fix: Get Gaming Again in Minutes!
Mar 18, 2025 pm 05:56 PM
[PROVEN] Steam Error e87 Fix: Get Gaming Again in Minutes!
Mar 18, 2025 pm 05:56 PM
Article discusses causes of Steam Error e87, including network issues, security software, server problems, outdated clients, and corrupted files. Offers prevention and solution strategies.[159 characters]
 Steam Error e87: What It Is & How to Fix It
Mar 18, 2025 pm 05:51 PM
Steam Error e87 occurs during Steam client updates or launches due to connection issues. Fix it by restarting devices, checking server status, changing DNS, disabling security software, clearing cache, or reinstalling Steam.
 Easy Fix: Steam Error e87 Explained & Solved
Mar 18, 2025 pm 05:53 PM
Steam Error e87, caused by connectivity issues, can be fixed without reinstalling by restarting, checking internet, and clearing cache. Adjusting Steam settings helps prevent future occurrences.
 How to Fix Steam Error Code e87: The ULTIMATE Guide
Mar 18, 2025 pm 05:51 PM
Article discusses fixing Steam Error Code e87, caused by network issues, corrupt files, or client problems. Provides troubleshooting steps and prevention tips.
 Steam Error e87: Why It Happens & 5 Ways to Fix It
Mar 18, 2025 pm 05:55 PM
Steam Error e87 disrupts gaming on Steam due to connectivity issues. The article discusses causes like unstable internet and server overload, and offers fixes like restarting Steam and checking for updates.
 Steam Error Code e87: Get Back to Gaming FAST!
Mar 18, 2025 pm 05:52 PM
The article discusses Steam Error Code e87, its causes like network issues, server problems, and corrupted files, and provides fixes and preventive measures to avoid it.Character count: 159
 How to fix: err_response_headers_multiple_access_control_allow_origin error in Google Chrome
Mar 21, 2025 pm 06:19 PM
Article discusses fixing "err_response_headers_multiple_access_control_allow_origin" error in Chrome by addressing multiple Access-Control-Allow-Origin headers.
 Steam Error e87 SOLVED! Quick Fix Guide for 2024
Mar 18, 2025 pm 05:49 PM
Article discusses Steam Error e87, offering solutions like restarting Steam, clearing cache, and updating. Preventive measures and community solutions are also covered.


