

Hard drive writing assistant in mac (macbook air m1 hard drive writing)

php editor Baicao introduces you to a practical tool - hard disk writing assistant in mac (macbook air m1 hard disk writing), which can help users perform hard disk writing operations on MacBook Air M1 and improve work efficiency. . This tool is simple to use, easy to operate, supports multiple formats, and allows users to easily meet their hard drive writing needs.
How to write the cdr of the lazy version of Black Apple to a USB disk?
Step one: Download the seed of the lazy version image toolkit containing the CDR suffix. Step 2: Use the system's own or third-party tools to divide the hard disk into two areas, a 6G boot disk and an installation disk of at least 20G. Do not format it immediately. Step 3: Write the image file to the partition.
Use bootice to format the U disk into a USB-HDD (multi-partition) and divide it into two partitions: one with 500M and the other with remaining space. Assign a drive letter to the large partition of the USB flash drive, and then use 7zip to decompress iATKOS_ML2 to get the hfs file. Finally, use the hard disk writing assistant to write hfs into the large partition of the USB flash drive.
How to install the Black Apple system to a USB flash drive? First, download the U boot software and prepare a U disk of at least 10GB. Run the U boot software, select the inserted U disk, and click "Start Production".
Under Windows system, you can use a USB flash drive to create a MAC installation disk, but simply copying data to the USB flash drive is not enough. The image of the MAC system must be written to the USB flash drive. You can use the "Leopard Hard Drive Installation Assistant" software to complete this step. In this way, you can successfully create a USB flash drive that can be used to install the MAC system.
Use Hard Disk Installation Assistant v0.3 to write the Yosemite Install(14D131).cdr lazy version image to 7G, install Chameleon Install 228exe, and then replace wowpc.iso with the r2667FileNVRAM version. Restart the computer, press Del to enter the BIOS, and change the Gigabyte H61M-DS2 hard drive to AHCI.
Prepare the U disk in advance, download the Tianyi U disk maintenance package, make a startup tool disk, understand the computer hardware model, and prepare the Kext driver.
How to copy files to the hard drive on a mac computer
First open the MAC computer and click on the Launchpad icon on the left. Then search and open the [mounty] application. If it is not installed, you can download it from the software website. Then a mountain icon will appear in the menu bar.
After installing NTFS for Mac, restart the Mac system and open System Preferences, which can be found in the software icon. Under normal circumstances, after installing the software and inserting the ntfs file system disk again, you can immediately perform file operations, such as storing, creating, deleting files, etc., and you can use it directly without additional settings.
After right-clicking on the NTFS-formatted mobile hard disk, I found that the "New Folder" option was missing. You can use Mounty11 software to help copy files in NTFS formatted storage devices.
4. The first step is to connect the mobile hard disk to the computer, and then click the [Launch Pad] icon at the bottom as shown in the picture below. In the second step, in the pop-up window, find and click the [Photo] icon as shown in the picture below.
5. First, find the photo you want to copy to the hard drive on your Apple computer. Here is an example of a photo stored on the desktop. Place the mouse within the picture and right-click, and then the pop-up window will appear. Click the copy image .JPG in the options box that comes.
6. The method of copying photos from Mac to the hard drive is as follows: Connect the mobile hard drive to the computer and click the [Launch Pad] icon at the bottom. In the pop-up window, find and click the [Photo] icon. After opening the [Photos] window, hold down the [Shift] key and select all photos in sequence. Click the [File-Export-Export X Photos] option.
What to do if the Mac computer cannot write to the mobile hard disk
1. Follow the wizard prompts and restart the computer to complete all configurations. After the Mac restarts, open the Mac "Preferences" and you will see the icon of this software. Just double-click it to open it.
2. As shown in the picture below, a mobile hard drive is currently connected to my Mac.
3. Enter LaunchPad, find Disk Utility and click to open it. Click on the mobile hard drive on the left and click "Erase" at the top. For formatting settings, you can choose FAT or ExFAT as the format. After setting, click OK. After formatting, you will find a copy option in the right-click option, and you can also copy the file.
Conclusion: The above is all the content about the hard disk writing assistant in Mac that this website has compiled for you. Thank you for taking the time to read the content of this website. I hope it will be helpful to you. Don’t forget to learn more related content. Find it on this site.
The above is the detailed content of Hard drive writing assistant in mac (macbook air m1 hard drive writing). For more information, please follow other related articles on the PHP Chinese website!

Hot AI Tools

Undresser.AI Undress
AI-powered app for creating realistic nude photos

AI Clothes Remover
Online AI tool for removing clothes from photos.

Undress AI Tool
Undress images for free

Clothoff.io
AI clothes remover

AI Hentai Generator
Generate AI Hentai for free.

Hot Article
Hot Tools

Notepad++7.3.1
Easy-to-use and free code editor

SublimeText3 Chinese version
Chinese version, very easy to use

Zend Studio 13.0.1
Powerful PHP integrated development environment

Dreamweaver CS6
Visual web development tools

SublimeText3 Mac version
God-level code editing software (SublimeText3)
Hot Topics


 3 tips to easily customize your Mac computer name, host name and Bonjour name
Mar 06, 2024 pm 12:20 PM
3 tips to easily customize your Mac computer name, host name and Bonjour name
Mar 06, 2024 pm 12:20 PM
Many Mac users tend to keep the default name of their device and may never consider changing it. Many people choose to stick with the name from the initial setup, such as "Johnny's MacBook Air" or simply "iMac." Learning how to change the name of your Mac is a very useful skill, especially when you have multiple devices, as it can help you quickly distinguish and manage them. Next, we will teach you step by step how to change the computer name, host name and Bonjour name (local host name) in macOS system. Why should you change your Mac name? Changing the name of your Mac can not only show your personality, but also help improve the user experience: Personalize your Mac: The default name may not be to your taste, change it to a name you like.
 mhdd repair bad sectors tutorial
Feb 22, 2024 am 08:12 AM
mhdd repair bad sectors tutorial
Feb 22, 2024 am 08:12 AM
Introduction to the MHDD tutorial on repairing bad sectors: The hard disk is one of the most important components of the computer, and bad sectors are one of the common problems in the hard disk. Bad sectors can cause hard disk read and write speeds to slow down, data to be lost, and even system crashes. MHDD is a powerful hard drive repair tool. This article will introduce how to use MHDD to repair bad sectors on the hard drive. Step 1: Preparation to download the MHDD software: Search and download the MHDD software on the Internet to ensure you get the latest version of the software. Prepare a bootable USB flash drive: format the USB flash drive,
 Understand U disk format in one article: FAT32, NTFS or exFAT?
Mar 27, 2024 pm 05:40 PM
Understand U disk format in one article: FAT32, NTFS or exFAT?
Mar 27, 2024 pm 05:40 PM
U disk is one of the most commonly used storage devices in our daily lives. It is easy to carry, has sufficient capacity, and is affordable. But, do you know what the file system formats of USB flash drives are? Different file system formats have an important impact on the performance and compatibility of USB flash drives. This article will give you a detailed explanation of the three mainstream U disk file system formats: FAT32, NTFS and exFAT, and help you choose the U disk format that best suits you. Tool materials: System version: Windows 11 Home version Brand model: SanDisk Extreme High Speed CoolBean USB3.2 Software version: DiskGenius5.4.2.1239 1. FAT32 format FAT32 is currently the most widely used file system format for U disks. It has better Compatibility, several
 Detailed explanation of U disk formatting: understand the meaning and operation steps of formatting U disk in one article
May 01, 2024 pm 06:40 PM
Detailed explanation of U disk formatting: understand the meaning and operation steps of formatting U disk in one article
May 01, 2024 pm 06:40 PM
U disk is one of the commonly used storage devices in our daily life. It is small in size, large in capacity and easy to carry. It is deeply loved by the majority of users. However, in the process of using U disk, we often encounter situations where we need to format the U disk. So, what is formatting a USB flash drive? Why format the USB flash drive? How to format a USB flash drive correctly? This article will answer these questions for you in detail. Tool materials: System version: Windows11 Brand model: Kingston DataTravelerMax256GB Software version: No additional software required 1. What is a formatted USB flash drive? Formatting a USB flash drive means clearing all data on the USB flash drive and re-dividing the storage area to restore it to its original factory state. The formatted USB flash drive is like
 pkg file to install on mac?
Feb 20, 2024 pm 03:21 PM
pkg file to install on mac?
Feb 20, 2024 pm 03:21 PM
Preface: Today, this site will share with you the relevant content about installing pkg files on Mac. If it can solve the problem you are facing now, don’t forget to follow this site and start now! The previous version of macos pkg cannot be installed to upgrade the operating system: If your laptop is using an older operating system version, it is recommended to upgrade to the latest operating system version. Because older versions may not support installation of the latest macOS system. Select "Erase" in Disk Utility, then select the Macos extension in the format, do not check the encryption option, and do not select the apfs format, and finally click the "Erase" button to solve the problem of being unable to complete the macOS installation. Drag the application's icon to the file starting with App
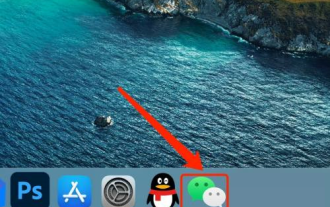 How to set up WeChat Mac to automatically convert voice messages into text - How to set up voice to text conversion
Mar 19, 2024 am 08:28 AM
How to set up WeChat Mac to automatically convert voice messages into text - How to set up voice to text conversion
Mar 19, 2024 am 08:28 AM
Recently, some friends have consulted the editor about how to set up WeChat Mac to automatically convert voice messages into text. The following is a method for setting up WeChat Mac to automatically convert voice messages into text. Friends in need can come and learn more. Step 1: First, open the Mac version of WeChat. As shown in the picture: Step 2: Next, click "Settings". As shown in the picture: Step 3: Then, click "General". As shown in the picture: Step 4: Then check the option "Automatically convert voice messages in chat to text". As shown in the picture: Step 5: Finally, close the window. As shown in the picture:
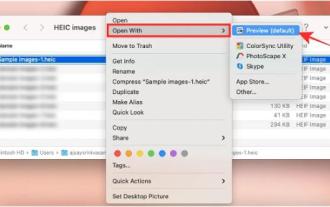 3 Ways to Convert HEIC Photos to JPG on Mac
Mar 15, 2024 pm 08:43 PM
3 Ways to Convert HEIC Photos to JPG on Mac
Mar 15, 2024 pm 08:43 PM
By default, iPhone takes photos from the camera in HEIC format. HEIC stands for High Efficiency Image Container and can hold more pixel data than PNG or JPG files, taking up significantly less space on iPhone storage compared to other formats. These files work best on iPhones but are not widely accepted on the internet because they often result in blurry/grainy pictures when you share them with non-Apple devices. To ensure that HEIC images are compatible on other devices, you may need to convert them to JPG format. This article will introduce how to convert HEIC images to JPG on Mac. How to Convert HEIC Photos to JPG on Mac [3 Methods] Method
 The copy of windows7 build 7601 is not genuine. The simplest solution is that the copy of build 7601 is not genuine.
Mar 15, 2024 pm 09:49 PM
The copy of windows7 build 7601 is not genuine. The simplest solution is that the copy of build 7601 is not genuine.
Mar 15, 2024 pm 09:49 PM
Recently, some friends reported that their computer prompts "The copy of Windows 7 internal version 7601 is not genuine." They all want to know if the copy of Windows 7 is not genuine 7601 and affects the use of it. The main reason for this is that the user's system has not been activated. Today I will give it to you. Let’s talk about the simplest solution to the problem that the copy of internal version 7601 is not genuine. Friends in need can come and take a look. The copy of windows7 internal version 7601 is not genuine. Method 1: 1. Press "win r" on the keyboard at the same time, then enter "CMD", and then press "Enter" to confirm. 2. Enter "SLMGR-REARM" in the pop-up window. Please note that there is a space in the middle. Don't miss it. 3. Then press Enter to confirm. A dialog box will pop up and click "Confirm".
