
 System Tutorial
MAC
Mac computer connected to external hard drive (macbookair external hard drive)
System Tutorial
MAC
Mac computer connected to external hard drive (macbookair external hard drive)
Mac computer connected to external hard drive (macbookair external hard drive)

php editor Banana will show you how to connect an external hard drive (macbook air external hard drive) to a mac computer, allowing you to easily expand storage space and realize convenient operations of data backup and file transfer.
One IMAC and one WIN10, how to use an external solid state together without having to plug and unplug it constantly?_Baidu...
When using Boot Camp under the Mac system, insert the USB After the market closes, you can find the operation options in the upper left corner. After clicking, an option will appear to download Windows support software, which are actually drivers. These support software are about 800MB and are needed when installing Windows systems.
You can install one system on one hard disk, or you can install multiple systems on the same hard disk.
Prepare a data cable. Your computer should now be equipped with a hard drive tray that has holes, so align it with the holes and insert it. In addition, find the power cord. It should be inside the chassis. Do not plug it in backwards and make sure it is inserted in the correct position.
Solid state drives and mechanical hard drives can be installed in a host at the same time, mainly depending on the host's expansion capabilities. You need to ensure that the host has a suitable location for installing two hard drives. It is best to directly equip 5-inch and 3.5-inch hard drive bays. This can make full use of the high-speed read and write performance of solid-state drives and the large-capacity storage of mechanical hard drives, improving the performance and storage capabilities of the overall system.
How to solve the problem of Mac not recognizing the external hard drive? Please find the method
The specific steps are as follows: When this prompt appears when booting, it means that the SSD has been successfully connected. Then click Initialize and open Disk Utility. Find the SSD in the tool and it will show as uninitialized.
If the Mac system cannot write to the external hard drive because it uses the NTFS file system, you can use the Mac's built-in disk tool to reformat the hard drive into a Mac-compatible format. Before doing this, be sure to back up important data using data backup software.
To solve the problem of reading a mobile hard drive on an Apple computer, you can connect the mobile hard drive to a Windows computer and check whether it can be recognized. In Windows systems, the external hard drive may appear in different locations, which may help find the reason why the external hard drive cannot be displayed on Apple computers.
Make sure the mobile hard drive is correctly inserted into the Mac computer and check whether the power supply is powered on. Check whether the USB data cable is intact. If the problem persists, there may be a system failure. Try restarting your Mac.
How to connect a mobile hard drive on Mac
Mac computers can connect the mobile hard drive through the USB interface, and then access the files in it through Finder. The specific connection steps include: using a USB cable to connect the mobile hard drive to the Mac computer, making sure the hard drive has been formatted in FAT32 format to ensure compatibility.
2. How to read the mobile hard drive with mac. Use a USB cable to connect the mobile hard drive to the Mac computer. Click the Apple icon in the upper left corner of the screen and select About This Mac to view the operating system version of your Mac computer. Find Finder from the desktop or application and click to open it.
3. You can use Tuxera NTFS For Mac software to identify, read and write the external disk. If you cannot read the mobile hard disk, you can try the following methods: Check whether "Show external disk" is checked. Check whether the Mac successfully mounts the external hard drive. Check whether the device has the NTFS for Mac driver installed. Restart your Mac computer.
4. The steps to use a mobile hard drive on Mac are as follows: Insert the mobile hard drive into the USB interface of the Mac computer. A new hard drive icon will appear on the desktop, double-click to open it. If the external hard drive is new, Mac will prompt you to format the hard drive.
5. First, you can use third-party software, such as paid ParagonNTFS or TuxeraNTFS. If you are using a Seagate hard drive, you can go to the Seagate official website to download a ParagonNTFS Seagate special version for free. You can also directly use the designated NTFS hard drive. Read and write.
How to use mobile hard disk on mac
1. Use USB cable to connect the mobile hard disk to Mac computer. Click the Apple icon in the upper left corner of the screen and select About This Mac to view the operating system version of your Mac computer. Find Finder from the desktop or application and click to open it.
2. The Mac computer can connect the mobile hard drive through the USB interface, and then open the mobile hard drive through Finder to access the files in it. The connection method specifically includes the following steps: Use a USB cable to connect the mobile hard drive to the Mac computer. Format the mobile hard disk to FAT32, and both systems can be used normally.
3. First, you can use third-party software, such as paid ParagonNTFS or TuxeraNTFS. If you are using a Seagate hard drive, you can go to the Seagate official website to download a ParagonNTFS Seagate special version for free. You can also directly use the designated NTFS hard drive. Read and write. Use a USB cable to connect the mobile hard drive to your Mac computer.

How to copy files to the hard drive on a mac computer
Correctly install NTFS for Mac. After the Mac system restarts, open System Preferences to find the software icon. Under normal circumstances, after the software is installed, when you insert the ntfs file system disk again, you can immediately store, create, and delete files on the disk normally, and you can use it directly without any other software settings.
Check the partition format of the mobile hard disk, which is displayed as an NTFS format mobile hard disk. Right-click on the mobile hard disk and find that there is no "New Folder" option. Mounty11 software can help us copy files to NTFS format storage devices.
The first step is to connect the mobile hard disk to the computer, and then click the [Launch Pad] icon at the bottom as shown in the picture below. In the second step, in the pop-up window, find and click the [Photo] icon as shown in the picture below.
First find the photo you want to copy to the hard drive on your Apple computer. Here is an example of a photo stored on the desktop. Place the mouse within the picture and right-click. Then in the pop-up Click in the option box to copy the image.JPG.
, download the NTFS software below to your computer and double-click it. Drag the NTFS here into the application folder. 2. Click NTFS for Mac.app to install and then open it. Enter your computer's own password and click Install Helper.
Conclusion: The above is all the content about connecting external hard drives to Mac computers introduced by this site. I hope it will be helpful to everyone. If you want to know more about this, remember to bookmark and follow this article. stand.
The above is the detailed content of Mac computer connected to external hard drive (macbookair external hard drive). For more information, please follow other related articles on the PHP Chinese website!

Hot AI Tools

Undresser.AI Undress
AI-powered app for creating realistic nude photos

AI Clothes Remover
Online AI tool for removing clothes from photos.

Undress AI Tool
Undress images for free

Clothoff.io
AI clothes remover

Video Face Swap
Swap faces in any video effortlessly with our completely free AI face swap tool!

Hot Article
Hot Tools

Notepad++7.3.1
Easy-to-use and free code editor

SublimeText3 Chinese version
Chinese version, very easy to use

Zend Studio 13.0.1
Powerful PHP integrated development environment

Dreamweaver CS6
Visual web development tools

SublimeText3 Mac version
God-level code editing software (SublimeText3)
Hot Topics
 1389
1389
 52
52

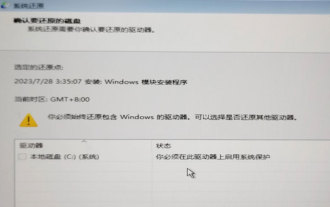 System Restore prompts that you must enable system protection on this drive
Jun 19, 2024 pm 12:23 PM
System Restore prompts that you must enable system protection on this drive
Jun 19, 2024 pm 12:23 PM
The computer has a restore point, and when the system is restored, it prompts "You must enable system protection on this drive." This usually means that the system protection function is not turned on. System protection is a feature provided by the Windows operating system that can create system restore points to back up system files and settings. That way, if something goes wrong, you can revert to a previous state. When the system fails and you cannot enter the desktop to start it, you can only try the following method: Troubleshooting-Advanced Options-Command Prompt Command 1 netstartvssrstrui.exe/offline:C:\windows=active Command 2 cd%windir%\system32 \configrenSYSTEMsy
 What should I do if win10 does not switch users? Win10 login interface does not have the option to switch users. Solution
Jun 25, 2024 pm 05:21 PM
What should I do if win10 does not switch users? Win10 login interface does not have the option to switch users. Solution
Jun 25, 2024 pm 05:21 PM
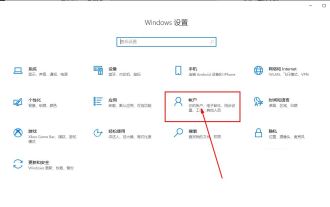
A problem that Windows 10 users may encounter is that they cannot find the switch user option on the login interface. So what should I do if there is no switch user option on the win10 login interface? Let this site give users a detailed explanation of the problem of not switching user options in the win10 login interface. Detailed solution to the problem of switching user options on the Win10 login interface: Check user account settings: First, make sure you have multiple user accounts on your computer and that these accounts are enabled. You can check and enable the account by following these steps: a. Press Win+I keys to open Settings and select "Accounts". b. Select "Family & Others" or &ld in the left navigation bar
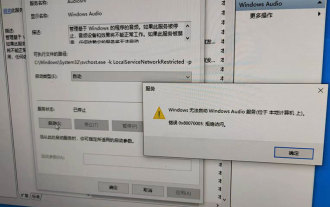 Windows cannot start the Windows Audio service Error 0x80070005
Jun 19, 2024 pm 01:08 PM
Windows cannot start the Windows Audio service Error 0x80070005
Jun 19, 2024 pm 01:08 PM
The guy's computer appears: Windows cannot start the WindowsAudio service (located on the local computer). Error 0x8007005: Access denied. This situation is usually caused by user permissions. You can try the following methods to fix it. Method 1: Modify the registry to add permissions through batch processing, create a new text document on the desktop, save it as .bat, and right-click the administrator to go far. Echo==========================EchoProcessingRegistryPermission.Pleasewait...Echo================== ========subinacl/subkey
 What to do if the Win10 Task Manager crashes? How to fix the Win10 Task Manager crash?
Jun 25, 2024 pm 04:31 PM
What to do if the Win10 Task Manager crashes? How to fix the Win10 Task Manager crash?
Jun 25, 2024 pm 04:31 PM
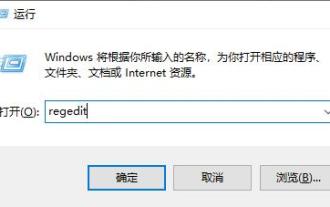
Hello everyone, have you ever encountered the situation where the Windows 10 Task Manager keeps crashing? This function helps us a lot, allowing us to quickly see all running tasks, which is very convenient to use, right? However, some friends said that they encountered this problem and didn’t know how to solve it, so let me share with you the specific solution! Solution to Win10 Task Manager crash 1. First, press and hold the "Win" + "R" keys on the keyboard to open Run, enter "regedit" and press the Enter key. 2. Expand the folders and find "HKEY_CURRENT_USERSoftwareMicros
 What should I do if my Win10 password does not meet the password policy requirements? What to do if my computer password does not meet the policy requirements?
Jun 25, 2024 pm 04:59 PM
What should I do if my Win10 password does not meet the password policy requirements? What to do if my computer password does not meet the policy requirements?
Jun 25, 2024 pm 04:59 PM
In the Windows 10 system, the password policy is a set of security rules to ensure that the passwords set by users meet certain strength and complexity requirements. If the system prompts that your password does not meet the password policy requirements, it usually means that your password does not meet the requirements set by Microsoft. standards for complexity, length, or character types, so how can this be avoided? Users can directly find the password policy under the local computer policy to perform operations. Let’s take a look below. Solutions that do not comply with password policy specifications: Change the password length: According to the password policy requirements, we can try to increase the length of the password, such as changing the original 6-digit password to 8-digit or longer. Add special characters: Password policies often require special characters such as @, #, $, etc. I
 Windows privacy optimization, Win10/11 system privacy settings, protect personal information security
Jun 18, 2024 pm 08:55 PM
Windows privacy optimization, Win10/11 system privacy settings, protect personal information security
Jun 18, 2024 pm 08:55 PM
From the Microsoft official website, create a new text document on the desktop, save it as "Privacy Optimization.reg", right-click and merge. WindowsRegistryEditorVersion5.00;Turn off the activity test of the Windows Network Connectivity Status Indicator[HKEY_LOCAL_MACHINE\SOFTWARE\Policies\Microsoft\Windows\NetworkConnectivityStatusIndicator]"NoActiveProbe"=dword:00000001;Turn off the automatic download and update of map data[HKEY_LOCA
 Where is the win10 user profile? How to set the user profile in Win10
Jun 25, 2024 pm 05:55 PM
Where is the win10 user profile? How to set the user profile in Win10
Jun 25, 2024 pm 05:55 PM
Recently, many Win10 system users want to change the user profile, but they don’t know how to do it. This article will show you how to set the user profile in Win10 system! How to set up user profile in Win10 1. First, press the "Win+I" keys to open the settings interface, and click to enter the "System" settings. 2. Then, in the opened interface, click "About" on the left, then find and click "Advanced System Settings". 3. Then, in the pop-up window, switch to the "" option bar and click "User Configuration" below.
 MacBook Pro, iMac to get the M4 upgrade later this year followed by MacBook Air in spring of 2025, claims reliable tipster
Jun 25, 2024 am 06:35 AM
MacBook Pro, iMac to get the M4 upgrade later this year followed by MacBook Air in spring of 2025, claims reliable tipster
Jun 25, 2024 am 06:35 AM
Ever since the Apple M4-powered OLED iPad Prolineuparrived, Apple Silicon aficionados have been eagerly awaiting the arrival of the M4 SoC on the Mac lineup. The M4 was undeniably a major leap forward in both compute and graphics performance - leapfr
