
php editor Banana will introduce you to two methods of setting the "read-only mode" of Word documents. This way you ensure that the document content is not accidentally modified or deleted. The following will explain to you in detail how to use these two methods to protect your Word documents.
After opening the Word document, click the [File] option on the menu bar, and then click [Information]-[Protect] Document]-[Always open as read-only].
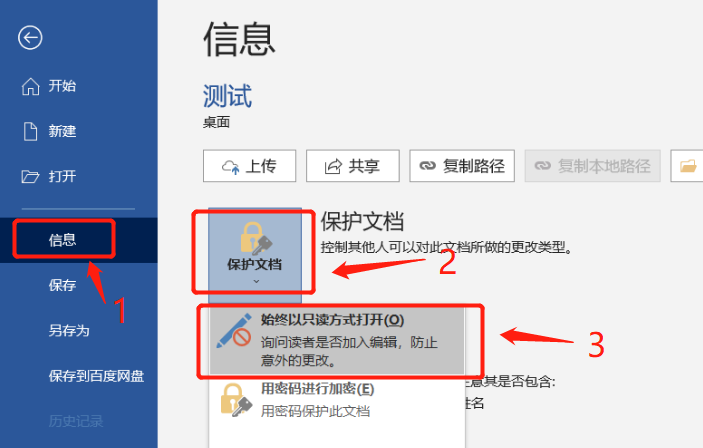
Then save and close the document, and the "read-only mode" will be set. When you open the document again, you will be prompted [Whether to open it in read-only mode].

If you select [No], the document will not be opened in "read-only mode" and can be edited normally.
If you select [Yes], the document can still be edited, but when closing the document, it will prompt [This file cannot be saved], which means that although it can be modified, the original document cannot be saved. This can prevent accidental modification of the document content. role.
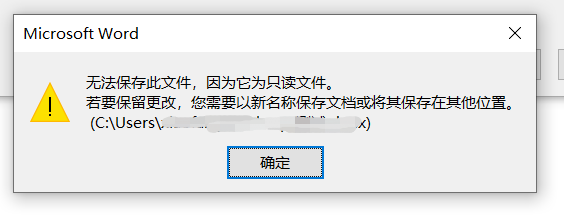
If protection is no longer needed later, this "passwordless read-only mode" can also be removed.
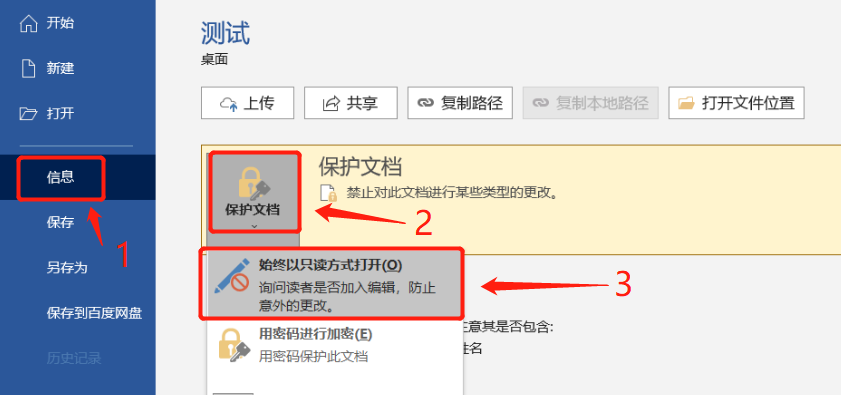
First of all, after opening the Word document and the above prompt pops up, you must select [No] to enter the normal editing mode, and then follow the set path and click [File] - [Information] - [Protect Document] - [Always use only Open in reading mode].
After completion, the "read-only mode" of the Word document will be cancelled.
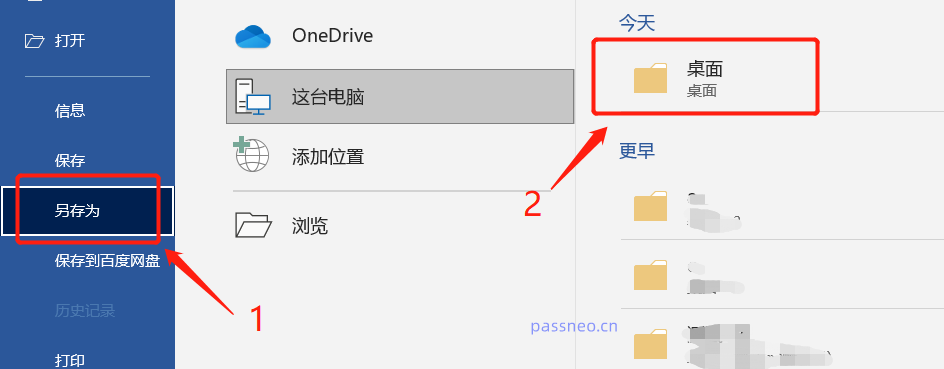
If you need to set the "read-only mode" of the password, we can set it through the "Save As" method.
After opening the Word document, click the [File] option on the menu bar, then click [Save As], and then select the save path on the right.
After the new page pops up, click [General Options] in the [Tools] list below.
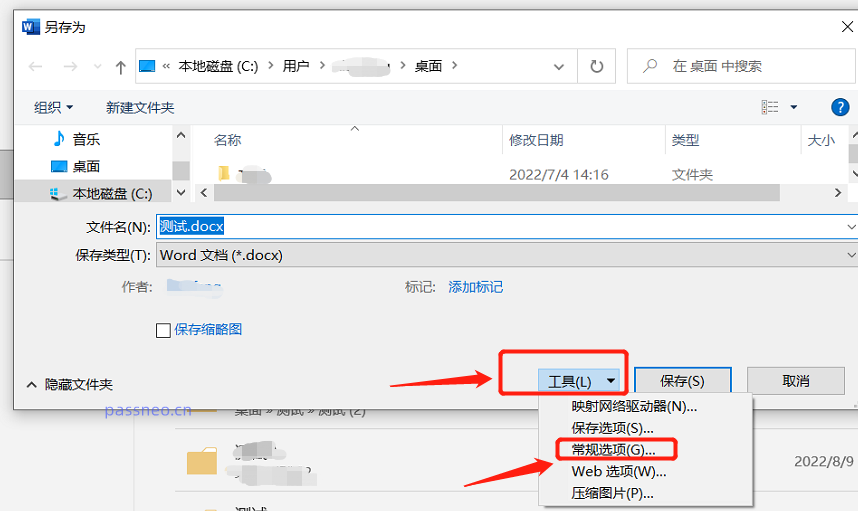
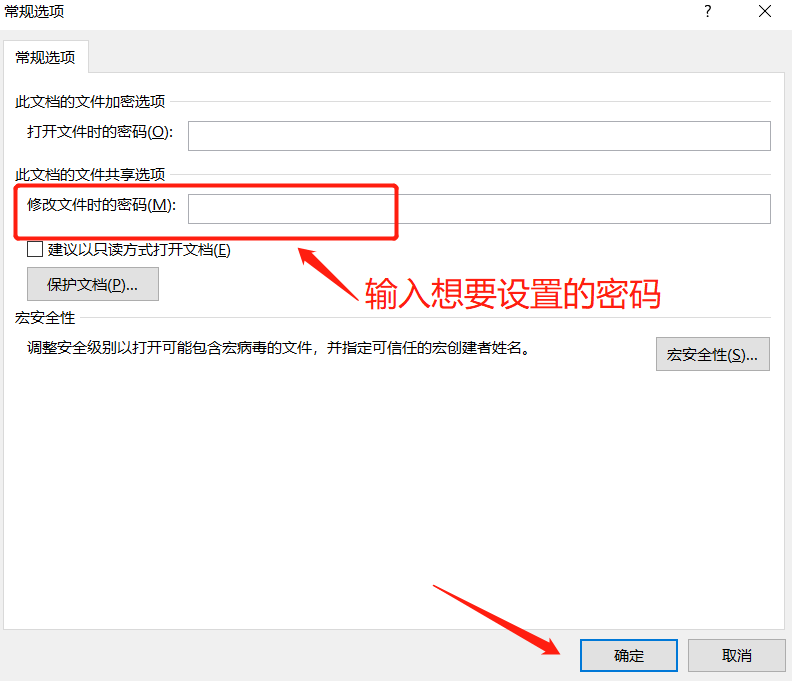
In the password page, find [Password when modifying files], enter the password you want to set, and then confirm the password again. After clicking [Save], the "Read-only mode with password" of the Word document will be set. .
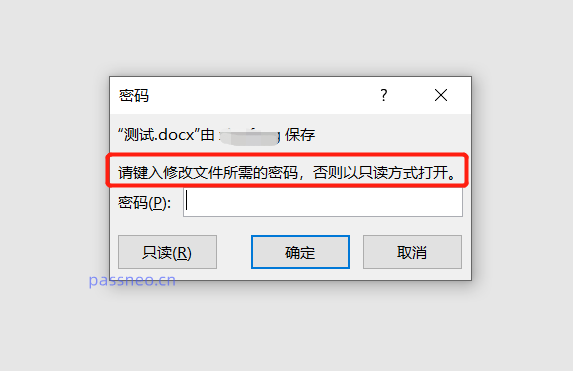
When you open the document again, the same prompt will pop up, but this time the prompt is [You need to enter a password, otherwise it will be opened in read-only mode]. In other words, if you want to edit normally, you need to enter the originally set password. If you select [Read Only], you can also edit, but the original document cannot be saved.
The "password read-only mode" of Word documents can also be lifted, whether you know the password or not.
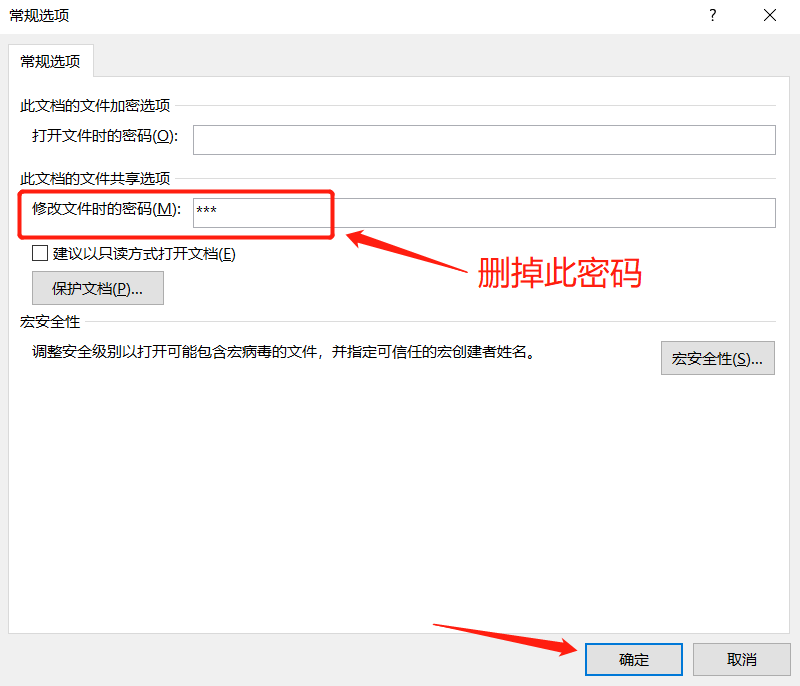
If you know the password, after opening the Word document, enter the editing mode through the password, and then follow the set operation path and click [File] - [Save As] - ["Select Save Path"] - [Tools] - [General] Options].
You can see that in the pop-up page, there is already a password in [Password when modifying the file]. Delete the password and turn it into a blank space. After clicking [OK], the "read-only mode with password" of the Word document will be released. .
If we don’t know the password, we can enter the Word document by clicking the [Read-only] option. 
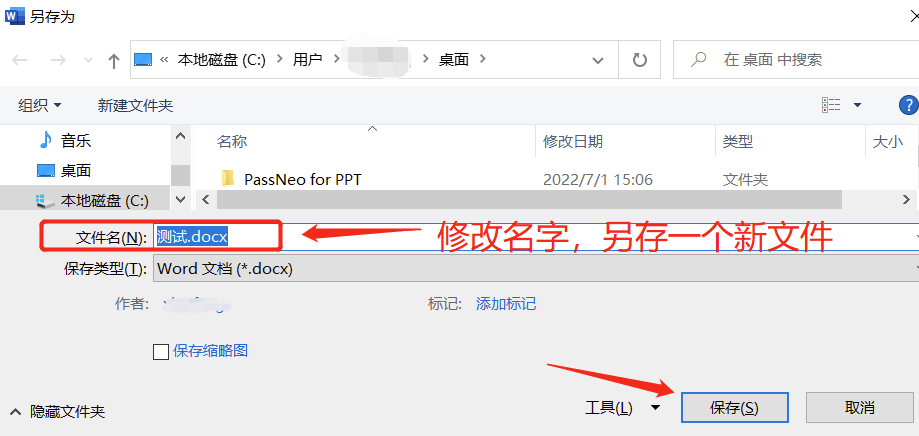
Then use "Save As" to modify the file name and save Word as a new document. The new document will not have "read-only mode".
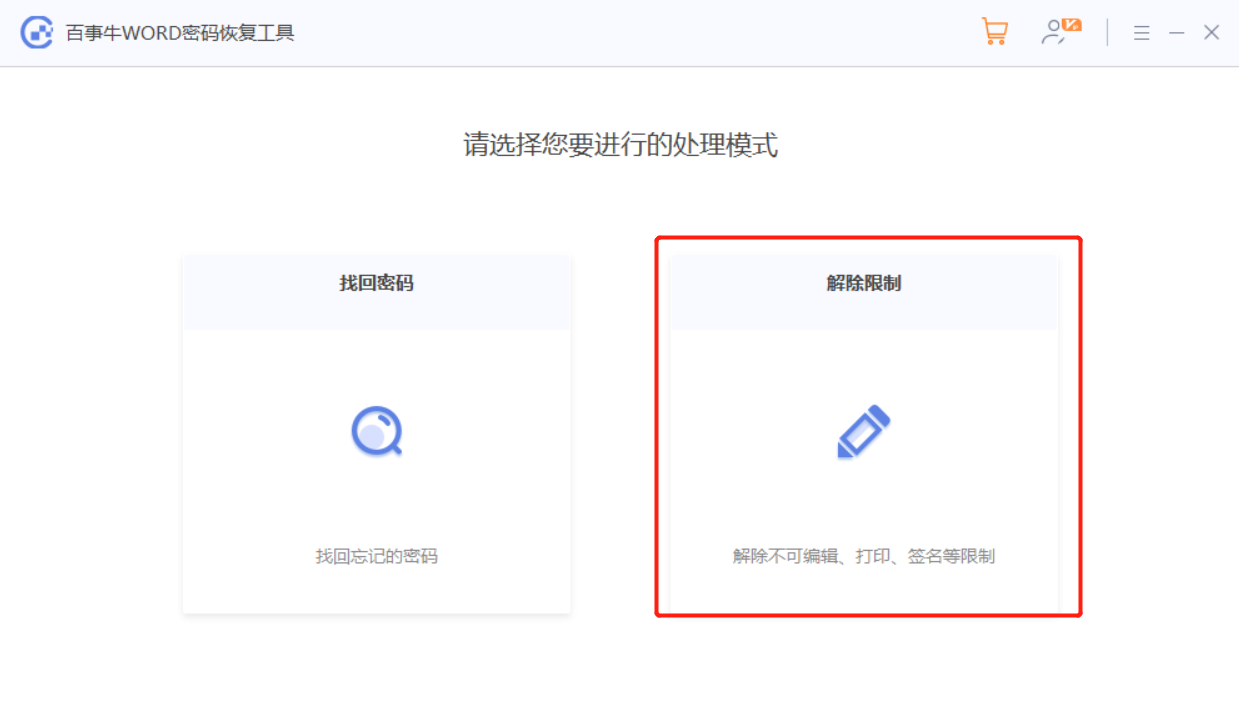
Of course, we can also use other tools, such as the Pepsi Niu Word password recovery tool, No matter which "read-only mode" it is, it can be removed directly, and the "restricted editing" can also be lifted without entering the password. ".
Select the [Unrestriction] module in the tool, and then import the Word file to remove it.
Tool link: Pepsi Niu Word Password Recovery Tool
That’s it for today’s sharing. If you still have questions related to Word, you can read the editor’s other articles.
The above is the detailed content of Two methods to set the 'read-only mode' of a Word document. For more information, please follow other related articles on the PHP Chinese website!
 What versions of linux system are there?
 Usage of #include in C language
 What does margin mean in css
 How to restore normal printing when the printer is offline
 What does liquidation mean?
 Introduction to article tag attributes
 How to start oracle data monitoring
 windows cannot open add printer
 Virtual mobile phone number to receive verification code


