

php editor Banana shares two methods of setting the "read-only mode" of PPT. At work, sometimes we need to share PPT for others to view, but we do not want them to edit or modify the content. At this time, setting the PPT to "read-only mode" is a good choice. Next, we will introduce two simple and practical methods to help you easily master how to set the "read-only mode" of PPT.
There are two specific setting methods. We can choose the appropriate method according to different needs.
method one:
To prevent accidental changes and serve as a reminder, we only need to set the "read-only mode" without a password.
After opening the PPT, click the [File] option in the menu, and then click [Information] - [Protect Presentation] - [Always open as read-only].
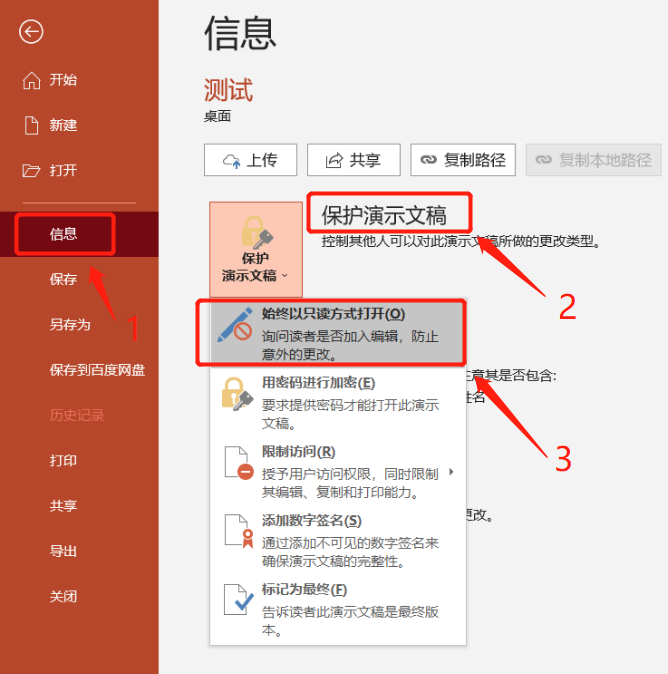
After selection, close the PPT file and save it, and the "read-only mode" of the PPT will be set. When you open the PPT file again, you cannot modify or input content, and the options in the menu bar are also gray and cannot be clicked.

If we want to edit the PPT later, we can find a prompt under the menu bar [To prevent accidental changes, the author has set this file to open in read-only mode], and then click [Edit Anyway] on the right, PPT You can edit it directly.

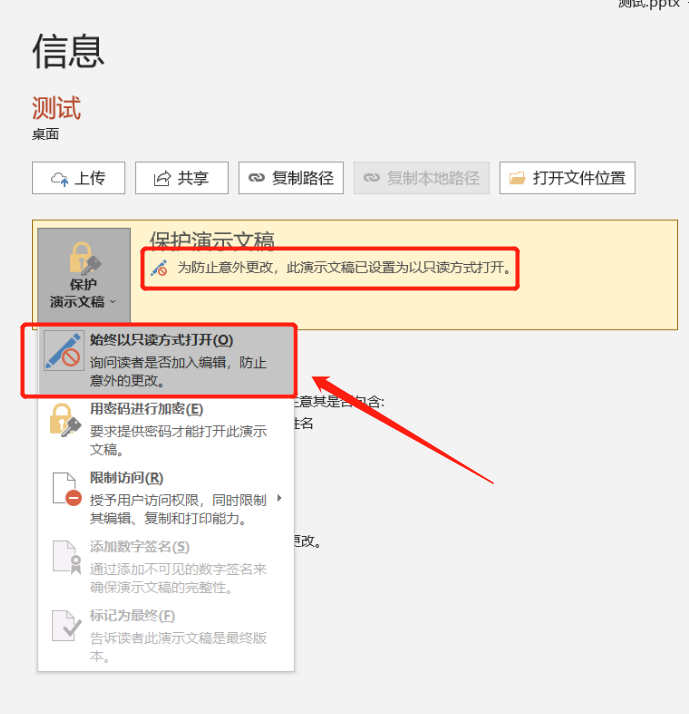
If we want the file to no longer be in "read-only mode" next time we open it, that is, to cancel the read-only mode, we need to click [Edit Still] in the appeal method, and then click [File] according to the set path. -[Information]-[Protect Presentation].
You can see the text prompting "Document is set to open in read-only mode" under the options, then click [Always open in read-only mode], and the "read-only mode" of the PPT will be released. There are no restrictions when you open the PPT again and you can edit it directly.
Method Two:
If the purpose of setting protection for the PPT file is to prevent others from modifying it at will, we can set a "read-only mode" with a password, so that the PPT can only be modified by entering the correct password.
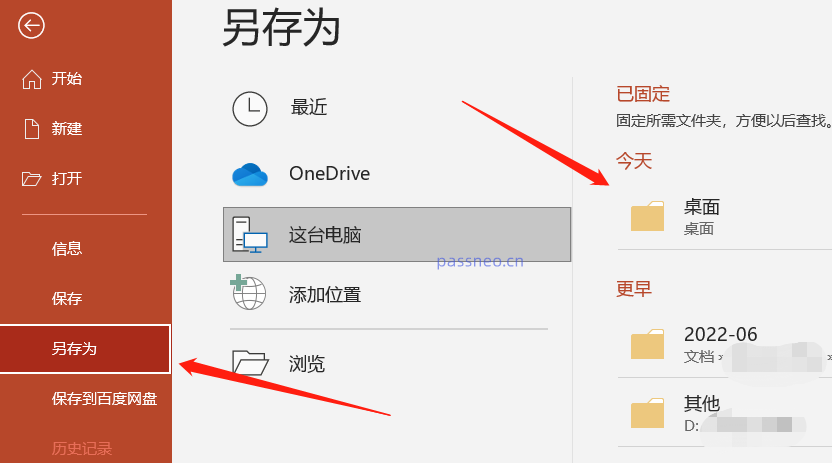
After opening the PPT, click the [File] option in the menu, then click [Save As], and select the save path on the right.
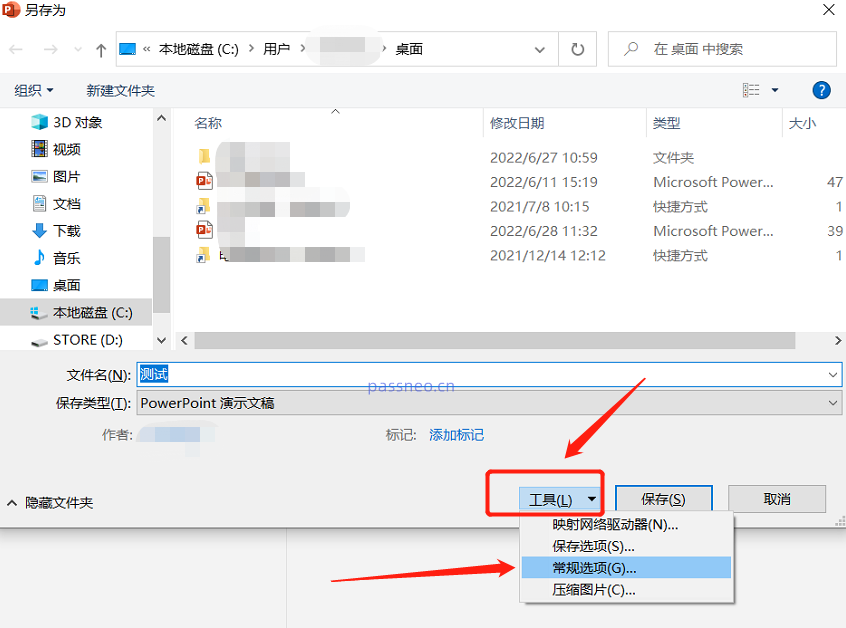
After the dialog box pops up, click [General Options] in the [Tools] list below.
The file name can be changed and saved as a new PPT, or it can directly replace the original file without changing it.
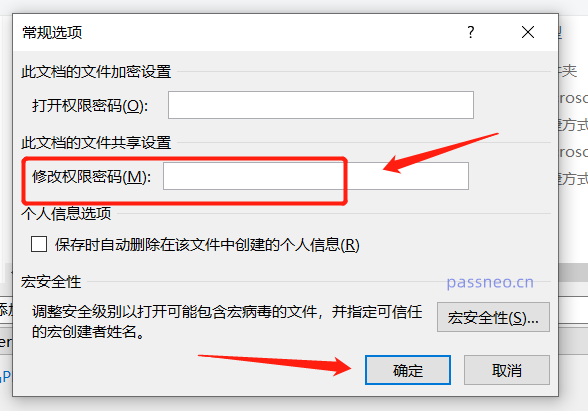
After the dialog box pops up again, enter the password you want to set in the [Modify permission password] column, and then re-enter the password again. After clicking [OK], the "read-only mode" of the PPT with password is set.
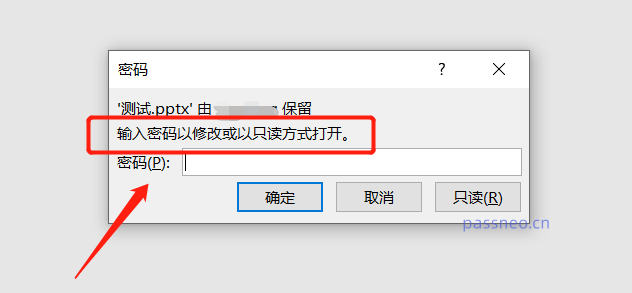
Open the PPT file again, and the prompt box "Enter password to modify or open in read-only mode" will pop up. Only by entering the correct password to open the PPT can you make edit changes. Select [Read Only] to open the PPT, but you cannot edit and change the content.
The "read-only mode" set by this method cannot be directly changed to editable mode like the first method. It needs to be opened with a password before it can be edited.
If you want to release this mode, you also need to open the PPT with a password before you can operate it. Methods as below:
According to the set operation path, open the last [General Options] through the "Save As" option. You can see that the password for "Modify Permission Password" already exists. Delete the password and turn it into a blank space. After clicking OK, the PPT The "read-only mode" with password is released.

So if you set the second "read-only mode", you need to remember or save the password. If you don't remember the password, you can't lift the restrictions in PPT. In this case, we need to use other tools, such as the Pepsi Niu PPT password recovery tool, which can directly remove the "read-only mode" of PPT without a password.
Click the [Unrestriction] module in the tool and then import the PPT.
Tool link: Pepsi Niu PPT password recovery tool

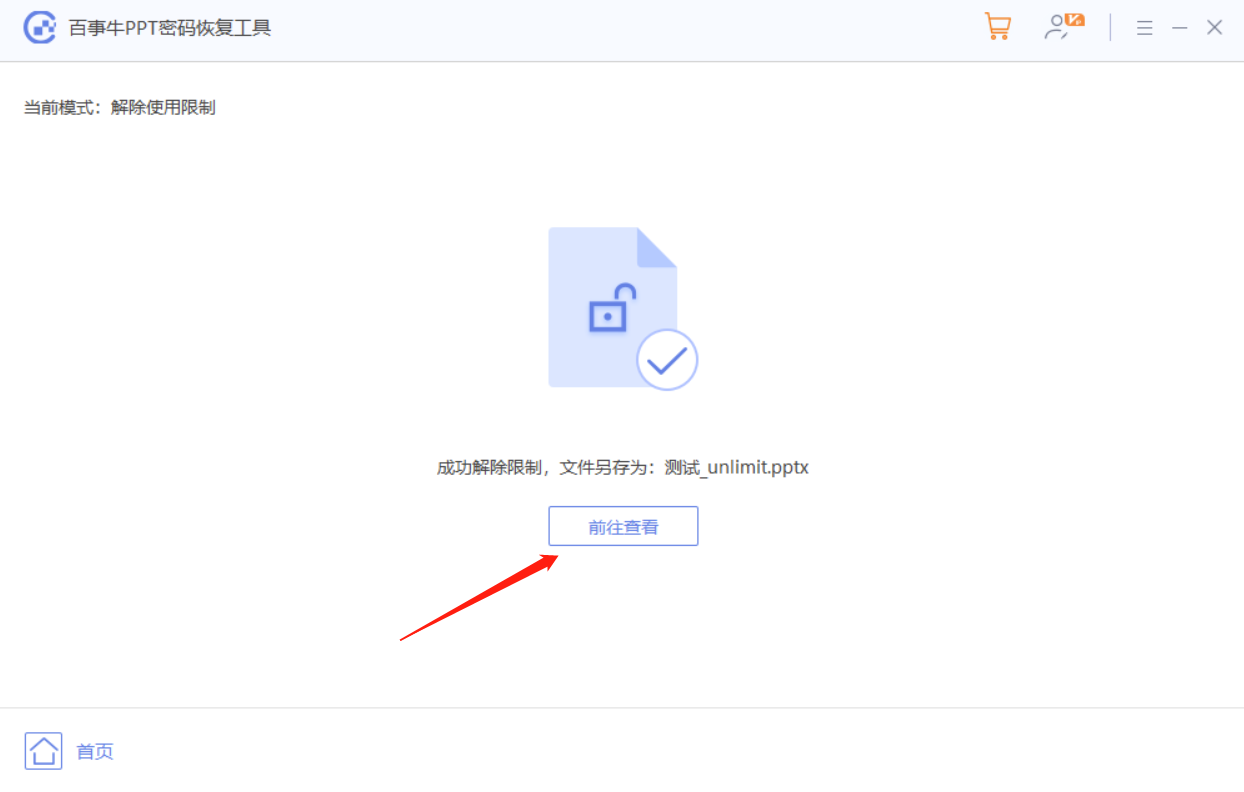
The PPT after the restriction is lifted will be saved as a new file. Click [Go to View] to open the folder where the new PPT is located.
The above is the detailed content of Two ways to set 'read-only mode' in PPT. For more information, please follow other related articles on the PHP Chinese website!
 webservice calling method
 The difference between footnotes and endnotes
 Where is the audio interface located on the motherboard?
 Solution to the problem that the input is not supported when the computer starts up
 How to refund Douyin recharged Doucoin
 How to export word from powerdesigner
 How to check if port 445 is closed
 What is javascript mainly used for?


![[Web front-end] Node.js quick start](https://img.php.cn/upload/course/000/000/067/662b5d34ba7c0227.png)


