

The latest collection of Linux commands


1. Basic knowledge
1.1 File structure of Linux system
/bin        二进制文件,系统常规命令
/boot       系统启动分区,系统启动时读取的文件
/dev        设备文件
/etc        大多数配置文件
/home       普通用户的家目录
/lib        32位函数库
/lib64      64位库
/media      手动临时挂载点
/mnt        手动临时挂载点
/opt        第三方软件安装位置
/proc       进程信息及硬件信息
/root       临时设备的默认挂载点
/sbin       系统管理命令
/srv        数据
/var        数据
/sys        内核相关信息
/tmp        临时文件
/usr        用户相关设定
1.2 The meaning of Linux system command line
示例:root@app00:~#
root    //用户名,root为超级用户
@       //分隔符
app00   //主机名称
~       //当前所在目录,默认用户目录为~,会随着目录切换而变化,例如:(root@app00:/bin# ,当前位置在bin目录下)
#       //表示当前用户是超级用户,普通用户为$,例如:("yao@app00:/root$" ,表示使用用户"yao"访问/root文件夹)
1.3 Composition of commands
示例:命令 参数名 参数值
二、基础操作
2.1 重启系统
(1)立刻关机  shutdown -h now 或者 poweroff
(2)两分钟后关机  shutdown -h 2
2.2 关闭系统
(1)立刻重启  shutdown -r now 或者 reboot
(2)两分钟后重启  shutdown -r 2
2.3 帮助命令(help)
ifconfig --help //查看 ifconfig 命令的用法
2.4 命令说明书(man)
man shutdown //打开命令说明后,可按"q"键退出
2.5 切换用户(su)
su bunian              //切换为用户"bunian",输入后回车需要输入该用户的密码
exit                 //退出当前用户
三、目录操作
3.1 切换目录(cd)
cd /                 //切换到根目录
cd /bin              //切换到根目录下的bin目录
cd ../               //切换到上一级目录 或者使用命令:cd ..
cd ~                 //切换到home目录
cd -                 //切换到上次访问的目录
cd xx(文件夹名)       //切换到本目录下的名为xx的文件目录,如果目录不存在报错
cd /xxx/xx/x         //可以输入完整的路径,直接切换到目标目录,输入过程中可以使用tab键快速补全
3.2 查看目录(ls)
ls                   //查看当前目录下的所有目录和文件
ls -a                //查看当前目录下的所有目录和文件(包括隐藏的文件)
ls -l                //列表查看当前目录下的所有目录和文件(列表查看,显示更多信息),与命令"ll"效果一样
ls /bin              //查看指定目录下的所有目录和文件
3.3 创建目录(mkdir)
mkdir tools          //在当前目录下创建一个名为tools的目录
mkdir /bin/tools     //在指定目录下创建一个名为tools的目录
3.3 删除目录与文件(rm)
rm 文件名              //删除当前目录下的文件
rm -f 文件名           //删除当前目录的的文件(不询问)
rm -r 文件夹名         //递归删除当前目录下此名的目录
rm -rf 文件夹名        //递归删除当前目录下此名的目录(不询问)
rm -rf *              //将当前目录下的所有目录和文件全部删除
rm -rf /*             //将根目录下的所有文件全部删除【慎用!相当于格式化系统】
3.4 修改目录(mv)
mv 当前目录名 新目录名         //修改目录名,同样适用与文件操作
mv /usr/tmp/tool /opt       //将/usr/tmp目录下的tool目录剪切到 /opt目录下面
mv -r /usr/tmp/tool /opt    //递归剪切目录中所有文件和文件夹
3.5 拷贝目录(cp)
cp /usr/tmp/tool /opt       //将/usr/tmp目录下的tool目录复制到 /opt目录下面
cp -r /usr/tmp/tool /opt    //递归剪复制目录中所有文件和文件夹
3.6 搜索目录(find)
find /bin -name 'a*' //查找/bin目录下的所有以a开头的文件或者目录
3.7 查看当前目录(pwd)
pwd //显示当前位置路径
四、文件操作
4.1 新增文件(touch)
touch a.txt //在当前目录下创建名为a的txt文件(文件不存在),如果文件存在,将文件时间属性修改为当前系统时间
4.2 删除文件(rm)
rm 文件名              //删除当前目录下的文件
rm -f 文件名           //删除当前目录的的文件(不询问)
4.3 编辑文件(vi、vim)
vi 文件名//打开需要编辑的文件
--进入后,操作界面有三种模式:命令模式(command mode)、插入模式(Insert mode)和底行模式(last line mode)
命令模式
-刚进入文件就是命令模式,通过方向键控制光标位置,
-使用命令"dd"删除当前整行
-使用命令"/字段"进行查找
-按"i"在光标所在字符前开始插入
-按"a"在光标所在字符后开始插入
-按"o"在光标所在行的下面另起一新行插入
-按":"进入底行模式
插入模式
-此时可以对文件内容进行编辑,左下角会显示 "-- 插入 --""
-按"ESC"进入底行模式
底行模式
-退出编辑::q
-强制退出::q!
-保存并退出::wq
## 操作步骤示例 ##
1.保存文件:按"ESC" -> 输入":" -> 输入"wq",回车 //保存并退出编辑
2.取消操作:按"ESC" -> 输入":" -> 输入"q!",回车 //撤销本次修改并退出编辑
## 补充 ##
vim +10 filename.txt //打开文件并跳到第10行
vim -R /etc/passwd //以只读模式打开文件
4.4 查看文件
cat a.txt          //查看文件最后一屏内容
less a.txt         //PgUp向上翻页,PgDn向下翻页,"q"退出查看
more a.txt         //显示百分比,回车查看下一行,空格查看下一页,"q"退出查看
tail -100 a.txt    //查看文件的后100行,"Ctrl+C"退出查看
五、文件权限
5.1 权限说明
文件权限简介:'r' 代表可读(4),'w' 代表可写(2),'x' 代表执行权限(1),括号内代表"8421法"
##文件权限信息示例:-rwxrw-r--
-第一位:'-'就代表是文件,'d'代表是文件夹
-第一组三位:拥有者的权限
-第二组三位:拥有者所在的组,组员的权限
-第三组三位:代表的是其他用户的权限
5.2 文件权限
普通授权    chmod +x a.txt
8421法     chmod 777 a.txt     //1+2+4=7,"7"说明授予所有权限
六、打包与解压
6.1 说明
.zip、.rar        //windows系统中压缩文件的扩展名
.tar              //Linux中打包文件的扩展名
.gz               //Linux中压缩文件的扩展名
.tar.gz           //Linux中打包并压缩文件的扩展名
6.2 打包文件
tar -zcvf 打包压缩后的文件名 要打包的文件
参数说明:z:调用gzip压缩命令进行压缩; c:打包文件; v:显示运行过程; f:指定文件名;
示例:
tar -zcvf a.tar file1 file2,...      //多个文件压缩打包
6.3 解压文件
tar -zxvf a.tar                      //解包至当前目录
tar -zxvf a.tar -C /usr------        //指定解压的位置
unzip test.zip             //解压*.zip文件
unzip -l test.zip          //查看*.zip文件的内容
七、其他常用命令
7.1 find
find . -name "*.c" //将目前目录及其子目录下所有延伸档名是 c 的文件列出来
find . -type f //将目前目录其其下子目录中所有一般文件列出
find . -ctime -20//将目前目录及其子目录下所有最近 20 天内更新过的文件列出
find /var/log -type f -mtime +7 -ok rm {} \; //查找/var/log目录中更改时间在7日以前的普通文件,并在删除之前询问它们
find . -type f -perm 644 -exec ls -l {} \; //查找前目录中文件属主具有读、写权限,并且文件所属组的用户和其他用户具有读权限的文件
find / -type f -size 0 -exec ls -l {} \; //为了查找系统中所有文件长度为0的普通文件,并列出它们的完整路径7.2 whereis
whereis ls //将和ls文件相关的文件都查找出来
7.3 which
说明:which指令会在环境变量$PATH设置的目录里查找符合条件的文件。
which bash             //查看指令"bash"的绝对路径
7.4 sudo
说明:sudo命令以系统管理者的身份执行指令,也就是说,经由 sudo 所执行的指令就好像是 root 亲自执行。需要输入自己账户密码。
使用权限:在 /etc/sudoers 中有出现的使用者
sudo -l//列出目前的权限
$ sudo -u yao vi ~www/index.html//以 yao 用户身份编辑home 目录下www目录中的 index.html 文件
7.5 grep
grep -i "the" demo_file              //在文件中查找字符串(不区分大小写)
grep -A 3 -i "example" demo_text     //输出成功匹配的行,以及该行之后的三行
grep -r "ramesh" *                   //在一个文件夹中递归查询包含指定字符串的文件
7.6 service
说明:service命令用于运行System V init脚本,这些脚本一般位于/etc/init.d文件下,这个命令可以直接运行这个文件夹里面的脚本,而不用加上路径
service ssh status      //查看服务状态
service --status-all    //查看所有服务状态
service ssh restart     //重启服务
7.7 free
说明:这个命令用于显示系统当前内存的使用情况,包括已用内存、可用内存和交换内存的情况
free -g            //以G为单位输出内存的使用量,-g为GB,-m为MB,-k为KB,-b为字节
free -t            //查看所有内存的汇总
7.8 top
top //显示当前系统中占用资源最多的一些进程, shift+m 按照内存大小查看
7.9 df
说明:显示文件系统的磁盘使用情况
df -h            //一种易看的显示
7.10 mount
mount /dev/sdb1 /u01              //挂载一个文件系统,需要先创建一个目录,然后将这个文件系统挂载到这个目录上
dev/sdb1 /u01 ext2 defaults 0 2   //添加到fstab中进行自动挂载,这样任何时候系统重启的时候,文件系统都会被加载
7.11 uname
说明:uname可以显示一些重要的系统信息,例如内核名称、主机名、内核版本号、处理器类型之类的信息
uname -a
7.12 yum
说明:安装插件命令
yum install httpd      //使用yum安装apache
yum update httpd       //更新apache
yum remove httpd       //卸载/删除apache
7.13 rpm
说明:插件安装命令
rpm -ivh httpd-2.2.3-22.0.1.el5.i386.rpm      //使用rpm文件安装apache
rpm -uvh httpd-2.2.3-22.0.1.el5.i386.rpm      //使用rpm更新apache
rpm -ev httpd                                 //卸载/删除apache
7.14 date
date -s "02/01/2022 18:50:53" ///设置系统时间
7.15 wget
说明:使用wget从网上下载软件、音乐、视频
示例:
wget http://prdownloads.sourceforge.net/sourceforge/nagios/nagios-3.2.1.tar.gz  //下载文件并以指定的文件名保存文件
wget -O nagios.tar.gz http://prdownloads.sourceforge.net/sourceforge/nagios/nagios-3.2.1.tar.gz
7.16 ftp
ftp IP/hostname    //访问ftp服务器
mls *.html -       //显示远程主机上文件列表
7.17 scp
scp /opt/data.txt 192.168.1.10:/opt/ //将本地opt目录下的data文件发送到192.168.1.10服务器的opt目录下
八、系统管理
8.1 防火墙操作
service iptables status      //查看iptables服务的状态
service iptables start       //开启iptables服务
service iptables stop        //停止iptables服务
service iptables restart     //重启iptables服务
chkconfig iptables off       //关闭iptables服务的开机自启动
chkconfig iptables on        //开启iptables服务的开机自启动
##centos7 防火墙操作
systemctl status firewalld.service     //查看防火墙状态
systemctl stop firewalld.service       //关闭运行的防火墙
systemctl disable firewalld.service    //永久禁止防火墙服务
8.2 修改主机名(CentOS 7)
hostnamectl set-hostname 主机名
8.3 查看网络
ifconfig
8.4 修改IP
修改网络配置文件,文件地址:/etc/sysconfig/network-scripts/ifcfg-eth0
------------------------------------------------
主要修改以下配置:
TYPE=Ethernet               //网络类型
BOOTPROTO=static            //静态IP
DEVICE=ens00                //网卡名
IPADDR=192.168.1.100        //设置的IP
NETMASK=255.255.255.0       //子网掩码
GATEWAY=192.168.1.1         //网关
DNS1=192.168.1.1            //DNS
DNS2=8.8.8.8                //备用DNS
ONBOOT=yes                  //系统启动时启动此设置
-------------------------------------------------
修改保存以后使用命令重启网卡:
service network restart
8.5 配置映射
修改文件:vi /etc/hosts
在文件最后添加映射地址,示例如下:
192.168.1.101  node1
192.168.1.102  node2
192.168.1.103  node3  配置好以后保存退出,输入命令:ping node1 ,可见实际 ping 的是 192.168.1.101。
8.6 查看进程
ps -ef //查看所有正在运行的进程
8.7 结束进程
kill pid       //杀死该pid的进程
kill -9 pid    //强制杀死该进程
8.8 查看链接
ping IP        //查看与此IP地址的连接情况
netstat -an    //查看当前系统端口
netstat -an | grep 8080     //查看指定端口
8.9 快速清屏
ctrl+l //清屏,往上翻可以查看历史操作
8.10 远程主机
ssh IP //远程主机,需要输入用户名和密码
The above is the detailed content of The latest collection of Linux commands. For more information, please follow other related articles on the PHP Chinese website!

Hot AI Tools

Undresser.AI Undress
AI-powered app for creating realistic nude photos

AI Clothes Remover
Online AI tool for removing clothes from photos.

Undress AI Tool
Undress images for free

Clothoff.io
AI clothes remover

AI Hentai Generator
Generate AI Hentai for free.

Hot Article
Hot Tools

Notepad++7.3.1
Easy-to-use and free code editor

SublimeText3 Chinese version
Chinese version, very easy to use

Zend Studio 13.0.1
Powerful PHP integrated development environment

Dreamweaver CS6
Visual web development tools

SublimeText3 Mac version
God-level code editing software (SublimeText3)
Hot Topics
 1378
1378
 52
52

 How to recover expired WeChat files? Can expired WeChat files be recovered?
Feb 22, 2024 pm 02:46 PM
How to recover expired WeChat files? Can expired WeChat files be recovered?
Feb 22, 2024 pm 02:46 PM
Open WeChat, select Settings in Me, select General and then select Storage Space, select Management in Storage Space, select the conversation in which you want to restore files and select the exclamation mark icon. Tutorial Applicable Model: iPhone13 System: iOS15.3 Version: WeChat 8.0.24 Analysis 1 First open WeChat and click the Settings option on the My page. 2 Then find and click General Options on the settings page. 3Then click Storage Space on the general page. 4 Next, click Manage on the storage space page. 5Finally, select the conversation in which you want to recover files and click the exclamation mark icon on the right. Supplement: WeChat files generally expire in a few days. If the file received by WeChat has not been clicked, the WeChat system will clear it after 72 hours. If the WeChat file has been viewed,
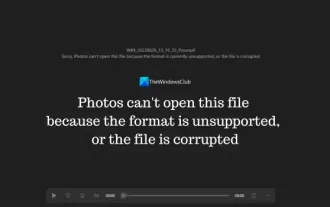 Photos cannot open this file because the format is not supported or the file is corrupted
Feb 22, 2024 am 09:49 AM
Photos cannot open this file because the format is not supported or the file is corrupted
Feb 22, 2024 am 09:49 AM
In Windows, the Photos app is a convenient way to view and manage photos and videos. Through this application, users can easily access their multimedia files without installing additional software. However, sometimes users may encounter some problems, such as encountering a "This file cannot be opened because the format is not supported" error message when using the Photos app, or file corruption when trying to open photos or videos. This situation can be confusing and inconvenient for users, requiring some investigation and fixes to resolve the issues. Users see the following error when they try to open photos or videos on the Photos app. Sorry, Photos cannot open this file because the format is not currently supported, or the file
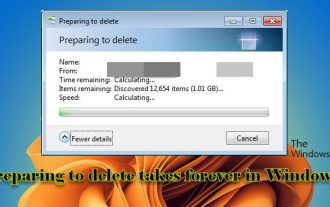 Preparing for removal takes a long time in Windows 11/10
Feb 19, 2024 pm 07:42 PM
Preparing for removal takes a long time in Windows 11/10
Feb 19, 2024 pm 07:42 PM
In this article, we will introduce how to solve the problem of "Ready to delete" prompt when deleting files or folders in Windows system. This prompt means that the system is performing some background operations, such as checking file permissions, verifying whether the file is occupied by other programs, calculating the size of the item to be deleted, etc. We will provide you with some workarounds to ensure that you can successfully delete your files without waiting too long. Why does Windows take so long to delete files? The time it takes Windows to prepare a file for deletion is affected by a variety of factors, including file size, storage device speed, and background processes. A long or stuck "Preparing to delete" prompt may indicate insufficient system resources, disk errors, or file system issues. exist
 Can Tmp format files be deleted?
Feb 24, 2024 pm 04:33 PM
Can Tmp format files be deleted?
Feb 24, 2024 pm 04:33 PM
Tmp format files are a temporary file format usually generated by a computer system or program during execution. The purpose of these files is to store temporary data to help the program run properly or improve performance. Once the program execution is completed or the computer is restarted, these tmp files are often no longer necessary. Therefore, for Tmp format files, they are essentially deletable. Moreover, deleting these tmp files can free up hard disk space and ensure the normal operation of the computer. However, before deleting Tmp format files, we need to
 What to do if the 0x80004005 error code appears. The editor will teach you how to solve the 0x80004005 error code.
Mar 21, 2024 pm 09:17 PM
What to do if the 0x80004005 error code appears. The editor will teach you how to solve the 0x80004005 error code.
Mar 21, 2024 pm 09:17 PM
When deleting or decompressing a folder on your computer, sometimes a prompt dialog box "Error 0x80004005: Unspecified Error" will pop up. How should you solve this situation? There are actually many reasons why the error code 0x80004005 is prompted, but most of them are caused by viruses. We can re-register the dll to solve the problem. Below, the editor will explain to you the experience of handling the 0x80004005 error code. Some users are prompted with error code 0X80004005 when using their computers. The 0x80004005 error is mainly caused by the computer not correctly registering certain dynamic link library files, or by a firewall that does not allow HTTPS connections between the computer and the Internet. So how about
 How to transfer files from Quark Cloud Disk to Baidu Cloud Disk?
Mar 14, 2024 pm 02:07 PM
How to transfer files from Quark Cloud Disk to Baidu Cloud Disk?
Mar 14, 2024 pm 02:07 PM
Quark Netdisk and Baidu Netdisk are currently the most commonly used Netdisk software for storing files. If you want to save the files in Quark Netdisk to Baidu Netdisk, how do you do it? In this issue, the editor has compiled the tutorial steps for transferring files from Quark Network Disk computer to Baidu Network Disk. Let’s take a look at how to operate it. How to save Quark network disk files to Baidu network disk? To transfer files from Quark Network Disk to Baidu Network Disk, you first need to download the required files from Quark Network Disk, then select the target folder in the Baidu Network Disk client and open it. Then, drag and drop the files downloaded from Quark Cloud Disk into the folder opened by the Baidu Cloud Disk client, or use the upload function to add the files to Baidu Cloud Disk. Make sure to check whether the file was successfully transferred in Baidu Cloud Disk after the upload is completed. That's it
 How to install GHO files
Feb 19, 2024 pm 10:06 PM
How to install GHO files
Feb 19, 2024 pm 10:06 PM
The gho file is a GhostImage image file, which is usually used to back up the entire hard disk or partition data into a file. In some specific cases, we need to reinstall this gho file back to the hard drive to restore the hard drive or partition to its previous state. The following will introduce how to install the gho file. First, before installation, we need to prepare the following tools and materials: Entity gho file: Make sure you have a complete gho file, which usually has a .gho suffix and contains a backup
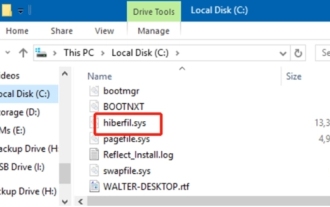 What is hiberfil.sys file? Can hiberfil.sys be deleted?
Mar 15, 2024 am 09:49 AM
What is hiberfil.sys file? Can hiberfil.sys be deleted?
Mar 15, 2024 am 09:49 AM
Recently, many netizens have asked the editor, what is the file hiberfil.sys? Can hiberfil.sys take up a lot of C drive space and be deleted? The editor can tell you that the hiberfil.sys file can be deleted. Let’s take a look at the details below. hiberfil.sys is a hidden file in the Windows system and also a system hibernation file. It is usually stored in the root directory of the C drive, and its size is equivalent to the size of the system's installed memory. This file is used when the computer is hibernated and contains the memory data of the current system so that it can be quickly restored to the previous state during recovery. Since its size is equal to the memory capacity, it may take up a larger amount of hard drive space. hiber
