

Learn the MyBatis entry program: simply master the key skills

Teach you step by step how to write a MyBatis introductory program: easily master the core skills
Introduction:
MyBatis is a popular persistence layer framework, which can help us more Interact with the database conveniently. This article will be based on a simple example and teach you step by step how to write an introductory program for MyBatis, allowing you to easily master the core skills. During the writing process, we will use Java as the programming language and the MySQL database as an example.
1. Environment preparation
Before starting, we need to prepare the following environment:
- JDK: Make sure that the JDK has been installed and the environment variables have been configured correctly.
- Maven: Maven is a tool for building Java projects. We will use Maven to manage our project dependencies.
- MySQL database: Make sure that the MySQL database has been installed and the corresponding database and tables have been created.
2. Create a Maven project
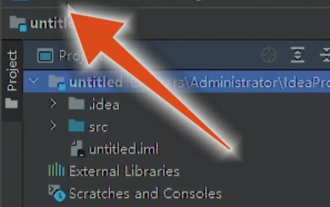
- Open an IDE (such as Eclipse, IntelliJ IDEA, etc.) and create a new Maven project.
- Add MyBatis and MySQL dependencies in the pom.xml file:
<dependencies>
    <!-- MyBatis -->
    <dependency>
        <groupId>org.mybatis</groupId>
        <artifactId>mybatis</artifactId>
        <version>3.5.6</version>
    </dependency>

    <!-- MySQL -->
    <dependency>
        <groupId>mysql</groupId>
        <artifactId>mysql-connector-java</artifactId>
        <version>8.0.22</version>
    </dependency>
</dependencies>3. Write the database configuration file
- In src/main/resources Create a file named mybatis-config.xml in the directory.
- Add the following content in mybatis-config.xml:
<configuration>
    <environments default="development">
        <environment id="development">
            <transactionManager type="JDBC"/>
            <dataSource type="POOLED">
                <property name="driver" value="com.mysql.cj.jdbc.Driver"/>
                <property name="url" value="jdbc:mysql://localhost:3306/mybatis_demo?useUnicode=true&characterEncoding=utf8&serverTimezone=Asia/Shanghai"/>
                <property name="username" value="your_username"/>
                <property name="password" value="your_password"/>
            </dataSource>
        </environment>
    </environments>

    <mappers>
        <mapper resource="mapper/UserMapper.xml"/>
    </mappers>
</configuration>Pay attention to replacing the value attribute in the <property> tag Information about your own database.
4. Write the POJO class corresponding to the data table
- Create a User class to represent the records in the database table.
public class User {
    private int id;
    private String name;
    private int age;

      // 省略getter和setter方法
}2. Write the Mapper interface and mapping file
- Create a UserMapper interface to define the method of operating the database.
public interface UserMapper {
    public User getUserById(int id);
    public List<User> getAllUsers();
    public void addUser(User user);
    public void updateUser(User user);
    public void deleteUser(int id);
}- Create a file named UserMapper.xml in the src/main/resources/mapper directory.
- Add the following content in UserMapper.xml:
<!DOCTYPE mapper PUBLIC "-//mybatis.org//DTD Mapper 3.0//EN"
"http://mybatis.org/dtd/mybatis-3-mapper.dtd">

<mapper namespace="com.example.mapper.UserMapper">
    <select id="getUserById" parameterType="int" resultType="com.example.pojo.User">
        SELECT * FROM user WHERE id = #{id}
    </select>

    <select id="getAllUsers" resultType="com.example.pojo.User">
        SELECT * FROM user
    </select>

    <insert id="addUser" parameterType="com.example.pojo.User">
        INSERT INTO user (name, age) VALUES (#{name}, #{age})
    </insert>

    <update id="updateUser" parameterType="com.example.pojo.User">
        UPDATE user SET name = #{name}, age = #{age} WHERE id = #{id}
    </update>

    <delete id="deleteUser" parameterType="int">
        DELETE FROM user WHERE id = #{id}
    </delete>
</mapper>5. Write test code
- Create a Java class named App and write Test the code.
public class App {
    public static void main(String[] args) {
        // 创建SqlSessionFactory对象
        InputStream inputStream = Resources.getResourceAsStream("mybatis-config.xml");
        SqlSessionFactory sqlSessionFactory = new SqlSessionFactoryBuilder().build(inputStream);

        // 获取SqlSession对象
        SqlSession sqlSession = sqlSessionFactory.openSession();

        try {
            // 获取UserMapper接口的实例
            UserMapper userMapper = sqlSession.getMapper(UserMapper.class);

            // 测试getUserById方法
            User user = userMapper.getUserById(1);
            System.out.println(user.getId() + " " + user.getName() + " " + user.getAge());

            // 测试getAllUsers方法
            List<User> userList = userMapper.getAllUsers();
            for (User u : userList) {
                System.out.println(u.getId() + " " + u.getName() + " " + u.getAge());
            }

            // 测试addUser方法
            User newUser = new User();
            newUser.setName("张三");
            newUser.setAge(20);
            userMapper.addUser(newUser);
            sqlSession.commit();

            // 测试updateUser方法
            User updateUser = new User();
            updateUser.setId(1);
            updateUser.setName("李四");
            updateUser.setAge(25);
            userMapper.updateUser(updateUser);
            sqlSession.commit();

            // 测试deleteUser方法
            userMapper.deleteUser(1);
            sqlSession.commit();
        } finally {
            sqlSession.close();
        }
    }
}6. Run the program
- Right-click the App class in the IDE and select "Run As" -> "Java Application" to run the program.
- Check the console output to confirm that the program is running normally.
Conclusion:
Through the study of this article, I believe you have easily mastered the core skills of MyBatis. I hope you can use MyBatis in actual projects to improve development efficiency. If you want to further learn the advanced usage of MyBatis, it is recommended to refer to the official documentation and related books for continuous in-depth study and practice. I wish you greater success in your MyBatis learning journey!
The above is the detailed content of Learn the MyBatis entry program: simply master the key skills. For more information, please follow other related articles on the PHP Chinese website!

Hot AI Tools

Undresser.AI Undress
AI-powered app for creating realistic nude photos

AI Clothes Remover
Online AI tool for removing clothes from photos.

Undress AI Tool
Undress images for free

Clothoff.io
AI clothes remover

AI Hentai Generator
Generate AI Hentai for free.

Hot Article
Hot Tools

Notepad++7.3.1
Easy-to-use and free code editor

SublimeText3 Chinese version
Chinese version, very easy to use

Zend Studio 13.0.1
Powerful PHP integrated development environment

Dreamweaver CS6
Visual web development tools

SublimeText3 Mac version
God-level code editing software (SublimeText3)
Hot Topics


 What should I use to open html?
Apr 21, 2024 am 11:33 AM
What should I use to open html?
Apr 21, 2024 am 11:33 AM
To open HTML files you need to use a browser such as Google Chrome or Mozilla Firefox. To open an HTML file using a browser, follow these steps: 1. Open your browser. 2. Drag and drop the HTML file into the browser window, or click the File menu and select Open.
 Four recommended AI-assisted programming tools
Apr 22, 2024 pm 05:34 PM
Four recommended AI-assisted programming tools
Apr 22, 2024 pm 05:34 PM
This AI-assisted programming tool has unearthed a large number of useful AI-assisted programming tools in this stage of rapid AI development. AI-assisted programming tools can improve development efficiency, improve code quality, and reduce bug rates. They are important assistants in the modern software development process. Today Dayao will share with you 4 AI-assisted programming tools (and all support C# language). I hope it will be helpful to everyone. https://github.com/YSGStudyHards/DotNetGuide1.GitHubCopilotGitHubCopilot is an AI coding assistant that helps you write code faster and with less effort, so you can focus more on problem solving and collaboration. Git
 How to set Chinese in IntelliJ IDEA
Apr 04, 2024 pm 03:31 PM
How to set Chinese in IntelliJ IDEA
Apr 04, 2024 pm 03:31 PM
IntelliJIDEA is a development tool for the Java programming language. So how to set up Chinese for IntelliJIDEA? Here the editor will give you a detailed introduction to the Chinese tutorial on IntelliJIDEA settings. Friends in need can take a look. 1. Double-click to open the software and click "File" in the upper left corner. 2. Then click "Settings" in the option list below. 3. In the window interface that opens, click "Plugins" in the left column and enter the keyword "Chinese" in the search box on the right. 4. Then select any one of the search results given
 What is the difference between webstorm and idea?
Apr 08, 2024 pm 08:24 PM
What is the difference between webstorm and idea?
Apr 08, 2024 pm 08:24 PM
WebStorm is tailor-made for web development and provides powerful features for web development languages, while IntelliJ IDEA is a versatile IDE that supports multiple languages. Their differences mainly lie in language support, web development features, code navigation, debugging and testing capabilities, and additional features. The final choice depends on language preference and project needs.
 Java emulator recommendations: These five are easy to use and practical!
Feb 22, 2024 pm 08:42 PM
Java emulator recommendations: These five are easy to use and practical!
Feb 22, 2024 pm 08:42 PM
A Java emulator is software that can run Java applications on a computer or device. It can simulate the Java virtual machine and execute Java bytecode, enabling users to run Java programs on different platforms. Java simulators are widely used in software development, learning and testing. This article will introduce five useful and practical Java emulators that can meet the needs of different users and help users develop and run Java programs more efficiently. The first emulator was Eclipse. Ecl
 How to introduce idea into bootstrap
Apr 05, 2024 am 02:33 AM
How to introduce idea into bootstrap
Apr 05, 2024 am 02:33 AM
Steps to introduce Bootstrap in IntelliJ IDEA: Create a new project and select "Web Application". Add "Bootstrap" Maven dependency. Create an HTML file and add Bootstrap references. Replace with the actual path to the Bootstrap CSS file. Run the HTML file to use Bootstrap styles. Tip: Use a CDN to import Bootstrap or customize HTML file templates.
 Is there a big difference between navicat and datagrip?
Apr 24, 2024 pm 07:21 PM
Is there a big difference between navicat and datagrip?
Apr 24, 2024 pm 07:21 PM
The main differences between Navicat and DataGrip are: Supported databases: Navicat supports more than 30, while DataGrip focuses on JetBrains databases. Integration: DataGrip is tightly integrated with JetBrains tools, while Navicat has limited integration. Collaboration features: DataGrip offers code review and collaboration features, while Navicat does not.
 How to switch to Chinese in webstorm
Apr 08, 2024 pm 01:30 PM
How to switch to Chinese in webstorm
Apr 08, 2024 pm 01:30 PM
How to switch to Chinese in WebStorm: Open the settings panel (Windows/Linux: Ctrl + Alt + S; macOS: Command + ,). Navigate to Appearance & Behavior > Languages & Frameworks. Select "IntelliJ IDEA User Interface" in the "User Interface Language" drop-down menu. Select the desired Chinese language in the "Locale" list (e.g. "Chinese (Mainland China)"). Click "Apply" to restart WebStorm.
