

Unable to clear TPM in BIOS, error 0x80290300 [FIXED]

This article will guide you to fix error 0x80290300, which occurs when trying to clear TPM information in BIOS. Usually appears when clearing TPM information on a specific Windows 11/10 device.
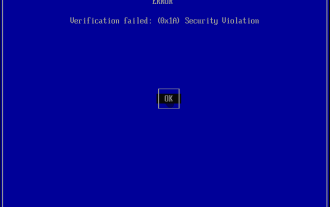
0x80290300: A general error was detected while trying to obtain the BIOS response to the physical presence command.
This message appears when the Remove TPM from Operating System or Operating System Manage TPM option is disabled in the BIOS. Fortunately, there are simple ways you can fix this problem.
![Unable to clear TPM in BIOS, error 0x80290300 [FIXED]](https://img.php.cn/upload/article/000/887/227/170831341351612.jpg)
Fix cannot clear TPM in BIOS, error 0x80290300
If you are unable to clear the TPM in the BIOS and receive error 0x80290300 on your Windows computer, follow these suggestions:
Now, let’s take a closer look at these.
1] Enable TPM reset from the operating system and management of TPM options by the operating system
First, enable TPM reset in the operating system, and subsequently enable operating system management of the TPM option in the system BIOS. Enter the BIOS and go to Security > TPM Embedded Security page. Here, enable the appropriate option and check if you can resolve the error 0x80290300 to clear TPM Get Fixed.
2] Clear TPM from TPM Management Console
If enabling the above options does not help, try clearing the TPM from the management console. Here’s how to do it:
The above is the detailed content of Unable to clear TPM in BIOS, error 0x80290300 [FIXED]. For more information, please follow other related articles on the PHP Chinese website!

Hot AI Tools

Undresser.AI Undress
AI-powered app for creating realistic nude photos

AI Clothes Remover
Online AI tool for removing clothes from photos.

Undress AI Tool
Undress images for free

Clothoff.io
AI clothes remover

Video Face Swap
Swap faces in any video effortlessly with our completely free AI face swap tool!

Hot Article
Hot Tools

Notepad++7.3.1
Easy-to-use and free code editor

SublimeText3 Chinese version
Chinese version, very easy to use

Zend Studio 13.0.1
Powerful PHP integrated development environment

Dreamweaver CS6
Visual web development tools

SublimeText3 Mac version
God-level code editing software (SublimeText3)
Hot Topics
 1392
1392
 52
52

 Ventoy secure boot settingsSecure Boot
Jun 18, 2024 pm 09:00 PM
Ventoy secure boot settingsSecure Boot
Jun 18, 2024 pm 09:00 PM
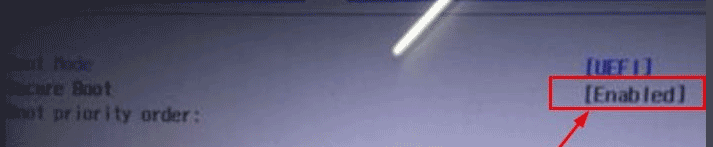
Ventoy is a USB boot tool that can directly boot ISO/WIM/IMG/VHD(x)/EFI and other types of files in the USB flash drive. It is very easy to use. Laptops have secure boot turned on by default. If they are not turned off or cannot be turned off, they cannot be booted from a USB device. Ventoy also supports secure boot. The principle is to inject a GRUB installation certificate into the current computer. As long as your computer After being injected once, any USB disk PE booted based on grub can pass. The official description of Ventoy is a GIF image. The playback speed is too fast and you may not be able to remember it. The editor has divided the GIF image to make it easier to understand. Ventoy secure boot has EnrollKey and Enro
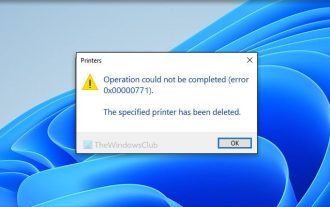 Unable to complete operation (Error 0x0000771) Printer error
Mar 16, 2024 pm 03:50 PM
Unable to complete operation (Error 0x0000771) Printer error
Mar 16, 2024 pm 03:50 PM
If you encounter an error message when using your printer, such as the operation could not be completed (error 0x00000771), it may be because the printer has been disconnected. In this case, you can solve the problem through the following methods. In this article, we will discuss how to fix this issue on Windows 11/10 PC. The entire error message says: The operation could not be completed (error 0x0000771). The specified printer has been deleted. Fix 0x00000771 Printer Error on Windows PC To fix Printer Error the operation could not be completed (Error 0x0000771), the specified printer has been deleted on Windows 11/10 PC, follow this solution: Restart Print Spool
 Acer laptop disables secure boot and removes password in Bios
Jun 19, 2024 am 06:49 AM
Acer laptop disables secure boot and removes password in Bios
Jun 19, 2024 am 06:49 AM
I repaired an Acer laptop and had to turn off secure boot when entering PE. I recorded how to turn off secure boot and remove the password from Bios. Turn on the computer and when the screen is not on, keep pressing the F2 key to enter the BIOS. On Acer laptops, turn off Secure Boot and press the arrow keys to switch to Boot. If SecureBoot is gray and unclickable, switch to the Security page, select SetSupervisorPassword and press Enter to set the password. Then switch to Boot, SecureBoot can be selected as Disabled, and press F10 to save. Modify and clear the BIOS password on your Acer notebook. Switch to the Security menu and select SetSupervisorPasswo.
 Check if Lenovo laptop supports TPM? How to turn on and off TPM on Lenovo laptop?
Mar 14, 2024 am 08:30 AM
Check if Lenovo laptop supports TPM? How to turn on and off TPM on Lenovo laptop?
Mar 14, 2024 am 08:30 AM
Recently, some Lenovo notebook partners have upgraded their systems to Win11. At this time, they need to check the computer to see if it supports TPM. If the computer supports TPM, it can be turned on in the motherboard BIOS. But how to enable the tpm function on Lenovo computers? Does it support opening? The following tutorial will introduce in detail the TPM activation of Lenovo notebooks. 1. Check whether TPM is supported 1. Right-click the start menu-Run (or press the Win+R keys on the keyboard), enter TPM.msc-press Enter. 2. As shown in the red box in the figure below, "TPM is ready for use" indicates that the machine supports TPM, and the version is version 2.0 shown in the red box below. 3. If
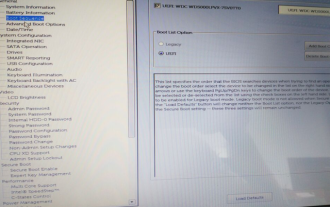 Dell computer bios interface to set USB disk startup items
Feb 10, 2024 pm 10:09 PM
Dell computer bios interface to set USB disk startup items
Feb 10, 2024 pm 10:09 PM
How do you set up a USB drive if your computer is a Dell laptop? Many friends have found that Dell laptops will not display the USB disk option by pressing the boot hotkey, so they need to enter the BIOS to set up the USB disk boot, so what if they don't know how to operate it? Now follow the editor’s steps to demonstrate how to set up a USB flash drive on a Dell laptop. Many friends assemble Dell computers, but don't know how to use the USB boot tool after entering the USBPE interface. Many friends don't know that they need to enter the BIOS interface to set up USB boot, so pressing the boot hotkey will not appear. what should we do? Let’s see how Dell sets up USB boot! Set up Dell laptop to reinstall system bootable from USB disk
 0x80070026 error solution: win101909 version update error fix
Dec 25, 2023 pm 05:10 PM
0x80070026 error solution: win101909 version update error fix
Dec 25, 2023 pm 05:10 PM
During the process of updating the system, many friends encountered the error code prompt 0x80070026 and did not know how to solve it. This situation may be due to an internal error in the system, which can be repaired in the command prompt. How to solve win101909 version update error 0x80070026 1. First launch the "Start" menu, enter "cmd", right-click "Command Prompt" and select run as "Administrator". 2. Then enter the following commands in sequence (copy and paste carefully): SCconfigwuauservstart=auto, press Enter SCconfigbitsstart=auto, press Enter SCconfigcryptsvc
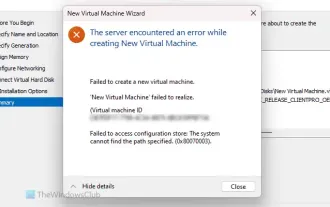 The server encountered an error, 0x80070003, while creating a new virtual machine.
Feb 19, 2024 pm 02:30 PM
The server encountered an error, 0x80070003, while creating a new virtual machine.
Feb 19, 2024 pm 02:30 PM
If you encounter error code 0x80070003 when using Hyper-V to create or start a virtual machine, it may be caused by permission issues, file corruption, or configuration errors. Solutions include checking file permissions, repairing damaged files, ensuring correct configuration, and more. This problem can be solved by ruling out the different possibilities one by one. The entire error message looks like this: The server encountered an error while creating [virtual machine name]. Unable to create new virtual machine. Unable to access configuration store: The system cannot find the path specified. (0x80070003). Some possible causes of this error include: The virtual machine file is corrupted. This can happen due to malware, virus or adware attacks. Although the likelihood of this happening is low, you can't completely
 The system has posted in safe mode ASUS motherboard
Jun 19, 2024 am 07:35 AM
The system has posted in safe mode ASUS motherboard
Jun 19, 2024 am 07:35 AM
After the computer is turned on, it prompts The system has posted in safe mode. You can set it in the BIOS to ignore the F1 error. Although it does not prompt, it directly enters the BIOS when it is turned on. Sometimes F1 is useless every time it is turned on. Then you need to restart the BIOS, and then exit the BIOS to enter the system. . thesystemhaspostedinsafemode=The system is in safe mode. This problem is relatively common on ASUS motherboards. As long as you turn off the XMP of the memory and adjust the memory frequency back to normal, you can boot normally without the thesystemhaspostedinsafemode error. Updating the latest motherboard BIOS should be OK.
