

jQuery Example: Remove the z-index attribute of an element

jQuery Example: Delete the z-index setting of an element
In the process of developing Web pages or applications, we often need to manipulate the element styles on the page. Among them, z-index is an important attribute that controls the stacking order of elements. Sometimes, we may need to dynamically remove the z-index setting of an element to achieve different effects. This article will introduce how to use jQuery to manipulate the z-index attribute of elements and give specific code examples.
z-index attribute introduction
In CSS, the z-index attribute is used to control the position of elements in the stacking order. The larger the value, the higher the element is. Typically, the value of the z-index attribute is an integer, used to specify the stacking order of elements in the browser. At the same time, z-index only takes effect in elements with position defined.
Use jQuery to operate z-index
In jQuery, you can operate the style attributes of elements, including z-index, through the .css() method. Here is a simple example that demonstrates how to use jQuery to set the z-index attribute of an element:
<!DOCTYPE html>
<html lang="en">
<head>
<meta charset="UTF-8">
<meta http-equiv="X-UA-Compatible" content="IE=edge">
<meta name="viewport" content="width=device-width, initial-scale=1.0">
<title>jQuery 操作 z-index</title>
<script src="https://code.jquery.com/jquery-3.6.0.min.js"></script>
<style>
    .box {
        width: 100px;
        height: 100px;
        background-color: lightblue;
        position: absolute;
    }
</style>
</head>
<body>

<div class="box" id="box1" style="top: 50px; left: 50px; z-index: 1;"></div>
<div class="box" id="box2" style="top: 100px; left: 100px; z-index: 2;"></div>

<button id="removeZIndex">Remove z-index</button>

<script>
    $(document).ready(function () {
        $('#removeZIndex').click(function () {
            $('#box1').css('z-index', '');
        });
    });
</script>

</body>
</html>In the above code, we create two boxes with z-index attributes and add a button. When the button is clicked, the z-index property of the first box will be removed using jQuery. This way, the default document flow order will take effect, with the first box below the second box.
Notes
- When removing the z-index setting of an element, you can do so by setting its property to an empty string.
- After deleting the z-index setting of an element, if you need to reset the z-index, you can directly use the .css() method to respecify the value.
Conclusion
Through the above introduction, we learned how to use jQuery to delete the z-index setting of an element, and gave specific code examples. In actual development, the z-index attribute can be flexibly used according to specific needs to achieve better page effects. Hope this article helps you!
The above is the detailed content of jQuery Example: Remove the z-index attribute of an element. For more information, please follow other related articles on the PHP Chinese website!

Hot AI Tools

Undresser.AI Undress
AI-powered app for creating realistic nude photos

AI Clothes Remover
Online AI tool for removing clothes from photos.

Undress AI Tool
Undress images for free

Clothoff.io
AI clothes remover

Video Face Swap
Swap faces in any video effortlessly with our completely free AI face swap tool!

Hot Article
Hot Tools

Notepad++7.3.1
Easy-to-use and free code editor

SublimeText3 Chinese version
Chinese version, very easy to use

Zend Studio 13.0.1
Powerful PHP integrated development environment

Dreamweaver CS6
Visual web development tools

SublimeText3 Mac version
God-level code editing software (SublimeText3)
Hot Topics
 1664
1664
 14
1423
52
1317
25
1268
29
1242
24
14
1423
52
1317
25
1268
29
1242
24

 Can the inetpub folder be deleted? How to quickly delete the inetpub folder on the C drive
Mar 13, 2024 pm 02:00 PM
Can the inetpub folder be deleted? How to quickly delete the inetpub folder on the C drive
Mar 13, 2024 pm 02:00 PM
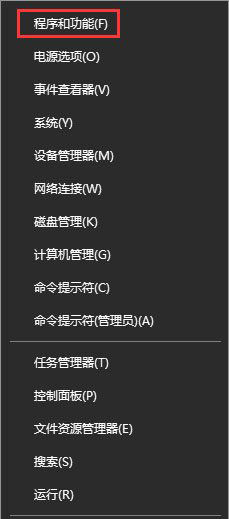
It was found that there is an inetpub folder on the C drive of the computer that takes up a lot of memory. What is this inetpub folder? Can it be deleted directly? In fact, inetpub is a folder on the IIS server. The full name of IIS is Internet Information Services, which is Internet Information Services. It can be used to build and debug websites. If it is not needed, it can be uninstalled. The specific method is as follows: 1. Right-click the Start menu and select "Programs and Features". 2. After opening, click "Turn Windows features on or off". 3. In the Windows feature list, uncheck II
 How to delete Xiaohongshu notes
Mar 21, 2024 pm 08:12 PM
How to delete Xiaohongshu notes
Mar 21, 2024 pm 08:12 PM
How to delete Xiaohongshu notes? Notes can be edited in the Xiaohongshu APP. Most users don’t know how to delete Xiaohongshu notes. Next, the editor brings users pictures and texts on how to delete Xiaohongshu notes. Tutorial, interested users come and take a look! Xiaohongshu usage tutorial How to delete Xiaohongshu notes 1. First open the Xiaohongshu APP and enter the main page, select [Me] in the lower right corner to enter the special area; 2. Then in the My area, click on the note page shown in the picture below , select the note you want to delete; 3. Enter the note page, click [three dots] in the upper right corner; 4. Finally, the function bar will expand at the bottom, click [Delete] to complete.
 Is it true that you can be blocked and deleted on WeChat and permanently unable to be added?
Apr 08, 2024 am 11:41 AM
Is it true that you can be blocked and deleted on WeChat and permanently unable to be added?
Apr 08, 2024 am 11:41 AM
1. First of all, it is false to block and delete someone permanently and not add them permanently. If you want to add the other party after you have blocked them and deleted them, you only need the other party's consent. 2. If a user blocks someone, the other party will not be able to send messages to the user, view the user's circle of friends, or make calls with the user. 3. Blocking does not mean deleting the other party from the user's WeChat contact list. 4. If the user deletes the other party from the user's WeChat contact list after blocking them, there is no way to recover after deletion. 5. If the user wants to add the other party as a friend again, the other party needs to agree and add the user again.
 What folder is found.000? Can the found.000 folder be deleted?
Mar 13, 2024 pm 08:52 PM
What folder is found.000? Can the found.000 folder be deleted?
Mar 13, 2024 pm 08:52 PM
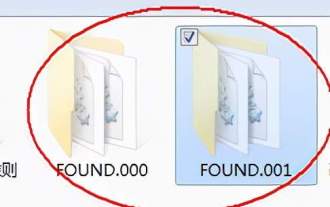
In the process of daily use of the computer, you may receive an error message that the found.000 file is lost and damaged. What folder is this found.000? Can it be deleted if it is no longer useful? Since so many people do not know this file, let me tell you about the found.000 folder in detail~ 1. What is the found.000 folder? When the computer is partially or completely lost due to illegal shutdown, , you can find the special folder named "found.000" and the files with the ".chk" extension contained inside it in the specified directory located in the system partition. This "fo
 How can I retrieve someone else's deleted comment on Xiaohongshu? Will it be displayed if someone else's comment is deleted?
Mar 21, 2024 pm 10:46 PM
How can I retrieve someone else's deleted comment on Xiaohongshu? Will it be displayed if someone else's comment is deleted?
Mar 21, 2024 pm 10:46 PM
Xiaohongshu is a popular social e-commerce platform, and interactive comments between users are an indispensable method of communication on the platform. Occasionally, we may find that our comments have been deleted by others, which can be confusing. 1. How can I retrieve someone else’s deleted comments on Xiaohongshu? When you find that your comments have been deleted, you can first try to directly search for relevant posts or products on the platform to see if you can still find the comment. If the comment is still displayed after being deleted, it may have been deleted by the original post owner. At this time, you can try to contact the original post owner to ask the reason for deleting the comment and request to restore the comment. If a comment has been completely deleted and cannot be found on the original post, the chances of it being reinstated on the platform are relatively slim. You can try other ways
 How to delete Xiaohongshu releases? How to recover after deletion?
Mar 21, 2024 pm 05:10 PM
How to delete Xiaohongshu releases? How to recover after deletion?
Mar 21, 2024 pm 05:10 PM
As a popular social e-commerce platform, Xiaohongshu has attracted a large number of users to share their daily life and shopping experiences. Sometimes we may inadvertently publish some inappropriate content, which needs to be deleted in time to better maintain our personal image or comply with platform regulations. 1. How to delete Xiaohongshu releases? 1. Log in to your Xiaohongshu account and enter your personal homepage. 2. At the bottom of the personal homepage, find the "My Creations" option and click to enter. 3. On the "My Creations" page, you can see all published content, including notes, videos, etc. 4. Find the content that needs to be deleted and click the "..." button on the right. 5. In the pop-up menu, select the "Delete" option. 6. After confirming the deletion, the content will disappear from your personal homepage and public page.
 How to completely delete TikTok chat history
May 07, 2024 am 11:14 AM
How to completely delete TikTok chat history
May 07, 2024 am 11:14 AM
1. Open the Douyin app, click [Message] at the bottom of the interface, and click the chat conversation entry that needs to be deleted. 2. Long press any chat record, click [Multiple Select], and check the chat records you want to delete. 3. Click the [Delete] button in the lower right corner and select [Confirm deletion] in the pop-up window to permanently delete these records.
 How to completely delete WeChat File Transfer Assistant_Introduction to how to close WeChat File Transfer Assistant
Mar 20, 2024 pm 08:31 PM
How to completely delete WeChat File Transfer Assistant_Introduction to how to close WeChat File Transfer Assistant
Mar 20, 2024 pm 08:31 PM
WeChat's file transfer assistant is available to every user. Some users use it as a memo to record some things. So how to completely delete WeChat File Transfer Assistant? Let me introduce it to you in detail below. How to completely delete WeChat File Transfer Assistant? Answer: [WeChat]-[Long press File Transfer Assistant]-[Delete this chat]. Specific steps: 1. First open the WeChat software. After entering the home page, we find [File Transfer Assistant] and press and hold; 2. Then a pop-up will be marked as unread, pin the chat to the top, do not display the chat, and delete the chat. Here We can click [Delete this chat];
