

Apple all-in-one USB flash drive to install mac?

php editor Zimo is here to introduce how to use a USB flash drive to install the Mac system. In many cases, we may need to reinstall the Mac system or upgrade the system. At this time, if there is no optical drive, you can use a USB flash drive to complete the installation. Next, we will introduce in detail how to make a bootable USB flash drive and install the Mac system, so that you can easily complete the operation.
How to install MAC dual system using U disk
First of all, it is recommended to prepare two U disks with a capacity of 4G or more. Make sure there are no files stored in the USB flash drive to avoid problems when making a Win7 boot disk. In addition, you need to prepare a Win7 image file, and it is best to choose the 64-bit system version. Download the Mac hardware driver for Win7 in Mac system.
First, open your Apple computer and click "Settings." Next, go into system settings and enter your username and password, then confirm. In Settings, locate the "General" option. In General Settings, find and click "Create USB Bootable Installer".
Apple notebooks use the macos system by default, but the considerate Apple system has built-in BootCamp assistant, which allows users to install windows to form a dual system.
The steps are as follows: First, launch Boot Camp Assistant and select the continue option. Then insert the Windows system USB flash drive and choose to download the latest Windows support software from Apple. Click Continue and let the system automatically download the Windows driver to the USB flash drive. After waiting for the Windows support files to download, click on the Exit option.
First, visit Microsoft’s official website to download the latest Windows 10 image, and be sure to select the 64-bit system version. In addition, prepare a USB flash drive with a capacity of no less than 8GB for making a Windows 10 installation disk.
, download the win10 image file on your Apple computer, or use a USB flash drive to copy the win10 image to your Apple computer.
Installation tutorial for mac system using U disk
The third step, after the backup is completed, insert the U disk on the computer, click Disk Utility, select the U disk you inserted, and click Click Erase, enter Macbl after the name, and click Erase to format the USB drive.
First you need to prepare a USB flash drive with a capacity greater than 8G, as well as a Mac OS installation CD or corresponding image file. Open Disk Utility in Mac OS system, format the USB flash drive to Mac OS extended format, and then click the "Recover" button.
Insert the USB drive, open Disk Utility, select the USB drive, click Partition, select a partition for Partition Layout, select Mac OS Extended (Journaled), select a name, and click Apply. Once done, close Disk Utility.
Step one: It is best to have two USB flash drives with a capacity of more than 4G. Be careful not to put anything in it, otherwise it will be gone when you create a win7 boot disk on a mac. There is also the image file of win7 (it is best to install a 64-bit system). Download the mac hardware driver under win7 system on mac.
Required tools: 8G or above U disk appstore download macosx system image Normally used mac computer mac system production U disk system installation disk The steps are as follows. OSXLion downloaded from the appstore will be placed in the Dock at the bottom of the screen.
Source Object" column; the destination disk is naturally the partition (or U disk) you just created on the mobile hard disk. OK, you can use the mobile hard disk or U disk to install the Mac OS X operating system for Apple computers .

Tutorial on reinstalling mac system from USB disk
The installation process takes about half an hour (the speed depends on the USB reading speed and the performance of the computer) , after the installation is completed, the computer will automatically restart. After the computer is turned on, you can perform simple settings. At this time, the computer will be the same as a new one. The U disk we use to reinstall the system can be kept for next time.
Prepare an 8G USB flash drive. Use the USB keyboard to download the Mac OS Format, select Mac OS extension for format, and name it as you like. After formatting, select recovery, select your system installation file as the source disk, and the destination disk is the disk partition you formatted. Use the mouse to drag it into the box. .
How to use USB flash drive to install mac system on Apple computers
1. In the second step, connect the mobile hard drive to the computer, click System Preferences, and then click Time Machine to back up the data in the computer.
2. Click the logo on the computer where Mac needs to be installed. Then select Shut Down on the menu. After shutting down, insert the prepared startup disk into the computer USB. Then hold down option and press the power button to Turn on the computer.
3. First, use the "Disk Utility" (Finder--Applications--Utilities--Disk Utility) that comes with Apple's Mac OS X system to partition the mobile hard disk.
4. Prepare an 8G USB flash drive. Use the USB keyboard to download the Mac OS
##First, use the "Disk Utility" (Finder--Applications--Utilities--Disk Utility) that comes with Apple's Mac OS Enter the win7 iso image and select the target U disk. This is to create and install the win7 U disk. In addition, the software will also prompt you to put the downloaded Apple driver and bootcamp there. At this time, another U disk will be used.Use a U disk to install the win7 dual system under the Apple system. You need to add the Windows partition under the Apple system and install the win7 system on the boot disk of the U disk. The specific method is as follows: Click the 10 million mark in the menu bar above the Apple system. Click Utilities. Click Disk Utility.
How to start an Apple all-in-one USB flash drive: The shortcut hotkey for one-click boot of a USB flash drive on an Apple laptop is: option. First, insert the u boot disk that has been created using u Daxia u disk installation system software into the USB port on the Apple laptop, and then turn on the computer.
How to use USB flash drive to install mac system on Apple computer?
1. The second step is to connect the mobile hard drive to the computer, click System Preferences, and then click Time Machine to back up the data in the computer.
2. Turn on the computer, enter the main page of the computer, shut down the computer, then press and hold the option key on the keyboard, and then press the power key. After the computer is turned on, you will see the following screen. Under the utility option Disk Management, click Continue in the lower right corner of it.
3. The method of reinstalling the mac system is as follows: First, we need to prepare a USB flash drive with 8G memory and create the mac system that needs to be reinstalled. Reinstalling the system does not retain any settings and data, and requires backing up all data on the hard drive. The latest stable version of macosx system can be downloaded through the AppStore.
4. First, use the "Disk Utility" (Finder--Applications--Utilities--Disk Utility) that comes with Apple's Mac OS X system to partition the mobile hard disk.
Conclusion: The above is a summary of the answers related to the Apple all-in-one USB disk installation mac compiled by this site. I hope it will be helpful to you! If your problem is solved, please share it with more friends who care about this problem~
The above is the detailed content of Apple all-in-one USB flash drive to install mac?. For more information, please follow other related articles on the PHP Chinese website!

Hot AI Tools

Undresser.AI Undress
AI-powered app for creating realistic nude photos

AI Clothes Remover
Online AI tool for removing clothes from photos.

Undress AI Tool
Undress images for free

Clothoff.io
AI clothes remover

AI Hentai Generator
Generate AI Hentai for free.

Hot Article
Hot Tools

Notepad++7.3.1
Easy-to-use and free code editor

SublimeText3 Chinese version
Chinese version, very easy to use

Zend Studio 13.0.1
Powerful PHP integrated development environment

Dreamweaver CS6
Visual web development tools

SublimeText3 Mac version
God-level code editing software (SublimeText3)
Hot Topics
 1386
1386
 52
52

 What should I do if Win10 cannot turn on the mobile hotspot network? What should I do if Win10 cannot turn on the mobile hotspot switch?
Jun 26, 2024 am 12:33 AM
What should I do if Win10 cannot turn on the mobile hotspot network? What should I do if Win10 cannot turn on the mobile hotspot switch?
Jun 26, 2024 am 12:33 AM
Mobile hotspots can help users quickly connect their devices to the Internet, but many users are asking what to do if Win10 cannot turn on the mobile hotspot switch? Let this site carefully introduce to users the solution to the problem that Win10 cannot turn on the mobile hotspot switch. Solution to the problem that Win10 cannot turn on the mobile hotspot switch 1. In the device manager, find the network adapter and display hidden hardware devices. 2. Find the disabled MicrosoftWi-FiDirectVirtualAdapter device and re-enable it. 3. Try turning on the mobile hotspot again and return to normal.
 Apple iPhone 16 is no longer pre-installed with Apple Intelligence
Jul 30, 2024 pm 01:18 PM
Apple iPhone 16 is no longer pre-installed with Apple Intelligence
Jul 30, 2024 pm 01:18 PM
According to industry insider Mark Gurman, Apple’s Apple Intelligence will be postponed to October. In other words, it will be pushed first on iOS18.1. Apple iPhone 16 is expected to be released in September, so Apple Intelligence will not be pre-installed. 1. Apple Intelligence Apple Intelligence is a personal intelligence system that uses a powerful generative model to provide new functions for iPhone, iPad and Mac to assist users in communicating, working and expressing. 2. Natural language understanding The large model embedded in Apple Intelligence has a deep understanding of the meaning of language.
 How to solve the problem that two accounts are displayed when Windows 10 is started and two accounts are logged in?
Jun 26, 2024 am 12:07 AM
How to solve the problem that two accounts are displayed when Windows 10 is started and two accounts are logged in?
Jun 26, 2024 am 12:07 AM
After the computer is turned on, two user login names are displayed. This may be because someone has added a new account to the computer. So what should I do if the Win10 computer displays two accounts when it is turned on? Let this site give users a detailed introduction to the problem of two accounts showing when Windows 10 starts up. Analysis of the problem that two accounts are displayed when Windows 10 starts up 1. First, right-click on "This Computer" or "My Computer" and select "Manage". 2. In "Computer Management (Local)". 3. Select "Local Users and Groups". 4. Select “User&rdq”
 Win10 19045.4593: Beta / RP will release the same preview version update patch KB5039299 (with a more detailed fix introduction)
Jun 25, 2024 pm 06:18 PM
Win10 19045.4593: Beta / RP will release the same preview version update patch KB5039299 (with a more detailed fix introduction)
Jun 25, 2024 pm 06:18 PM
Microsoft today released the KB5039299 update for Windows 1022H2 to WindowsInsider project members in the Beta and ReleasePreview channels. After users install it, the version number rises to Build19045.4593. Microsoft stated that starting from this preview version, the same Windows 10 preview version will be pushed to the Beta channel and Release Preview channel in the future, but users in the Beta channel can try some new functions/features under development. Improvements rolling out gradually to Beta channel users [Search on taskbar] improves the overall stability of searching for apps in the taskbar search box. [Window
 ChatGPT is now available for macOS with the release of a dedicated app
Jun 27, 2024 am 10:05 AM
ChatGPT is now available for macOS with the release of a dedicated app
Jun 27, 2024 am 10:05 AM
Open AI’s ChatGPT Mac application is now available to everyone, having been limited to only those with a ChatGPT Plus subscription for the last few months. The app installs just like any other native Mac app, as long as you have an up to date Apple S
 How to turn off tablet mode in win10? Tutorial on exiting tablet mode in win10
Jun 26, 2024 am 01:10 AM
How to turn off tablet mode in win10? Tutorial on exiting tablet mode in win10
Jun 26, 2024 am 01:10 AM
How to exit tablet mode on Win10 computer? In Win10 computer operation, users do not need to use the tablet mode function. I want to know how to successfully turn off this function? First, the user opens the system settings option, finds the tablet option, and finally selects to never save in tablet mode. The following is a detailed introduction to the steps to turn off Windows 10 tablet mode. How to turn off tablet mode in win10 Method 1: Turn off through settings 1. Click the settings function in the start menu in the lower left corner. 2. In the windows settings page that opens, click the [System] option. 3. In the system settings page, find the [Tablet PC] option in the left column and click it. 4. On the tablet page on the right, click [When I sign in] under
 How to enable periodic virus scanning function in win10 system? How to enable periodic virus scanning function in win10 system
Jun 26, 2024 am 12:06 AM
How to enable periodic virus scanning function in win10 system? How to enable periodic virus scanning function in win10 system
Jun 26, 2024 am 12:06 AM
How to turn on the regular virus scanning function in Windows 10? This function can very well help us define and clean up viruses on our computers. Many friends don’t know where to set up and use them. In response to this problem, this win10 tutorial will share detailed steps for users. Let’s take a look. Here’s the complete setup method. Tutorial on enabling periodic virus scanning in Windows 10 1. Enter the “Settings” interface using the “win+i” shortcut key and click on the “Update and Security” option. 2. After entering the new window interface, click "Windows Security Center" in the left column. 3. Then click&l on the right
 What should I do if the font prompt when installing Win10 is invalid? What to do if Win10 is not a valid font?
Jun 25, 2024 pm 10:36 PM
What should I do if the font prompt when installing Win10 is invalid? What to do if Win10 is not a valid font?
Jun 25, 2024 pm 10:36 PM
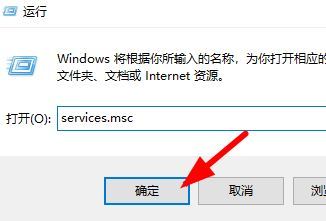
In order to make the system fonts or when printing word or using PS drawing more beautiful and unique, we can achieve the goal by adding new fonts to the system. After installing fonts, you can also make your system more beautiful. Although installing fonts is simple, many users have encountered installation failures. For example, a user recently reported to the editor that the installation of a new font in the win10 system failed and prompted "not a valid font". If you encounter this problem, we can fix it as follows. The solution is as follows: Method 1: 1. Use the "win+R" shortcut key to start running, enter "service.msc", click &
