

Insert USB flash drive into Mac Apple system?

php editor Xiaoxin has brought a guide on inserting a USB flash drive on Mac Apple system. In daily use, sometimes we need to transfer data from a USB flash drive to a Mac computer, or vice versa. However, you may encounter some problems when inserting a USB flash drive on a Mac. This article will give you a detailed introduction on how to safely insert and remove a USB flash drive on a Mac system to avoid data loss and other unnecessary troubles. Let’s find out together!
How to use U disk on Mac and Windows systems
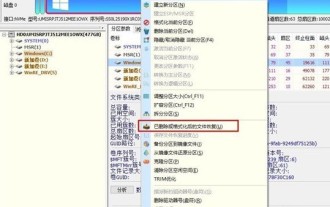
First, insert the U disk into the computer, then find and click the [Disk Utility] icon according to the icon. Then, in the next step, select the USB drive and click the [Erase] icon.
After opening your Mac, press the corresponding shortcut key and make sure the universal option of the external hard drive is checked. Insert the USB flash drive into the computer. A new disk icon will be displayed on the desktop. Click to open it. Now you can access the files in the USB flash drive and copy, delete or import them.
When using a USB flash drive on a Mac, if you need to use a Windows installation disk, you must first install the Windows 10 image. You can download the installation image or search for the ISO download image directly from the app store. After inserting the USB flash drive into your Mac, make sure to turn on the USB flash drive, otherwise the computer may not start properly.
First, insert the USB flash drive into your Mac computer and open "Disk Utility". Next, select your USB drive in the sidebar of Disk Utility. Then, click the "Erase" option at the top, which is similar to the format function in Windows, and select the "MS-DOS(FAT)" format in the "Format" drop-down menu.
Right-click on the U disk, in the menu that opens, select Show Introduction to view the format of the U disk. If it is the ntfs format that comes with Windows, it can only be read but not writable. If it is in exfat format, it is common on Windows and Mac. If it is a Macos extended format, it is only allowed to be used by Apple computers.
Click the "Continue" button and wait for BootCamp Assistant to prepare the Windows installation USB flash drive. Next, turn off the Apple computer and insert the prepared Windows installation USB flash drive into the computer. Restart your Apple computer, hold down the "Option" key until the boot device list appears, and select the Windows installation USB drive as the boot device.

Where to open the USB flash drive inserted into Apple computer
is a complete and independent operating system USB flash drive: USB flash drive, the full name is USB flash drive. The English name is "USB flash disk".
The second step is to insert the prepared U disk into the computer and make sure it is inserted correctly. Then, the third step is to find the Dock bar on the computer screen and click the [Finder] icon. The fourth step is to browse the list on the left in the [Finder] window that opens, find and click on the USB flash drive to access its contents.
The specific steps to open the USB flash drive on Macbook pro are as follows: First, insert the USB flash drive into the Mac. There may be no reaction. Switch the Mac screen to the desktop and you will see the device as shown in the picture. displayed, and the name displayed is the name of your USB flash drive, as shown in the figure below.
Where to open the USB flash drive on Apple computer? Method: First insert the U disk into the computer. At this time, you will see the U disk icon on the desktop. Open it; then you will see the files inside. Method: Open finder and click on the U disk icon on the left; you will also see the contents of the U disk at this time.
How to solve the problem that the USB disk can only read but not write on mac Apple computer
1. First, we open the Apple computer and enter the desktop, then find the console application and click to open it. After entering the interface, click the launchpad option, and then we find other icons in the pop-up interface and click to open. Then we will enter the disk utility interface.
2. First, turn on the computer and click to open the "Other" option in the launchpad. Then click to open "Disk Utility" in the pop-up window. Then select the USB drive in the pop-up window and click to open "Erase".
3. Follow the wizard prompts and restart the computer to complete all configurations. After the Mac restarts, open the Mac "Preferences" and you will see the icon of this software. Just double-click it to open it.
4. To solve the problem of USB free writing on macbook, first find launchpad and open it. The second step is to find "Others" and open it. The third step is to find Disk Utility and open it. Insert the USB flash drive and select the drive to be formatted. This operation is called "erase" on Mac.
5. If your USB flash drive has a built-in physical write-protect switch as mentioned in my introduction, check to see if the switch has been set to the on state. If it is on, it means it is write-protected.
6. First, check the format of the U disk. If the U disk is in FAT format, open the U disk and copy and paste the files directly, just like using the window system. But this memory must be small, and the U disk memory cannot exceed 4G.
Conclusion: The above is all the content about inserting a USB flash drive into the Mac Apple system introduced by this site. I hope it will be helpful to everyone. If you want to know more about this, remember to bookmark and follow it. This site.
The above is the detailed content of Insert USB flash drive into Mac Apple system?. For more information, please follow other related articles on the PHP Chinese website!

Hot AI Tools

Undresser.AI Undress
AI-powered app for creating realistic nude photos

AI Clothes Remover
Online AI tool for removing clothes from photos.

Undress AI Tool
Undress images for free

Clothoff.io
AI clothes remover

AI Hentai Generator
Generate AI Hentai for free.

Hot Article
Hot Tools

Notepad++7.3.1
Easy-to-use and free code editor

SublimeText3 Chinese version
Chinese version, very easy to use

Zend Studio 13.0.1
Powerful PHP integrated development environment

Dreamweaver CS6
Visual web development tools

SublimeText3 Mac version
God-level code editing software (SublimeText3)
Hot Topics


 Is the monitor resolution related to the graphics card?
May 08, 2024 pm 01:34 PM
Is the monitor resolution related to the graphics card?
May 08, 2024 pm 01:34 PM
What is the relationship between graphics card performance and monitor resolution? 1. Both the monitor and graphics card have the highest (and best) resolution (usually with a corresponding refresh rate). When the two match, it is perfect. Otherwise, the graphics card has the highest resolution. It must be higher than the maximum resolution of the monitor to achieve the display of the maximum resolution of the monitor. For example. 2. The computer screen resolution is related to both the graphics card and the monitor. The better the graphics card, the higher the resolution it will support. Generally, the maximum resolution of the graphics card is higher than the maximum resolution of the monitor, so the resolution only needs to be set to the maximum resolution supported by the monitor. 3. For LCD displays, the maximum resolution given is the best resolution. The larger the display, the greater the optimal resolution. The greater the resolution, the requirements for graphics card configuration.
 Laptop power on but black screen
May 09, 2024 am 09:04 AM
Laptop power on but black screen
May 09, 2024 am 09:04 AM
What should I do if the laptop power-on indicator light comes on and the screen goes black? It may be caused by poor contact. It is recommended to restart the laptop. If the problem still cannot be solved, the monitor is broken and it is recommended to go to a repair shop for repair. When the notebook is turned on, the screen is black, but there is sound entering the system, and the external monitor is still abnormal. It may be a problem with the graphics card or motherboard. Just remove and replace it. Start switch problem. Black screen when booting, no self-test. Use the meter pin to short-circuit the startup terminal on the motherboard, and it will start normally. Memory stick problem. There will be a long beep when the screen is black when the phone is turned on. Just take out the memory stick, clean it and then plug it back in. cpu problem. It is recommended to use an external monitor of the computer, which is a general desktop monitor, and connect it to the external display interface of the notebook. If a
 How to recover diskgenius data diskgenius data recovery tutorial
May 08, 2024 pm 02:22 PM
How to recover diskgenius data diskgenius data recovery tutorial
May 08, 2024 pm 02:22 PM
Step 1: You can directly select the partition in the hard disk partition map above the main interface of DiskGenius, right-click, and then select the [Deleted or Formatted File Recovery] menu item in the pop-up shortcut menu (as shown in the picture) . Step 2: The recovery options window pops up, check the three options of [Recover Deleted Files], [Complete Recovery], and [Additional Scan for Known File Types] (as shown in the picture). Step 3: Click the [Select File Type] button on the right and specify the file type you need to recover in the pop-up window (as shown in the picture). Step 4: After setting the recovery options and clicking the [Start] button, the DiskGenius software will start scanning the data in the hard disk or partition. First, a scanning window will pop up (as shown in the figure)
 How to recover files with the partition tool diskgenius How to recover files with the partition tool diskgenius
May 08, 2024 pm 02:25 PM
How to recover files with the partition tool diskgenius How to recover files with the partition tool diskgenius
May 08, 2024 pm 02:25 PM
1. You can directly select the partition in the hard disk partition map above the main interface of DiskGenius, right-click, and then select the [Deleted or Formatted File Recovery] menu item in the pop-up shortcut menu, as shown in the figure below. 2. The recovery options window pops up, check the three options of [Recover Deleted Files], [Complete Recovery], and [Additional Scan for Known File Types], as shown in the figure below. 3. Click the [Select File Type] button on the right and specify the file type you need to recover in the pop-up window, as shown in the figure below. 4. After setting the recovery options and clicking the [Start] button, the DiskGenius software will start scanning the data in the hard disk or partition. First, a scanning window will pop up, as shown in the figure below. 5. After the scan is completed,
 How long does the motherboard battery last?
May 08, 2024 pm 09:04 PM
How long does the motherboard battery last?
May 08, 2024 pm 09:04 PM
How often should you replace a computer motherboard battery? Generally speaking, the service life of a motherboard battery is 3-5 years, but it may be shorter or longer. If the computer has problems such as inaccurate clock and incorrect system settings, it may be caused by damage to the motherboard battery. The motherboard battery should be replaced every 2 to 3 years. The motherboard battery is used to record the time of the computer system, that is, to maintain the accuracy of the system clock. When the battery is insufficient, the time will return to the factory date. When CMOS errors occur frequently when starting the computer, and the date and time are incorrect, it is time to replace the battery. The battery life of the motherboard is very long, usually about 5 years. The battery is in a charging state when the computer is turned on, and the BIOS is discharged after the computer is shut down to maintain the associated information in the BIOS (such as
 How to recover deleted files with Scanner Almighty King_How to recover deleted files with Scanner Almighty King
May 07, 2024 am 10:22 AM
How to recover deleted files with Scanner Almighty King_How to recover deleted files with Scanner Almighty King
May 07, 2024 am 10:22 AM
1. First open Scanner, click the button in the upper left corner to display the personal interface, as shown in the figure below. 2. Then click Settings and slide the interface to find the help interface button, as shown in the figure below. 3. Then find the help button and click to enter, as shown in the figure below. 4. Then find [I deleted a document by mistake, how do I restore it? 】, click to enter, as shown in the figure below. 5. We can see that there is a URL, follow the instructions to log in to the URL to restore (unsynchronized files cannot be restored, be sure to synchronize important files after scanning), as shown in the figure below. 6. After logging in, you can view your synchronized files and find the files you accidentally deleted, as shown in the figure below.
 The easiest way to convert mobile phone videos to MP4 (quick tips for converting mobile phone videos to MP4 format)
May 08, 2024 pm 08:43 PM
The easiest way to convert mobile phone videos to MP4 (quick tips for converting mobile phone videos to MP4 format)
May 08, 2024 pm 08:43 PM
But sometimes it is necessary to convert it to MP4 format to play on other devices. People shoot more and more mobile phone videos with the popularity of smartphones. To help users quickly convert mobile phone videos to MP4 format, this article will introduce the simplest method. 1. Use professional video conversion tools to convert mobile phone videos to MP4 format, such as FFmpeg, etc., such as HandBrake. Can meet the needs of different users, these tools provide rich conversion options. 2. Mobile phone application conversion tools such as iConv also provide video conversion functions. Users only need to import mobile phone videos into the application and choose to output them in MP4 format. Some mobile phone applications such as VideoConverte
 How to set disk high temperature alarm with CrystalDiskInfo hard disk detection tool_How to set disk high temperature alarm with CrystalDiskInfo hard disk detection tool
May 07, 2024 am 10:01 AM
How to set disk high temperature alarm with CrystalDiskInfo hard disk detection tool_How to set disk high temperature alarm with CrystalDiskInfo hard disk detection tool
May 07, 2024 am 10:01 AM
Step 1: Open CrystalDiskInfo and enter the main interface. After entering, switch the disk for which you want to set the alarm. Step 2: Then click on the currently displayed temperature location. Step 3: After clicking, the temperature alarm setting function will pop up. The default is 60℃. Step 4: You can drag the scroll bar to set the temperature, and then click the Apply button. Step 5: If there are multiple disks, you can click the drop-down box above to select other hard disks for settings.
