

How to automate tasks using PowerShell

If you are an IT administrator or technology expert, you must be aware of the importance of automation. Especially for Windows users, Microsoft PowerShell is one of the best automation tools. Microsoft offers a variety of tools for your automation needs, without the need to install third-party applications. This guide will detail how to leverage PowerShell to automate tasks.
What is a PowerShell script?
If you have experience using PowerShell, you may have used commands to configure your operating system. A script is a collection of these commands in a .ps1 file. .ps1 files contain scripts executed by PowerShell, such as the basic Get-Help command. While simple commands like Get-Help may not be worth saving to a .ps1 file, to save time, more complex commands like Get-Date-DisplayHint Date should be written into a script file. Later, we'll explore more complex commands that are worth saving in a .ps1 file.
How to use PowerShell to automate tasks
PowerShell is more than just an application, it is a scripting language built on the .Net CLR to automate IT tasks. It has backward compatibility with CMD and can automate simple or complex tasks. Due to its versatility, it can be used on Windows clients and servers, and in MacOS, Linux and cloud environments, PowerShell is a compelling tool used by most IT professionals to automate daily tasks.
To automate tasks in PowerShell, we just need to follow the steps below.
Let’s talk about it in detail.
1]Configure execution policy in PowerShell to allow scripts to run
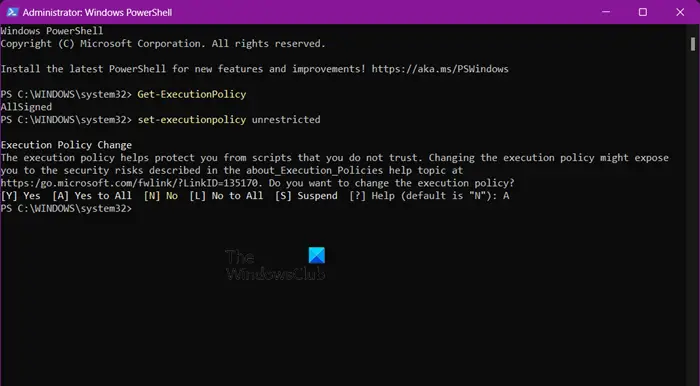
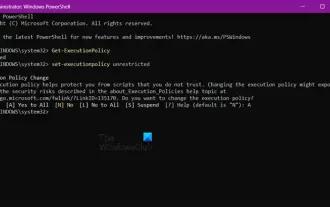
Normally, Windows restricts users from running scripts in PowerShell and needs to be changed by executing specific commands. This restriction can be lifted with simple steps.
To check the execution policy, run the following command in PowerShell’s elevated mode.
获取-执行策略
If it displays AllSigned, it means that all scripts and configuration files are signed by a trusted publisher, including scripts written on the local computer.
To further change the execution policy, you can run the following command.
设置执行策略不受限制
or
设置执行策略远程签名
This will allow you to run PowerShell scripts.
2]Create a PowerShell script
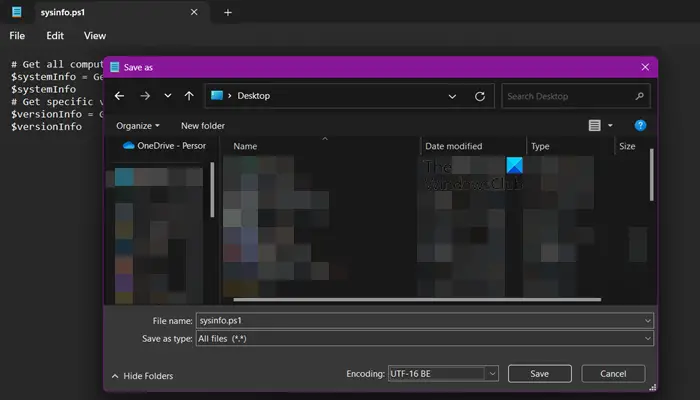
Exploring the world of PowerShell scripting would require a separate article, but here we’ll teach you how to create and run a basic PowerShell script.
#获取所有计算机属性
$system Info=Get-ComputerInfo
$system Info

#获取具体版本属性
$versionInfo=Get-ComputerInfo-Property“*Version”
$versionInfo
This script retrieves all system and operating system properties, including version-related properties such as Windows version and BIOS version.
Although there are several tools for writing PowerShell scripts, we will use Notepad, which comes preinstalled on your computer.
So, open notepad, paste the script given earlier, go to File > Save As and give a name with extension .ps1, change the save as type to Delete All Files and press Enter . If your file doesn't save, change the location to your desktop and try again.
Note: We recommend that you use Visual Studio Code to write PowerShell scripts, as Notepad lacks various features, making it not an ideal scripting utility.
(3) Run and test the PowerShell script
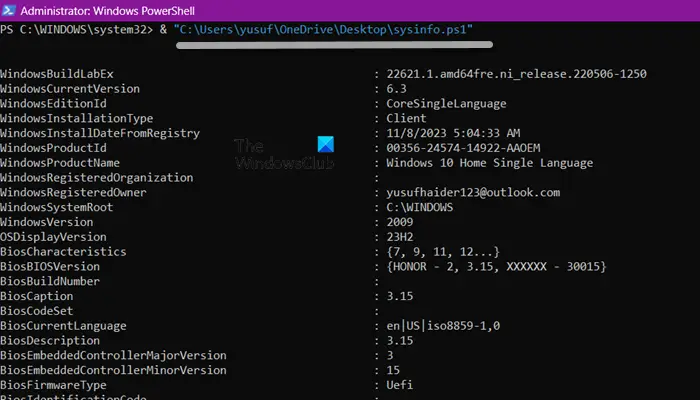
Now, let’s see how to run the PowerShell script. Now that we have created the PowerShell script using Notepad, to run it we must use PowerShell. So, open PowerShell as administrator and run the following command.
&;“脚本位置/脚本名称.ps1”
If you are not sure of the exact location of your script, right-click on it, go to Properties, and copy the exact location from the Location field. Just put the location and name of the script in the syntax given earlier and you're good to go.
4] Schedule the script using Task Scheduler
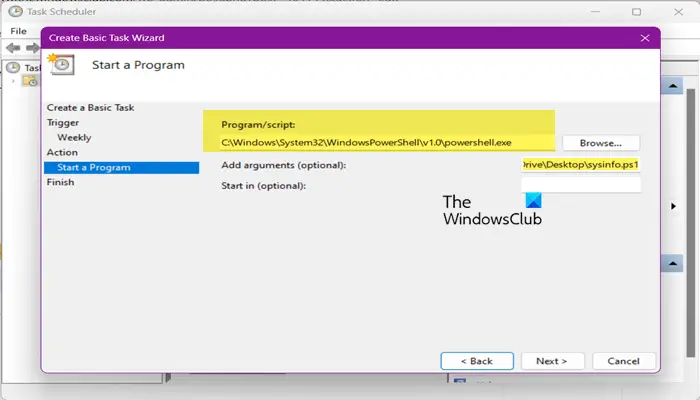
If your script is running well, there is no harm in scheduling the script. In order to do this, we will use Task Scheduler, a built-in Windows application that, as the name suggests, does just that. Follow the steps mentioned below to arrange the PowerShell script.

You can select the task and click Run to confirm that it is running.
Hopefully you now know how to create and run PowerShell scripts on your Windows computer.
Read: How to Delete Scheduled Tasks in Windows
Can I use PowerShell to automate tasks?
Yes, with the help of PowerShell scripting language, you can write scripts that, when executed, can automatically perform tasks for you. This script can be scheduled using the built-in task scheduler utility, and you're good to go.
The above is the detailed content of How to automate tasks using PowerShell. For more information, please follow other related articles on the PHP Chinese website!

Hot AI Tools

Undresser.AI Undress
AI-powered app for creating realistic nude photos

AI Clothes Remover
Online AI tool for removing clothes from photos.

Undress AI Tool
Undress images for free

Clothoff.io
AI clothes remover

AI Hentai Generator
Generate AI Hentai for free.

Hot Article
Hot Tools

Notepad++7.3.1
Easy-to-use and free code editor

SublimeText3 Chinese version
Chinese version, very easy to use

Zend Studio 13.0.1
Powerful PHP integrated development environment

Dreamweaver CS6
Visual web development tools

SublimeText3 Mac version
God-level code editing software (SublimeText3)
Hot Topics
 1377
1377
 52
52

 How to execute .sh file in Linux system?
Mar 14, 2024 pm 06:42 PM
How to execute .sh file in Linux system?
Mar 14, 2024 pm 06:42 PM
How to execute .sh file in Linux system? In Linux systems, a .sh file is a file called a Shell script, which is used to execute a series of commands. Executing .sh files is a very common operation. This article will introduce how to execute .sh files in Linux systems and provide specific code examples. Method 1: Use an absolute path to execute a .sh file. To execute a .sh file in a Linux system, you can use an absolute path to specify the location of the file. The following are the specific steps: Open the terminal
 Introduction to the process of extracting line drawings in PS
Apr 01, 2024 pm 12:51 PM
Introduction to the process of extracting line drawings in PS
Apr 01, 2024 pm 12:51 PM
1. Open the software and import a piece of material, as shown in the picture below. 2. Then ctrl+shift+u to remove color. 3. Then press ctrl+J to copy the layer. 4. Then reverse ctrl+I, and then set the layer blending mode to Color Dodge. 5. Click Filter--Others--Minimum. 6. In the pop-up dialog box, set the radius to 2 and click OK. 7. Finally, you can see the line draft extracted.
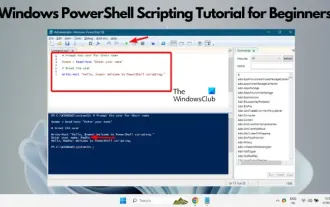 Windows PowerShell Scripting Tutorial for Beginners
Mar 13, 2024 pm 10:55 PM
Windows PowerShell Scripting Tutorial for Beginners
Mar 13, 2024 pm 10:55 PM
We've designed this Windows PowerShell scripting tutorial for beginners, whether you're a tech enthusiast or a professional looking to improve your scripting skills. If you have no prior knowledge of PowerShell scripting, this article will start with the basics and be tailored for you. We'll help you master the installation steps for a PowerShell environment and walk you through the main concepts and features of PowerShell scripts. If you're ready to learn more about PowerShell scripting, let's embark on this exciting learning journey together! What is WindowsPowerShell? PowerShell is a hybrid command system developed by Microsoft
 How to automate tasks using PowerShell
Feb 20, 2024 pm 01:51 PM
How to automate tasks using PowerShell
Feb 20, 2024 pm 01:51 PM
If you are an IT administrator or technology expert, you must be aware of the importance of automation. Especially for Windows users, Microsoft PowerShell is one of the best automation tools. Microsoft offers a variety of tools for your automation needs, without the need to install third-party applications. This guide will detail how to leverage PowerShell to automate tasks. What is a PowerShell script? If you have experience using PowerShell, you may have used commands to configure your operating system. A script is a collection of these commands in a .ps1 file. .ps1 files contain scripts executed by PowerShell, such as basic Get-Help
 Complete list of ps shortcut keys
Mar 11, 2024 pm 04:31 PM
Complete list of ps shortcut keys
Mar 11, 2024 pm 04:31 PM
1. Ctrl + N: Create a new document. 2. Ctrl + O: Open a file. 3. Ctrl + S: Save the current file. 4. Ctrl + Shift + S: Save as. 5. Ctrl + W: Close the current document. 6. Ctrl + Q: Exit Photoshop. 7. Ctrl + Z: Undo. 8. Ctrl + Y: Redo. 9. Ctrl + X: Cut the selected content. 10. Ctrl + C: Copy the selected content.
 How to open url file
Mar 28, 2024 pm 06:27 PM
How to open url file
Mar 28, 2024 pm 06:27 PM
Methods for using URL files to open Internet resources include: double-clicking to open using a web browser. Open it with a text editor, copy the link address and paste it into the browser address bar. Through the command line, use the "start" or "open" command to specify the URL file path. Create a script file that contains the command to open the URL file.
 PS copy layer shortcut key
Feb 23, 2024 pm 02:34 PM
PS copy layer shortcut key
Feb 23, 2024 pm 02:34 PM
In the PS copy layer shortcut keys, we can know that if you want to copy a layer when using PS, you can use the shortcut key [Ctrl+J] for quick copying. This introduction to the shortcut keys for copying layers can tell you the specific operation method. The following is the detailed content, so take a look. PS copy layer shortcut key answer: [Ctrl+J] Specific method: 1. Open the image in PS and select the layer that needs to be copied. 2. Press [Ctrl+J] on the keyboard at the same time to complete the copy of the layer. Other copying methods: 1. After opening the image, press and hold the layer and move the [New Layer] icon downwards. 2. After moving to the icon, let go. 3. The layer copy is completed.
 How to use ps vanishing point - how to use ps vanishing point
Mar 05, 2024 am 09:00 AM
How to use ps vanishing point - how to use ps vanishing point
Mar 05, 2024 am 09:00 AM
Recently, many friends have asked the editor how to use PS vanishing point. Next, let us learn how to use PS vanishing point. I hope it can help everyone. Step one: First open the ps software and import a picture with a three-dimensional perspective effect (as shown in the picture). Step 2: Then import a material picture, any picture can be used (as shown in the picture). Step 3: Then select the material picture, then ctrl+c to copy the material picture, hide the eyes in front, select the stereoscopic perspective effect picture, and then click the vanishing point option in the filter options (as shown in the picture). Step 4: Enter the editing window of the vanishing point filter and select the Create Plane tool on the left (as shown in the picture). Step 5: Click on the four corners of the object in the three-dimensional perspective rendering to form a closed circle
