

How to connect printer to computer

How to connect a printer to a computer
With the development and popularization of technology, printers have become one of the indispensable devices in our daily life and work. Whether printing study materials, work documents, photos, albums, etc., printers can provide us with convenience. However, many people encounter confusion when they first start using a printer and don't know how to connect the printer to their computer. This article will walk you through how to connect your printer to your computer.
First of all, we need to make it clear that the connection methods of different types of printers are different. Common printer types include USB printers, wired network printers, and wireless network printers. Below we will introduce these three connection methods respectively.
1. USB printer connection
USB printer is one of the most common printer types. For USB printers, connecting is very simple.
The first step is to plug the printer power cord into the power socket and turn on the printer power switch;
The second step is to connect the printer to the computer using a USB data cable. Plug one end into the USB port of the printer and the other end into the USB port of the computer;
The third step is that the computer will automatically recognize the new device and load the corresponding driver. If the computer system comes with the corresponding driver, there is no need to install additional drivers;
The fourth step is to find the file that needs to be printed on the computer, select the printer option, and click Print to complete printing.
2. Wired network printer connection
A wired network printer is a printer connected to the LAN through an Ethernet cable, and can share printing resources through multiple computers. To connect a wired network printer, we need to follow the steps below to set it up.
The first step is to plug the wired network printer power cord into the power socket and turn on the printer power switch;
The second step is to use a network cable to connect the printer to the router. Plug one end into the printer's Ethernet interface and the other end into the router's Ethernet interface;
The third step is to open the computer, find the control panel or settings, and click "Devices and Printers";
The fourth step is to click " "Add Printer" option, the computer will automatically search for printers in the LAN;
The fifth step, select the printer you want to connect to in the search results, and click "Next";
The sixth step, the computer will automatically install After the printer driver is installed, click "Finish" and the connection will be successful.
3. Wireless network printer connection
A wireless network printer is a printer connected to a local area network through Wi-Fi and can print without a wired connection. Connecting to a wireless network printer requires the following settings.
The first step is to plug the wireless network printer power cord into the power socket and turn on the printer power switch;
The second step is to turn on the Wi-Fi function of the computer and search for available Wi-Fi networks;
The third step, find the Wi-Fi network corresponding to the printer you want to connect to in the search results, and connect;
The fourth step, the computer will automatically install the printer driver. After the installation is completed, the connection will be successful. .
It should be noted that before connecting to a wireless network printer, we need to ensure that the router has set up a Wi-Fi network and that the printer matches the wireless network settings of the router. Also, the setting methods of wireless network printers of different brands and models may be different, so please set them according to the printer's instruction manual.
Whether it is a USB printer, a wired network printer, or a wireless network printer, as long as you follow the above steps to connect correctly, you can successfully connect the printer to the computer and realize the printing operation. If you encounter problems during the connection process, you can check the printer's instruction manual or consult relevant technical personnel for help. After the printer is successfully connected, we can easily print and improve work efficiency and convenience.
In short, the method of connecting the printer to the computer is relatively simple. You only need to make the correct settings according to the specific connection method. Printers are indispensable tools in our daily lives and work. Mastering the correct connection method can better enjoy the convenience and efficiency brought by printing.
The above is the detailed content of How to connect printer to computer. For more information, please follow other related articles on the PHP Chinese website!

Hot AI Tools

Undresser.AI Undress
AI-powered app for creating realistic nude photos

AI Clothes Remover
Online AI tool for removing clothes from photos.

Undress AI Tool
Undress images for free

Clothoff.io
AI clothes remover

AI Hentai Generator
Generate AI Hentai for free.

Hot Article
Hot Tools

Notepad++7.3.1
Easy-to-use and free code editor

SublimeText3 Chinese version
Chinese version, very easy to use

Zend Studio 13.0.1
Powerful PHP integrated development environment

Dreamweaver CS6
Visual web development tools

SublimeText3 Mac version
God-level code editing software (SublimeText3)
Hot Topics
 1378
1378
 52
52

 Guide to Solving Win11 Printer Sharing Connection Error 0x0000709
Jan 29, 2024 pm 07:54 PM
Guide to Solving Win11 Printer Sharing Connection Error 0x0000709
Jan 29, 2024 pm 07:54 PM
Although the Win11 system is rich in functions and powerful, users may encounter the problem of being unable to connect to a shared printer during use, such as error code 0x0000709. This issue may be caused by a problem setting up a shared printer that prevents the connection from being established. Here's how to fix it. Features of the connection error reporting function: Simple operation, one-click repair of printer sharing link failure caused by update patches (supports Win7/10/11/2012/2016/2019/LTSC). Method 2: Modify and configure RPC connection settings 1. First, press the [Win+X] key combination on the keyboard, or right-click the [Windows Start Icon] on the taskbar, and select [Run] in the hidden menu item that opens. 4. Select [Configuration
 How to set up wireless network printing on the printer (convenient)
May 02, 2024 pm 06:04 PM
How to set up wireless network printing on the printer (convenient)
May 02, 2024 pm 06:04 PM
Wireless printing has become an indispensable part of the modern office environment, with the continuous development of technology. It can also connect to various devices quickly and easily. Setting up wireless network printing on the printer can not only improve work efficiency. This article will introduce in detail how to achieve a wireless printing experience and convenience through simple settings. 1. Confirm the printer model and network support (printer model) and support the wireless network type used. Before setting up wireless network printing, make sure the printer has wireless printing function. First, you need to confirm the printer model and network support. 2. Connect the printer and computer (connection method) to ensure that the two can communicate normally, physically connect the printer to the computer, use a USB cable or connect through a LAN. 3. Open the printer setting interface (Settings
 How to use usb to connect mobile phone camera on win10 computer_How to use usb to connect mobile phone camera on win10 computer
Mar 28, 2024 am 08:21 AM
How to use usb to connect mobile phone camera on win10 computer_How to use usb to connect mobile phone camera on win10 computer
Mar 28, 2024 am 08:21 AM
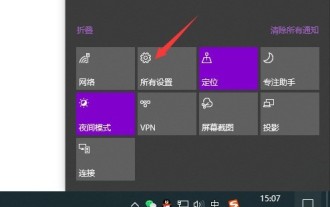
1. First, click the menu on the right side of the status bar to select All Settings. 2. Select Privacy under the icon. 3. Then, select the camera as shown below. 4. Next, select changes as shown below. 5. Just open it.
 How to reconnect an offline printer
Jan 15, 2024 am 10:36 AM
How to reconnect an offline printer
Jan 15, 2024 am 10:36 AM
When many friends print documents and send them to the printer, there is no movement. The printer's light is still on, but there is no response from the printer. This means that the printer is offline and does not work. Here is the article about the printer being offline. Let’s take a look at the connection recovery printing method. How to connect the printer when it is offline: Method 1: First, please check whether the line connecting the printer to the computer is in poor contact or the line is faulty. Method 2: Check whether "Use Printer Offline" is turned on. The steps are to open the printer interface that is printing, click the printer tab, uncheck "Use Printer Offline", and try printing again. Method three: If it is a problem with the printer driver, it is recommended to uninstall the printer and reinstall it. See the steps below. 1,
 How to add a shared printer on another computer
Feb 18, 2024 pm 12:18 PM
How to add a shared printer on another computer
Feb 18, 2024 pm 12:18 PM
In the modern information age, printers have become one of the essential devices in almost every home and office. Especially in office environments, multiple computers often need to share one printer. So, how to add another computer to an existing shared printer? The following will introduce it to you in detail. Step 1: Confirm that the printer is suitable for sharing. First, we need to confirm whether the printer you are using is suitable for sharing among multiple computers. Some older printers may not support network sharing and can only be connected to a single computer via USB cable.
 How to connect the printer through the router (simple operation allows you to easily connect the printer to the router)
Mar 14, 2024 pm 04:19 PM
How to connect the printer through the router (simple operation allows you to easily connect the printer to the router)
Mar 14, 2024 pm 04:19 PM
Printers have become one of the indispensable devices in life and work in modern society. Many people don't know how to connect a printer to their home or office router for wireless printing capabilities, however. Easily connect your printer to your router, this article will show you how to do it with simple operations. One: Understand wireless printing technology - Introduce the basic principles and advantages of wireless printing technology - Application scenarios and development trends of wireless printing technology Two: Choose suitable printers and routers - Introduce how to choose a printer that supports wireless connection functions - How to choose a printer that is suitable for your home or family Router 3 used in the office: Check the network environment and connection requirements - Check the network environment at home or in the office to ensure that the network is working properly - Determine the connection requirements between the printer and the router
 Win10 tutorial on using USB to connect mobile phone hotspot
Dec 28, 2023 pm 12:44 PM
Win10 tutorial on using USB to connect mobile phone hotspot
Dec 28, 2023 pm 12:44 PM
When we use the win10 operating system, have we ever understood how win10usb connects to mobile phone hotspots? How many friends know about it? Here, let the editor lead you to learn the details of how to use USB to connect to mobile phone hotspots in Win10! How to use USB to connect to mobile phone hotspot in win10: 1. Find this computer on the desktop, right-click, select "Manage", and open the "Computer Management" window. 2. Find "Services and Applications" on the left and click it. Find the "Services" item on the right side of the dialog box and double-click it. 3. Find "Mobile Hotspot Service" in the window that opens and click it. 4. Find "Start" on the left side of the page that opens and click it. 5. The startup is successful as shown below. 6. The computer settings are completed. Now open the mobile hotspot and find the "Settings"
 Step-by-step tutorial on how to set up a shared printer in win7
Jul 10, 2023 pm 12:29 PM
Step-by-step tutorial on how to set up a shared printer in win7
Jul 10, 2023 pm 12:29 PM
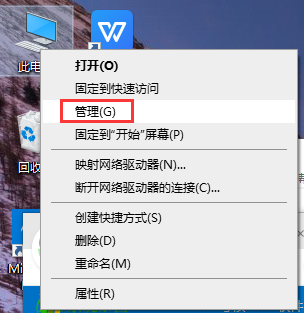
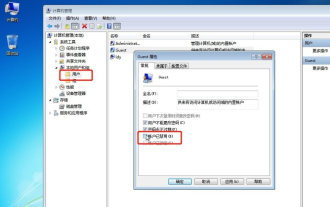
How to set up printer sharing in win7? Although printers are now an essential electronic device in the office, they are not suitable for everyone in the same way that computers are. So, how do we set up a shared printer? Today, the editor will tell you about the step-by-step tutorial on how to set up a shared printer in win7. Let's take a look. 1. Right-click [Computer] and select [Manage]. In the pop-up [Computer Management] window: System Tools->Local Users and Groups->Users. Find [Guest] on the right, double-click it, and check the Account Disabled box. Remove. 2. Return to the computer desktop, press the win+R shortcut key to pop up Run, or click Start in the lower left corner of the computer, find Run on the Start menu, and enter: gpedit.ms in Run
