 Computer Tutorials
 Computer Knowledge
 Raspberry PI monitor not working; doesn't show up after startup
Raspberry PI monitor not working; doesn't show up after startup
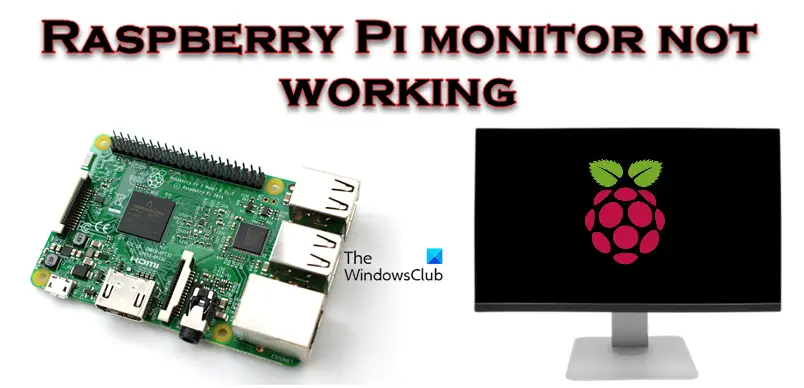
When we connect the Raspberry PI to the monitor and try to boot the device, there is no display. The monitor says no signal and then goes into standby mode. In this article, we will discuss this issue and see what you can do if your Raspberry Pi display is not working and has no display after powering on.

Why is my Raspberry Pi screen black when I boot up?
Raspberry PI does not support HDMI hot-plug function. If you connect or turn on the monitor after the Raspberry PI is powered on, only a black screen will appear. Additionally, if the operating system is not installed on the Raspberry Pi, it will not boot and will just show a black screen.
Fix Raspberry PI monitor not working issue
If the Raspberry PI display is not working properly and there is no display after booting, please follow the solutions mentioned below to resolve the issue.
Let’s talk about it in detail.
No display after startup of Raspberry Pi monitor
1]Make sure you are using the correct PSU

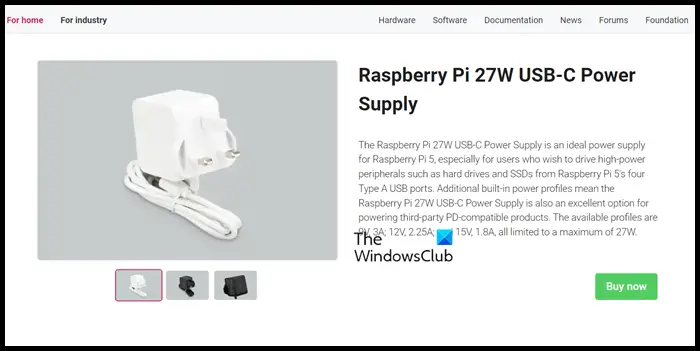
According to the newly released Raspberry Pi 5, it requires up to 27W of USB-C power to ensure normal operation. While some users say the older Raspberry Pi 4 performs well in terms of power supply, it doesn't always work as expected when connecting multiple external devices.
While it may be difficult to purchase the official Raspberry Pi 27w PSU in some regions, we recommend not choosing to purchase third-party alternatives as this may result in a waste of money.
Similar to the Raspberry Pi 5, the Raspberry Pi 4 also requires a different power supply unit (PSU) than older models, which is equipped with a USB Type-C interface. To ensure normal operation, it is best to use the officially recommended 5.1V 3A PSU. It's worth noting that using your phone or tablet's charger to power it is not enough for any Raspberry Pi model. If you need to purchase official products, you can go to the official website of raspberrypi.com for more details.
2] Check if the boot device is connected
Raspberry Pi 5 has multiple boot methods, including booting from USB or microSD card. Similar to the Raspberry Pi 4, it also supports booting over Ethernet. And, unlike before, Raspberry Pi 5 can also boot from a PCIe-connected solid-state drive, providing users with more choices and flexibility.
However, since the Raspberry Pi's display is not booting, the device is most likely not booting because the boot media is connected correctly. So please check to make sure the correct boot device is connected correctly.
3]Analyze LED and do a clean install
The Raspberry Pi's LED is set up so that people can decipher what is causing the problem by looking at it. A red (PWR) light indicates power and a green (ACT) light indicates activity. While there are other highlights, we need to focus on these two aspects.
If you notice the PWR flickering occasionally, your power supply is consistently dropping below 4.65V. However, if there is no red light, we can assume there is no electricity. If the red PWR LED only lights up and does not blink, we can safely assume that there are no readable boot instructions on the SD card.
It is worth noting that during the boot process of Raspberry Pi, the green ACT light should flash irregularly. However, if there is a problem with the system, it may flash in a more supervised mode to indicate the problem. Here are some possible error indicators and their meanings:
- If the indicator light flashes three times, it means that the start.self file cannot be found.
- If the indicator light flashes four times, it means that the start.self file is damaged or cannot be started. This could also mean that the SD card is not inserted correctly or that the card slot is not working properly.
- If the indicator light flashes seven times, it means that the kernel.img file cannot be found.
- If the indicator light flashes eight times, the SDRAM cannot be recognized. This could be due to corrupted SDRAM or an unreadable bootcode.bin or start.elf file.
If you notice any of these error indicators, we recommend that you connect a new SD card with a newly installed Raspberry PI operating system.
4]Edit configuration file
There is a solution that works for most victims and can do the trick for you too. We need to edit the configuration file and comment out the override string. So to do the same, first SSH to your Raspberry PI, navigate to /ot/config.txt and comment out dtoverlay=vc4-kms-v3d by adding a # to the string.
5]Use the correct HDMI cable

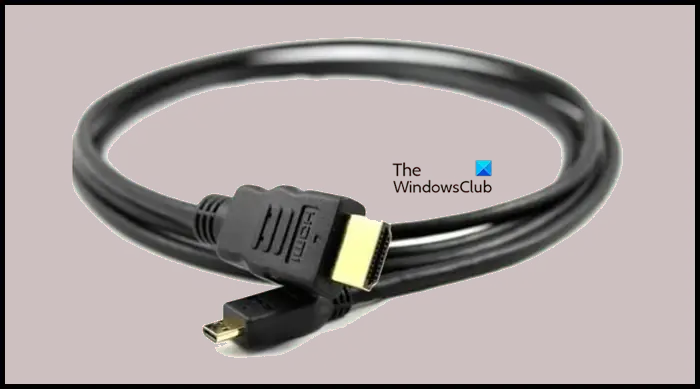
We need to use the correct HDMI cable supported by our monitor for the Raspberry PI 5 to work. If you use a micro HDMI adapter, switch to a good quality micro HDMI to HDMI cable.
Read: How to install Windows 11 on Raspberry Pi4?
6]Force HDMI detection
For a display device to work with the Raspberry Pi, it must be able to detect its signal. If we encounter a situation where the Pi doesn't seem to boot up and the screen remains blank, we can try pushing HDMI detection. Since the Raspberry Pi does not have a BIOS, it relies on a configuration file on the SD card. To force HDMI detection, you need to insert the SD card into your desktop or laptop and navigate to the /boot/ partition. Open this file and add the following lines at the end:
hdmi_force_hotplug=1
Finally, save your changes, eject the SD card, and check if the problem is resolved.
Read: How to Create a Raspberry PI Virtual Machine
7]Contact your manufacturer
If all else fails, you must contact the manufacturer and have them check the hardware. There may be some issues with your motherboard; in this case, consulting the manufacturer is your only option.
Hope you are able to solve this problem using the solutions mentioned in this article.
Read: How to stress test a Raspberry Pi 4 in a Windows PC?
How do I get my Raspberry Pi to show up?
To connect your Raspberry PI 4 to the screen, you will need a micro HDMI to HDMI cable or a standard HDMI to HDMI cable and a micro HDMI to HDMI adapter. Alternatively, if you have a Raspberry Pi 1, 2, or 3, you can easily connect them to the screen using a standard HDMI-to-HDMI cable, since they all come with a full-size HDMI port.
Also Read: Best Raspberry PI4 ideas for Science Project using Windows PC.
The above is the detailed content of Raspberry PI monitor not working; doesn't show up after startup. For more information, please follow other related articles on the PHP Chinese website!

Hot AI Tools

Undresser.AI Undress
AI-powered app for creating realistic nude photos

AI Clothes Remover
Online AI tool for removing clothes from photos.

Undress AI Tool
Undress images for free

Clothoff.io
AI clothes remover

Video Face Swap
Swap faces in any video effortlessly with our completely free AI face swap tool!

Hot Article

Hot Tools

Notepad++7.3.1
Easy-to-use and free code editor

SublimeText3 Chinese version
Chinese version, very easy to use

Zend Studio 13.0.1
Powerful PHP integrated development environment

Dreamweaver CS6
Visual web development tools

SublimeText3 Mac version
God-level code editing software (SublimeText3)

Hot Topics
 1664
1664
 14
14
 1423
1423
 52
52
 1317
1317
 25
25
 1268
1268
 29
29
 1242
1242
 24
24
 SANC launches 23.8-inch G52 Plus monitor: 2K native 180Hz FastIPS, 799 yuan
Jul 29, 2024 pm 09:57 PM
According to news from this site on July 29, SANC launched a G52 monitor in December last year, with a 23.8-inch 2K180Hz, with a starting price of 798 yuan. Now it has launched a G52Plus monitor, with a starting price of 799 yuan. Compared with the G52, the color gamut and brightness are slightly smaller. promote. This monitor still uses a 23.8-inch Fast panel with 2560*1440 resolution, 180Hz refresh rate, brightness increased to 350 nits, 10bit color depth, 1msGTG response time, 100% sRGB/97%DCI-P3 color gamut, G-Sync compatible. This website noticed that this monitor has also been upgraded with a lifting and rotating bracket, and the design is more low-key. It is also equipped with an under-screen night light and supports Owl
 Pi Node Teaching: What is a Pi Node? How to install and set up Pi Node?
Mar 05, 2025 pm 05:57 PM
Detailed explanation and installation guide for PiNetwork nodes This article will introduce the PiNetwork ecosystem in detail - Pi nodes, a key role in the PiNetwork ecosystem, and provide complete steps for installation and configuration. After the launch of the PiNetwork blockchain test network, Pi nodes have become an important part of many pioneers actively participating in the testing, preparing for the upcoming main network release. If you don’t know PiNetwork yet, please refer to what is Picoin? What is the price for listing? Pi usage, mining and security analysis. What is PiNetwork? The PiNetwork project started in 2019 and owns its exclusive cryptocurrency Pi Coin. The project aims to create a one that everyone can participate
 Discover ways to solve ghosting problems on HP monitors (How to eliminate ghosting on HP monitors)
Aug 08, 2024 am 01:11 AM
As a common computer peripheral, HP monitors will inevitably have some problems. One of them is the ghosting problem. When we use HP monitors, blur, ghosting or lag appears on the screen, which will not only affect our visual experience, but also reduce our work efficiency. How should we solve this problem? Understand the phenomenon of ghosting - Ghosting is when a copy of an object or text appears on the monitor screen, causing the image to be blurred or overlapping. -Ghosting issues can be caused by a variety of factors, such as monitor aging, signal transmission issues, etc. Check the connecting cables - Check that the cables connecting the computer and monitor are intact. - Make sure the connection cable is appropriately tight and not loose or broken. Adjust resolution and refresh rate - in operating system settings
 KTC '25GR950' 24.5-inch monitor is now available: 1080P 180Hz Fast IPS, 579 yuan
Aug 19, 2024 pm 10:45 PM
According to news from this website on August 19, KTC launched a 24.5-inch monitor with model number "25GR950" on JD.com today. This monitor features "1080P180Hz" and the initial price is 579 yuan. As of the time of publication of this website, the machine has not yet been displayed. Specific sales time. According to reports, this monitor uses a 1920x1080 resolution 180Hz panel, a response speed of 1ms, a static contrast ratio of 1000:1, a brightness of 350 nits, supports 8-Bit color, and covers 99% sRGB and 95% DCI-P3 color gamut. This monitor stand supports tilting, and the monitor body supports VESA100x100mm wall mounting. It provides 1 DP1.4 interface, 2 HDMI2.0 interfaces, and 1 3.
 AOC 'Q24B35' 23.8-inch monitor is now available: 2K 120Hz, 749 yuan
Aug 17, 2024 pm 07:44 PM
According to news from this site on August 17, AOC launched a 23.8-inch monitor with the model number "Q24B35" in its JD flagship store today. This monitor features "2K120Hz", but it is currently out of stock. The product page shows that the price of the monitor is 749 yuan. According to reports, this monitor uses a 2560x1440 resolution 120Hz IPS panel, a brightness of 250 nits, a static contrast ratio of 1300:1, a response speed of 4ms, and supports 8-Bit color. In addition, the monitor stand supports tilt/lift/rotate/tilt, the main body supports VESA100x100mm wall mounting, and provides 1 HDMI2.0 interface and 1 DP1.4 interface. This site organizes the currently known monitor parameter information as follows:
 Zhuowei XL2566X + professional gaming monitor: new generation Fast TN panel + 400Hz refresh rate, 5699 yuan
Aug 10, 2024 pm 10:41 PM
According to news from this site on August 10, Zhuowei XL2566X+ professional gaming monitor is now available on JD.com, priced at 5,699 yuan. The product page shows that Zhuowei XL2566X+ monitor uses a 24.1-inch new generation FastTN panel (resolution 1920*1080, brightness 320cd/㎡), which is said to be "optimized based on the resolution commonly used by professional players to provide clearer enemy outlines for FPS games"; The new panel adopts a faster electrical conduction design, which further improves the native response speed of liquid crystal molecules and improves the clarity of dynamic images. In addition, based on Zhuowei's specially tuned panel hardware design, DyAc2 can provide players with better dynamic picture clarity, thereby improving the overall visual perception in FPS scenes. X+ series
 MSI showcases MAG 321CUPDF: the world's first curved dual-mode monitor, supporting 4K 160Hz / 1080P 320Hz
Aug 23, 2024 am 11:17 AM
According to news from this website on August 23, MSI attended the Cologne Games Show in Germany and showed off the new MAG321CUPDF monitor, claiming to be the world's first curved dual-mode monitor. MSI initially showed the details of the monitor at the 2024 Taipei International Computer Show held in June this year, but the model at the time was MPG321CUPF, but now the official model and series have been adjusted, and it is now called MAG321CUPDF. The MAG321CUPDF display is 31.5 inches in size and supports a 160Hz refresh rate at 4K (3840x2160) resolution and a 320Hz refresh rate at 1080P resolution. Users can switch to high resolution or high refresh rate according to needs. MAG321CUPD
 AOC launches 'U24P10R' 23.8-inch monitor: 4K 60Hz + 90W PD USB-C, 1699 yuan
Aug 16, 2024 am 07:34 AM
According to news from this site on August 15, AOC launched a 23.8-inch monitor model "U24P10R" on JD.com today. This monitor features "4K60Hz + 90WPD USB-C" and is currently on sale, with an initial price of 1,699 yuan. According to reports, this monitor is equipped with a 3840x2160 resolution 60Hz IPS panel, a brightness of 400 nits, a response speed of 4ms, a static contrast ratio of 1300:1, supports 10-Bit color, and covers 100% sRGB and 95% DCI-P3 color gamut. In addition, this monitor stand supports tilt/lift/rotate/tilt, the monitor body supports 100x100mm VESA wall mounting, and provides 2 HDMI2.0 interfaces and 1 DP1


