

How to repair sound card driver

The sound card is one of the important hardware in the computer. It is responsible for processing and outputting audio signals. However, sometimes we may encounter problems with the sound card driver, causing the computer to be unable to play sound properly. The following will introduce some common sound card problems and their repair methods to help you solve sound card driver problems.
1. No sound output
When we find that the computer cannot play sound, we must first check whether there is a problem with the sound card driver. The method to solve the problem of no sound output is as follows:
- Check whether the sound card driver has been installed normally. We can confirm whether the sound card is working properly by checking whether the sound card driver has a yellow exclamation mark or question mark in "Device Manager". If these signs are present, there may be a problem with the sound card driver.
- Update or reinstall the sound card driver. We can try to solve the problem of no sound output by updating the sound card driver. First, we can go to the official website of the sound card manufacturer to download the latest sound card driver, and then follow the installation steps to install it. If we have installed the driver before, we can try to uninstall the original driver first and then reinstall the new version driver.
- Check sound settings. In the computer's control panel, we can find the "Sound" option. After entering, check whether the sound settings are correct. For example, we need to confirm whether the sound output device is selected correctly, whether the volume is adjusted to the appropriate position, etc.
2. The sound card is too noisy
Sometimes when we use the computer, we will find that the sound output by the sound card is noisy. This may be caused by a sound card driver problem. We can take the following measures to solve the problem of excessive sound card noise:
- Clean the audio jack. Sometimes the audio interface you plug into may be dusty or dirty, causing the sound to be unstable or noisy. We can use a cleaner or cotton swab to gently clean the jack, then plug the audio interface back in to see if the noise is still there.
- Update the sound card driver. Similar to the no sound output problem, the sound card driver may also affect the sound quality. We can try to update the sound card driver to solve the noise problem, or reinstall the driver.
- Check the computer cable. Sometimes, the wire connecting the computer and the speaker may be loose or damaged, causing the sound to be noisy. We can check the connection status of the wire, or replace it with a new wire for testing.
3. The sound card cannot be recognized or other abnormalities occur
Sometimes the sound card driver may not be recognized, causing the sound card to not work properly. In order to fix this type of problem, you can take the following methods:
- Uninstall and reinstall the sound card driver. We can first try to uninstall the sound card driver in the computer, and then reinstall the latest driver. Before uninstalling, it is recommended that we back up important data first.
- Check whether the sound card is inserted correctly. Sometimes, the sound card may be loose or inserted incorrectly, causing the computer to not recognize the sound card properly. We can try to re-plug the sound card, make sure it is firmly inserted, and then restart the computer to test.
To sum up, sound card driver problems may cause the computer to be unable to play sound normally, causing inconvenience to our use. If you encounter similar problems, we can try to solve the problem by updating and reinstalling the sound card driver, and check whether the device connection and sound settings are correct. If the problem persists, it is recommended that we contact professional maintenance personnel for further inspection and repair.
The above is the detailed content of How to repair sound card driver. For more information, please follow other related articles on the PHP Chinese website!

Hot AI Tools

Undresser.AI Undress
AI-powered app for creating realistic nude photos

AI Clothes Remover
Online AI tool for removing clothes from photos.

Undress AI Tool
Undress images for free

Clothoff.io
AI clothes remover

Video Face Swap
Swap faces in any video effortlessly with our completely free AI face swap tool!

Hot Article
Hot Tools

Notepad++7.3.1
Easy-to-use and free code editor

SublimeText3 Chinese version
Chinese version, very easy to use

Zend Studio 13.0.1
Powerful PHP integrated development environment

Dreamweaver CS6
Visual web development tools

SublimeText3 Mac version
God-level code editing software (SublimeText3)
Hot Topics
 1387
1387
 52
52

 Does Logitech ghub driver not support win7? -Why can Logitech ghub driver only be installed on the c drive?
Mar 18, 2024 pm 05:37 PM
Does Logitech ghub driver not support win7? -Why can Logitech ghub driver only be installed on the c drive?
Mar 18, 2024 pm 05:37 PM
Does Logitech ghub driver not support win7? Not compatible. Since Windows 7 has stopped updating and is no longer Microsoft's main operating system, many new software no longer supports it, such as Logitech ghub. The main interface of the Logitech driver: 1. The main software interface is on the left. The three buttons are lighting, buttons, and sensitivity settings. 2. In the settings of the lighting interface, the general special effects are relatively conventional, and the audio visual effects are the highlight. They can change color according to the sound frequency, and can be set according to the high, middle and bass bands, with different colors and effects. 3. In button settings, users can edit them here according to their special requirements. 4. In the sensitivity settings, many users will have some of their own settings. They can add the DPI speed switching point by themselves, but
 This Apple ID is not yet in use in the iTunes Store: Fix
Jun 10, 2024 pm 05:42 PM
This Apple ID is not yet in use in the iTunes Store: Fix
Jun 10, 2024 pm 05:42 PM
When logging into iTunesStore using AppleID, this error saying "This AppleID has not been used in iTunesStore" may be thrown on the screen. There are no error messages to worry about, you can fix them by following these solution sets. Fix 1 – Change Shipping Address The main reason why this prompt appears in iTunes Store is that you don’t have the correct address in your AppleID profile. Step 1 – First, open iPhone Settings on your iPhone. Step 2 – AppleID should be on top of all other settings. So, open it. Step 3 – Once there, open the “Payment & Shipping” option. Step 4 – Verify your access using Face ID. step
 How to fix red-eye on iPhone
Feb 23, 2024 pm 04:31 PM
How to fix red-eye on iPhone
Feb 23, 2024 pm 04:31 PM
So, you took some great photos at your last party, but unfortunately, most of the photos you took were of red eyes. The photo itself is great, but the red eyes in it kind of ruin the image. Not to mention, some of those party photos might be from your friends’ phones. Today we'll look at how to remove red eye from photos. What causes the red eyes in the photo? Red-eye often occurs when taking photos with flash. This is because the light from the flash shines directly into the back of the eye, causing the blood vessels under the eye to reflect the light, giving the effect of red eyes in the photo. Fortunately, with the continuous advancement of technology, some cameras are now equipped with red-eye correction functions that can effectively solve this problem. By using this feature, the camera takes pictures
 How to solve the problem of Win11 failing to verify credentials?
Jan 30, 2024 pm 02:03 PM
How to solve the problem of Win11 failing to verify credentials?
Jan 30, 2024 pm 02:03 PM
When a Win11 user uses credentials to log in, he or she receives an error message stating that your credentials cannot be verified. What is going on? After the editor investigated this problem, I found that there may be several different situations that directly or indirectly cause this problem. Let's take a look with the editor.
 Steps to restore Logitech driver to default configuration
Feb 28, 2024 am 11:04 AM
Steps to restore Logitech driver to default configuration
Feb 28, 2024 am 11:04 AM
Facing the Logitech driver that cannot be used normally, it can only be solved by restoring the factory settings. However, many friends do not know how to restore the factory settings. The following will provide you with detailed steps to restore the factory settings. I hope it can help you. Steps to restore the Logitech driver to the default configuration: 1. First download the Logitech dedicated driver software GHub, and open it after the download is complete. 2. Then open the mouse to set up, and click the settings (gear) in the upper right corner. 3. At the bottom, click "Restore default settings" , click directly and reopen the software to restore factory settings. How to connect the Logitech driver to the device 1. Open the back cover of the mouse and take out the wireless mouse socket. 2. Select the mouse socket next to the computer. 3. Set the corresponding parameter information for the mouse. 4. Bluetooth pair the device and long press Bluetooth.
 Comprehensive Guide to PHP 500 Errors: Causes, Diagnosis and Fixes
Mar 22, 2024 pm 12:45 PM
Comprehensive Guide to PHP 500 Errors: Causes, Diagnosis and Fixes
Mar 22, 2024 pm 12:45 PM
A Comprehensive Guide to PHP 500 Errors: Causes, Diagnosis, and Fixes During PHP development, we often encounter errors with HTTP status code 500. This error is usually called "500InternalServerError", which means that some unknown errors occurred while processing the request on the server side. In this article, we will explore the common causes of PHP500 errors, how to diagnose them, and how to fix them, and provide specific code examples for reference. Common causes of 1.500 errors 1.
 How to download Razer mouse driver
Mar 11, 2024 pm 03:40 PM
How to download Razer mouse driver
Mar 11, 2024 pm 03:40 PM
Steps to download the Razer mouse driver: 1. Open the browser and enter the Razer official website; 2. On the official website page, find and click "Technical Support" or a similar option; 3. On the technical support page, select "Mouse" or the specific subcategory; 4. On the mouse driver download page, you can see various mouse models and their corresponding drivers; 5. Click the download link for the selected driver; 6. After the download is completed, check whether the downloaded file is complete , make sure nothing is damaged or missing.
 How to fix the volume cannot be adjusted in WIN10
Mar 27, 2024 pm 05:16 PM
How to fix the volume cannot be adjusted in WIN10
Mar 27, 2024 pm 05:16 PM
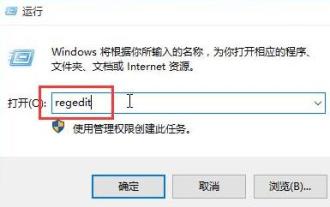
1. Press win+r to open the run window, enter [regedit] and press Enter to open the registry editor. 2. In the opened registry editor, click to expand [HKEY_LOCAL_MACHINESOFTWAREMicrosoftWindowsCurrentVersionRun]. In the blank space on the right, right-click and select [New - String Value], and rename it to [systray.exe]. 3. Double-click to open systray.exe, modify its numerical data to [C:WindowsSystem32systray.exe], and click [OK] to save the settings.
