
 Software Tutorial
Mobile Application
How to restore original data after restoring factory settings. The latest method to recover lost data after restoring factory settings.
Software Tutorial
Mobile Application
How to restore original data after restoring factory settings. The latest method to recover lost data after restoring factory settings.
How to restore original data after restoring factory settings. The latest method to recover lost data after restoring factory settings.

php editor Xiaoxin will introduce to you how to retrieve the original data after restoring factory settings. After operating the device and restoring it to factory settings, important data may be lost. However, there are some effective methods that you can try to get back these lost data. This article will introduce you in detail the latest data recovery methods to help you retrieve data lost after restoring factory settings.
What should I do if I lose data after restoring win10 to factory settings? Normally, when we enter the system restore operation, the system will pop up a prompt box with two options, one is to restore the system but keep personal files, the other is to restore the system but delete all file contents.

If you choose to delete all file contents during the restoration process, it means that the system disk and other The files, system files, and applications in the disk will be cleared, that is, all data will be cleared. In this case, how to recover the lost data after restoring to factory settings? We can use data recovery software to scan and try. If the file can be searched and the file preview is normal, it means the file can be recovered.
There are many kinds of data recovery software on the market. If you choose an unprofessional data recovery operation, not only will the lost files not be recovered, but the file data may even be damaged. Therefore, when choosing a file recovery tool, be sure to choose one with a good reputation! The recovery effect is strong! Data recovery software that does not cause any damage to your data!
In summary, Cloud Knight Data Recovery Software is the preferred data recovery software, and it has helped many users solve data loss problems. It will not cause secondary damage to disk data, is easy to operate and has complete functions!
The specific operation steps are as follows:
1. Open the Cloud Knight data recovery software (it is recommended to use another computer to put the software into the USB flash drive when installing the data recovery software, and then install it Go to the computer that needs to be restored) and select the recovery function as needed. It is recommended to use the deep recovery function because it scans more comprehensively and deeply.
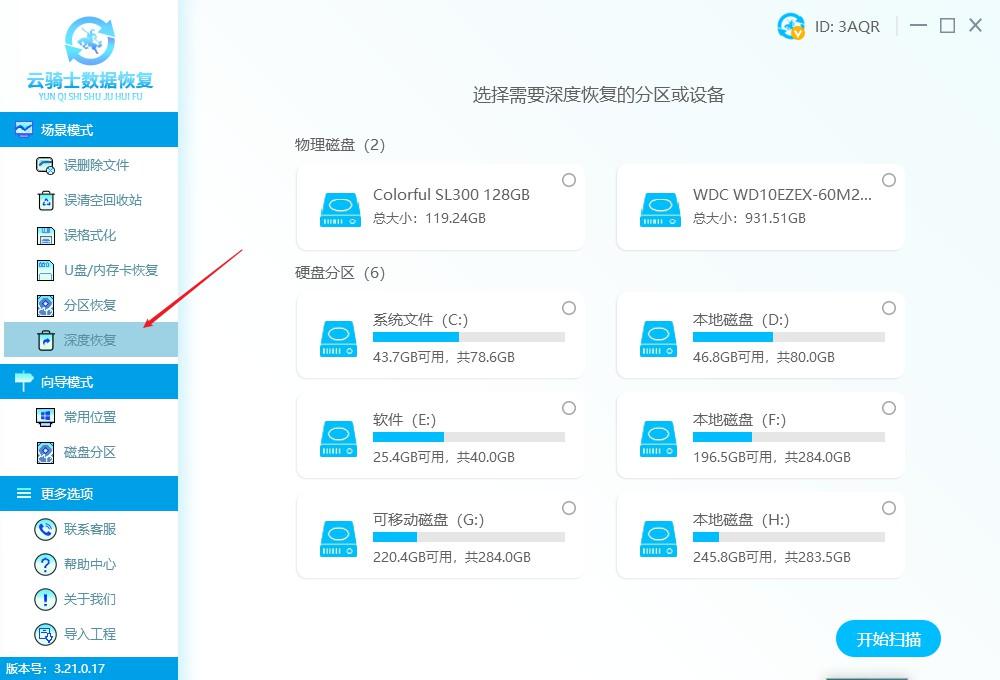
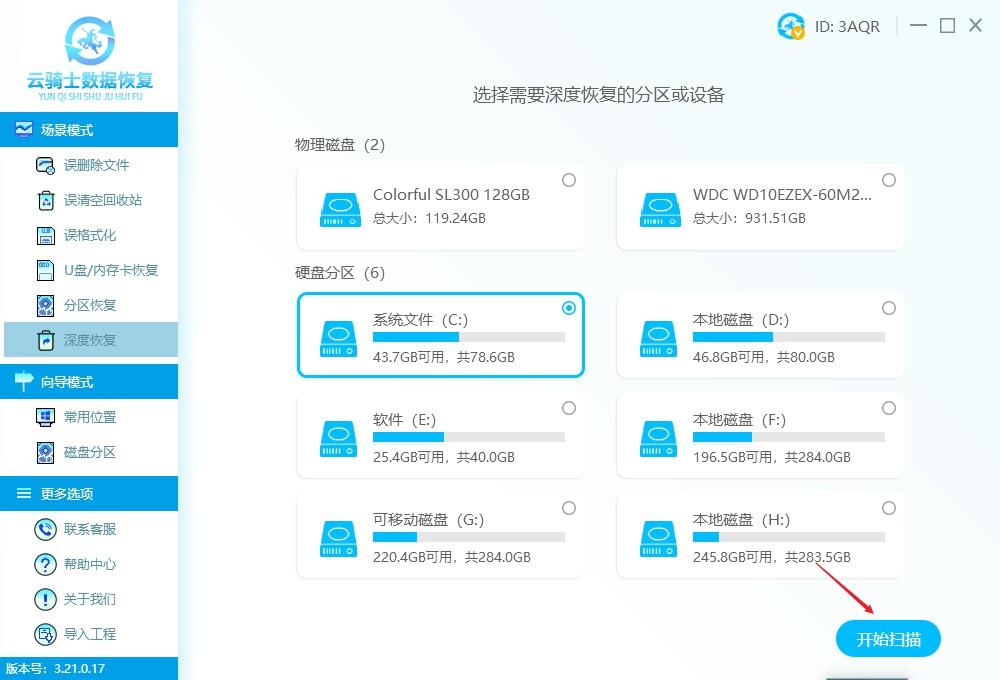
2. Select the partition where the data is lost and click Start Scan in the lower right corner.
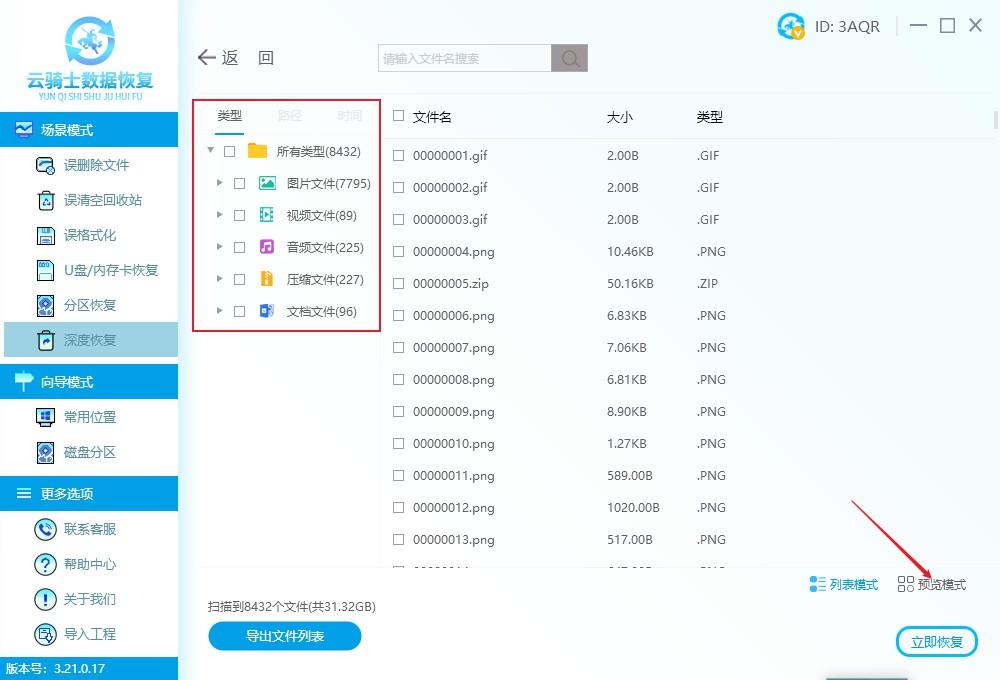
3. After the scan is completed, you will find that the file name is presented in digital form. This is because the deep scan is based on The file data structure is scanned and sorted, and the files are randomly renamed. At this time, we can check whether there is the data we want through the file type and file size.

4. After checking the file types to be recovered, click preview mode to preview.
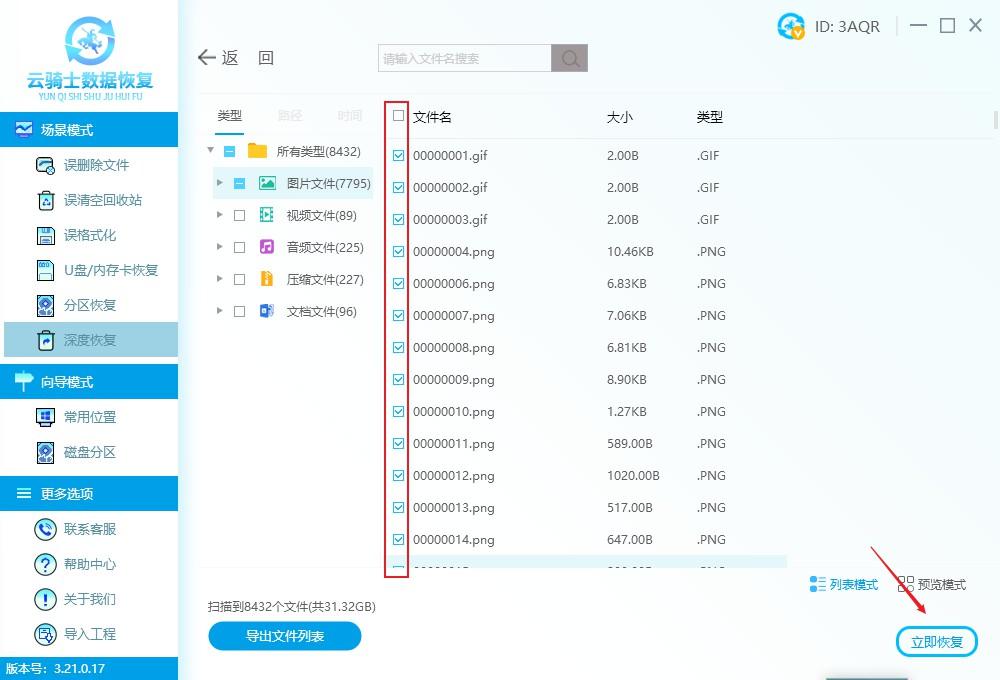
5. Then check the data that needs to be recovered, and then click the Recover Now button at the bottom of the right corner.
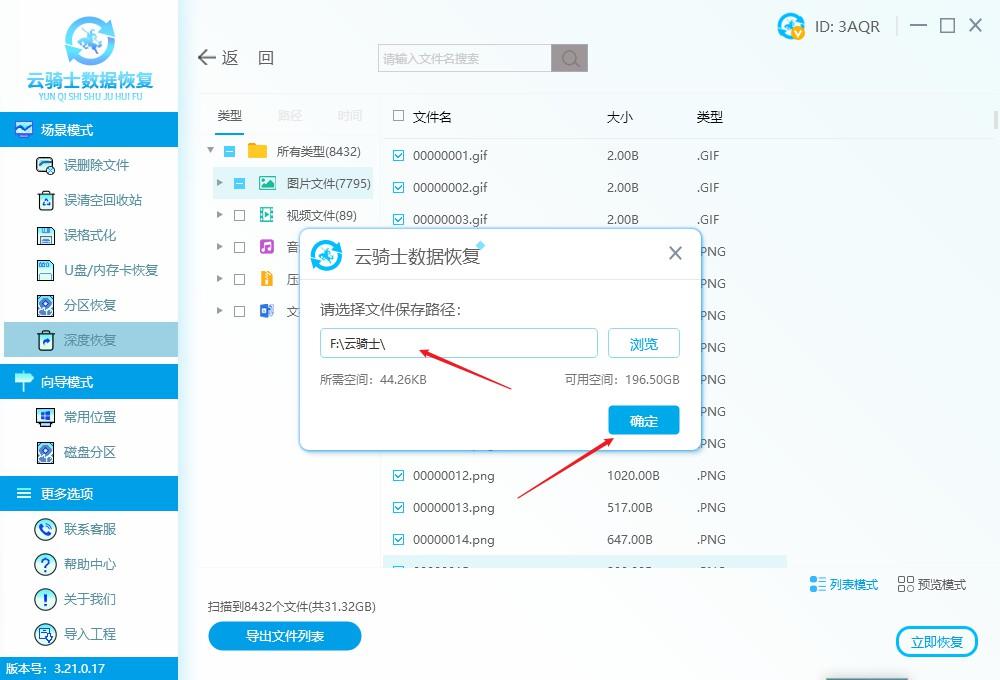
6. Save the data to another disk and click the OK button.
7. Wait patiently for the data to be exported successfully, and click View to view the recovered data.

Summary: The above is the method to restore the factory settings and recover the lost data. Finally, it is recommended that in order to ensure everything is foolproof, it is best to restore the file Perform backup processing.
The above is all the content of the article. I hope it can help you. I have carefully read the article "How to recover the original data after restoring factory settings" "The latest method to recover lost data after restoring factory settings". I feel like I have gained a lot of knowledge, please give me a thumbs up! Guaranteed to bring you lots of learning!
The above is the detailed content of How to restore original data after restoring factory settings. The latest method to recover lost data after restoring factory settings.. For more information, please follow other related articles on the PHP Chinese website!

Hot AI Tools

Undresser.AI Undress
AI-powered app for creating realistic nude photos

AI Clothes Remover
Online AI tool for removing clothes from photos.

Undress AI Tool
Undress images for free

Clothoff.io
AI clothes remover

AI Hentai Generator
Generate AI Hentai for free.

Hot Article
Hot Tools

Notepad++7.3.1
Easy-to-use and free code editor

SublimeText3 Chinese version
Chinese version, very easy to use

Zend Studio 13.0.1
Powerful PHP integrated development environment

Dreamweaver CS6
Visual web development tools

SublimeText3 Mac version
God-level code editing software (SublimeText3)
Hot Topics
 1376
1376
 52
52

 How to solve mysql cannot be started
Apr 08, 2025 pm 02:21 PM
How to solve mysql cannot be started
Apr 08, 2025 pm 02:21 PM
There are many reasons why MySQL startup fails, and it can be diagnosed by checking the error log. Common causes include port conflicts (check port occupancy and modify configuration), permission issues (check service running user permissions), configuration file errors (check parameter settings), data directory corruption (restore data or rebuild table space), InnoDB table space issues (check ibdata1 files), plug-in loading failure (check error log). When solving problems, you should analyze them based on the error log, find the root cause of the problem, and develop the habit of backing up data regularly to prevent and solve problems.
 Solutions to the errors reported by MySQL on a specific system version
Apr 08, 2025 am 11:54 AM
Solutions to the errors reported by MySQL on a specific system version
Apr 08, 2025 am 11:54 AM
The solution to MySQL installation error is: 1. Carefully check the system environment to ensure that the MySQL dependency library requirements are met. Different operating systems and version requirements are different; 2. Carefully read the error message and take corresponding measures according to prompts (such as missing library files or insufficient permissions), such as installing dependencies or using sudo commands; 3. If necessary, try to install the source code and carefully check the compilation log, but this requires a certain amount of Linux knowledge and experience. The key to ultimately solving the problem is to carefully check the system environment and error information, and refer to the official documents.
 How to use sql datetime
Apr 09, 2025 pm 06:09 PM
How to use sql datetime
Apr 09, 2025 pm 06:09 PM
The DATETIME data type is used to store high-precision date and time information, ranging from 0001-01-01 00:00:00 to 9999-12-31 23:59:59.99999999, and the syntax is DATETIME(precision), where precision specifies the accuracy after the decimal point (0-7), and the default is 3. It supports sorting, calculation, and time zone conversion functions, but needs to be aware of potential issues when converting precision, range and time zones.
 Can I retrieve the database password in Navicat?
Apr 08, 2025 pm 09:51 PM
Can I retrieve the database password in Navicat?
Apr 08, 2025 pm 09:51 PM
Navicat itself does not store the database password, and can only retrieve the encrypted password. Solution: 1. Check the password manager; 2. Check Navicat's "Remember Password" function; 3. Reset the database password; 4. Contact the database administrator.
 Does mysql need the internet
Apr 08, 2025 pm 02:18 PM
Does mysql need the internet
Apr 08, 2025 pm 02:18 PM
MySQL can run without network connections for basic data storage and management. However, network connection is required for interaction with other systems, remote access, or using advanced features such as replication and clustering. Additionally, security measures (such as firewalls), performance optimization (choose the right network connection), and data backup are critical to connecting to the Internet.
 How to backup and restore database after mysql installation
Apr 08, 2025 am 11:45 AM
How to backup and restore database after mysql installation
Apr 08, 2025 am 11:45 AM
There is no absolutely optimal MySQL database backup and recovery solution, and it needs to be selected based on the amount of data, business importance, RTO and RPO. 1. Logical backup (mysqldump) is simple and easy to use, suitable for small databases, but slow and huge files; 2. Physical backup (xtrabackup) is fast, suitable for large databases, but is more complicated to use. The backup strategy needs to consider the backup frequency (RPO decision), backup method (data quantity and time requirement decision) and storage location (off-site storage is more secure), and regularly test the backup and recovery process to avoid backup file corruption, permission problems, insufficient storage space, network interruption and untested issues, and ensure data security.
 How to view database password in Navicat for MariaDB?
Apr 08, 2025 pm 09:18 PM
How to view database password in Navicat for MariaDB?
Apr 08, 2025 pm 09:18 PM
Navicat for MariaDB cannot view the database password directly because the password is stored in encrypted form. To ensure the database security, there are three ways to reset your password: reset your password through Navicat and set a complex password. View the configuration file (not recommended, high risk). Use system command line tools (not recommended, you need to be proficient in command line tools).
 Navicat's method to view PostgreSQL database password
Apr 08, 2025 pm 09:57 PM
Navicat's method to view PostgreSQL database password
Apr 08, 2025 pm 09:57 PM
It is impossible to view PostgreSQL passwords directly from Navicat, because Navicat stores passwords encrypted for security reasons. To confirm the password, try to connect to the database; to modify the password, please use the graphical interface of psql or Navicat; for other purposes, you need to configure connection parameters in the code to avoid hard-coded passwords. To enhance security, it is recommended to use strong passwords, periodic modifications and enable multi-factor authentication.
