

A simple tutorial on using Node.js under Mac OS_node.js

Here is a good introductory article on Node.js great nodejs intro , which will give you a very convenient introduction to Node.js and CouchDB, and give you an example to implement REST services for Perform CRUD operations on bookmarks, using CouchDB as the database.
This article will introduce how to install and start using Node.js under Mac OS X. This process will take about 30 minutes. We will also install CouchDB and implement the REST API based on CouchDB.
This article assumes that Git is already installed on your machine. If not, please refer to this article to install it.
Install node.js and npm
The easiest way is to go to the node.js official website through the nodejs download section page and select the installer under Mac, which will install Node.js and npm (node package manager).
After the installation is successful, you can use the node and npm commands.
Install CouchDB
Because this article requires CouchDB to store objects, CouchDB also needs to be installed.
Installing CouchDB is a little more troublesome, because we need to download the source code and then compile it. Before that, we need to install Homebrew. Please execute the following command:
git clone https://github.com/mxcl/homebrew.git
cd homebrew/bin
brew install autoconf automake libtool
brew install couchdb
Important note: CouchDB previously reported a problem that may prevent you from installing it. To fix this problem, you need to manually edit the ~/couch/homebrew/Library/Formula/couchdb.rb file. The edit content is as follows:
class Couchdb < Formula
url 'http://www.apache.org/dyn/closer.cgi?path=couchdb/source/1.1.1/apache-couchdb-1.1.1.tar.gz'
homepage "http://couchdb.apache.org/"
md5 'cd126219b9cb69a4c521abd6960807a6'
Please note that the source in the url needs to be deleted. The final modification result is as follows:
class Couchdb < Formula
url 'http://www.apache.org/dyn/closer.cgi?path=couchdb/1.1.1/apache-couchdb-1.1.1.tar.gz'
homepage "http://couchdb.apache.org/"
md5 'cd126219b9cb69a4c521abd6960807a6'
If the installation process hangs, you need to CTRL-C to terminate and execute the following command to try again:
For more information about installing CouchDB on Mac OS X, please read "Installing CouchDB on OSX".
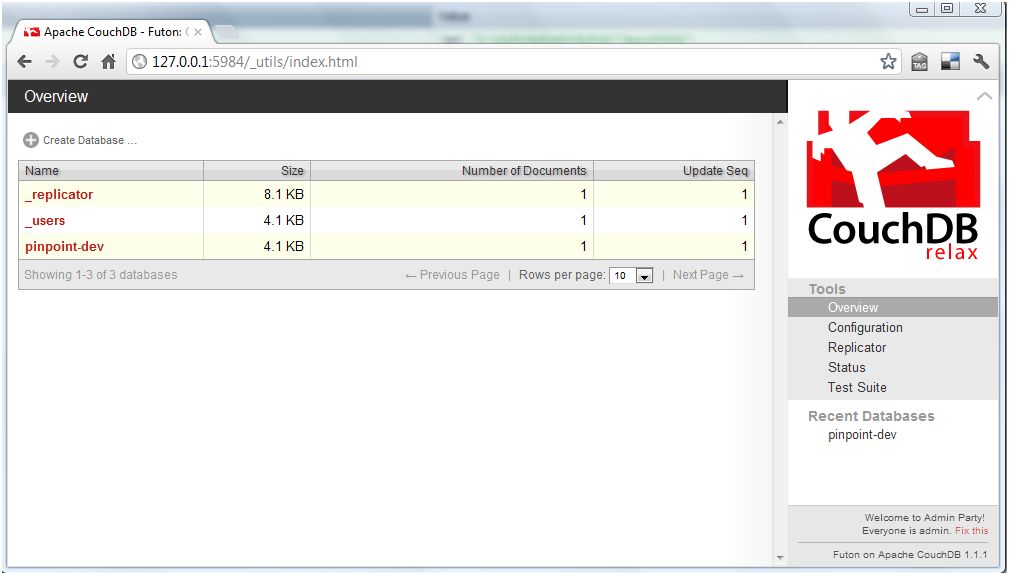
Once CouchDB is compiled, we can manually execute ./couchdb to start it. You can open the address http://127.0.0.1:5984/_utils in your browser to verify whether the CouchDB installation is successful.
Download Tutorial
Now that the required software has been installed, let’s continue with the Node.js introduction example.
First we use Git to obtain the instance source code
git clone https://github.com/indexzero/nodejs-intro.git
Create CouchDB database
Before starting the tutorial, we need to create a CouchDB database. First ensure that CouchDB has been started, and then use the following command to create the database:
$ curl -X PUT http://127.0.0.1:5984/pinpoint-dev10
{"ok":true}
You can visit http://127.0.0.1:5984/_utils in your browser to see the newly created database.
There is also a great guide to CouchDB here.
Start tutorial
The node js instance is built in a modular way. The lib directory contains many modules, and the server script is in the bin directory.
For example, if we want to start the CouchDB tutorial, we can execute the following command in the bin directory:
./server -t 02couchdb -s
The -t parameter allows you to specify the module in the lib directory to be executed, and the -s parameter is used to set the pinpoint-dev database we just created.
sys - util changes
Depending on the version of Node.js, you may see the following errors or warnings:
v0.7.7-pre
$ ./server -t 02couchdb -s
node.js:247
throw e; // process.nextTick error, or 'error' event on first tick
^
Error: The "sys" module is now called "util".
at sys.js:1:69
at NativeModule.compile (node.js:572:5)
at Function.require (node.js:540:18)
at Function._load (module.js:297:25)
at Module.require (module.js:357:17)
at require (module.js:373:17)
at Object. (/home/ubuntu/nodejs-intro/bin/server:3:11)
at Module._compile (module.js:444:26)
at Object..js (module.js:462:10)
at Module.load (module.js:351:32)
To avoid this problem, you need to replace all calls `require("sys")` with `require("util")`
Node v0.6.14 will not throw an error message, but will prompt a warning:
v0.6.14
$ ./server -t 02couchdb -s
The "sys" module is now called "util". It should have a similar interface.
Pinpoint demo server listening for 02couchdb on http://127.0.0.1:8000
Run the tutorial
When you run a tutorial, some errors will be prompted:
The "sys" module is now called "util". It should have a similar interface.
node.js:201
throw e; // process.nextTick error, or 'error' event on first tick
^
Error: Cannot find module 'optimist'
at Function._resolveFilename (module.js:332:11)
at Function._load (module.js:279:25)
at Module.require (module.js:354:17)
at require (module.js:370:17)
at Object. (/Users/ddewaele/Projects/Node/nodejs-intro/bin/server:5:12)
at Module._compile (module.js:441:26)
at Object..js (module.js:459:10)
at Module.load (module.js:348:31)
at Function._load (module.js:308:12)
at Array.0 (module.js:479:10)
该教程包含很多依赖,我们需要使用 npm 来下载这些依赖的包。
安装 node 包
Node packages (dependencies) 可通过 npm 命令来安装,例如:
$ npm install optimist
npm http GET https://registry.npmjs.org/optimist
npm http 200 https://registry.npmjs.org/optimist
npm http GET https://registry.npmjs.org/optimist/-/optimist-0.2.8.tgz
npm http 200 https://registry.npmjs.org/optimist/-/optimist-0.2.8.tgz
npm http GET https://registry.npmjs.org/wordwrap
npm http 200 https://registry.npmjs.org/wordwrap
npm http GET https://registry.npmjs.org/wordwrap/-/wordwrap-0.0.2.tgz
npm http 200 https://registry.npmjs.org/wordwrap/-/wordwrap-0.0.2.tgz
optimist@0.2.8 ../node_modules/optimist
└── wordwrap@0.0.2
这些包将被安装到 node_modules 文件夹中:
$ ls -l ../node_modules/
total 0
drwxr-xr-x 10 ddewaele staff 340 Apr 1 18:54 optimist
本文需要安装如下的 node 包:
npm install winston
npm install cradle
npm install journey
npm install optimist
运行教程
进入 bin 目录,通过下面命令来运行教程:
$ ./server -t 02couchdb -s
The "sys" module is now called "util". It should have a similar interface.
Pinpoint demo server listening for 02couchdb on http://127.0.0.1:8000
然后打开浏览器访问 http://127.0.0.1:8000/bookmarks ,将会看到如下的结果:
这表示服务已经启动并运行,为了在 CouchDB 中添加点测试数据,我们可以使用 http-console 控制台来访问 CouchDB 的 REST 服务。
安装 http-console
有一个非常棒的工具可以帮助你调试服务,该工具名为 http-console ,你可使用 npm 来安装:
sudo npm install -g http-console
然后就可以在命令行中执行该工具,不幸的是当我们执行该命令时报错了:
$ http-console


node.js:201
    throw e; // process.nextTick error, or 'error' event on first tick
       ^
Error: require.paths is removed. Use node_modules folders, or the NODE_PATH environment variable instead.
  at Function. (module.js:378:11)
  at Object. (/usr/local/lib/node_modules/http-console/bin/http-console:6:8)
  at Module._compile (module.js:441:26)
  at Object..js (module.js:459:10)
  at Module.load (module.js:348:31)
  at Function._load (module.js:308:12)
  at Array.0 (module.js:479:10)
  at EventEmitter._tickCallback (node.js:192:40)
很麻烦,我们还需要手工编辑 /usr/local/lib/node_modules/http-console/bin/http-console 文件,然后删除下面这一行:
现在 http-console 就可以启动了,无需任何参数,它将连接到 http://localhost:8080 ,如果你需要指定服务器和端口,把它作为第一个参数传递给 http-console 即可。
请注意我们这里使用了 \json 命令用来设置正确的 content-type:
$ http-console http://127.0.0.1:8000
The "sys" module is now called "util". It should have a similar interface.
> http-console 0.6.1
> Welcome, enter .help if you're lost.
> Connecting to 127.0.0.1 on port 8000.

http://127.0.0.1:8000/> \json
http://127.0.0.1:8000/>
访问 REST 服务
在 http-console 中,要执行 GET 请求只需要输入 GET /bookmarks 即可:
http://127.0.0.1:8000/> GET /bookmarks
HTTP/1.1 200 OK
Date: Sun, 01 Apr 2012 17:23:27 GMT
Server: journey/0.4.0
Content-Type: application/json;charset=utf-8
Content-Length: 16
Connection: keep-alive

{
  bookmarks: []
}
你也可以使用 JSON 的片段来执行 POST 请求:
http://127.0.0.1:8000/> POST /bookmarks
... { "url": "http://nodejs.org" }
HTTP/1.1 200 OK
Date: Thu, 05 Apr 2012 11:45:55 GMT
Server: journey/0.4.0
Content-Type: application/json;charset=utf-8
Content-Length: 91
Connection: keep-alive

{
  bookmark: {
    _id: 'WD-G-1',
    resource: 'Bookmark',
    url: 'http://nodejs.org'
  }
}
然后再次执行 GET 请求,你就可以看到新插入的数据了:
http://127.0.0.1:8000/> GET /bookmarks
HTTP/1.1 200 OK
Date: Sun, 01 Apr 2012 17:23:27 GMT
Server: journey/0.4.0
Content-Type: application/json;charset=utf-8
Content-Length: 16
Connection: keep-alive

{
  bookmarks: [
    {
      _rev: '1-cfced13a45a068e95daa04beff562360',
      _id: 'WD-G-1',
      resource: 'Bookmark',
      url: 'http://nodejs.org'
    }
  ]
}

Hot AI Tools

Undresser.AI Undress
AI-powered app for creating realistic nude photos

AI Clothes Remover
Online AI tool for removing clothes from photos.

Undress AI Tool
Undress images for free

Clothoff.io
AI clothes remover

AI Hentai Generator
Generate AI Hentai for free.

Hot Article
Hot Tools

Notepad++7.3.1
Easy-to-use and free code editor

SublimeText3 Chinese version
Chinese version, very easy to use

Zend Studio 13.0.1
Powerful PHP integrated development environment

Dreamweaver CS6
Visual web development tools

SublimeText3 Mac version
God-level code editing software (SublimeText3)
Hot Topics
 1378
1378
 52
52

 No response when entering password on mac keyboard?
Feb 20, 2024 pm 01:33 PM
No response when entering password on mac keyboard?
Feb 20, 2024 pm 01:33 PM
Introduction: In this article, this website will introduce to you the relevant content about the Mac keyboard not responding when entering passwords. I hope it will be helpful to you, let’s take a look. How to solve the problem that the password cannot be entered on the Apple Mac system? You can also try to connect this keyboard to other computers to see if it works normally. If the same problem occurs on another computer, it's most likely a fault with the keyboard itself. You may consider replacing the keyboard or repairing it. The first time you log in to Alipay with your Mac computer, you will find the login interface and cannot enter your password. The password input field displays: "Please click here to install the control", so Alipay login requires the installation of security controls. Security controls can encrypt and protect the information you enter (amount, password, etc.) to improve account security. Tie
 3 tips to easily customize your Mac computer name, host name and Bonjour name
Mar 06, 2024 pm 12:20 PM
3 tips to easily customize your Mac computer name, host name and Bonjour name
Mar 06, 2024 pm 12:20 PM
Many Mac users tend to keep the default name of their device and may never consider changing it. Many people choose to stick with the name from the initial setup, such as "Johnny's MacBook Air" or simply "iMac." Learning how to change the name of your Mac is a very useful skill, especially when you have multiple devices, as it can help you quickly distinguish and manage them. Next, we will teach you step by step how to change the computer name, host name and Bonjour name (local host name) in macOS system. Why should you change your Mac name? Changing the name of your Mac can not only show your personality, but also help improve the user experience: Personalize your Mac: The default name may not be to your taste, change it to a name you like.
 Forgot your mac installer password?
Feb 20, 2024 pm 01:00 PM
Forgot your mac installer password?
Feb 20, 2024 pm 01:00 PM
Introduction: In this article, this website will introduce to you the relevant content about forgetting the password of the Mac installation program. I hope it will be helpful to you, let’s take a look. What to do if you forget your password for Apple computer installation software. First, find iCloud in the phone settings and click to open it. Next, enter your account number and password. There is a line of small words below the login button that prompts you if you have forgotten your ID or password. Click this option. Normally, after you enter an incorrect password multiple times on the login interface, your MacBook Pro will prompt you to use your bound Apple ID to reset your password. You only need to follow the steps prompted by the system to complete the password reset. 3. First shut down your Mac, then restart it. While pressing the power button, immediately press and hold com on the keyboard.
 pkg file to install on mac?
Feb 20, 2024 pm 03:21 PM
pkg file to install on mac?
Feb 20, 2024 pm 03:21 PM
Preface: Today, this site will share with you the relevant content about installing pkg files on Mac. If it can solve the problem you are facing now, don’t forget to follow this site and start now! The previous version of macos pkg cannot be installed to upgrade the operating system: If your laptop is using an older operating system version, it is recommended to upgrade to the latest operating system version. Because older versions may not support installation of the latest macOS system. Select "Erase" in Disk Utility, then select the Macos extension in the format, do not check the encryption option, and do not select the apfs format, and finally click the "Erase" button to solve the problem of being unable to complete the macOS installation. Drag the application's icon to the file starting with App
 How to turn pages when typing on Apple Mac?
Feb 20, 2024 pm 12:54 PM
How to turn pages when typing on Apple Mac?
Feb 20, 2024 pm 12:54 PM
Introduction: Today, this site will share with you relevant content about how to turn pages when typing on Apple Mac. If it can solve the problem you are facing now, don’t forget to follow this site and start now! Tips for using the touchpad on Apple MacBook laptops. The steps for setting up two-finger sliding on Apple computers are as follows: Find the "Settings" icon on the computer desktop and click it. Select "Touchpad" in the settings interface, and then click "Scroll to Zoom". Check "Scroll direction: Natural" in the scroll zoom options to complete the setting. Setting up a two-finger swipe method on your Apple computer is easy. First, turn on your computer and click on the Settings icon at the top of the screen. In the settings interface, select the "Touchpad" option. Then click "Scroll Zoom" and make sure "Scroll Direction" is checked
 How to set up WeChat Mac to automatically convert voice messages into text - How to set up voice to text conversion
Mar 19, 2024 am 08:28 AM
How to set up WeChat Mac to automatically convert voice messages into text - How to set up voice to text conversion
Mar 19, 2024 am 08:28 AM
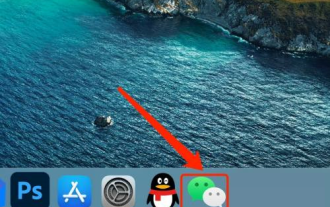
Recently, some friends have consulted the editor about how to set up WeChat Mac to automatically convert voice messages into text. The following is a method for setting up WeChat Mac to automatically convert voice messages into text. Friends in need can come and learn more. Step 1: First, open the Mac version of WeChat. As shown in the picture: Step 2: Next, click "Settings". As shown in the picture: Step 3: Then, click "General". As shown in the picture: Step 4: Then check the option "Automatically convert voice messages in chat to text". As shown in the picture: Step 5: Finally, close the window. As shown in the picture:
 Can Mac cut files to hard drive?
Feb 20, 2024 pm 01:00 PM
Can Mac cut files to hard drive?
Feb 20, 2024 pm 01:00 PM
Introduction: This article is here to introduce you to the relevant content of cutting files to the hard disk on Mac. I hope it will be helpful to you, let’s take a look. How to Export Photos to a Mobile Hard Drive on a Mac Computer You can use the Finder or Photos application to export photos to a mobile hard drive. When using Finder to export photos, first make sure the mobile hard drive is connected to the Mac and is successfully recognized by the Mac. The steps to transfer photos from Mac to hard drive are simple: first, connect the mobile hard drive to the computer, and then open the [Launcher] icon. Then, find and click the [Photos] icon in the pop-up window. In the opened [Photos] window, hold down the [Shift] key
 3 Ways to Convert HEIC Photos to JPG on Mac
Mar 15, 2024 pm 08:43 PM
3 Ways to Convert HEIC Photos to JPG on Mac
Mar 15, 2024 pm 08:43 PM
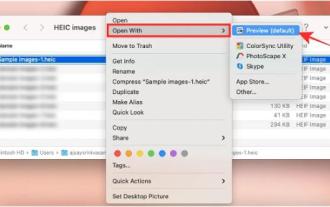
By default, iPhone takes photos from the camera in HEIC format. HEIC stands for High Efficiency Image Container and can hold more pixel data than PNG or JPG files, taking up significantly less space on iPhone storage compared to other formats. These files work best on iPhones but are not widely accepted on the internet because they often result in blurry/grainy pictures when you share them with non-Apple devices. To ensure that HEIC images are compatible on other devices, you may need to convert them to JPG format. This article will introduce how to convert HEIC images to JPG on Mac. How to Convert HEIC Photos to JPG on Mac [3 Methods] Method
