php editor Banana reveals to you how to create PS imitation hand-painted effect. In digital painting, hand-painted effects are often used to add an artistic touch and unique style to the picture. By skillfully using PS filters, layer masks and brush tools, you can simulate realistic hand-painted effects. This article will introduce in detail the steps and techniques for creating hand-painted effects, allowing you to easily master this skill and add more charm to your design works.
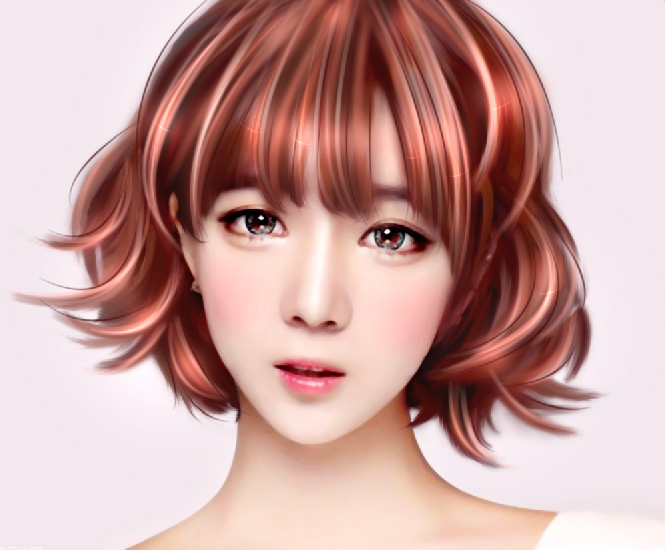
ps Steps to make a character's avatar into a hand-painted imitation effect Rendering:
 ##Material:
 Operation steps:
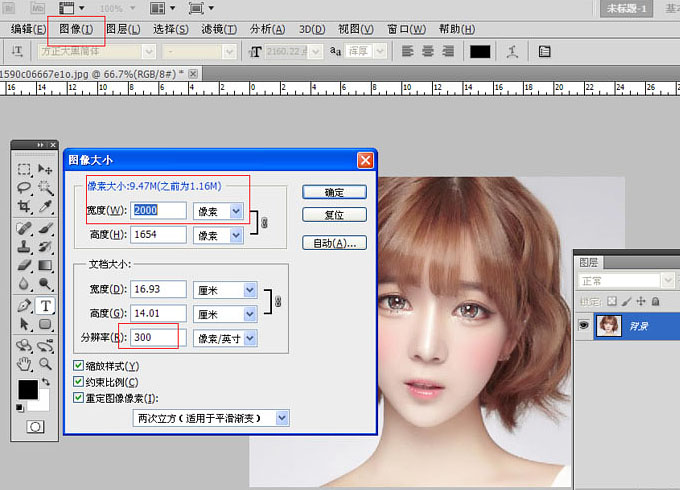
1. Modify the image resolution, 200~300 will do. A pixel size of about 10M is enough. If it is too large, it will get stuck easily.

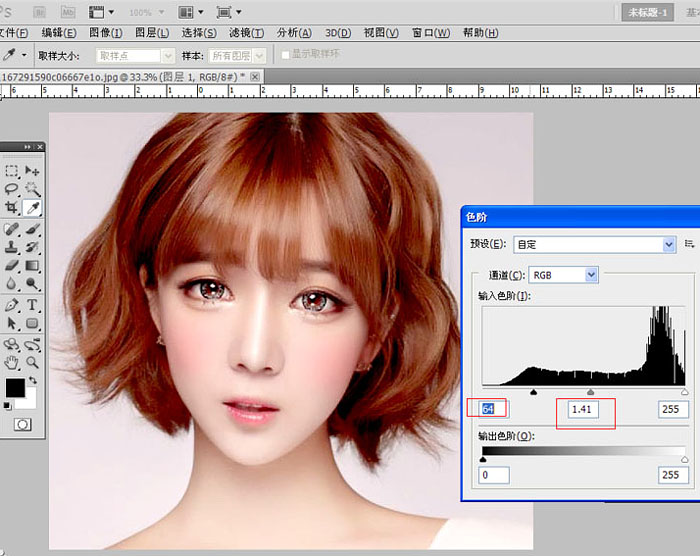
#2. Then it’s time to adjust the color. The color gradation feels okay.

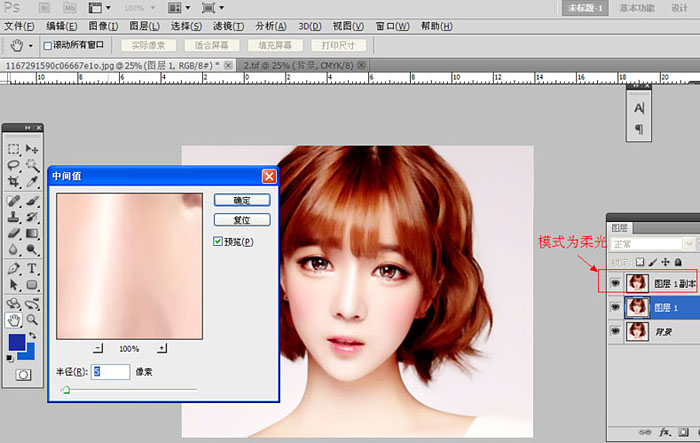
3. Duplicate the background layer into two layers, set the copy mode of layer 1 to soft light, and set the middle value of layer 1 to 5.

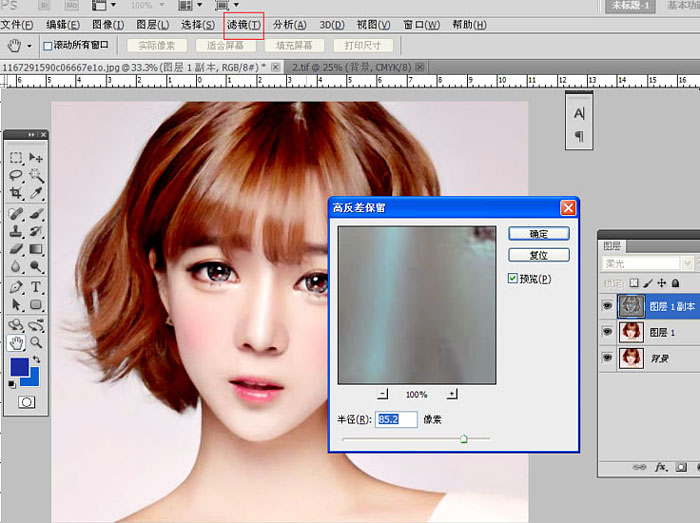
4. Execute Filter - Other - High Contrast Preservation on the copy of layer 1, value 85, then ctrl e downward to merge the layers.

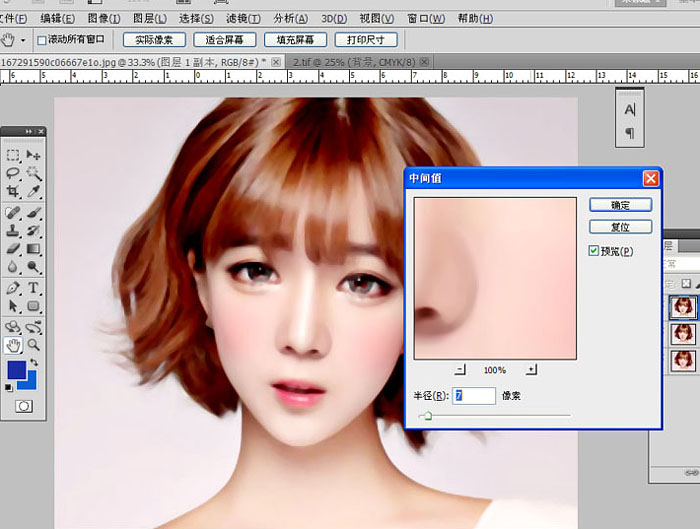
5. Then copy layer 1 and execute Filter-Noise-Middle Value, the value is 7. ,

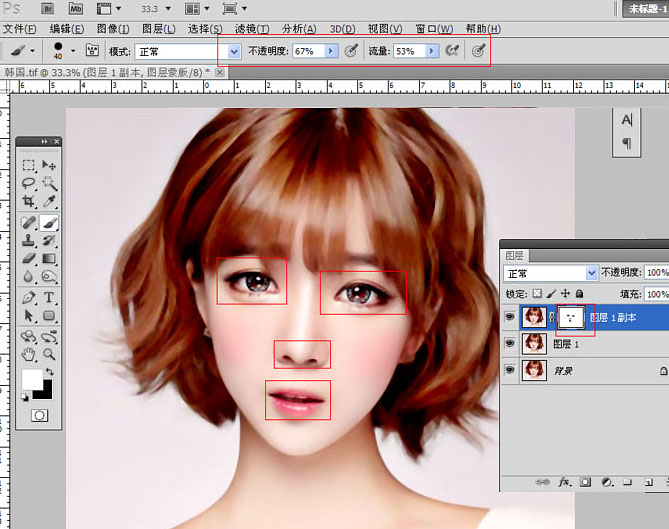
6. Create a white mask on the copy of layer 1, use a black brush to erase the facial features, the opacity of the brush can be smaller, and then merge downward. The skin of this picture is completed (this is the benefit of high-definition pictures).

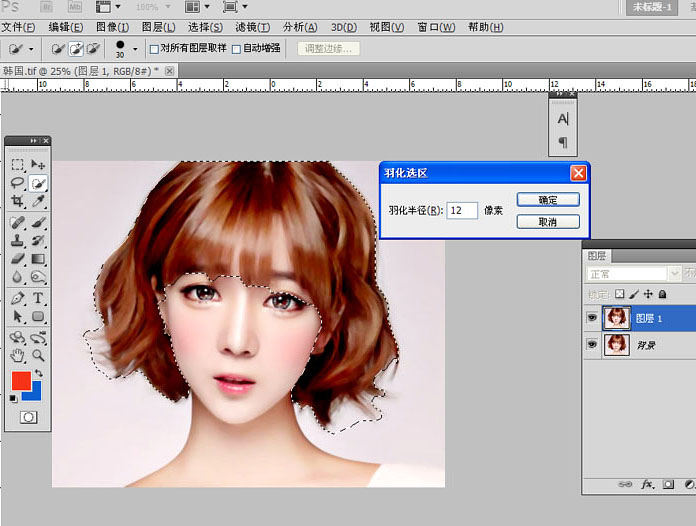
7. I feel embarrassed to ruin such delicate facial features. Let’s talk about the hair first. Use the quick selection tool to roughly select the hair, and then feather it by 12 pixels. ctrl j copies one layer.

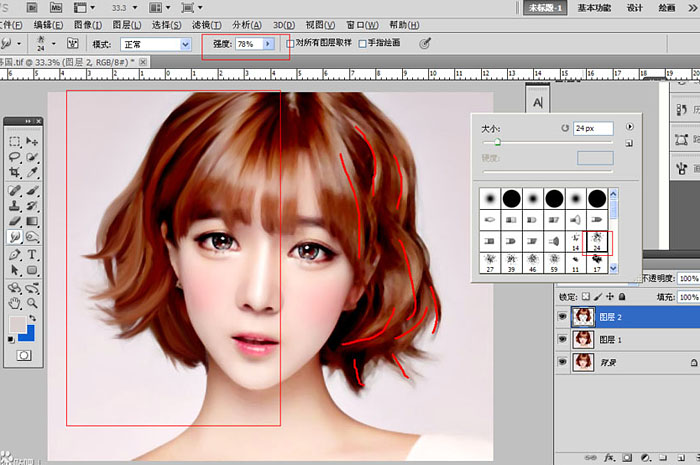
8. Use the applicator tool to apply along the direction of the hair. Adjust the size and intensity of the applicator tool at any time. The one on the left is the one that has been applied.

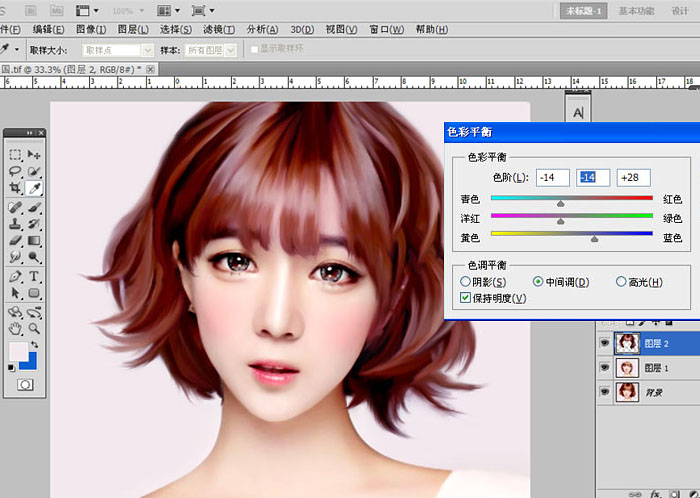
9. After applying everything, adjust the color. You can do it as you like. It depends on what tone you want the whole picture to be.

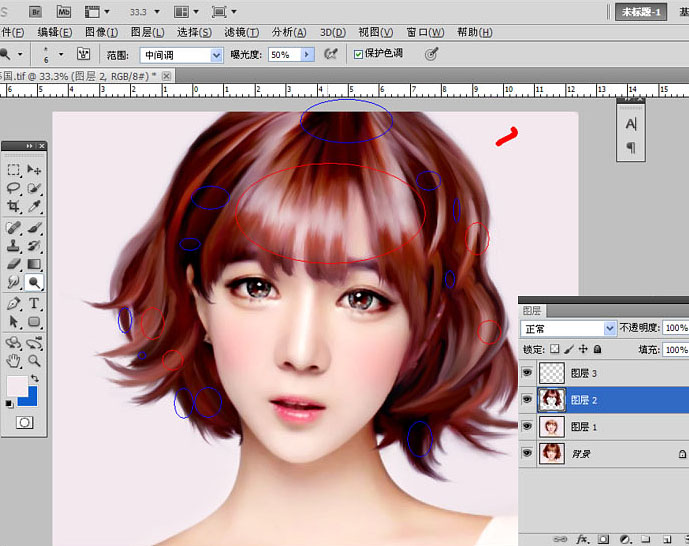
10. Of course, if you feel that the broken hair on the sides is difficult to deal with, you can use a brush to absorb the background color to cover them, so that it won't feel messy.

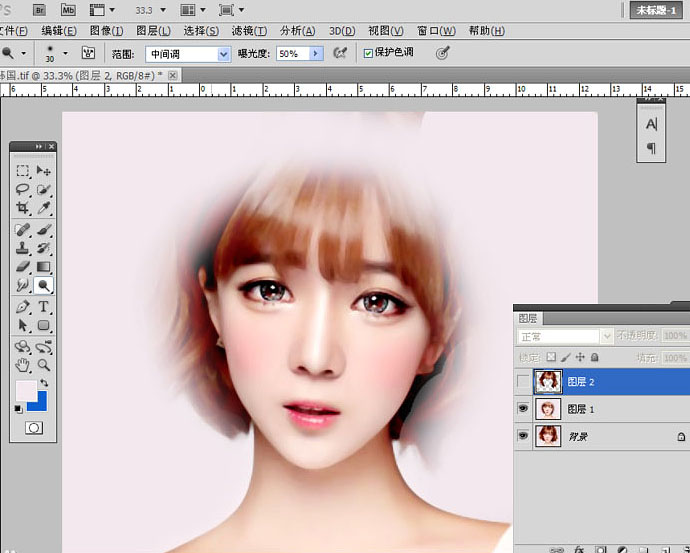
11. Use the Burn and Dodge tool to process it, dodge the bright ones and deepen the dark ones.

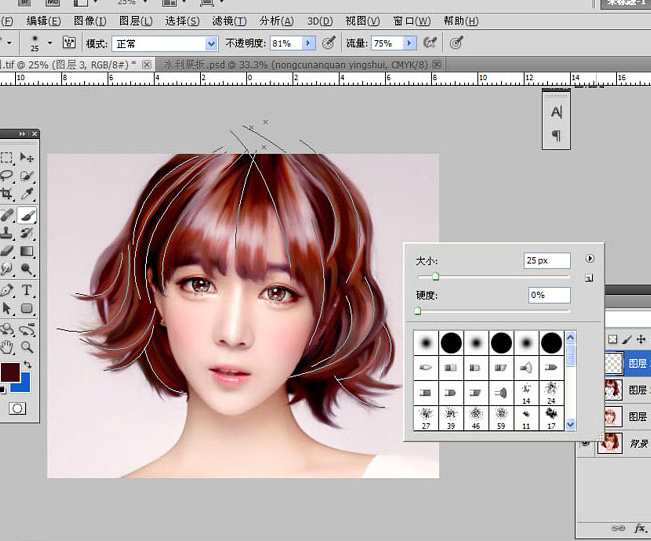
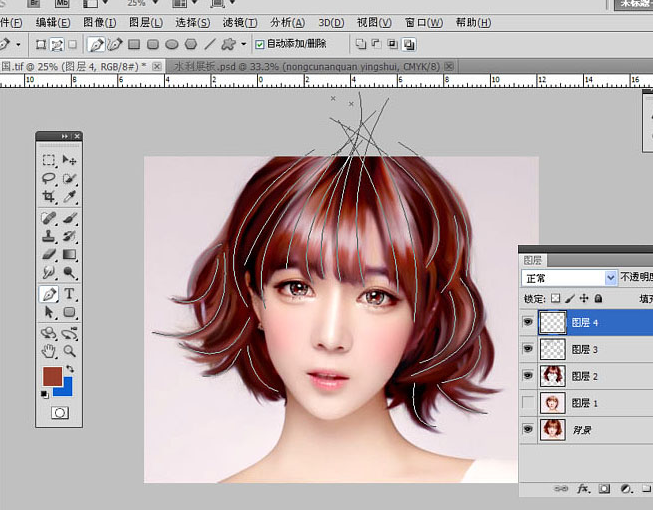
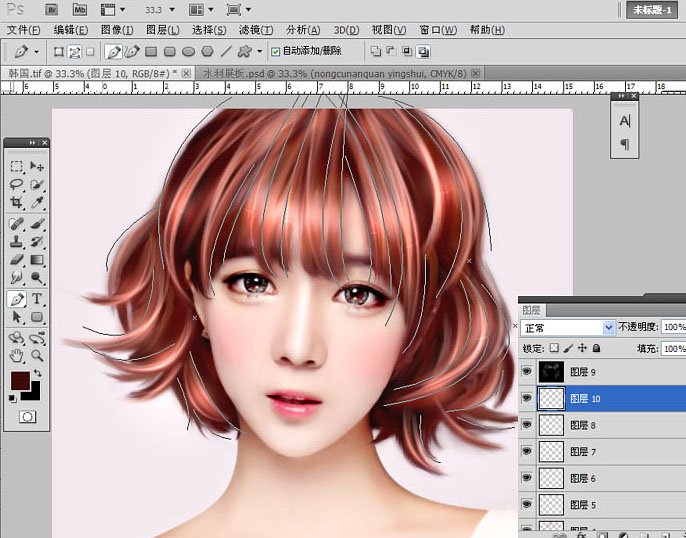
12. Use the pen tool to draw a path. The direction should be according to the hair. Take the darker color of the hair, not black. Use the brush to stroke, and then use The box is blurred and has a value of 12.

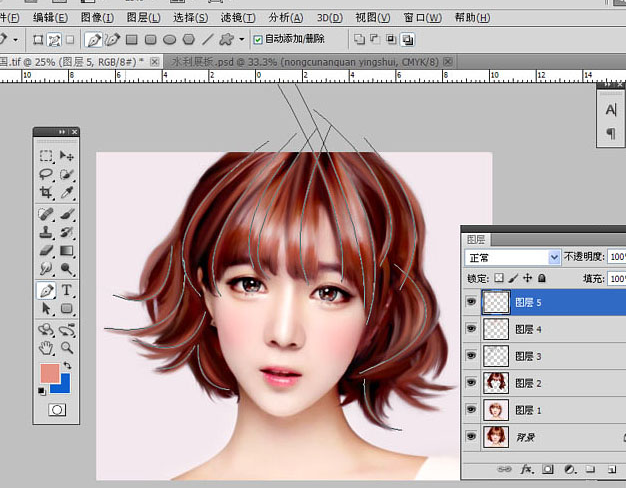
#13. Create a new layer and do the same operation again, this time changing the color to absorb in the bright part.

14. Continue to create a new layer and continue the process of outlining the path. The color is a little lighter than last time. Now you can adjust the brush to about 10. After the stroke The box is blurred. The next step should be the same as this step, and the next step too. The color should not be too different each time. It is best to only change the light and dark, otherwise it will become colorful. Also, the path should not be too different each time. Same, with a slight change.

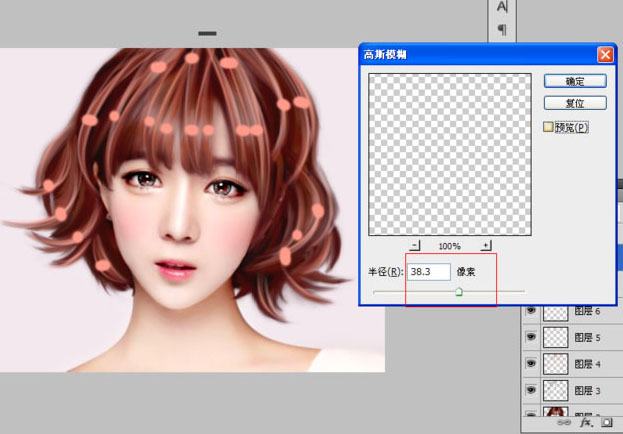
15. If the stroke is almost the same, I will use a brush to add some dots, and then apply Gaussian blur. I turned off the preview of this picture, and the value is about 40.

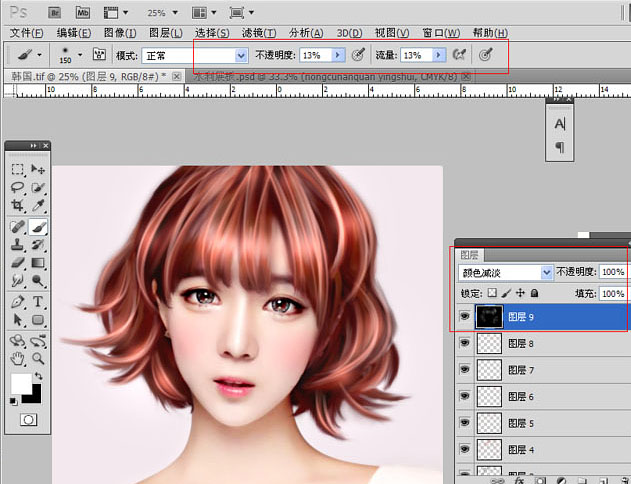
16. Create a new layer, fill it with black, change the mode to Color Dodge, use a white low-opacity brush to point on the hair, and the highlights will come out. You can also use a pen to draw a path on it, and still use the white brush to stroke it. , so that you can draw very bright hair.

17. Finally, add some fine hair strands. The brush size is about 5 for a darker color.

Finish:

The above is the detailed content of How to create imitation hand-painted effect in PS. For more information, please follow other related articles on the PHP Chinese website!

 ##Material:
  Operation steps: