Centos7 graphical interface graphic installation detailed explanation
php editor Strawberry brings you a detailed explanation of CentOS 7 graphical interface installation with pictures and texts. CentOS 7 is a stable and reliable Linux distribution. It is installed through a graphical interface, which is not only simple and easy to understand, but also helps you quickly complete system configuration. This article will introduce you to the CentOS 7 graphical interface installation steps in detail, including downloading the ISO image, making a bootable USB disk, and entering the installation interface. Follow our guide to easily master the installation skills of CentOS 7 and enjoy an efficient operating experience!
Write before installation:
If your centos7 is minimally installed, it does not come with X WINDOWS by default. Then before installing the graphical interface, you must first install X WINDOWS. This control function
yum groupinstall "X Window System"
1. Enter the installation command
yum groupinstall -y "GNOME Desktop"
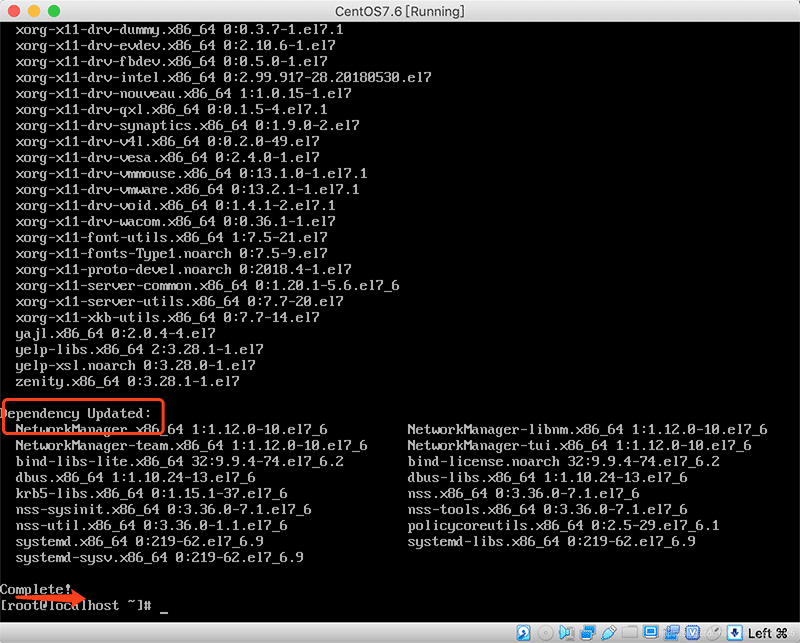
Wait for the installation to complete and Complete
appears.2. Enter the command to enter the graphical interface
init 5
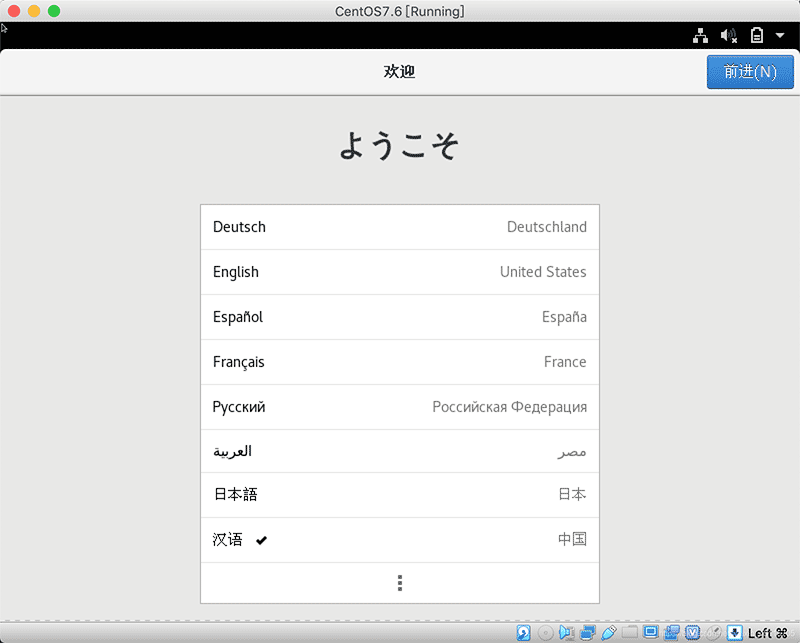
Enter the language selection interface, of course we choose Chinese
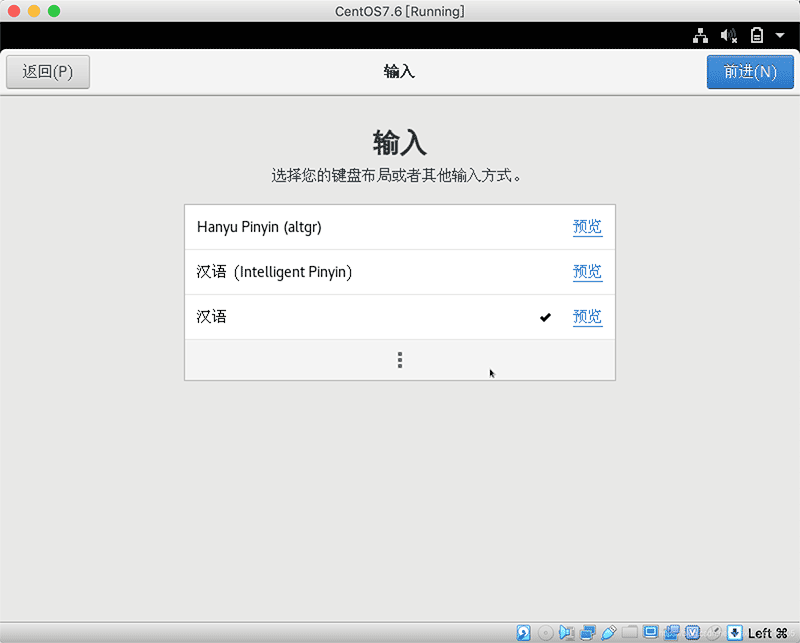
3.Select the location service switch
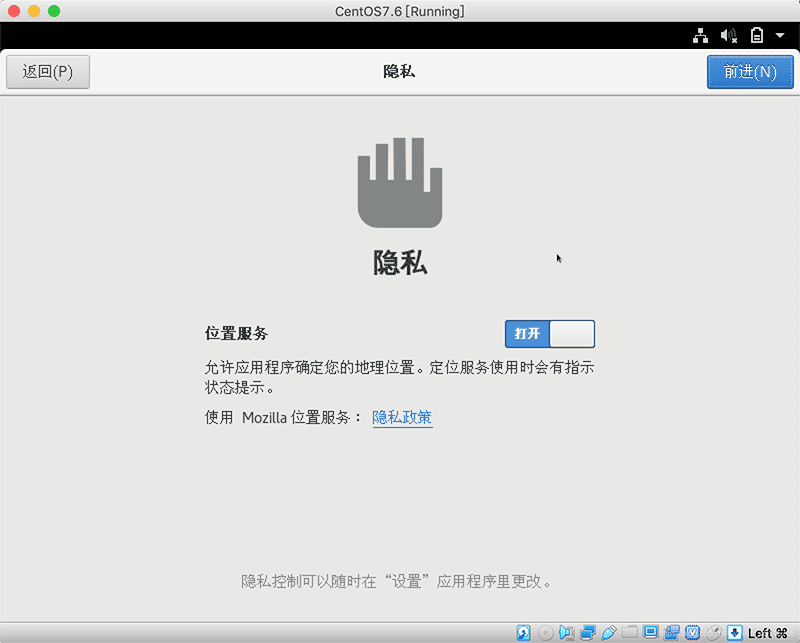
Depending on personal needs, I enable it by default
4.Select time zone
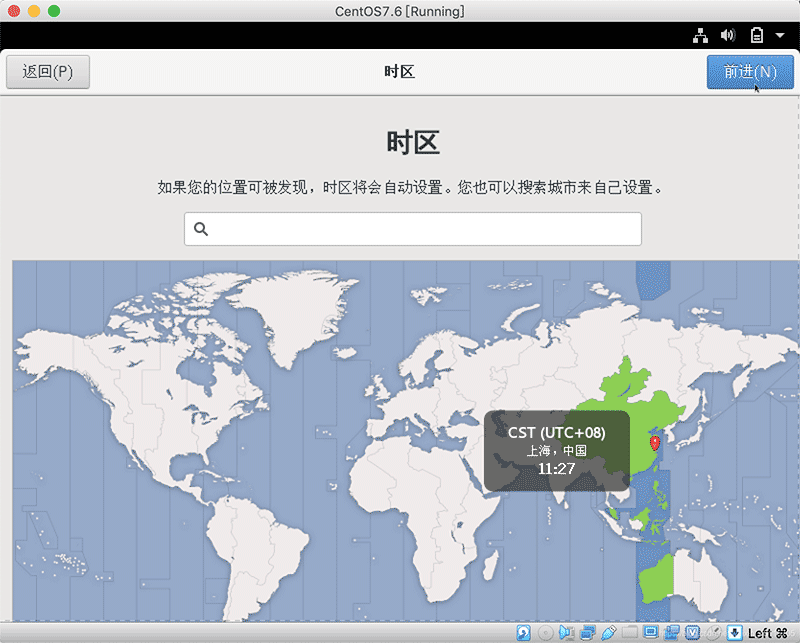
The default is enough, of course you can also change it yourself
5. Connect online account (can be skipped)
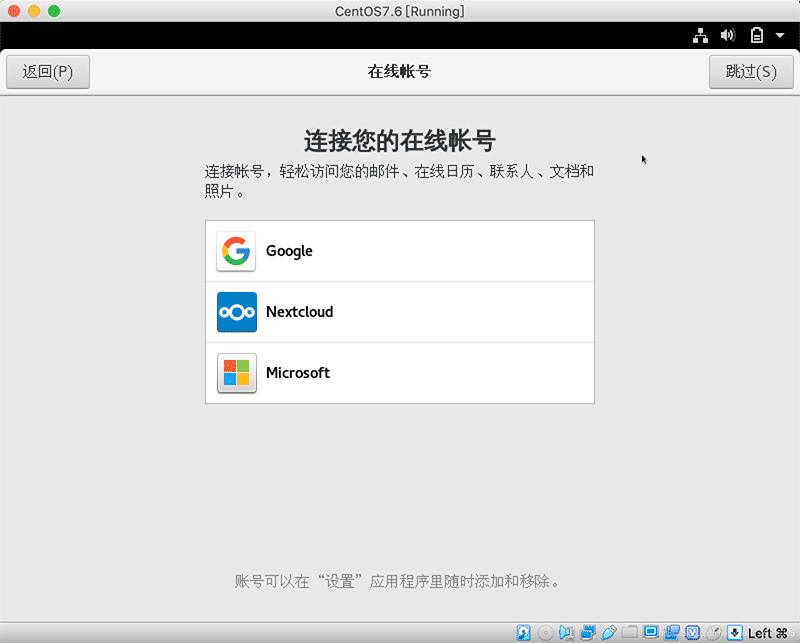
is of no use to the business for the time being, so we skip
6. Get a username
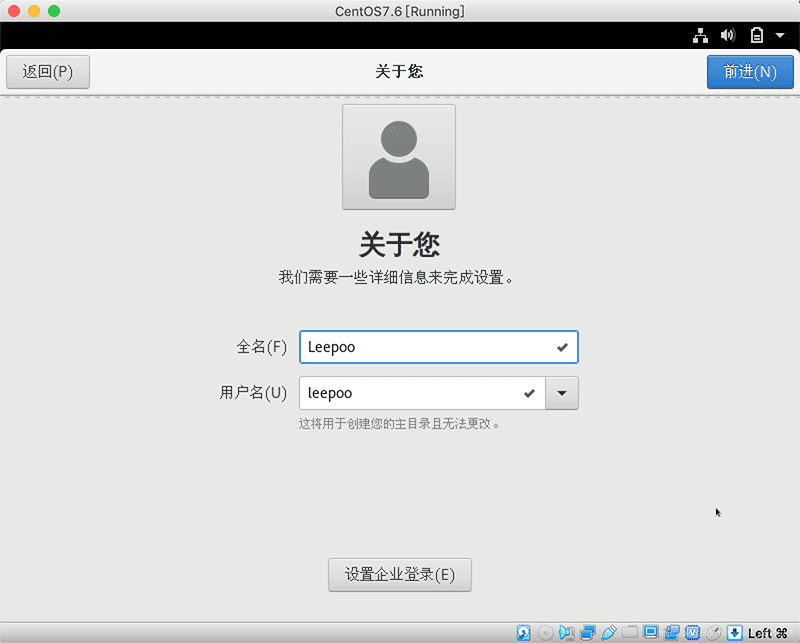
7.Set password
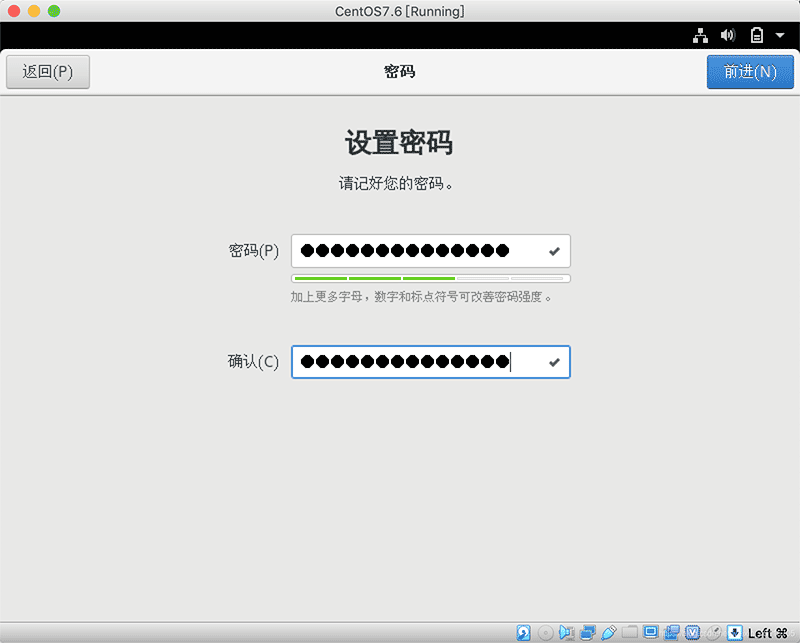
8. Enter the start interface
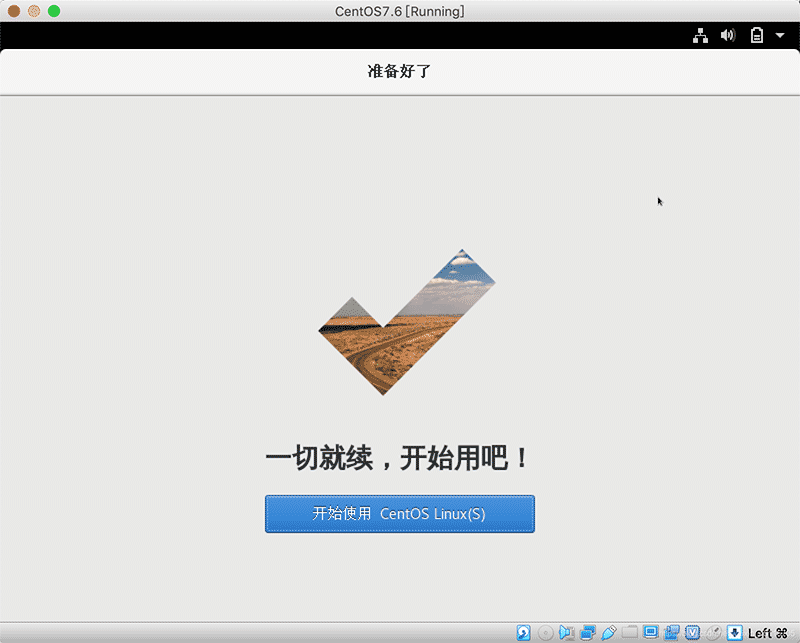
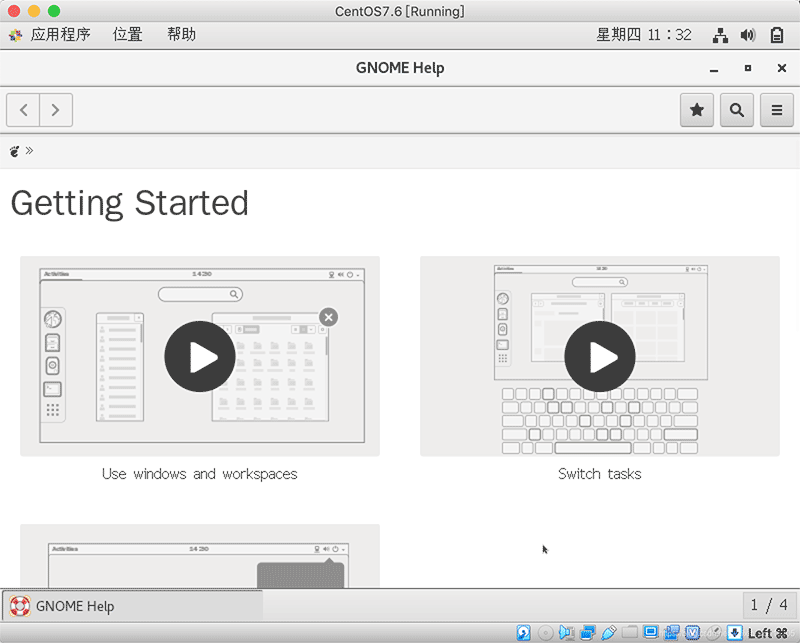
9. Click Start to enter the GNOME Help page, click ❌ in the upper right corner to exit the help page
10. Enter the login page and list the current computer to all user lists
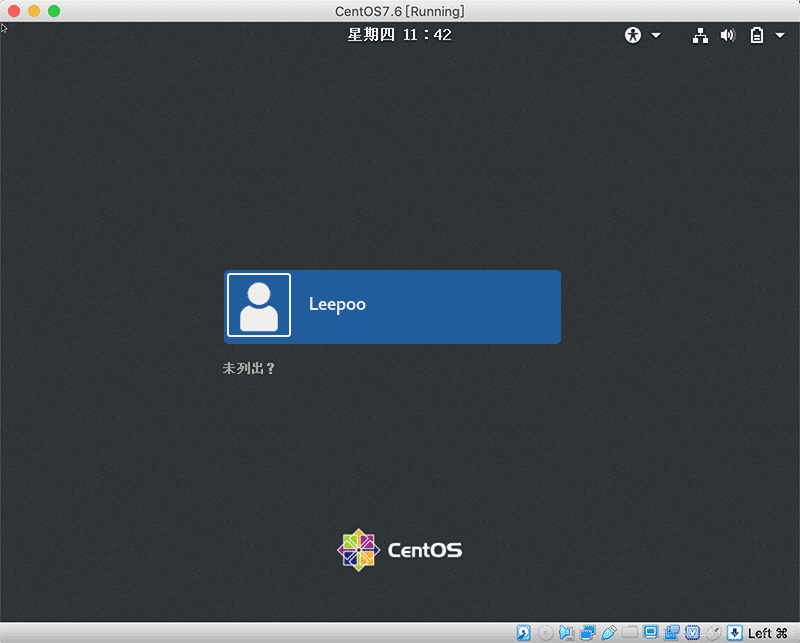
11. Click on the corresponding user and enter the corresponding password
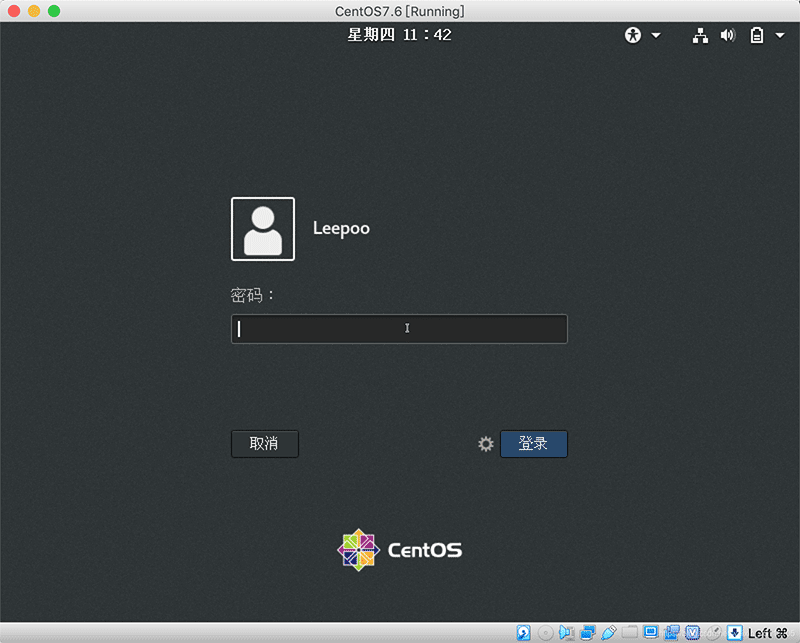
12. The first time is a bit slow, wait for a while and the graphical operation interface you like will appear
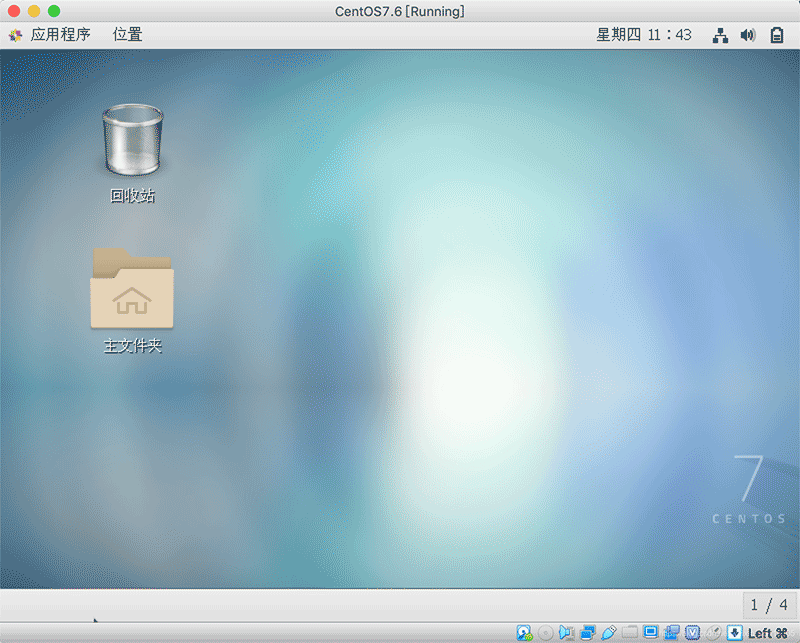
At this point, the centos7 installation graphical interface has come to a perfect end!
PS: In the future, you will definitely thank yourself for working hard today!
The above is the detailed content of Centos7 graphical interface graphic installation detailed explanation. For more information, please follow other related articles on the PHP Chinese website!

Hot AI Tools

Undresser.AI Undress
AI-powered app for creating realistic nude photos

AI Clothes Remover
Online AI tool for removing clothes from photos.

Undress AI Tool
Undress images for free

Clothoff.io
AI clothes remover

AI Hentai Generator
Generate AI Hentai for free.

Hot Article

Hot Tools

Notepad++7.3.1
Easy-to-use and free code editor

SublimeText3 Chinese version
Chinese version, very easy to use

Zend Studio 13.0.1
Powerful PHP integrated development environment

Dreamweaver CS6
Visual web development tools

SublimeText3 Mac version
God-level code editing software (SublimeText3)

Hot Topics
 How to modify Douyin IP location
May 04, 2024 pm 04:36 PM
Yes, you can modify the Douyin IP location as follows: Open Douyin and edit your profile. Modify the city information and select the city or region you want to display. Log out and log back in for the changes to take effect.
 Does Amap require mobile phone registration?
May 05, 2024 pm 05:12 PM
Yes, for security, personalized services and account management, Amap requires registration with a mobile phone number. The registration steps include: Open the Amap app, click "My" and "Login/Register", select a mobile phone number to register, enter the mobile phone number to get the verification code, set a password to complete the registration.
 How to post pictures and videos on Weibo
May 03, 2024 am 01:15 AM
The steps for posting pictures and videos at the same time on Weibo are as follows: Select related or complementary pictures and videos. Open the Weibo client and click the Publish button. Select the "Pictures & Videos" tab. Add pictures and videos (up to 9 pictures and 1 video). Enter text and add relevant information. Just publish it.
 How to reset Douyin recommendations? How to change recommendation to featured?
May 08, 2024 pm 03:52 PM
As a social platform focusing on short videos, Douyin’s recommendation algorithm is one of its core functions. It can recommend relevant video content based on users' interests and behaviors. Sometimes users may want to reset the recommendation algorithm to get content more in line with their preferences. So, how to reset Douyin recommendations? How to change Douyin recommendation to featured? This article will answer both questions for you. 1. How to reset Douyin recommendations? 1. Open Douyin APP and enter your personal homepage. 2. Click the "Settings" icon in the upper right corner to enter the settings page. 3. On the settings page, find the "Recommended Management" option and click to enter. 4. On the recommendation management page, you can see your interest tags and interest preferences. You can select or deselect different
 How to change recommendation settings on TikTok
May 04, 2024 am 12:06 AM
Douyin recommendations can be changed by changing the "Content Preferences" settings, including adjusting recommended video types, following interested creators, blocking disliked content, setting video language, geographical location restrictions, following hot topics and clearing search/browsing history .
 How to modify location permissions on TikTok
May 03, 2024 pm 11:24 PM
Steps to modify Douyin location permissions: 1. Open the Douyin app and click "Me". 2. Click the "three horizontal bars icon" in the upper right corner. 3. Select Settings. 4. Find "Privacy Settings" and click on it. 5. Click "Location Services". 6. Select Allow targeting or Only ask when using, as appropriate. 7. After modification, you need to restart the Douyin application to take effect.
 How to change TikTok time zone settings
May 04, 2024 am 01:57 AM
Douyin time zone settings cannot be changed, the time zone will be automatically set based on the current geographical location.
 How to set up your own store on Douyin map positioning? What should I do if I don't have a location for my own store?
Apr 27, 2024 pm 01:50 PM
As a popular short video application, Douyin not only provides users with a platform to express themselves and share their lives, but also provides businesses with a good opportunity to promote and attract traffic. By setting the map positioning of stores on Douyin, merchants can make it easier for customers to find their stores. So, how to set the map positioning of your store on Douyin? What should I do if I can’t find the location of my store on Douyin? Next, I will answer these two questions in detail for you. 1. How to set up your own store on Douyin map positioning? To set the map positioning of your store on Douyin, you can follow the following steps: 1. Open Douyin APP, enter the "Me" page, click the "three" icon in the upper right corner to enter settings. 2. On the settings page, find and click


