How to install and use NVIDIA apps on Windows 11
In this article, we will show you how to install and use NVIDIA apps on your Windows 11 PC. NVIDIA is launching the new NVIDIA App, providing users with a unified GPU control center to view and modify the graphics settings of their NVIDIA graphics processors. The app combines key features of the NVIDIA Control Panel and GeForce Experience app, allowing users to download the latest driver updates, change in-game settings or driver settings, discover other NVIDIA apps and do more from one place.
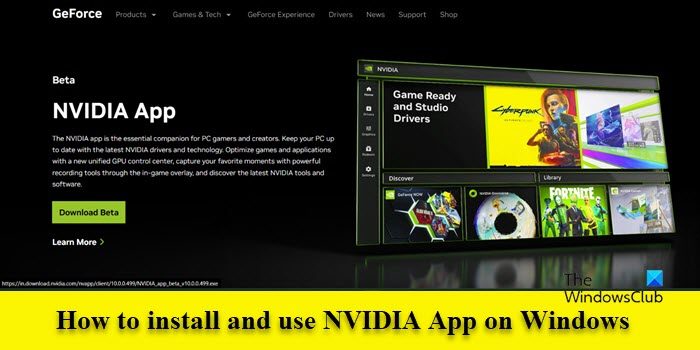
What does NVIDIA App do?
New NVIDIA apps focus on delivering an enhanced user experience to gamers and content creators. It features a cleaner and more responsive user interface, redesigned in-game overlays, improved driver information, and support for Shadowplay 120fps. The app also offers AI-powered filters like RTX HDR and RTX Dynamic Viviance to personalize the game’s visual aesthetic on RTX-equipped systems.
The main advantage of this app is that users can easily download driver updates or optimize game settings without logging into an NVIDIA account. Going forward, it will integrate remaining NVIDIA control panel features and properties in GeForce Experience, including features such as GPU overclocking and driver rollback.
How to install and use NVIDIA apps on Windows 11
To install and use NVIDIA applications on Windows 11, your system must meet the following requirements:
- Operating system: Windows 10, Windows 11
- RAM: 2 GB system memory
- Disk space required: 600 MB
- Driver: GeForce 551.52 driver or later
- CPU: Intel Pentium G series, Core i3, i5, i7 or higher/AMD FX, Ryzen 3, 5, 7, 9, ThreadRipper or higher.
- GPU: GeForce RTX 20, 30 and 40 series GPUs/GeForce GTX 800, 900, 1000, 1600 series GPUs/GeForce MX100, MX200, MX300, 800M and 900M GPUs.
Download and install new NVIDIA applications
You can get the latest NVIDIA application beta version by visiting the NVIDIA official website. After downloading, double-click the installation file to start the installation wizard.
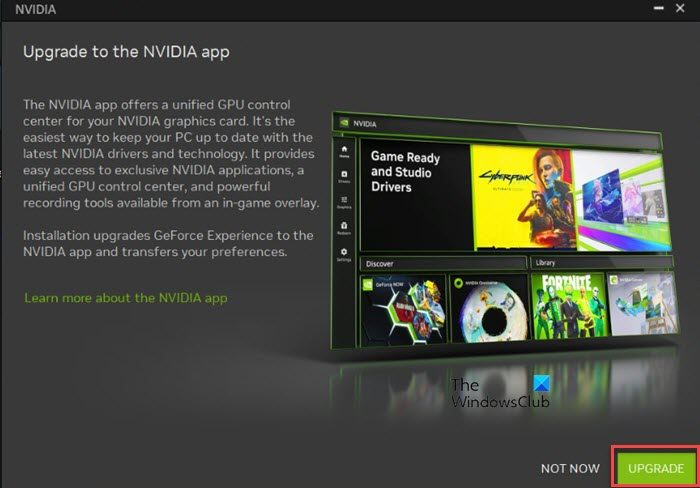
You will be reminded to upgrade to the NVIDIA application, which will upgrade GeForce Experience and migrate your preferences. Please click the "Upgrade" button to start installing the application. On the next screen, click the "Agree" and "Continue" buttons to accept NVIDIA's Privacy Policy and License Agreement. Subsequently, follow the on-screen instructions to complete the application installation process.
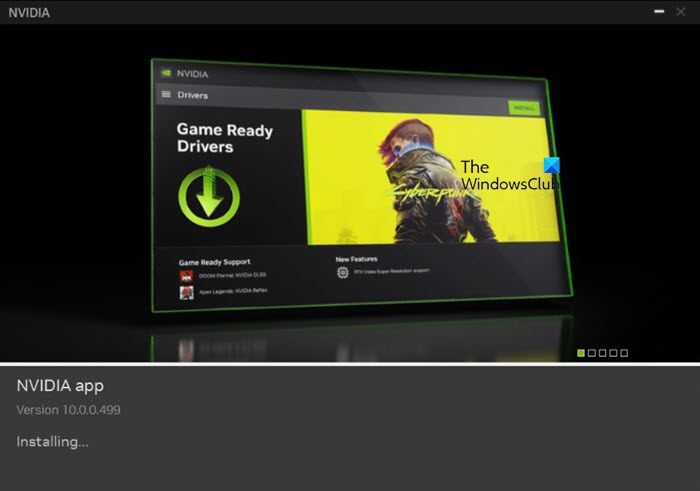
Use New NVIDIA Apps
Once the installation is complete, the application will launch automatically. Unlike GeForce Experience, the new NVIDIA apps can be used without logging into an NVIDIA account. Login is optional and is only required if you need to redeem a Tencent XT package or access exclusive rewards.
On the left side of the home page of the application you will see dedicated tabs for the following menus:
1]Home
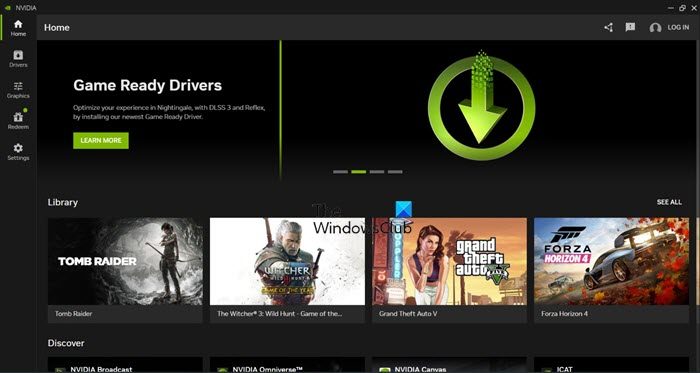
The Home tab displays a collection of shortcuts to the latest driver packages, a Library section where all games can be viewed, and a Discovery section for other NVIDIA applications such as NVIDIA Broadcast, NVIDIA Omniverse, and ICAT. While the Library section allows you to launch a game or modify its graphics settings, the Discovery section allows you to quickly install applications with one click.
2]Driver
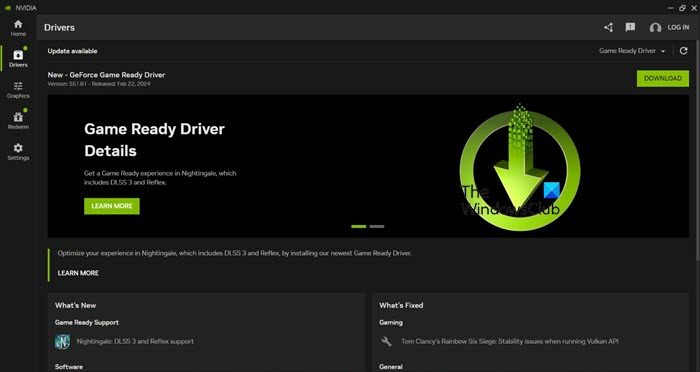
The Drivers tab allows you to download the latest NVIDIA drivers. You can choose between game-ready drivers or Studio drivers (using the drop-down list provided in the upper right corner) and find information about which ones are updated, including which ones are new and which ones have been fixed.
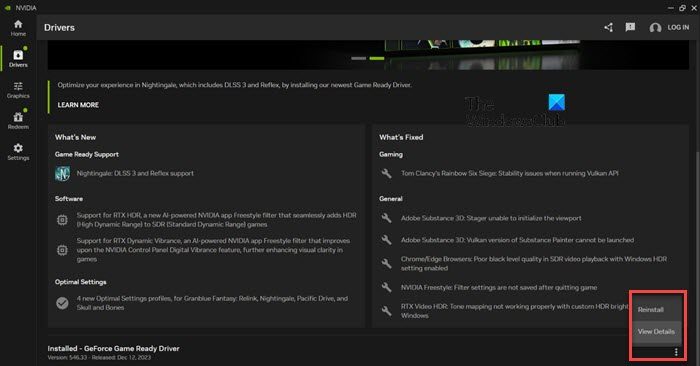
You can also view the release notes for your selected driver by clicking the three-dot icon in the lower right corner of the screen, or reinstall the driver if you are having system instability issues (click the icon and select Reinstall / check the detail information).
3]Graphics
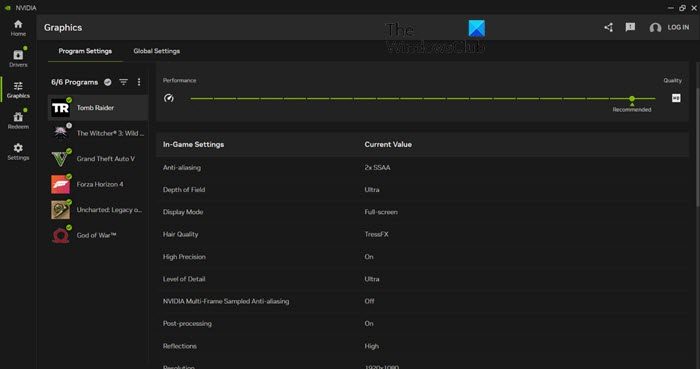
The Graphics tab gives you access to the best settings for GeForce Experience and the 3D Settings of the NVIDIA Control Panel, allowing you to fine-tune graphics settings for individual applications or set global profiles for all games and applications.
This tab also gives you access to the optimization tool, which applies recommended game settings based on your system with the click of a button (Optimize), and also allows you to manually adjust the settings by using the slider (you can adjust the settings according to the resolution of your choice). rate and display mode sliders up and down for better quality).
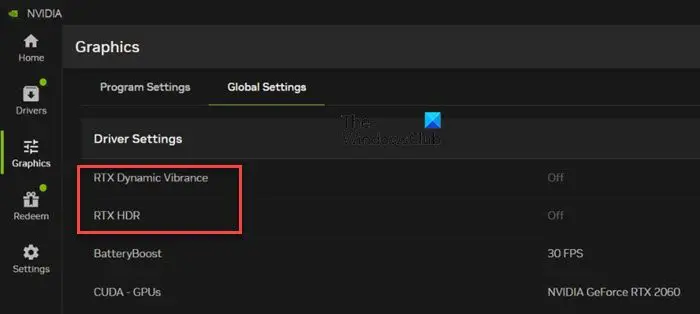
NVIDIA has also added two new settings to the Global Settings tab: RTX Dynamic Viviance and RTX HDR, which will lead you to the in-game overlay, which now slides out from the left side of the screen. Overlays have been completely redesigned, allowing quick access to Shadowplay tools (recording, instant replay, screenshots, photo mode) alongside a gallery of all captures displayed at the top of the UI via user-friendly thumbnails.
You can also decide whether to capture the microphone using the toggle at the bottom. Shadowplay remains largely the same, but now using the NVIDIA app beta, you can capture up to 120fps (previously 60fps) with the microphone.
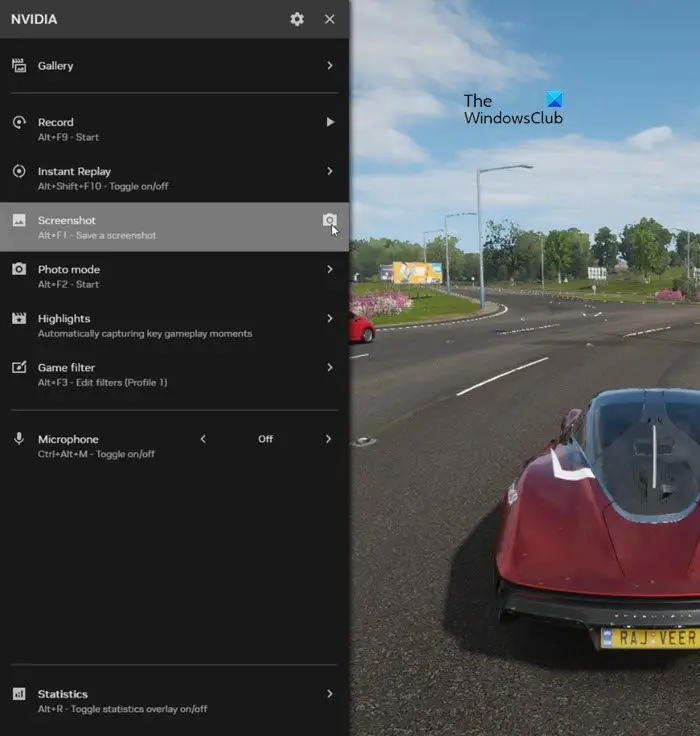
In addition to this, the overlay displays a Freestyle Game Filters section, allowing you to change the look of your game by adjusting various settings such as color, contrast, depth of field, RTX Dynamic Vibration, RTX HDR, and more. RTX Dynamic Viviance and RTX HDR are new AI Freestyle filters that leverage AI technology to enhance the beauty of games.
Tencent Dynamic Clarity enhances the visual clarity of every application, allowing colors to pop more on the screen, with perfect balance that minimizes color squashing and maintains image quality. RTX HDR uses RTX HDR technology to enable HDR support in SDR games.
Another big improvement is the Statistics section at the bottom of the overlay, which allows you to customize how the performance overlay displays during games. You can select just the statistics you want to see and place them anywhere on the screen in different orientations.
4]Exchange
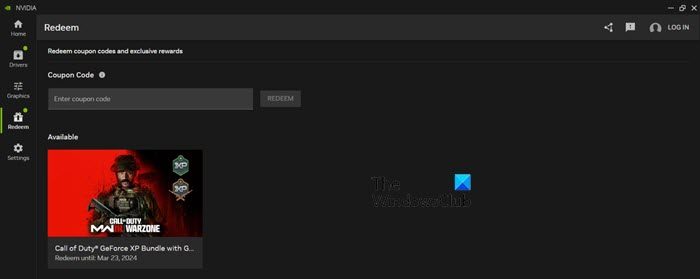
In the Redeem tab, you can redeem game codes (which may have been bundled with your newly purchased GPU) or receive exclusive rewards such as in-game content, exclusive GeForce Now Premium membership offers, and more. This is the only tab that requires login.
5]Settings
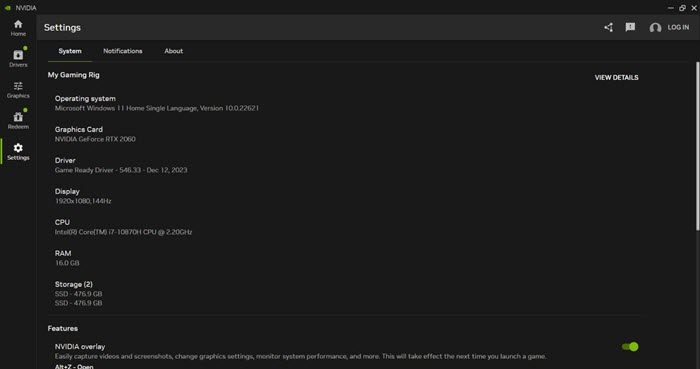
The last tab is the Settings tab, which allows you to access your gaming PC's specs (OS, graphics card, drivers, monitor, CPU, RAM, storage, etc.), application features, library scans, notifications, and more. The tab also offers a shortcut to the old NVIDIA Control Panel, which may only last until the app is officially released.
Note:
The above is the detailed content of How to install and use NVIDIA apps on Windows 11. For more information, please follow other related articles on the PHP Chinese website!

Hot AI Tools

Undresser.AI Undress
AI-powered app for creating realistic nude photos

AI Clothes Remover
Online AI tool for removing clothes from photos.

Undress AI Tool
Undress images for free

Clothoff.io
AI clothes remover

AI Hentai Generator
Generate AI Hentai for free.

Hot Article

Hot Tools

Notepad++7.3.1
Easy-to-use and free code editor

SublimeText3 Chinese version
Chinese version, very easy to use

Zend Studio 13.0.1
Powerful PHP integrated development environment

Dreamweaver CS6
Visual web development tools

SublimeText3 Mac version
God-level code editing software (SublimeText3)

Hot Topics
 1374
1374
 52
52
 How to solve the problem that the NVIDIA graphics card screen recording shortcut key cannot be used?
Mar 13, 2024 pm 03:52 PM
NVIDIA graphics cards have their own screen recording function. Users can directly use shortcut keys to record the desktop or game screen. However, some users reported that the shortcut keys cannot be used. So what is going on? Now, let this site give users a detailed introduction to the problem of the N-card screen recording shortcut key not responding. Analysis of the problem of NVIDIA screen recording shortcut key not responding Method 1, automatic recording 1. Automatic recording and instant replay mode. Players can regard it as automatic recording mode. First, open NVIDIA GeForce Experience. 2. After calling out the software menu with the Alt+Z key, click the Open button under Instant Replay to start recording, or use the Alt+Shift+F10 shortcut key to start recording.
 Detailed introduction to the difference between NVIDIA graphics card driver Game ready and Studio
Mar 14, 2024 am 10:00 AM
NVIDIA is a graphics card brand used by many users, that is, N card. However, some users found that there are Gameready and Studio when downloading the graphics card driver. Is there any difference? Let’s take a look at the detailed introduction of the difference between NVIDIA graphics card driver Gameready and Studio. Gameready is a product of NVIDIA graphics cards optimized for the gaming field, while the Studio series is aimed at professional users and optimizes the experience of using productivity software. These two series of graphics cards provide the best performance and stability for different application fields to meet users' needs for games and professional software. 2. The frequency of updates is different: gameready is updated frequently and will be released
 UCM in Windows 11/10 - UCSI VPI device driver error
Mar 24, 2024 am 09:50 AM
UCM-UCSIVPI is crucial to your computer because it is responsible for managing the USB Type-C port. When you encounter error messages for this driver in Device Manager, it will affect the normal working of your USB Type-C port. Therefore, it is crucial to resolve this issue promptly and this article will guide you on how to resolve the issues caused by this error message. UCM-UCSIACPI, Windows has stopped this device because it reported a problem (code 43). What is UCM—UCSIVPI device driver? Microsoft provides a driver that complies with the USB Type-C Connector System Software Interface (UCSI) specification for TPI transmission. If your system is configured
 Unable to save changes to Photos app error in Windows 11
Mar 04, 2024 am 09:34 AM
If you encounter the Unable to save changes error while using the Photos app for image editing in Windows 11, this article will provide you with solutions. Unable to save changes. An error occurred while saving. Please try again later. This problem usually occurs due to incorrect permission settings, file corruption, or system failure. So, we’ve done some deep research and compiled some of the most effective troubleshooting steps to help you resolve this issue and ensure you can continue to use the Microsoft Photos app seamlessly on your Windows 11 device. Fix Unable to Save Changes to Photos App Error in Windows 11 Many users have been talking about Microsoft Photos app error on different forums
 What should I do if Win11 fails to load the driver? What to do if the driver cannot be loaded on this device?
Apr 11, 2024 pm 05:01 PM
This article aims to solve the "The driver cannot be loaded on this device" error message that Win11 users encounter when trying to install or update drivers. By reading this article, Win11 users will be able to solve the "The driver cannot be loaded on this device" problem, thereby ensuring the stability of the system and the normal operation of the hardware device. Program Compatibility Assistant prompts: The driver cannot be loaded on this device. Method 1: 1. Press the [Win+X] key combination, or [right-click] click [Windows Start Logo] on the taskbar, and open the hidden menu item , select [Terminal Administrator]; 2. User Account Control window, do you want to allow this application to make changes to your device? Click【
![What should I do if my Bluetooth peripheral device does not have a driver? [solved]](https://img.php.cn/upload/article/000/465/014/171033721377290.jpg?x-oss-process=image/resize,m_fill,h_207,w_330) What should I do if my Bluetooth peripheral device does not have a driver? [solved]
Mar 13, 2024 pm 09:40 PM
What should I do if my Bluetooth peripheral device does not have a driver? [solved]
Mar 13, 2024 pm 09:40 PM
When many users use the Bluetooth function, an error message box pops up: The driver for the bluetooth peripheral device cannot be found, and an exclamation mark is displayed when opening the device manager. What is going on? In response to this problem, today I will share with you how to deal with the problem that the driver for the bluetooth peripheral device cannot be found. How to solve the problem that the driver cannot be found for bluetooth peripheral devices? Right-click the Bluetooth icon in the lower right corner to display Bluetooth devices. Right-click the paired Bluetooth device and click Delete Device, and the Bluetooth peripheral device will disappear. There is an uninstalled "Bluetooth Peripheral Device" in "Device Manager"
 Photos cannot open this file because the format is not supported or the file is corrupted
Feb 22, 2024 am 09:49 AM
In Windows, the Photos app is a convenient way to view and manage photos and videos. Through this application, users can easily access their multimedia files without installing additional software. However, sometimes users may encounter some problems, such as encountering a "This file cannot be opened because the format is not supported" error message when using the Photos app, or file corruption when trying to open photos or videos. This situation can be confusing and inconvenient for users, requiring some investigation and fixes to resolve the issues. Users see the following error when they try to open photos or videos on the Photos app. Sorry, Photos cannot open this file because the format is not currently supported, or the file
 How to connect Apple Vision Pro to PC
Apr 08, 2024 pm 09:01 PM
The Apple Vision Pro headset is not natively compatible with computers, so you must configure it to connect to a Windows computer. Since its launch, Apple Vision Pro has been a hit, and with its cutting-edge features and extensive operability, it's easy to see why. Although you can make some adjustments to it to suit your PC, and its functionality depends heavily on AppleOS, so its functionality will be limited. How do I connect AppleVisionPro to my computer? 1. Verify system requirements You need the latest version of Windows 11 (Custom PCs and Surface devices are not supported) Support 64-bit 2GHZ or faster fast processor High-performance GPU, most


