

centos编译安装mysql5.5_MySQL

CentOS
bitsCN.comcentos编译安装mysql5.5 安装Mysql5.5之前先卸载CentOS自带的Mysql5.0。 [root@localhost ~]# yum remove mysql 编译安装cmake 下载cmake源码包cmake-2.8.4.tar.gz,mv到/usr/local/src目录下 [root@localhost ~]# cd /usr/local/src/ [root@localhost src]# tar xzvf cmake-2.8.4.tar.gz [root@localhost src]# cd cmake-2.8.4 [root@localhost cmake-2.8.4]# ./bootstrap --------------------------------------------- CMake 2.8.4, Copyright 2000-2009 Kitware, Inc. --------------------------------------------- Error when bootstrapping CMake: Cannot find appropriate C compiler on this system. Please specify one using environment variable CC. See cmake_bootstrap.log for compilers attempted. --------------------------------------------- Log of errors: /usr/local/src/cmake-2.8.4/Bootstrap.cmk/cmake_bootstrap.log ---------------------------------------------报错:缺少C的编译器。 安装gcc编译器 可以从Linux系统的安装盘中安装,也可以简单地用yum安装 [root@localhost ~]# yum install gcc 继续cmake的安装 [root@localhost cmake-2.8.4]# ./bootstrap --------------------------------------------- CMake 2.8.4, Copyright 2000-2009 Kitware, Inc. C compiler on this system is: cc --------------------------------------------- Error when bootstrapping CMake: Cannot find appropriate C++ compiler on this system. Please specify one using environment variable CXX. See cmake_bootstrap.log for compilers attempted. --------------------------------------------- Log of errors: /usr/local/src/cmake-2.8.4/Bootstrap.cmk/cmake_bootstrap.log ---------------------------------------------再次报错:缺少C++编译器。 安装gcc-c++编译器 同样可以从Linux系统的安装盘中安装,或者简单地用yum安装 [root@localhost ~]# yum install gcc-c++ 重复上面的操作 [root@localhost cmake-2.8.4]# ./bootstrap 没有报错后,编译安装 [root@localhost cmake-2.8.4]# gmake [root@localhost cmake-2.8.4]# gmake install 开始正式安装Mysql 添加mysql用户和用户组 [root@localhost ~]# groupadd mysql [root@localhost ~]# useradd -g mysql mysql 下载mysql的源码包mysql-5.5.11.tar.gz到/usr/local/src下,解压 [root@localhost ~]# cd /usr/local/src/ [root@localhost src]# tar xzvf mysql-5.5.11.tar.gz [root@localhost src]# cd mysql-5.5.11 cmake运行 [root@localhost mysql-5.5.11]# cmake . 报错: -- Could NOT find Curses (missing: CURSES_LIBRARY CURSES_INCLUDE_PATH) CMake Error at cmake/readline.cmake:82 (MESSAGE): Curses library not found. Please install appropriate package, remove CMakeCache.txt and rerun cmake.On Debian/Ubuntu, package name is libncurses5-dev, on Redhat and derivates it is ncurses-devel. Call Stack (most recent call first): cmake/readline.cmake:126 (FIND_CURSES) cmake/readline.cmake:216 (MYSQL_USE_BUNDLED_LIBEDIT) CMakeLists.txt:250 (MYSQL_CHECK_READLINE) -- Configuring incomplete, errors occurred!
缺少Curses包,解决办法:remove CMakeCache.txt and rerun cmake.On Debian/Ubuntu, package name is libncurses5-dev, on Redhat and derivates it is ncurses-devel.很容易看懂,不解释了... 在CentOS下需要安装ncurses-devel [root@localhost mysql-5.5.11]# yum install ncurses-devel 重新cmake运行[root@localhost mysql-5.5.11]# cmake . 还是有个警告 Warning: Bison executable not found in PATH 有一个警告,也解决了它,缺少Bison就安装一下 [root@localhost mysql-5.5.11]# yum install bison 再次运行,没有报错 [root@localhost mysql-5.5.11]# cmake . 在编译安装前,可以设置安装的配置选项 [root@localhost mysql-5.5.11]# ./configure --help 根据帮助信息选择自己需要设置的选项,当然也可以跳过这步,按默认设置 开始编译安装,时间有点稍长,可以泡杯咖啡转悠一下... [root@localhost mysql-5.5.11]# make && make install完成编译安装 进入安装目录,将程序二进制的所有权改为root,数据目录的说有权改为mysql用户,更新授权表 [root@localhost mysql-5.5.11]# cd /usr/local/mysql/ [root@localhost mysql]# chown -R root . [root@localhost mysql]# chown -R mysql . [root@localhost mysql]# chgrp -R mysql . [root@localhost mysql]# scripts/mysql_install_db --user=mysql 安全启动mysql[root@localhost mysql]# ./bin/mysqld_safe --user=mysql & 关闭mysql[root@localhost mysql]# ./bin/mysqladmin -u root shutdown -p默认密码为空 方便调用,为mysql设置一个软链接[root@localhost ~]# ln -s /usr/local/mysql/bin/mysql /usr/bin/mysql 有3种方法为root账户设置密码: 使用SET PASSWORD语句 [root@localhost ~]# mysql -u rootmysql> SET PASSWORD FOR 'root'@'localhost' = PASSWORD('newpwd'); mysql> SET PASSWORD FOR 'root'@'host_name' = PASSWORD('newpwd')使用mysqladmin命令行程序 [root@localhost ~]# mysqladmin -u root password "newpwd" [root@localhost ~]# mysqladmin -u root -h host_name password "newpwd"使用UPDATE语句 [root@localhost ~]# mysql -u rootmysql> UPDATE mysql.user SET Password = PASSWORD('newpwd') -> WHERE User = 'root'; mysql> FLUSH PRIVILEGES; 其他设置处理: 设置选项文件,将配置文件拷贝到/etc下 [root@localhost mysql]# cp support-files/my-medium.cnf /etc/mysql.cnf 设置开机自启动 [root@localhost mysql]# cp support-files/mysql.server /etc/init.d/mysql [root@localhost mysql]# chmod +x /etc/init.d/mysql 现在可以通过服务来启动和关闭Mysql [root@localhost ~]# service mysql start [root@localhost ~]# service mysql shutdown 基本上的安装就是这样了
bitsCN.com

Hot AI Tools

Undresser.AI Undress
AI-powered app for creating realistic nude photos

AI Clothes Remover
Online AI tool for removing clothes from photos.

Undress AI Tool
Undress images for free

Clothoff.io
AI clothes remover

Video Face Swap
Swap faces in any video effortlessly with our completely free AI face swap tool!

Hot Article
Hot Tools

Notepad++7.3.1
Easy-to-use and free code editor

SublimeText3 Chinese version
Chinese version, very easy to use

Zend Studio 13.0.1
Powerful PHP integrated development environment

Dreamweaver CS6
Visual web development tools

SublimeText3 Mac version
God-level code editing software (SublimeText3)
Hot Topics
 1386
1386
 52
52

 Solution to the problem that Win11 system cannot install Chinese language pack
Mar 09, 2024 am 09:48 AM
Solution to the problem that Win11 system cannot install Chinese language pack
Mar 09, 2024 am 09:48 AM
Solution to the problem that Win11 system cannot install Chinese language pack With the launch of Windows 11 system, many users began to upgrade their operating system to experience new functions and interfaces. However, some users found that they were unable to install the Chinese language pack after upgrading, which troubled their experience. In this article, we will discuss the reasons why Win11 system cannot install the Chinese language pack and provide some solutions to help users solve this problem. Cause Analysis First, let us analyze the inability of Win11 system to
 How to uninstall wps document
Mar 20, 2024 pm 02:01 PM
How to uninstall wps document
Mar 20, 2024 pm 02:01 PM
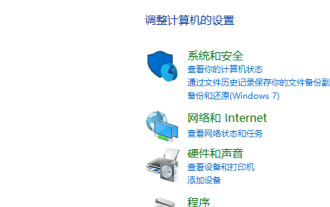
How to uninstall WPS documents: Go to the control panel and find wpsoffic to uninstall WPS. WPS has the most favorite office functions of working people. Commonly used documents, forms, presentations and other functions can be used directly, which can provide a lot of work efficiency. But many friends don’t know how to uninstall wps files, so how to uninstall wps files? Let me explain it to you below. Uninstallation is the process of removing program files, folders, and related data from a computer to free up disk space and remove software from the system. In addition, uninstallation involves deleting the device driver and related registry information from the hard disk and then removing the device from the computer's physical device. The following are the steps to uninstall WPS documents, which are suitable for uninstalling any software.
 Unable to install guest additions in VirtualBox
Mar 10, 2024 am 09:34 AM
Unable to install guest additions in VirtualBox
Mar 10, 2024 am 09:34 AM
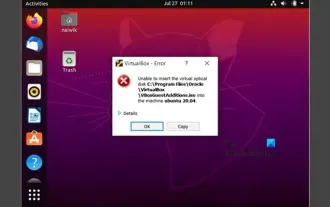
You may not be able to install guest additions to a virtual machine in OracleVirtualBox. When we click on Devices>InstallGuestAdditionsCDImage, it just throws an error as shown below: VirtualBox - Error: Unable to insert virtual disc C: Programming FilesOracleVirtualBoxVBoxGuestAdditions.iso into ubuntu machine In this post we will understand what happens when you What to do when you can't install guest additions in VirtualBox. Unable to install guest additions in VirtualBox If you can't install it in Virtua
 What should I do if Baidu Netdisk is downloaded successfully but cannot be installed?
Mar 13, 2024 pm 10:22 PM
What should I do if Baidu Netdisk is downloaded successfully but cannot be installed?
Mar 13, 2024 pm 10:22 PM
If you have successfully downloaded the installation file of Baidu Netdisk, but cannot install it normally, it may be that there is an error in the integrity of the software file or there is a problem with the residual files and registry entries. Let this site take care of it for users. Let’s introduce the analysis of the problem that Baidu Netdisk is successfully downloaded but cannot be installed. Analysis of the problem that Baidu Netdisk downloaded successfully but could not be installed 1. Check the integrity of the installation file: Make sure that the downloaded installation file is complete and not damaged. You can download it again, or try to download the installation file from another trusted source. 2. Turn off anti-virus software and firewall: Some anti-virus software or firewall programs may prevent the installation program from running properly. Try disabling or exiting the anti-virus software and firewall, then re-run the installation
 How to uninstall Quark Network Disk? How to completely uninstall Quark Network Disk
Mar 14, 2024 am 08:52 AM
How to uninstall Quark Network Disk? How to completely uninstall Quark Network Disk
Mar 14, 2024 am 08:52 AM
There are many easy-to-use network disk software on the market, such as Baidu Cloud Disk, Quark Cloud Disk, Alibaba Cloud Disk, etc. Some users have transferred the resources in Quark Network Disk to another disk and want to uninstall Quark Network Disk but find that they cannot uninstall. What is going on? This tutorial will show you how to completely uninstall Quark Network Disk. How to uninstall Quark Network Disk? 1. First open the control panel. 2. Then select “Uninstall a program”. 3. Finally, right-click and select "Uninstall" to uninstall cleanly. PS: After uninstalling, you can also use the software to scan again to see if there is any remaining garbage.
 How to install Android apps on Linux?
Mar 19, 2024 am 11:15 AM
How to install Android apps on Linux?
Mar 19, 2024 am 11:15 AM
Installing Android applications on Linux has always been a concern for many users. Especially for Linux users who like to use Android applications, it is very important to master how to install Android applications on Linux systems. Although running Android applications directly on Linux is not as simple as on the Android platform, by using emulators or third-party tools, we can still happily enjoy Android applications on Linux. The following will introduce how to install Android applications on Linux systems.
 The latest solution to the problem that Office is not cleanly uninstalled and cannot be reinstalled
Mar 13, 2024 pm 04:31 PM
The latest solution to the problem that Office is not cleanly uninstalled and cannot be reinstalled
Mar 13, 2024 pm 04:31 PM
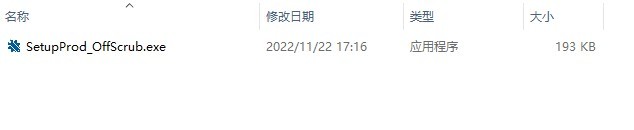
Nowadays, computers on the market will have Office software installed by default. However, some users find that the version is not easy to use. If they want to uninstall and reinstall the commonly used Office version, they are prompted that the uninstallation failed and cannot be installed. This is because the system’s own Office cannot be uninstalled. clean, causing a version conflict during installation. Let’s take a look at how to solve the problem that Office is not cleanly uninstalled and cannot be reinstalled. Method 1: Use the official office uninstall tool 1. Download the [Microsoft official office uninstall tool] to support automatic uninstallation of Office 2007~2019 series and Microsoft 365 and other software. 2. After running [SetupProd_OffScrub.exe], it will automatically
 How to install Podman on Ubuntu 24.04
Mar 22, 2024 am 11:26 AM
How to install Podman on Ubuntu 24.04
Mar 22, 2024 am 11:26 AM
If you have used Docker, you must understand daemons, containers, and their functions. A daemon is a service that runs in the background when a container is already in use in any system. Podman is a free management tool for managing and creating containers without relying on any daemon such as Docker. Therefore, it has advantages in managing containers without the need for long-term backend services. Additionally, Podman does not require root-level permissions to be used. This guide discusses in detail how to install Podman on Ubuntu24. To update the system, we first need to update the system and open the Terminal shell of Ubuntu24. During both installation and upgrade processes, we need to use the command line. a simple
