php editor Zimo will introduce to you how to associate QQ mailbox with other mailboxes. In daily life, we may use multiple email accounts. In order to facilitate management, we can associate QQ email with other email accounts. Through simple setting steps, you can send and receive emails from other mailboxes in QQ mailbox, improving work efficiency and convenience. Next, let us learn the specific steps to make using your email more convenient!
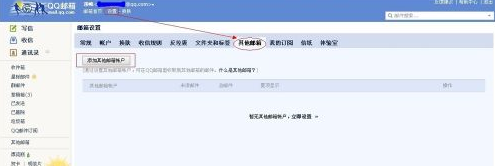
First log in to your QQ mailbox, click "Settings" - "Other Mailboxes", and you can see the associated "Other Mailboxes". There are no other emails associated with it in the picture below.

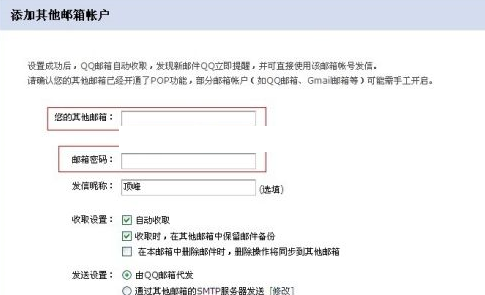
Click the "Add another email account" button, enter the other email name and password for the email, and click the "OK" button.

It prompts that the addition is successful. Set whether to start receiving emails now according to your needs.

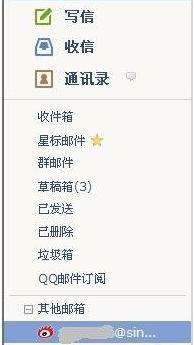
After the addition is successful, you can see the added mailbox on the left side of the mailbox. Click on it to see the emails below it.

Go back to "Other Mailboxes" and you can see the mailbox you just added. If you want to delete the mailbox, you can click "Settings" to delete it. You can also rename "Other Email".

The above is the detailed content of How to associate QQ mailbox with other mailboxes - How to associate QQ mailbox with other mailboxes. For more information, please follow other related articles on the PHP Chinese website!
 How to turn off win10 upgrade prompt
 The difference between lightweight application servers and cloud servers
 CMD close port command
 The difference between external screen and internal screen broken
 How to jump with parameters in vue.js
 Cell sum
 How to intercept harassing calls
 virtual digital currency


