php Xiaobian Xigua introduces you to the specific operations of creating a telescope effect in Adobe Premiere Pro CS6. Through this tutorial, you will learn how to use the special effects and adjustment tools in Premiere Pro CS6 to easily create an impressive telescope effect. Follow our steps to make your video production more interesting!
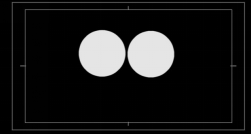
First, we import the materials used into the project panel and create a new "double telescope" sequence. Click [Subtitles - New Subtitles - Default Static Subtitles] in the menu bar, select the Ellipse tool in the pop-up dialog box, hold down the shift key at the same time, draw a circle on the screen, then click the selection tool, while holding down Alt Click and drag the circle just now to copy a circle, as shown in Figure 1. Name this subtitle "Telescope".

Next, we can drag the material "Landscape.jpg" to the Video 1 track, and drag the "Telescope" subtitle to the Video 2 track. Next, add [Video Special Effects—Keying—Track Mask Key] to the material in the video track 1. Click to select the material of video 1 track, then open the special effects control panel and set the parameters of the track mask key according to Figure 2.

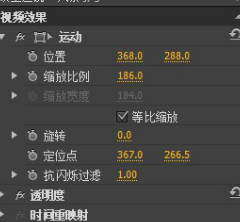
Then click to select the material of video track 1, open the special effects control panel and set the parameters of the motion effect as shown in Figure 3.

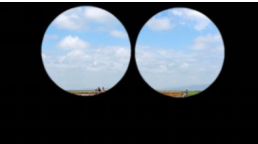
Finally, we press the space bar to preview the final effect in the program panel. As shown in Figure 4.

The above is the detailed content of How to create a telescope effect in Adobe Premiere Pro CS6 - Specific operations to create a telescope effect in Adobe Premiere Pro CS6. For more information, please follow other related articles on the PHP Chinese website!