

How to restore IE browser to automatically jump to EDGE

Solutions for IE browser to automatically jump to EDGE: 1. Change the default browser settings; 2. Prevent the Edge browser from automatically jumping; 3. Change the default opening method of hyperlinks; 4. Disable " "Fast Web Viewer"; 5. Uninstall the Edge browser; 6. Check third-party plug-ins or applications; 7. Clear the browser cache and data; 8. Use the command prompt to change the default browser.

Regarding the recovery method of IE browser automatically jumping to Edge browser, you can try the following solutions:
1. Change the default browser settings:
In Windows 10 systems, the Edge browser is often set as the default browser. You can cancel the default settings of the Edge browser and set IE as the default browser through the options in "Settings"->"Apps"->"Default Apps". This way, when you try to open a link, it will open in IE by default instead of jumping to Edge.
2. Prevent the automatic jump of the Edge browser:
Open the Edge browser, click the three dots in the upper right corner, and select "Settings".
Select "Default Browser" in the left menu.
Select "Never" in the drop-down menu behind "Have Internet Explorer open websites in Microsoft Edge."
Close the Edge browser and try to reopen the IE browser. At this point, the IE browser should be able to open successfully and will no longer automatically jump to the Edge browser.
3. Change the default opening method of hyperlinks:
When you click some links, the browser may automatically jump to the Edge browser. To solve this problem, you can try right-clicking on the hyperlink that needs to be opened and selecting "Open in new tab" or "Open in new window". This way, the link will open in the browser of your choice instead of automatically jumping to Edge.
4. Disable "Fast Web Viewer" :
"Fast Web Viewer" is a feature designed to speed up page loading, but it may sometimes cause The browser automatically jumps to Edge. You can disable this feature in the IE browser through the options in "Options" -> "Advanced" -> "Browser Features".
5. Uninstall the Edge browser:
If none of the above methods work, you may consider uninstalling the Edge browser. This will completely prevent IE browser from automatically jumping to Edge. Please note that uninstalling the Edge browser may affect the normal use of the system, so make sure to back up important data before doing this.
6. Check third-party plug-ins or applications:
Sometimes, third-party plug-ins or applications may interfere with the normal behavior of the browser. You can try uninstalling any recently installed third-party plug-ins or applications and restarting the browser to see if that resolves the issue.
7. Clear browser cache and data:
Sometimes, the browser's cache and data may cause the browser to behave abnormally. You can try clearing your browser cache and data to see if that affects your browser's redirect behavior.
8. Use the command prompt to change the default browser:
If you are using a Windows operating system, you can try using the command prompt to change the default browser . Open a command prompt (administrator rights) and enter the following command: netsh winhttp set default_browser ie. This will change the default browser in Windows 10 to Internet Explorer.
Please note that the above methods may vary depending on your operating system version, browser version, or specific settings. Before attempting any changes, it is recommended to back up important data and make sure you understand the impact of each step.
In general, if your IE browser automatically jumps to the Edge browser, you can change the default browser settings, prevent the Edge browser from automatically jumping, change the default opening method of hyperlinks, and disable " Quick Web Viewer", uninstall the Edge browser, check for third-party plug-ins or applications, clear the browser cache and data, or use command prompt to change the default browser to solve the problem.
The above is the detailed content of How to restore IE browser to automatically jump to EDGE. For more information, please follow other related articles on the PHP Chinese website!

Hot AI Tools

Undresser.AI Undress
AI-powered app for creating realistic nude photos

AI Clothes Remover
Online AI tool for removing clothes from photos.

Undress AI Tool
Undress images for free

Clothoff.io
AI clothes remover

AI Hentai Generator
Generate AI Hentai for free.

Hot Article
Hot Tools

Notepad++7.3.1
Easy-to-use and free code editor

SublimeText3 Chinese version
Chinese version, very easy to use

Zend Studio 13.0.1
Powerful PHP integrated development environment

Dreamweaver CS6
Visual web development tools

SublimeText3 Mac version
God-level code editing software (SublimeText3)
Hot Topics


 How to set full screen in Edge browser How to set full screen in Edge browser
May 09, 2024 am 10:40 AM
How to set full screen in Edge browser How to set full screen in Edge browser
May 09, 2024 am 10:40 AM
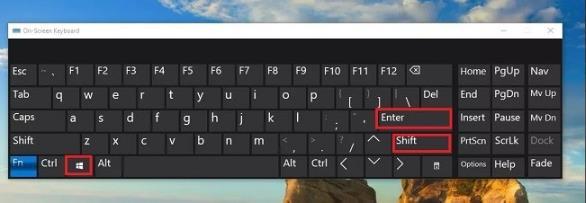
1. Use the shortcut key [Win+Shift+Enter]. 2. After entering full screen, click F11 to exit. Method 2: 1. Enter the browser and click the three dots in the upper right corner. 2. Click the magnification arrow behind zoom. 3. Press F11 after entering full screen to exit.
 How to set up microsoft edge autofill_microsoft edge autofill setting tutorial
May 09, 2024 pm 01:22 PM
How to set up microsoft edge autofill_microsoft edge autofill setting tutorial
May 09, 2024 pm 01:22 PM
1. First open Microsoft Edge, click the [...] button, and then click the [Settings] option button. 2. Then click the [Password and Autofill] button. 3. The last step is the Microsoft Edge auto-fill setting area.
 What to do if there is no sound in Edge browser What to do if there is no sound in Edge browser
May 09, 2024 pm 12:30 PM
What to do if there is no sound in Edge browser What to do if there is no sound in Edge browser
May 09, 2024 pm 12:30 PM
1. First, right-click the volume in the lower right corner and click [Open Volume Mix]. 2. Then, click the small speaker under the speaker to turn it off. 3. Again, click on the small speaker to open it, and then restart the computer. Solution 2: 1. First, right-click the volume in the lower right corner and click [Playback Device]. 2. Then, right-click the device in the list in the interface and [Disable] all devices. 3. After that, enable the applications one by one, click [OK] to restart the computer.
 How to enable microphone permission in Edge browser How to enable microphone permission
May 09, 2024 pm 04:40 PM
How to enable microphone permission in Edge browser How to enable microphone permission
May 09, 2024 pm 04:40 PM
1. First, click Start, right-click and select [Microsoft Edge]. 2. Then, click [More] to open [App Settings]. 3. Next, find and enter [Application Permissions]. 4. Then, find [Microphone] in the permissions below. 5. Finally, turn on the switch behind the microphone.
 How to reset Microsoft Edge browser_Microsoft Edge browser reset tutorial
May 09, 2024 pm 02:19 PM
How to reset Microsoft Edge browser_Microsoft Edge browser reset tutorial
May 09, 2024 pm 02:19 PM
Step 1: Open the Microsoft Edge browser (as shown in the picture). Step 2: Click the three-dot icon in the upper right corner of the browser window (as shown in the picture). Step 3: In the drop-down menu that appears, select Settings (as shown in the picture). Step 4: Then click Reset Settings (as shown in the picture). Step 5: Under [Reset Settings], click to restore the settings to their default values (as shown in the picture). Step 6: When prompted, click the [Reset] button (as shown in the picture).
 What to do if the Edge browser takes up too much memory What to do if the Edge browser takes up too much memory
May 09, 2024 am 11:10 AM
What to do if the Edge browser takes up too much memory What to do if the Edge browser takes up too much memory
May 09, 2024 am 11:10 AM
1. First, enter the Edge browser and click the three dots in the upper right corner. 2. Then, select [Extensions] in the taskbar. 3. Next, close or uninstall the plug-ins you do not need.
 How to create a shortcut in the Microsoft Edge browser_How to create a shortcut in the Microsoft Edge browser
May 09, 2024 am 11:58 AM
How to create a shortcut in the Microsoft Edge browser_How to create a shortcut in the Microsoft Edge browser
May 09, 2024 am 11:58 AM
Step 1: First, right-click an empty space on the desktop, and in the pop-up window, click [New Shortcut], as shown in the figure. Step 2: In the input box, enter [%windir%explorer.exeshell:::{4234d49b-0245-4df3-b780-3893943456e1}] and click Next, as shown in the figure. Step 3: Just click [Finish], as shown in the picture. Step 4: A folder icon named [explorer.exe] appears on the desktop, as shown in the figure. Step 5: Double-click this folder, and after opening it, you will find that the browser icon is white, as shown in the picture. Step 6: Right-click the icon, and in the pop-up option box, click
 How to assemble an acer desktop computer?
May 08, 2024 pm 08:25 PM
How to assemble an acer desktop computer?
May 08, 2024 pm 08:25 PM
How to assemble an acer desktop computer? The assembly method of Acer desktop computer is as follows: open the case, install the power supply into the case, and tighten the screws. Install the CPU onto the motherboard, making sure the pins on the CPU are aligned with the slots on the motherboard, and tighten the screws on the CPU heat sink. Install the memory module onto the motherboard, making sure that the bumps on the memory module are aligned with the slots on the motherboard. Press down hard until you hear a "pop" sound to complete the installation. Install graphics cards, sound cards, network cards and other boards onto the motherboard, making sure the screws on the boards are tightened. Install storage devices such as hard drives and optical drives into the chassis, making sure the screws are tightened. Connect the motherboard to the chassis, including power cables, hard drive cables, optical drive cables, etc. Finally, close the chassis cover and tighten the screws to complete the assembly. exist
