
 Software Tutorial
Computer Software
How to create a DVD in VideoStudio X10 - How to create a DVD in VideoStudio X10
Software Tutorial
Computer Software
How to create a DVD in VideoStudio X10 - How to create a DVD in VideoStudio X10
How to create a DVD in VideoStudio X10 - How to create a DVD in VideoStudio X10

php Xiaobian Yuzai teaches you how to create DVD in VideoStudio X10! VideoStudio X10 is a powerful video editing software. Through simple operations, you can create wonderful videos into professional DVD discs. This article will introduce in detail the operation method of creating DVD with VideoStudio X10, allowing you to easily master the skills of creating DVD. Next, let’s understand this process together!
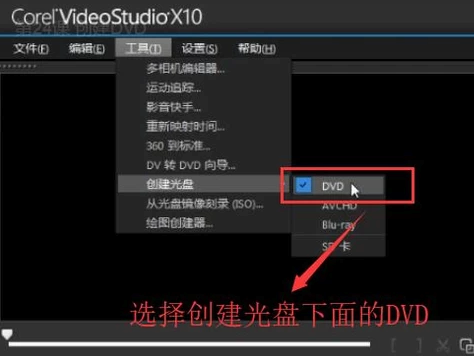
First open the VideoStudio X10 software, click the Tools menu at the top, and select the DVD option under Create Disc, as shown in the figure below
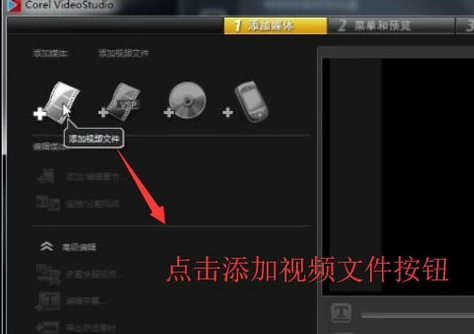
Next, click the Add Video Folder button in the upper left corner of the pop-up interface, as shown in the figure below
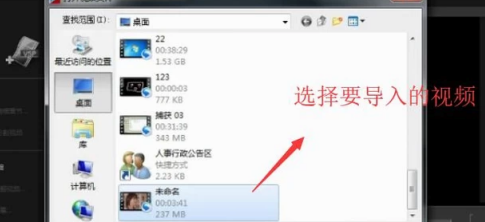
Then in the open video file interface that pops up, we select the video to add, as shown in the figure below
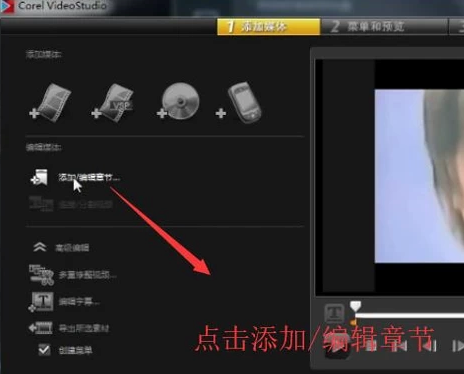
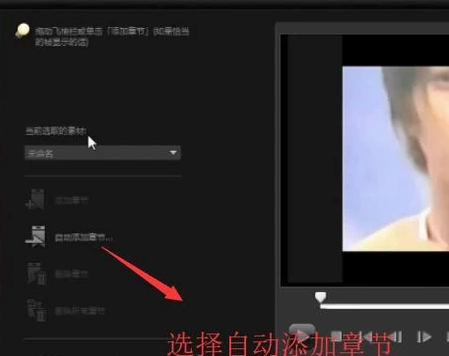
After the video is imported, we click Add/Edit Chapter in the Edit Media column, as shown in the figure below
In the pop-up add/edit chapter interface, we click the Automatically add chapter button, as shown in the figure below
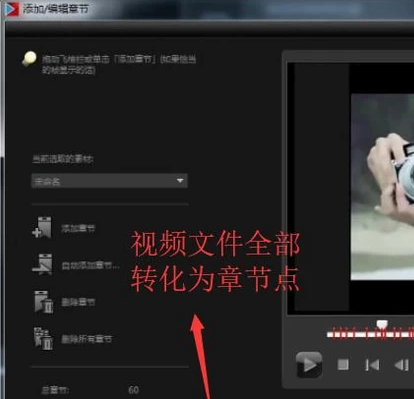
Next, VideoStudio X10 will convert all video files into chapters, as shown in the figure below, then click the Next button
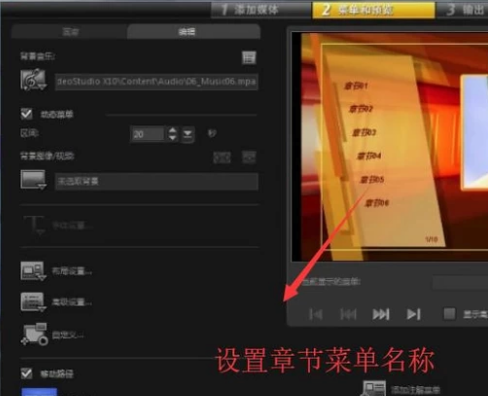
Then we will enter the menu and preview interface. Here we need to set the name of the chapter. Just double-click to edit, as shown in the figure below.
Finally, enter the output interface and set the location information of the DVD output to export the DVD, as shown in the figure below.

The above is the detailed content of How to create a DVD in VideoStudio X10 - How to create a DVD in VideoStudio X10. For more information, please follow other related articles on the PHP Chinese website!

Hot AI Tools

Undresser.AI Undress
AI-powered app for creating realistic nude photos

AI Clothes Remover
Online AI tool for removing clothes from photos.

Undress AI Tool
Undress images for free

Clothoff.io
AI clothes remover

AI Hentai Generator
Generate AI Hentai for free.
Hot Article
Hot Tools

Notepad++7.3.1
Easy-to-use and free code editor

SublimeText3 Chinese version
Chinese version, very easy to use

Zend Studio 13.0.1
Powerful PHP integrated development environment

Dreamweaver CS6
Visual web development tools

SublimeText3 Mac version
God-level code editing software (SublimeText3)
Hot Topics
 1369
1369
 52
52

 How to record screen video with OPPO phone (simple operation)
May 07, 2024 pm 06:22 PM
How to record screen video with OPPO phone (simple operation)
May 07, 2024 pm 06:22 PM
Game skills or teaching demonstrations, in daily life, we often need to use mobile phones to record screen videos to show some operating steps. Its function of recording screen video is also very good, and OPPO mobile phone is a powerful smartphone. Allowing you to complete the recording task easily and quickly, this article will introduce in detail how to use OPPO mobile phones to record screen videos. Preparation - Determine recording goals You need to clarify your recording goals before you start. Do you want to record a step-by-step demonstration video? Or want to record a wonderful moment of a game? Or want to record a teaching video? Only by better arranging the recording process and clear goals. Open the screen recording function of OPPO mobile phone and find it in the shortcut panel. The screen recording function is located in the shortcut panel.
 What is the difference between quad-core and eight-core computer CPUs?
May 06, 2024 am 09:46 AM
What is the difference between quad-core and eight-core computer CPUs?
May 06, 2024 am 09:46 AM
What is the difference between quad-core and eight-core computer CPUs? The difference is processing speed and performance. A quad-core CPU has four processor cores, while an eight-core CPU has eight cores. This means that the former can perform four tasks at the same time, and the latter can perform eight tasks at the same time. Therefore, an octa-core CPU is faster than a quad-core CPU when used to process large amounts of data or run multiple programs. At the same time, eight-core CPUs are also better suited for multimedia work, such as video editing or gaming, as these tasks require higher processing speeds and better graphics processing power. However, the cost of eight-core CPUs is also higher, so it is very important to choose the right CPU based on actual needs and budget. Is a computer CPU better, dual-core or quad-core? Whether dual-core or quad-core is better depends on your usage needs.
 How to change TikTok timing settings
May 04, 2024 am 01:06 AM
How to change TikTok timing settings
May 04, 2024 am 01:06 AM
There are two ways to change the timing settings of Douyin: Video editing page: Click the "Scheduled Release" option on the editing page to set the release time. Video management page: Long press the video to select "Edit", click "Schedule Release" to reset the release time.
 How to set up Douyin to schedule videos
May 04, 2024 am 03:33 AM
How to set up Douyin to schedule videos
May 04, 2024 am 03:33 AM
The steps for scheduled video publishing on Douyin are as follows: Upload video Edit video scheduled publishing (set publishing time) Confirm publishing (time and content)
 Which one is better, Snapdragon 8gen3 or third generation Snapdragon 8s?
May 05, 2024 am 01:24 AM
Which one is better, Snapdragon 8gen3 or third generation Snapdragon 8s?
May 05, 2024 am 01:24 AM
Snapdragon 8 Gen 3 is superior in overall performance, while Snapdragon 8s Gen 3 has more advantages in power consumption, heat generation and connectivity. Both support high-resolution cameras, advanced image processing capabilities, and powerful AI engines. Snapdragon 8 Gen 3 is equipped with an X70 modem, while Snapdragon 8s Gen 3 is equipped with an X65 modem.
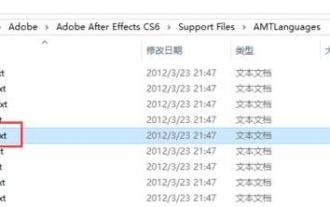 How to switch language in Adobe After Effects cs6 (Ae cs6) Detailed steps for switching between Chinese and English in Ae cs6 - ZOL download
May 09, 2024 pm 02:00 PM
How to switch language in Adobe After Effects cs6 (Ae cs6) Detailed steps for switching between Chinese and English in Ae cs6 - ZOL download
May 09, 2024 pm 02:00 PM
1. First find the AMTLanguages folder. We found some documentation in the AMTLanguages folder. If you install Simplified Chinese, there will be a zh_CN.txt text document (the text content is: zh_CN). If you installed it in English, there will be a text document en_US.txt (the text content is: en_US). 3. Therefore, if we want to switch to Chinese, we need to create a new text document of zh_CN.txt (the text content is: zh_CN) under the AdobeAfterEffectsCCSupportFilesAMTLanguages path. 4. On the contrary, if we want to switch to English,
 How to set TikTok screen video size
May 04, 2024 am 03:18 AM
How to set TikTok screen video size
May 04, 2024 am 03:18 AM
There are two steps to setting the screen video size on Douyin: 1. Select the video ratio (16:9, 9:16 or 1:1); 2. Adjust the video size to ensure it fits the screen ratio. Recommended optimal screen video sizes are 16:9 (landscape), 9:16 (portrait), or 1:1 (square). Note: Video size will affect clarity and smoothness, use video editing software to adjust video size for best results. Douyin compresses the uploaded video, thus ensuring that the original video is of sufficient high quality.
 How to change video code number on Douyin
May 04, 2024 am 09:09 AM
How to change video code number on Douyin
May 04, 2024 am 09:09 AM
How to change the code number of Douyin videos: Step 1: Select the video; Step 2: Click Edit; Step 3: Select "Video Editing"; Step 4: Adjust the code number (recommended resolution: High 720p, Medium 480p, Low 360p); Step 5: Save changes.
