


Why won't my laptop start up after pressing the power button?
There could be several reasons why your Windows laptop won't boot. Memory failure, dead battery, faulty power button, or hardware issues are all common causes. Here are some solutions to help you resolve this issue.
Laptop won't start after pressing power button
If your Windows laptop still won't start after pressing the power button, you can take the following steps to resolve the issue:
1] Is your laptop fully charged?
The first thing to do is check that your laptop is fully charged. If the battery is drained, the laptop will not start. You need to connect the charger and make sure the laptop is getting power. Wait a moment and observe if there are any changes. If there is no change, you can continue to the next step.
2]Perform a hard reset
Attempting a hard reset may help resolve this issue. A hard reset removes any residual charge that may be present in the capacitors that may be causing the laptop to start up. Perform a hard reset and see if that changes the status quo. Follow these steps:
- Turn off your laptop.
- Remove all peripherals and chargers.
- Remove the battery. If your laptop has a non-removable battery, skip this step.
- Press and hold the power button for 30 to 45 seconds.
- Connect the charger and turn on the laptop.
Some laptops are equipped with a small hole called a reset button. You can check to see if your laptop has a similar button. If available, you can perform a hard reset by inserting a pin into the hole and pressing the button. This process will reset your laptop. Afterwards you can check if any changes occurred.
3]Clean your laptop
After regular use of a laptop, dust and dirt will accumulate, which may cause the power button to malfunction. It is crucial to clean your laptop regularly to eliminate these build-ups. Therefore, it is recommended that you clean your laptop regularly. If you're not good at cleaning your laptop, consider getting professional help. This ensures your laptop remains in good condition and extends its lifespan.
4]Reseat the memory
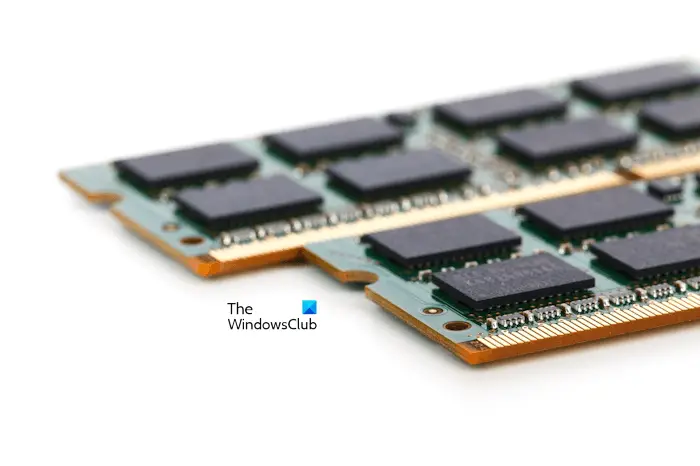
If you have recently upgraded your computer's memory, it may malfunction or be installed incorrectly. In order to solve this problem, it is recommended that you reseat the memory module. Please remove the memory module first and then re-insert it to make sure the slot is correct and inserted in place. You can check your motherboard manual for the correct installation method. If your computer has multiple memory sticks, it is recommended to remove and reinsert the memory sticks one by one.
5]Transparent CMOS battery
Clearing the CMOS battery will reset all BIOS settings to their default settings. If your laptop won't boot due to misconfigured BIOS settings, resetting the BIOS to its default values can resolve the issue.
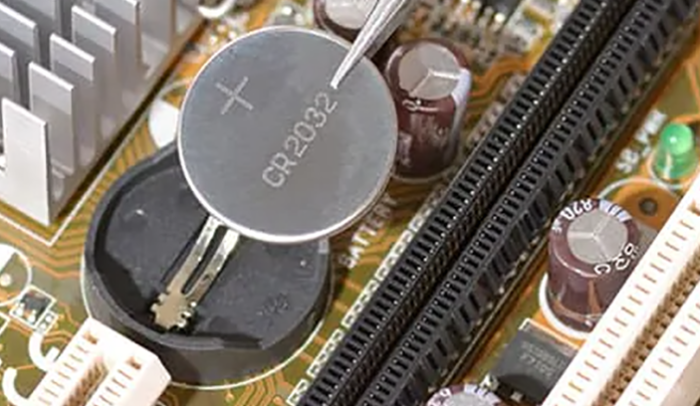
You can reset the BIOS settings to their default values by removing and reinserting the cmos battery. This cmos battery is a small coin-shaped battery. To clear the cmos battery you must open the computer case. Turn off the computer and disconnect the power cord to avoid electric shock.
Now, find the cmos battery on the motherboard, remove it, and wait for a few minutes. This will reset the BIOS to its default settings. Reinsert the battery and try starting again.
Be sure to pay attention to the direction of the and - terminals on the battery. Install the battery in the correct orientation; otherwise, your computer will not start.
6]Bring your laptop for repair
If none of these methods work for you, then we recommend that you take your laptop for repair. They will correctly diagnose the problem and recommend the best solution, which may include repairs or recommend replacement.
The above is the detailed content of Why won't my laptop start up after pressing the power button?. For more information, please follow other related articles on the PHP Chinese website!

Hot AI Tools

Undresser.AI Undress
AI-powered app for creating realistic nude photos

AI Clothes Remover
Online AI tool for removing clothes from photos.

Undress AI Tool
Undress images for free

Clothoff.io
AI clothes remover

AI Hentai Generator
Generate AI Hentai for free.

Hot Article

Hot Tools

Notepad++7.3.1
Easy-to-use and free code editor

SublimeText3 Chinese version
Chinese version, very easy to use

Zend Studio 13.0.1
Powerful PHP integrated development environment

Dreamweaver CS6
Visual web development tools

SublimeText3 Mac version
God-level code editing software (SublimeText3)

Hot Topics


I repaired an Acer laptop and had to turn off secure boot when entering PE. I recorded how to turn off secure boot and remove the password from Bios. Turn on the computer and when the screen is not on, keep pressing the F2 key to enter the BIOS. On Acer laptops, turn off Secure Boot and press the arrow keys to switch to Boot. If SecureBoot is gray and unclickable, switch to the Security page, select SetSupervisorPassword and press Enter to set the password. Then switch to Boot, SecureBoot can be selected as Disabled, and press F10 to save. Modify and clear the BIOS password on your Acer notebook. Switch to the Security menu and select SetSupervisorPasswo.

How to set up the U disk boot in the HP notebook bios (how to enter the HP computer bios) and then insert the U disk to be booted first into the USB port of the notebook. If you want to install the system, the system program must have been prepared in the U disk. First, open the laptop. Make sure the laptop is turned off. Setting the bios must be done with the computer turned off. Then insert the U disk that you want to boot first into the USB port of the notebook. If you want to install the system, the prerequisite is that the system program has been prepared in the U disk. Take the HP ProDesk400G5SFF desktop computer as an example. Set the BIOS disk startup method: First, restart the computer and wait for the startup screen to appear. There are two ways to set up USB disk startup on HP notebooks. One is to directly press the shortcut key to select

In March this year, we brought a review of the COLORFIRE MEOWR15 2024 all-in-one gaming laptop. COLORFIRE is a personalized brand specially created for young users under Colorful. MEOWR15 not only has a good-looking and trendy appearance, but also has a high-performance configuration of Ryzen 78845HS+RTX4070. . Recently, the larger MEOWR16 all-round notebook has also been officially launched. It is equipped with Ryzen 97845HX processor + RTX4070 and a 230W power adapter, which has better performance release. The lowest initial price of the 618 is only 6,999 yuan. Next, I will bring you the hands-on experience of this new product. The exterior design I received is COLORFIREMEO in Snow Shadow White color.

How to enter bios after assembling a computer? Before entering the BIOS, you need to make sure that the computer is completely shut down and powered off. Here are several common ways to enter the BIOS: 1. Use shortcut keys: Most computer manufacturers will display a prompt message at startup telling you which key to press to enter the BIOS settings. Usually the F2, F10, F12 or Delete key. After pressing the appropriate keys, you should be able to see a screen with information about your computer's hardware and BIOS settings. 2. Use the button on the motherboard: Some computer motherboards have a dedicated button for entering BIOS settings. This button is usually labeled "BIOS" or "UEFI". After pressing the button you should be able to see

How to cancel the MSI motherboard icon when booting 1. Press the DEL key when booting to enter the BIOS. Generally, in the "Advanced Features" item, you can find the words MSI motherboard LOGO screen. Select DISABLED, save and exit. There will no longer be this MSI motherboard LOGO screen when you turn on the computer in the future. MSI motherboard refers to the motherboard brand developed by MSI (MSI Technology Company). 2. The logo displayed when the computer is turned on is basically that of the motherboard manufacturer. You can set QUICKPOST to DISENABLE in the BIOS, so that the logo will generally no longer be displayed. It will display computer configuration-related information and give you more details. 3. First, teach you how to flash the BIOS in Windows environment. First: Go online

1. Gigabyte motherboard 1. First, we restart the computer and use the keyboard [DEL] to enter the BIOS settings when restarting. 2. Find and enter the [Settings] tab above. 3. Then find and enter [Miscellaneous] under settings. 4. Set [Intel Platform Trust Technology (PTT)] to [Enabled]. 5. After the settings are completed, use the keyboard [F10] to save, and then click [YES] to exit. 2. ASUS motherboard 1. First restart the computer and continuously tap [del] on the keyboard to enter the bios settings when booting. 2. Click [AdvancedMode] or press [F7] to find [A

1. Win11 does not have very high requirements for the motherboard. You can first download healthcheck or whynotwin11 to check whether your other hardware devices support it (you can download it from this site). 2. If other conditions are met and only tpm does not meet the requirements, you can enable tpm in the bios settings. 3. Restart the system, and then press [DEL] on the keyboard to enter the BIOS settings when the logo pops up. 4. Enter the [Settings] option and [Miscellaneous] option in sequence. 5. Find [Intel Platform Trust Technology (PTT)] below and set it to [Start]. 6. If it is an AMD platform, then

Reinstalling the system is a problem that many computer users often encounter. Whether it is due to system crash, poisoning or wanting to upgrade the system, reinstalling the system is a good choice. However, many people encounter various problems when reinstalling the system, such as not knowing how to set up the BIOS, not knowing how to choose a suitable installation disk, etc. Today, we will talk about some things you must know when reinstalling the system from a USB flash drive, and teach you how to set up the BIOS correctly and successfully complete the system reinstallation. Tool materials: System version: Windows1020H2 Brand model: Lenovo Xiaoxin Air14 Software version: Pocket machine One-click reinstallation of system software v1.0 1. Preparation 1. Prepare a U disk with a capacity of no less than 8GB, preferably USB3. 0, so the speed will be faster
