
php editor Zimo brings you 5 practical Word tips to take your office efficiency to the next level! From using shortcut keys to adjusting document formats, these tips will not only save you valuable time, but also make your work easier and more efficient. If you’re not already familiar with these techniques, that’s a shame! Hurry up and learn with us to take your Word skills to the next level!
Tip 1: Add one or more watermarks
If you only need to add a watermark to a Word document, first click [Watermark] in the [Design] list of the menu tab;

After the dialog box pops up, you can quickly select the watermark that comes with the document, or you can select [Custom Watermark] to set the watermark style you want.
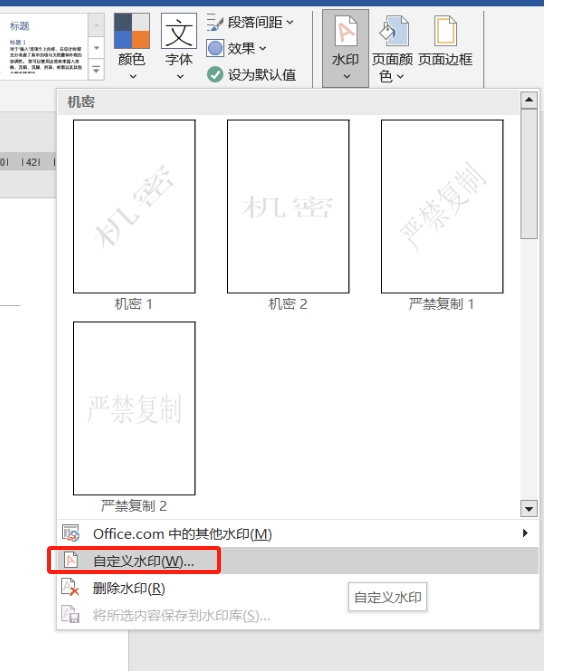
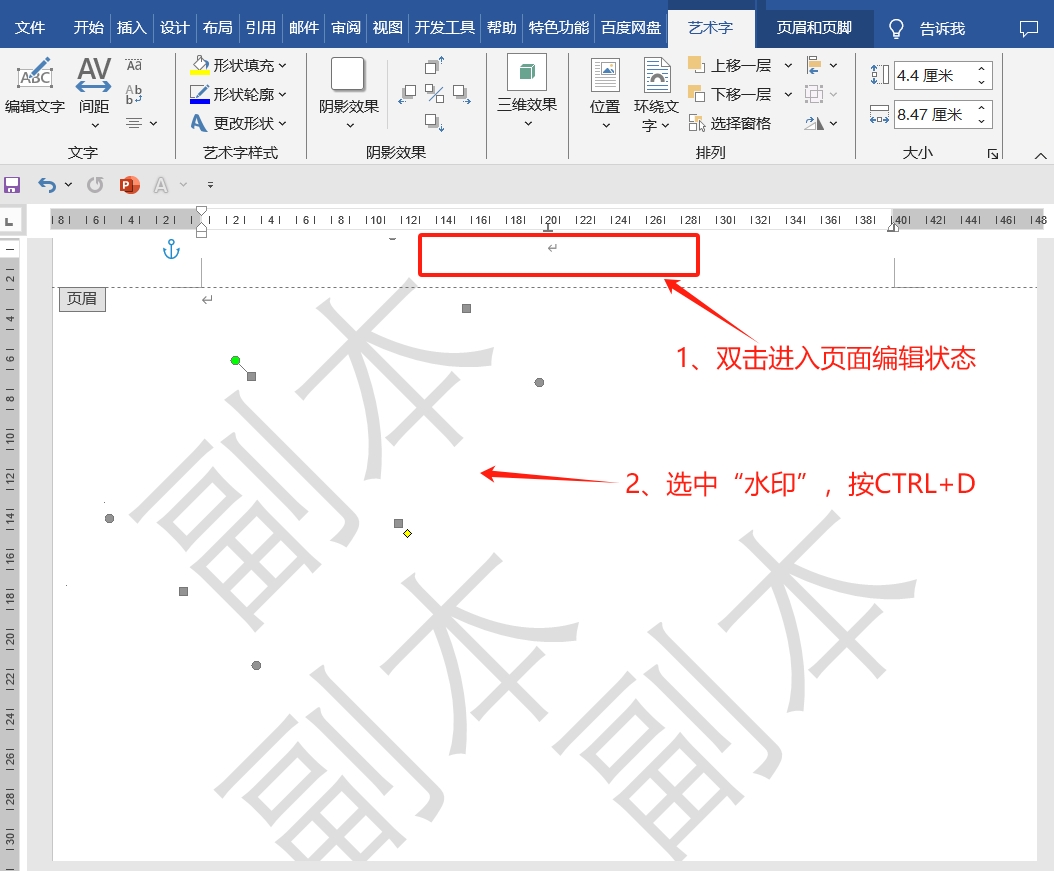
The above method can only add one watermark. If you want to add multiple watermarks, you can use the above method to add a watermark, double-click the header position to enter the editing state, then select the watermark with the mouse, and then press the shortcut key [CTRL D]. You can copy multiple watermarks, adjust the position of the watermarks, and close the header.
Tip 2: Unlimited format brushes
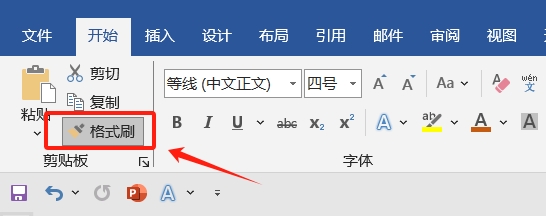
After editing a document, or after copying and pasting content, we often need to unify the font, font size, thickness, line spacing, etc. of the text and standardize the format. At this time, we often use the "Format Painter".
Many people know that after clicking "Format Refresh" once, they can only refresh it once. If there is a lot of content, it will be very time-consuming. In fact, as long as you double-click "Format Painter", you can perform "Format Painter" unlimited times without having to click repeatedly.
Tip 3: Disable editing and modification of the document
If you do not want the edited Word document to be modified at will, we can set up "restriction protection" so that only the correct password can be entered before the document can be edited or modified.
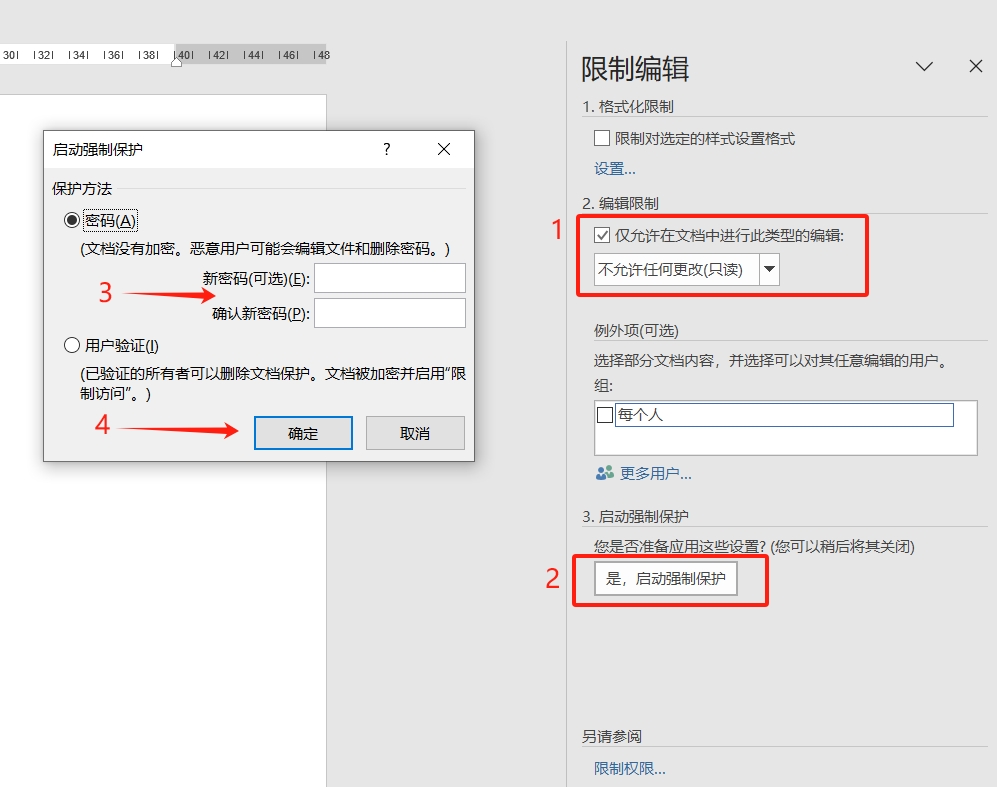
After opening the Word document, click [Restrict Editing] in the [Review] list of the menu tab to set it.

After the [Restrict Editing] interface appears, check [Allow only this type of editing in the document], and select [Do not allow any changes (read-only)] in the list below, and then click [Yes, start forced protection] 】.
After the dialog box pops up, enter the password you want to set in the password field, enter it again, and finally click [OK] to set it.
You cannot make edit changes after saving the document and opening it again.
If you no longer need "restriction protection" in the future, you should click [Restrict Editing] in the [Review] list of the menu tab, then click [Stop Protection] in the interface, and enter the originally set password in the password field after the dialog box pops up. Password, "restriction protection" will be lifted, and editing and changes can be made.
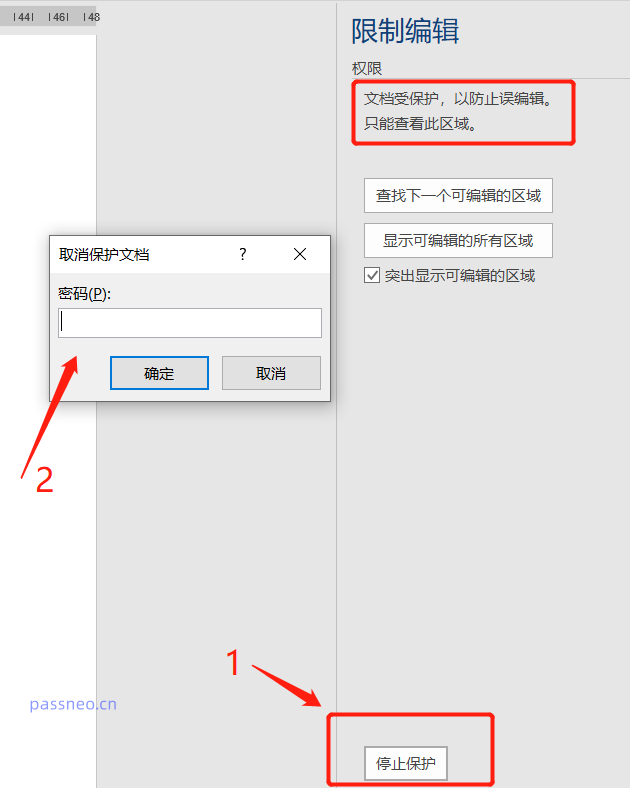
It should be noted that after setting the password, remember to remember it or save it, because there is no "forgot password" option in Word documents, and you cannot cancel "restriction protection" in Word documents without a password.
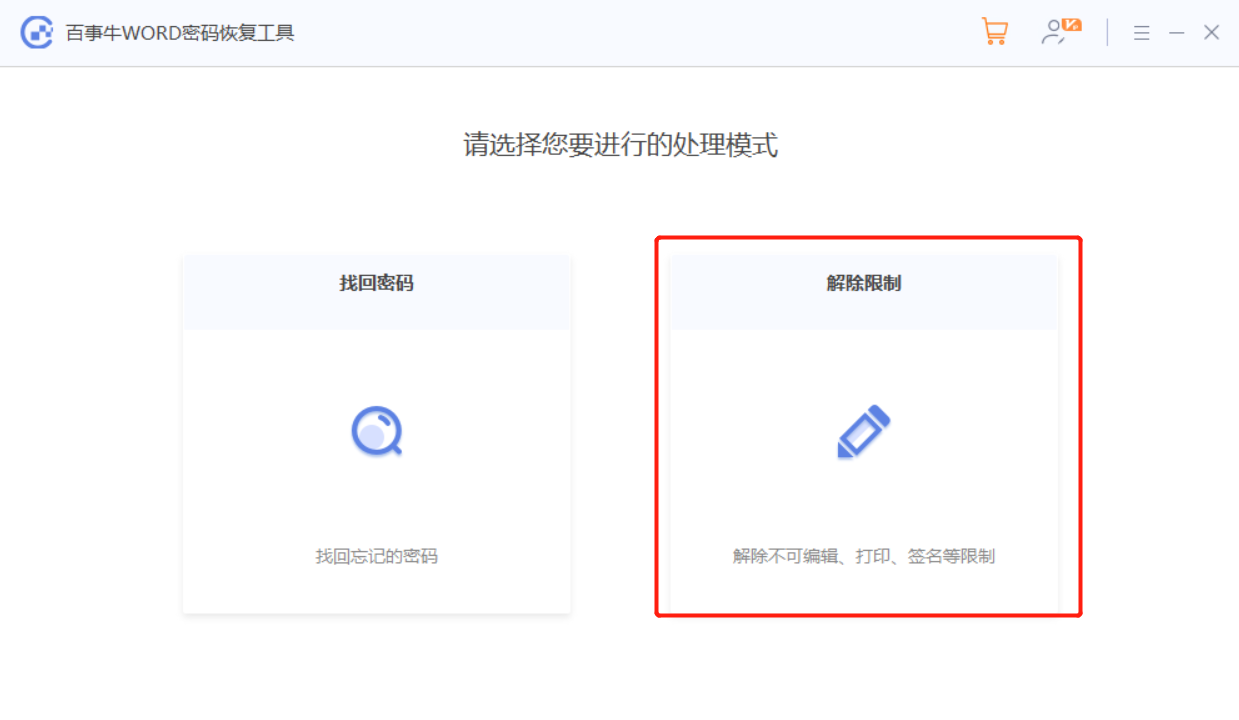
If there is a "forgot password" situation, we need to use tools to solve it. Taking PepsiNiu Word Password Recovery Tool as an example, you can directly remove the "restriction protection" of a Word document without a password.
Just select the [Unrestriction] module in the tool and then import the Word document.
Tip 4: Hide document content
If there is some content that you don’t want to make public or see when editing a Word document, we can set this part of the content to be hidden.
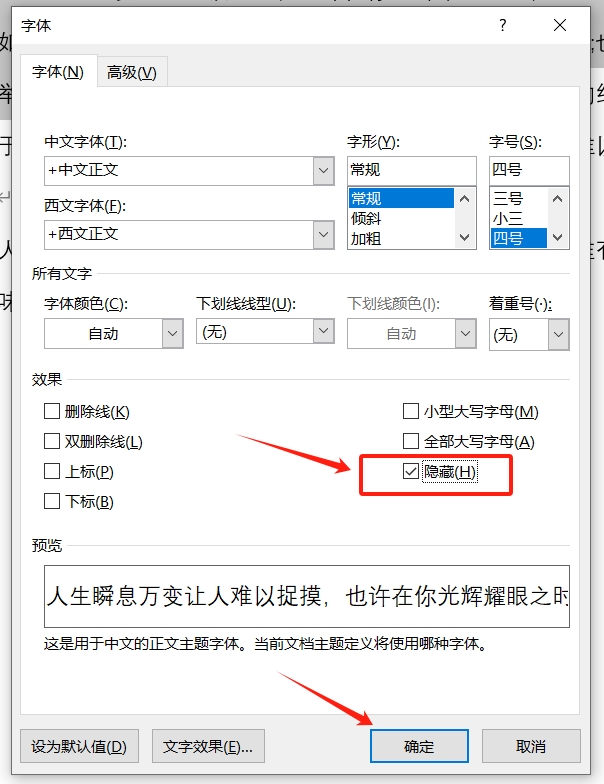
First select the content that needs to be hidden, then right-click the mouse and select [Font]. After the dialog box pops up, check the [Hide] checkbox.
There is no need to hide it later. You can select the full text, then open the [Font] dialog box and remove the [Hide] check.
Tip 5: Export pictures in Word documents in batches
If you want to export pictures in a Word document, you can click on the picture and save it through "Save As". However, if there are many pictures, it will be time-consuming to operate one by one. In this case, we can save them in batches through the following method.
First, change the suffix of the Word document to the "RAR" compressed file format;
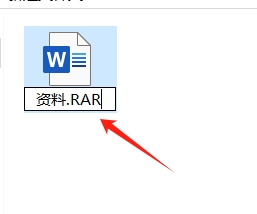
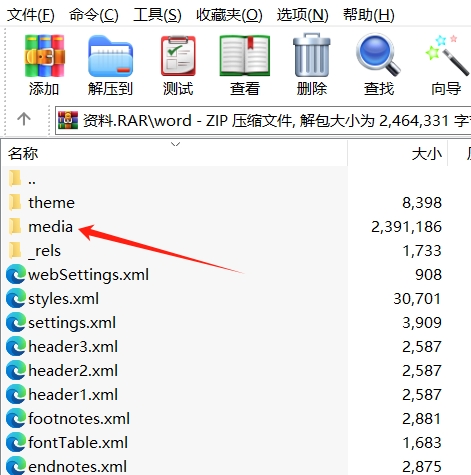
Then, use the decompression software to open the compressed package with the changed suffix, find the [Word] folder and open it;
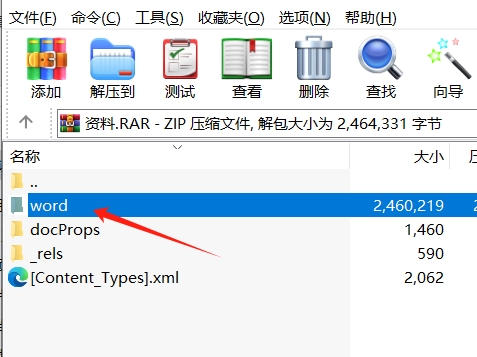
Open the [Word] folder, then find the [media] folder and open it, you can see all the pictures in the Word document.
I’ll share it here today. Have you learned these 5 Word skills?
The above is the detailed content of 5 practical tips for Word, it would be a shame not to know them!. For more information, please follow other related articles on the PHP Chinese website!


