
 Software Tutorial
Computer Software
How to remove write protection from USB flash drive? (How to remove write protection on USB flash drive)
Software Tutorial
Computer Software
How to remove write protection from USB flash drive? (How to remove write protection on USB flash drive)
How to remove write protection from USB flash drive? (How to remove write protection on USB flash drive)

php editor Yuzai will help you solve the problem of U disk write protection. USB flash drive write protection is a function to protect data security, but it sometimes brings inconvenience. There are many ways to remove the write protection of a USB flash drive, including through the registry, command prompt, disk management, etc. This article will introduce in detail different methods to remove write protection, allowing you to easily solve the problem of U disk write protection. Come and take a look!

Solution 1: Turn off the write protection switch
First, check that the write-protect switch on the side of the USB flash drive is turned on. If so, just physically close it. Then connect the unlocked USB flash drive to the computer to see if the write-protection status of the USB flash drive has been cancelled.
Option 2: Modify the registry
1. Enter "regedit" in the search box of the Start menu bar to open the Registry Editor.
2. Then expand HKEY_LOCAL_MACHINE—SYSTEM—CurrentControlSet—Control—StorageDevicePolicies in the registry editor.
3. Change the key value named "WriteProtect" in the right window to "0".

Note: If you don’t see the StorageDevicePolicies item, you can right-click Control to create a new item and name it StorageDevicePolicies. After the creation is successful, double-click to open the item, right-click the blank space on the right, click New-DWORD Value, and name it WriteProtect.
4. After completion, exit the registry, restart the computer, and check whether the write protection of the USB disk has been removed.
Option 3: Run anti-virus software
If the USB disk cannot be modified, it may also be because the computer itself is infected with a virus. We can first use anti-virus software to try to eliminate the virus. Generally, the virus disappears and the USB disk can return to normal.
Option 4: Change disk policy
We can remove the write protection of the USB drive by changing the disk policy. Open My Computer, find the USB drive and select the properties window in the USB drive letter. Then click on Hardware, Properties, Policy, and change it in the policy item to "Better performance" will do.
Option 5: Remove the write protection set through the computer
First, right-click the USB drive letter, and then click Properties in the options. Enter the properties interface, click Security at the top of the window, and then click Edit in the middle of the Security tab. Finally, click everyone in the window that opens, check the completion control in everyone's permissions, and click OK to complete.
Option 6: Use the Diskpart command to remove write protection
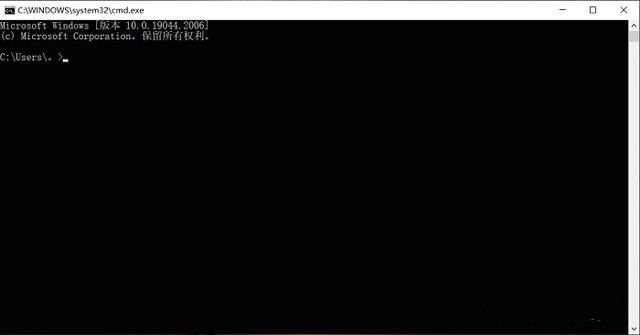
Press the Win R shortcut key combination to open Run, enter cmd and click OK. In the window that opens, enter diskpart, list disk and click OK. Remember to remember the number of the write-protected drive.
Then enter select disk 0 (0 refers to the number of the write-protected drive) and attributes disk clear readonly, and remember to click the enter key in sequence.
Option 7: Format the USB disk
If none of the above solutions are feasible, you can try formatting the USB flash drive, but formatting the USB flash drive will clear the data inside, so try to take out the data in the USB flash drive before formatting.
To format a USB flash drive, you first need to insert the USB flash drive into the computer, then enter "Control Panel" in the desktop search box and click to open it. Then click "System and Security", "Create and format hard disk partition". Finally, right-click the USB drive in the pop-up window, select "Format", and click "Yes" to complete.
How to remove the data from the USB flash drive?
During the process of removing the write protection of the USB flash drive, the data on the USB flash drive may be damaged or the data may be lost directly. Therefore, we recommend that you use professional tools to recover the data first and then remove the write protection.
The above is the detailed content of How to remove write protection from USB flash drive? (How to remove write protection on USB flash drive). For more information, please follow other related articles on the PHP Chinese website!

Hot AI Tools

Undresser.AI Undress
AI-powered app for creating realistic nude photos

AI Clothes Remover
Online AI tool for removing clothes from photos.

Undress AI Tool
Undress images for free

Clothoff.io
AI clothes remover

Video Face Swap
Swap faces in any video effortlessly with our completely free AI face swap tool!

Hot Article
Hot Tools

Notepad++7.3.1
Easy-to-use and free code editor

SublimeText3 Chinese version
Chinese version, very easy to use

Zend Studio 13.0.1
Powerful PHP integrated development environment

Dreamweaver CS6
Visual web development tools

SublimeText3 Mac version
God-level code editing software (SublimeText3)
Hot Topics
 1386
1386
 52
52

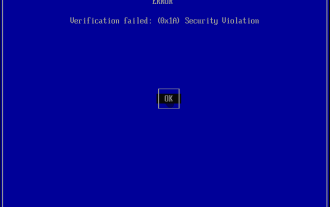 Ventoy secure boot settingsSecure Boot
Jun 18, 2024 pm 09:00 PM
Ventoy secure boot settingsSecure Boot
Jun 18, 2024 pm 09:00 PM
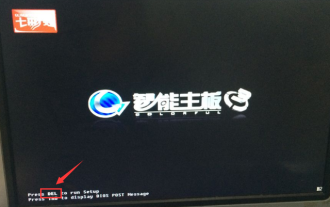
Ventoy is a USB boot tool that can directly boot ISO/WIM/IMG/VHD(x)/EFI and other types of files in the USB flash drive. It is very easy to use. Laptops have secure boot turned on by default. If they are not turned off or cannot be turned off, they cannot be booted from a USB device. Ventoy also supports secure boot. The principle is to inject a GRUB installation certificate into the current computer. As long as your computer After being injected once, any USB disk PE booted based on grub can pass. The official description of Ventoy is a GIF image. The playback speed is too fast and you may not be able to remember it. The editor has divided the GIF image to make it easier to understand. Ventoy secure boot has EnrollKey and Enro
 Colorful motherboard boot USB flash drive shortcut key
Mar 19, 2024 pm 12:55 PM
Colorful motherboard boot USB flash drive shortcut key
Mar 19, 2024 pm 12:55 PM
Hello everyone, today I will share a graphic tutorial from Xiaobai System official website (xiaobaixitong.com). Colorful motherboard is a computer motherboard brand with very good performance, and it has certain advantages in all aspects, and its price-performance ratio is also very high. So here comes the question, how to set the USB boot option for Colorful motherboard? Don’t worry, the editor will show you how to set up the USB disk boot option in Colorful. Teach you step by step how to set the U disk boot option for Colorful motherboard: First, insert the U disk into the computer, then turn on the computer and quickly and intermittently press the startup shortcut key to enter the BIOS setting interface (please note: usually it will be displayed below the computer brand logo Start hotkey hints). 2. Enter BIOS settings
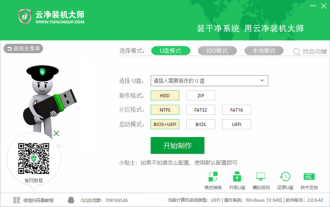 What should I do if the system installation is too slow when reinstalling the system from USB disk in System Home?
Mar 01, 2024 pm 11:30 PM
What should I do if the system installation is too slow when reinstalling the system from USB disk in System Home?
Mar 01, 2024 pm 11:30 PM
When reinstalling the system, many users use the USB flash drive reinstallation system of System Home. However, when they reinstall the USB flash drive, they find that the loading speed is too slow. So how should we deal with it? What should I do if the system installation is too slow when reinstalling the system via USB flash drive in System Home? Reason introduction: 1. The transmission speed of the USB flash drive itself is slow, especially when processing large files, and the operation time is very long. 2. The USB interface of the computer and the extension cord will cause The signal is attenuated, making the USB disk reinstallation system installation too slow. Solution: 1. The U disk can only be used as a PE system disk. Just put the system GHO file into the U disk. 2. When the user starts the U disk and enters the PE system, he directly copies GHO to the D disk. 3. When restoring the system, you can directly quote the GHO file of the D drive
 How to download qq music to USB flash drive? -How to download qq music to USB disk
Apr 01, 2024 am 10:11 AM
How to download qq music to USB flash drive? -How to download qq music to USB disk
Apr 01, 2024 am 10:11 AM
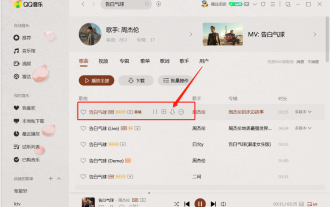
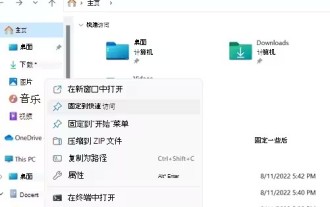
1. Open QQ Music software, enter the name of your favorite song in the search bar, and click the download button. 2. Open the folder where the downloaded songs are stored. 3. Copy the downloaded songs to the USB flash drive, and that’s it! Of course, you need to open the U disk first, then open the U disk in "My Computer" and paste it.
 How to delete USB disk files? What should I do if the USB disk files cannot be deleted?
Mar 14, 2024 pm 08:49 PM
How to delete USB disk files? What should I do if the USB disk files cannot be deleted?
Mar 14, 2024 pm 08:49 PM
There are many important files stored in the USB flash drive, and there are also some useless files. Cleaning the USB flash drive regularly can better manage the USB flash drive resources. However, some users found that some files in the USB disk cannot be deleted. What is going on? This tutorial will bring you the solution, come and take a look. 1. Check whether the file is occupied 1. Open the file explorer and find the path of the U disk. 2. Right-click the file you want to delete and select "Properties". 3. In the "Properties" window, switch to the "Security" tab. 4. Click the "Advanced" button to view the file permissions. 5. Ensure that the current user has
 How to download soda music to USB disk
Feb 24, 2024 pm 12:10 PM
How to download soda music to USB disk
Feb 24, 2024 pm 12:10 PM
Soda Music can download music to a USB flash drive, so how do you download it to a USB flash drive? Users need to click on the music, then click on the three dots on the right side of the music, and click on download. This introduction to the method of downloading to a USB disk can tell you how to operate it. The following is a detailed introduction, so take a look! Tutorial on using soda music. How to download soda music to USB flash drive. Answer: Click the three dots on the right side of the music in the music, and click download inside. The specific method: 1. First, click the music button below. 2. After selecting a piece of music, click the three dots on the right. 3. After entering, click the download button inside.
 U disk file shortcut icon does not appear
Feb 14, 2024 am 11:36 AM
U disk file shortcut icon does not appear
Feb 14, 2024 am 11:36 AM
I believe that many users have encountered the problem that the computer does not display the USB flash drive icon when inserting the USB flash drive into the computer. This problem has caused many users to be very distressed. So how to open the USB flash drive when the USB flash drive does not display the icon? What about the USB flash drive? This article will share with you the tutorial on how to open the USB flash drive when the computer does not display the USB flash drive icon. First, we need to confirm that the USB flash drive icon is not displayed but the computer has recognized the USB flash drive. This can be confirmed through the Computer Management window. Also understand the assigned drive letter. The current drive letter is G: (as shown in the figure below). Solution: Method 1: 1. Use the key combination (win key + r) to open the run window, enter the cmd command, and then click the "OK" button, as shown below: 2. In the opened administrator dos command window, enter " exp
 What does it mean when a disk is read-only?
Feb 18, 2024 pm 09:30 PM
What does it mean when a disk is read-only?
Feb 18, 2024 pm 09:30 PM
What does it mean when a disk is write-protected? A write-protected disk (Write-ProtectedDisk) refers to a state in which the user cannot perform write operations on the disk. When a disk is set to write-protect, users can only read the data on the disk but cannot delete, modify, or add new files. This state is typically used to protect important system files, software programs, or sensitive data on storage devices. There are many reasons why a disk may be write-protected. One common situation is to prevent data loss or damage caused by misuse. For example, in
