
 Software Tutorial
Computer Software
In which folder are the Logitech mouse drivers located? Where are the Logitech driver files?
Software Tutorial
Computer Software
In which folder are the Logitech mouse drivers located? Where are the Logitech driver files?
In which folder are the Logitech mouse drivers located? Where are the Logitech driver files?

php editor Xigua will answer the question about the location of the Logitech mouse driver folder. Logitech mouse driver files are usually stored in a folder named Logitech in the Program Files directory of the C drive. Users can find the Logitech mouse driver file by opening the C drive in the explorer, then finding the Program Files folder, and then entering the Logitech folder. If you can't find it, you can try to reinstall the Logitech mouse driver or go to Logitech's official website to download the latest version of the driver.
Where is the Logitech mouse driver located?
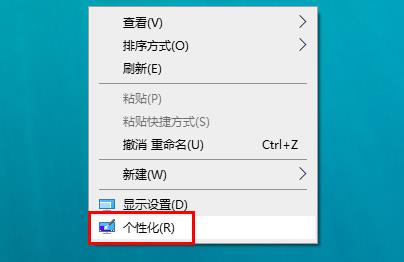
1. First, right-click on the computer and select "Personalize".
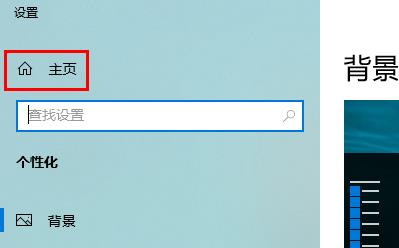
2. Then click "Home" on the upper left.
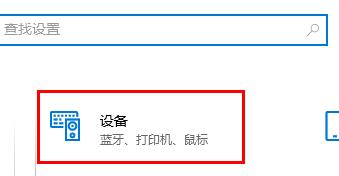
3. After entering the homepage, click "Devices".
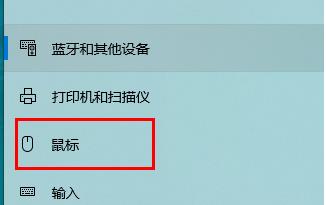
4. Then click "Mouse".
5. Find "Other Mouse Options" under the relevant settings on the right.

6. Then click “Hardware” on the far right above.
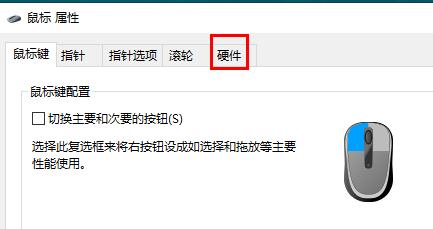
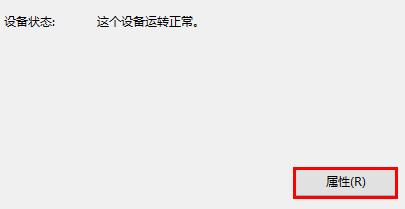
7. Click “Properties” in “Hardware”.
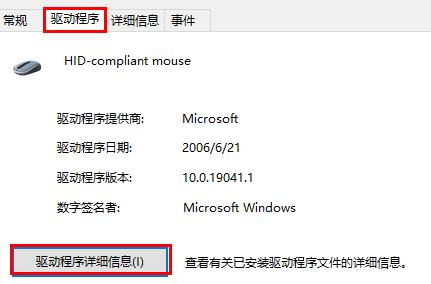
8. Finally, click "Driver" and you can view the file in "Driver Details".
The above is the detailed content of In which folder are the Logitech mouse drivers located? Where are the Logitech driver files?. For more information, please follow other related articles on the PHP Chinese website!

Hot AI Tools

Undresser.AI Undress
AI-powered app for creating realistic nude photos

AI Clothes Remover
Online AI tool for removing clothes from photos.

Undress AI Tool
Undress images for free

Clothoff.io
AI clothes remover

AI Hentai Generator
Generate AI Hentai for free.

Hot Article
Hot Tools

Notepad++7.3.1
Easy-to-use and free code editor

SublimeText3 Chinese version
Chinese version, very easy to use

Zend Studio 13.0.1
Powerful PHP integrated development environment

Dreamweaver CS6
Visual web development tools

SublimeText3 Mac version
God-level code editing software (SublimeText3)
Hot Topics
 1377
1377
 52
52

 Logitech G Hub not working in Windows 11? Fix now
Apr 17, 2023 pm 08:16 PM
Logitech G Hub not working in Windows 11? Fix now
Apr 17, 2023 pm 08:16 PM
Logitech GHub is software that allows users to manage their Logitech peripherals. This software is compatible with Windows 11. However, some users reported that Logitech GHub does not work for them in Windows 11. Our readers have reported that when they try to launch the software, it gets stuck loading. Therefore, they cannot use the software when it does not open for them. Have you also tried fixing LogitechGHub not working in Windows 11? If so, the potential solutions below may launch LogitechGHub. What's the reason why Logitech GHub doesn't work in Windows 11? with many other
 Logitech G Hub not detecting mouse? 3 ways to fix it
Apr 29, 2023 pm 12:16 PM
Logitech G Hub not detecting mouse? 3 ways to fix it
Apr 29, 2023 pm 12:16 PM
Logitech GHub software allows you to manage and change the settings and functionality of all Logitech devices connected to your computer. However, sometimes it encounters some errors that cause errors like one of LogitechGHub not detecting the mouse. Microsoft Windows, Apple Macintosh operating systems and this software package are fully compatible with each other. You can connect your Logitech camera, mouse, keyboard or microphone to your computer or iPad using the free downloadable Logitech GHub software. In order to take full advantage of your device's capabilities, it is critical that Logitech software is up to date and functioning properly on your computer. We are used to LogitechGHu
 Does Logitech ghub driver not support win7? -Why can Logitech ghub driver only be installed on the c drive?
Mar 18, 2024 pm 05:37 PM
Does Logitech ghub driver not support win7? -Why can Logitech ghub driver only be installed on the c drive?
Mar 18, 2024 pm 05:37 PM
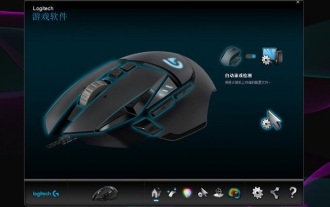
Does Logitech ghub driver not support win7? Not compatible. Since Windows 7 has stopped updating and is no longer Microsoft's main operating system, many new software no longer supports it, such as Logitech ghub. The main interface of the Logitech driver: 1. The main software interface is on the left. The three buttons are lighting, buttons, and sensitivity settings. 2. In the settings of the lighting interface, the general special effects are relatively conventional, and the audio visual effects are the highlight. They can change color according to the sound frequency, and can be set according to the high, middle and bass bands, with different colors and effects. 3. In button settings, users can edit them here according to their special requirements. 4. In the sensitivity settings, many users will have some of their own settings. They can add the DPI speed switching point by themselves, but
 What should I do if Win11 cannot run the Logitech driver? Solution to the problem that the Logitech mouse driver cannot run in Windows 11
Feb 11, 2024 pm 09:20 PM
What should I do if Win11 cannot run the Logitech driver? Solution to the problem that the Logitech mouse driver cannot run in Windows 11
Feb 11, 2024 pm 09:20 PM
Logitech drivers provide users of Logitech gaming peripherals with powerful configuration and personalization options, and users can also set them according to their own preferences. However, there are also some Win11 users who cannot run it when running the Logitech driver. What should they do? Let the editor introduce the solution in detail below. Solution to the Win11 Logitech mouse driver not running 1. Update Windows 11 and press the Windows+I keyboard keys at the same time to launch the "Settings" application. Select the Windows Update tab. Click Check for updates to download and install any available content. Select Advanced options and then select Optional updates in Settings. Then select the checkbox for any optional driver updates and click Download and Install
 Logitech driver import macro file steps
Feb 26, 2024 am 10:58 AM
Logitech driver import macro file steps
Feb 26, 2024 am 10:58 AM
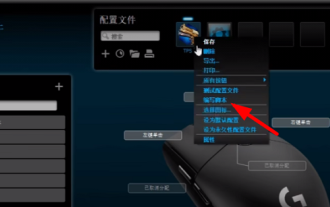
It doesn’t take much time to import game macro files. You can use them directly without writing them yourself. You can easily save them to the corresponding location without any trouble. But if you don’t know how to do it, please read on for the specific steps. Steps to import macro files into Logitech driver: 1. Enter the Logitech driver software and click "Write Script" in the picture. 2. Then click the "Import" button. 3. Then select the appropriate game script with ".lua" as the suffix. file, 4. Then click "Yes" in the pop-up window that appears to continue your import operation. 5. Finally, click the "Save" button in the upper left corner to use it directly.
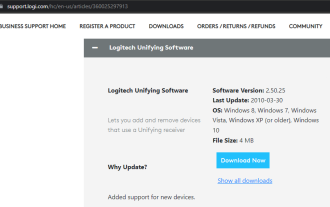 How to install and use Logitech Unifying receiver and software on Windows 11?
Apr 21, 2023 am 08:40 AM
How to install and use Logitech Unifying receiver and software on Windows 11?
Apr 21, 2023 am 08:40 AM
Logitech makes it easy to use multiple external devices in a single system without the need for USB ports. With just one receiver, you can connect up to six different Logitech-compatible devices (they must bear the Logitech logo) to your PC. But none of this would be possible without Logitech Unifying software. Since users have become accustomed to using the software in later operating systems, it's no surprise that they are now looking for ways to incorporate it into the new Windows 11. This tutorial will guide you through downloading the software on Windows 11. It also contains a fix for one of the common Logitech receiver issues, as well as other information. I can use my LogitechUnifying
 Steps to restore Logitech driver to default configuration
Feb 28, 2024 am 11:04 AM
Steps to restore Logitech driver to default configuration
Feb 28, 2024 am 11:04 AM
Facing the Logitech driver that cannot be used normally, it can only be solved by restoring the factory settings. However, many friends do not know how to restore the factory settings. The following will provide you with detailed steps to restore the factory settings. I hope it can help you. Steps to restore the Logitech driver to the default configuration: 1. First download the Logitech dedicated driver software GHub, and open it after the download is complete. 2. Then open the mouse to set up, and click the settings (gear) in the upper right corner. 3. At the bottom, click "Restore default settings" , click directly and reopen the software to restore factory settings. How to connect the Logitech driver to the device 1. Open the back cover of the mouse and take out the wireless mouse socket. 2. Select the mouse socket next to the computer. 3. Set the corresponding parameter information for the mouse. 4. Bluetooth pair the device and long press Bluetooth.
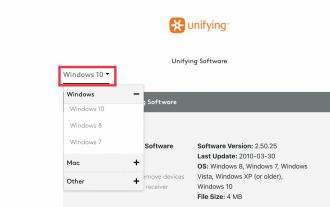 How to download Logitech Unifying software on Windows 11
Apr 13, 2023 pm 03:07 PM
How to download Logitech Unifying software on Windows 11
Apr 13, 2023 pm 03:07 PM
Logitech has a crazy feature that helps us reduce clutter by eliminating the need to carry multiple USB dongles for each Logitech device (keyboard, mouse, touchpad, trackpad, etc.). You can register up to 6 Logitech devices with one receiver. To do this, Logitech uses a program called Logitech Unifying Software. The app allows you to connect multiple Logitech Unifying certified products to a single Logitech Unifying receiver, and you can use up to 6 products simultaneously with that receiver. The software is free to download and use, but the problem here is that it hasn't been updated in a while, setting
