
 Software Tutorial
Mobile Application
How to join a group on DingTalk? DingTalk joining group operation process!
Software Tutorial
Mobile Application
How to join a group on DingTalk? DingTalk joining group operation process!
How to join a group on DingTalk? DingTalk joining group operation process!

php editor Apple will take you through the operation process of joining a group on DingTalk! In the DingTalk app, joining a group is very simple. Just follow the following steps: first open the DingTalk app and enter the "Work" interface; then click the "Group Chat" option, and then click " " in the upper right corner number; then select "Join Group", enter the group's invitation code, and click "OK" to successfully join the group. Through this quick operation process, you can easily join groups of interest and interact with more people!

1. How to join a group on DingTalk? DingTalk joining group operation process!
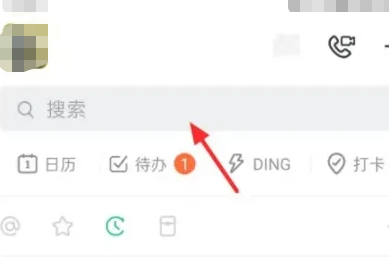
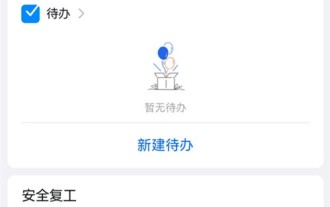
1. Enter the DingTalk app homepage and click on the search bar.
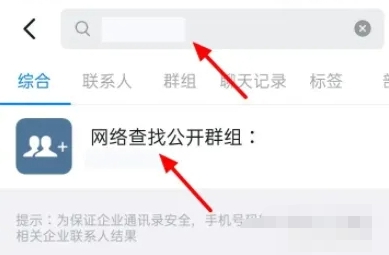
#2. Enter the group number in the search bar and click on the Internet to find the public group.
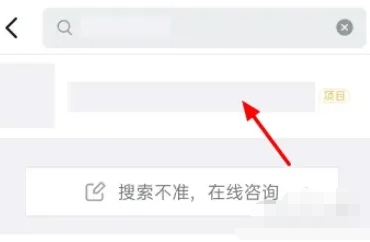
#3. Then in the search results, select the group you want to join.
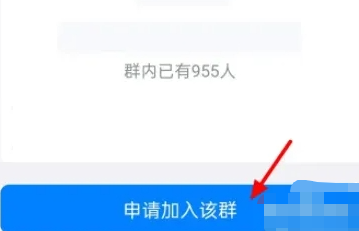
#4. Finally, click Apply to join the group and wait for approval to join successfully.
The above is the detailed content of How to join a group on DingTalk? DingTalk joining group operation process!. For more information, please follow other related articles on the PHP Chinese website!

Hot AI Tools

Undresser.AI Undress
AI-powered app for creating realistic nude photos

AI Clothes Remover
Online AI tool for removing clothes from photos.

Undress AI Tool
Undress images for free

Clothoff.io
AI clothes remover

AI Hentai Generator
Generate AI Hentai for free.

Hot Article
Hot Tools

Notepad++7.3.1
Easy-to-use and free code editor

SublimeText3 Chinese version
Chinese version, very easy to use

Zend Studio 13.0.1
Powerful PHP integrated development environment

Dreamweaver CS6
Visual web development tools

SublimeText3 Mac version
God-level code editing software (SublimeText3)
Hot Topics
 1377
1377
 52
52

 How to scan the QR code to join a group on DingTalk
May 01, 2024 am 03:18 AM
How to scan the QR code to join a group on DingTalk
May 01, 2024 am 03:18 AM
It only takes five steps to scan the QR code on DingTalk to join a group: open the DingTalk APP, enter the address book, click "Scan", scan the group QR code, and finally click "Join".
 How to join a group on DingTalk
May 01, 2024 am 03:09 AM
How to join a group on DingTalk
May 01, 2024 am 03:09 AM
There are many ways to join a DingTalk group: click on the link to join directly through the group link; join by scanning the QR code in the DingTalk App; enter the group number in the search box to join; agree to join through friend invitation; join the organization Automatically added after the architecture.
 What should I do if I have already registered DingTalk and forgot my password?
May 01, 2024 am 02:51 AM
What should I do if I have already registered DingTalk and forgot my password?
May 01, 2024 am 02:51 AM
If you forget your DingTalk password, you can retrieve it through the following methods: 1. Retrieve it through your mobile phone number; 2. Retrieve it through your email (requires binding); 3. Contact DingTalk customer service (relevant information is required to verify your identity).
 Where to set the attendance and clock-in range on DingTalk_Introduction to the method of changing the location and clock-in range on DingTalk
Apr 29, 2024 pm 12:52 PM
Where to set the attendance and clock-in range on DingTalk_Introduction to the method of changing the location and clock-in range on DingTalk
Apr 29, 2024 pm 12:52 PM
1. Open DingTalk, click Attendance and Clock on the workbench interface. 2. Click Settings in the lower right corner, select the attendance group, and click the clock-in method. 3. Turn on location check-in. After adding the location, set the allowed check-in range.
 How to set the background for a DingTalk video conference_A list of operations to display a virtual background for a DingTalk video conference
Apr 29, 2024 pm 02:20 PM
How to set the background for a DingTalk video conference_A list of operations to display a virtual background for a DingTalk video conference
Apr 29, 2024 pm 02:20 PM
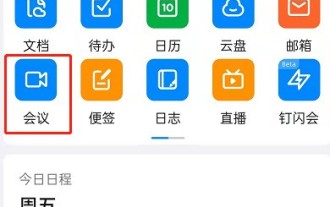
1. Open the DingTalk app, click to write below, and click to join the meeting. 2. Click More. 3. Select a virtual background. 4. Choose a background image you like. 5. You can see that your video conference screen has changed into this picture, which can replace appearing in person. Just click Finish.
 How to tell if others have deleted you on DingTalk?
May 01, 2024 am 02:57 AM
How to tell if others have deleted you on DingTalk?
May 01, 2024 am 02:57 AM
Determine whether others have deleted you on DingTalk: Check the group chat participant list. If your name is not there, it means you have been deleted. Check the one-on-one chat and there will be a dotted gray line next to the contact's name, which means it has been deleted. Check the recent contact list. If you are not included, it may have been deleted. Try sending the message, if it cannot be sent it may have been deleted. Check with the third party and ask them if they can see your name. It should be noted that the above method is not absolutely accurate, because muting or blocking contacts will also affect the display effect.
 How to export a person's attendance record on DingTalk individually? Tips on exporting personal attendance records on DingTalk
Apr 29, 2024 pm 03:16 PM
How to export a person's attendance record on DingTalk individually? Tips on exporting personal attendance records on DingTalk
Apr 29, 2024 pm 03:16 PM
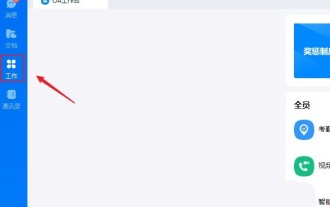
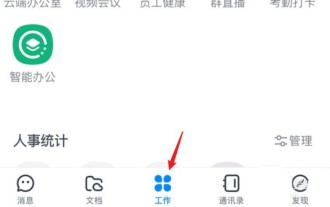
1. Open the software and click the [Work] icon in the navigation menu to enter the workbench interface. 2. Find [Attendance and Clock] in the application interface and click to enter. 3. Enter the attendance management background and click [Original Record] under [Attendance Statistics] in the menu. 4. Enter the original recording interface, click on the time at the top to pop up the calendar and select the start time and end time. 5. Click the drop-down list next to [Personnel Scope] and select [Department/Personnel]. 6. Click [Please select] next to [Department/Personnel], and check the person you want to find in the organization rack window that opens. 7. After filtering is completed, click the [Export Report] button and wait until the export is completed and saved to your computer to view the EXCEL file.
 How to create and approve photos on DingTalk app_Technical steps for creating approval templates for photos on DingTalk
Apr 29, 2024 pm 12:34 PM
How to create and approve photos on DingTalk app_Technical steps for creating approval templates for photos on DingTalk
Apr 29, 2024 pm 12:34 PM
1. Open the APP and enter the [Work] page. 2. Find [OA Approval] in the application list and click to enter. 3. After entering, click [Settings] on the bottom navigation menu. 4. Enter the settings page and click the [Create Approval Form] item. 5. Enter the Create Approval Form page, and then click [Photograph to Create Approval]. 6. After entering, click [Agree Agreement and Shoot], turn on the camera function of your mobile phone, lay the form flat and try to take a clearer picture. 7. After completion, it will wait for recognition, and the new form field will be created. Click [Edit] to make manual adjustments. 8. After the adjustment is completed, it can be released. More detailed adjustment suggestions will be more convenient to operate on the computer.
