
 System Tutorial
Windows Series
How to quickly format and clear your computer in Windows 7? How to format and clear your computer in Windows 7
System Tutorial
Windows Series
How to quickly format and clear your computer in Windows 7? How to format and clear your computer in Windows 7
How to quickly format and clear your computer in Windows 7? How to format and clear your computer in Windows 7

php editor Xiaoxin will show you how to quickly format and clear your computer in win7. When using win7 system, sometimes we need to clear the computer to solve problems or improve computer performance. Formatting is an effective method, but you need to pay attention to data backup, otherwise it will cause data loss. Below we will introduce the detailed steps of formatting and clearing the computer in win7 so that you can easily master it.
Win7 formatting and clearing computer operation method
Method 1
1. First open the computer in the computer.
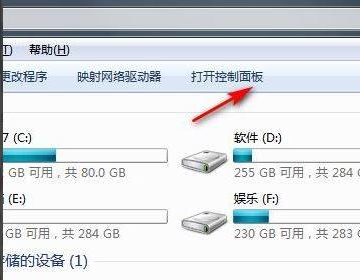
#2. Then in the computer that opens, click to open the Control Panel.
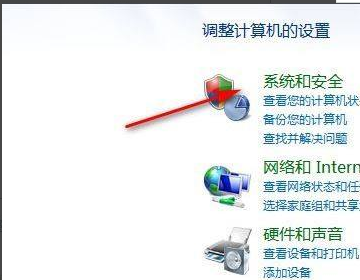
3. Then in the control panel that opens, click System and Security.
4. Then click Backup your computer.
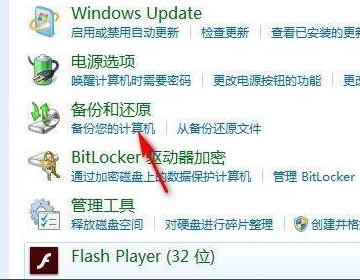
#5. Then click Restore system settings or computer.
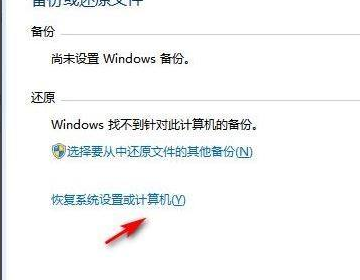
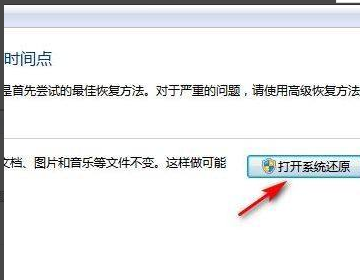
#6. Finally, open system restore, as shown in the figure below, and it is complete.
Method 2
1. First, we open the computer, find "Computer" and click to open it.
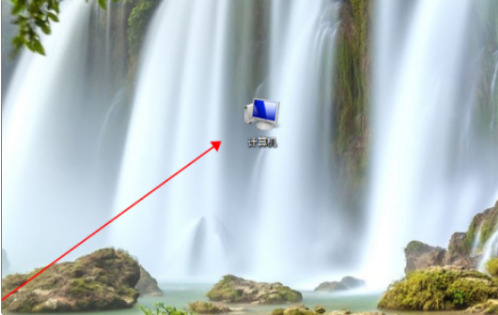
#2. Enter the page and click "Windows7 (C:)" to open the C drive.
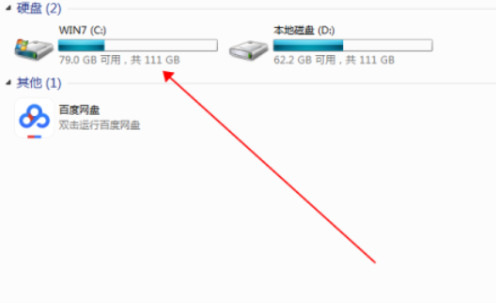
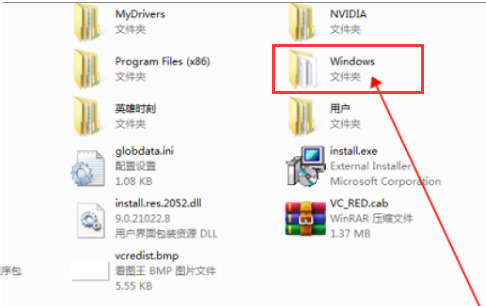
3. We find Windows 7 on the C drive interface and click to open it.
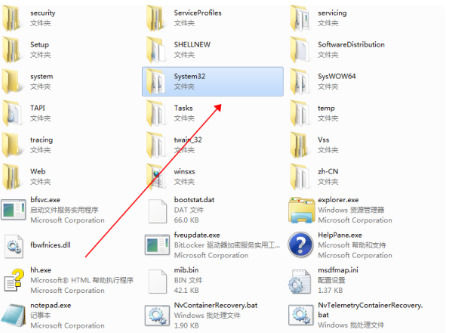
4. Go to the Win7 folder, find and double-click "System32" to open the folder.
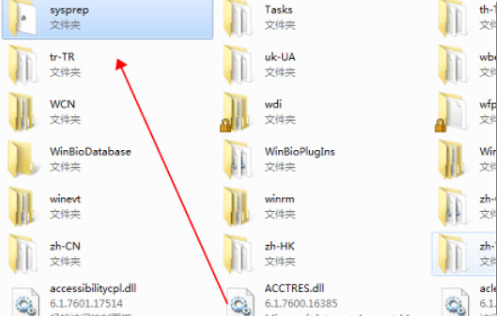
5. Then open the “System32” folder, find and double-click “sysprep”.
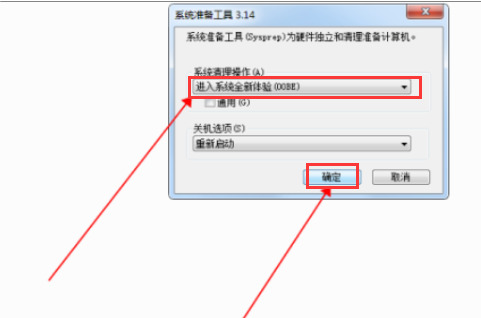
6. Finally, we find and double-click “sysprep.exe” in the “Sysprep” folder.
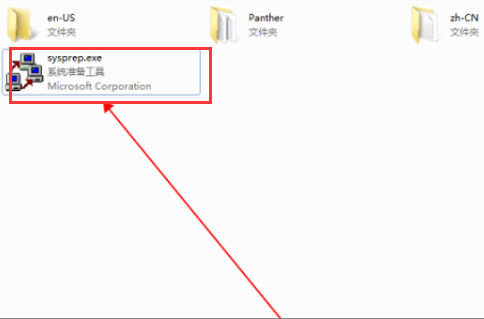
#7. We double-click to open it and click "OK" in the pop-up window. This solves the problem of restoring Windows 7 to factory settings.
Method 3
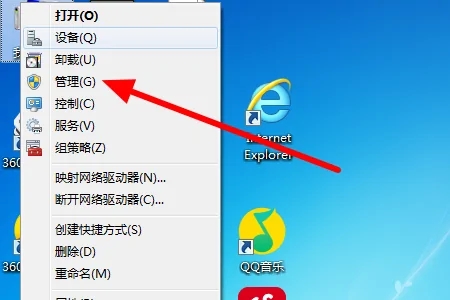
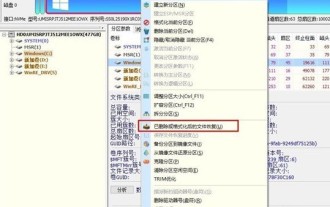
1. First open the computer, right-click the computer and select "Manage".
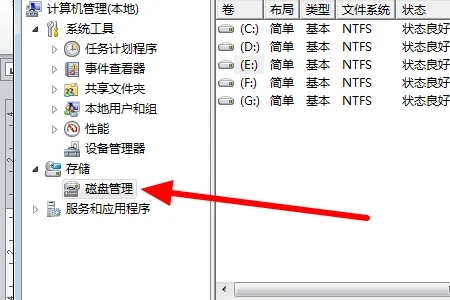
#2. Then click to open "Disk Management" in the pop-up window.
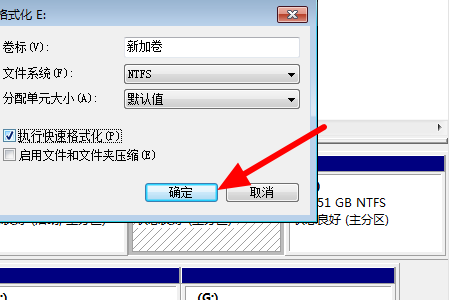
#3. Then right-click a disk in the pop-up window and select "Format".
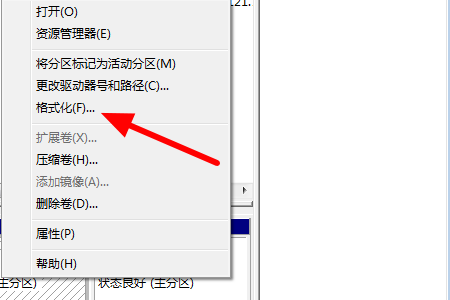
#4. Then click "OK" in the pop-up window and repeat steps 3 and 4 for other disks.
The above is the detailed content of How to quickly format and clear your computer in Windows 7? How to format and clear your computer in Windows 7. For more information, please follow other related articles on the PHP Chinese website!

Hot AI Tools

Undresser.AI Undress
AI-powered app for creating realistic nude photos

AI Clothes Remover
Online AI tool for removing clothes from photos.

Undress AI Tool
Undress images for free

Clothoff.io
AI clothes remover

AI Hentai Generator
Generate AI Hentai for free.

Hot Article
Hot Tools

Notepad++7.3.1
Easy-to-use and free code editor

SublimeText3 Chinese version
Chinese version, very easy to use

Zend Studio 13.0.1
Powerful PHP integrated development environment

Dreamweaver CS6
Visual web development tools

SublimeText3 Mac version
God-level code editing software (SublimeText3)
Hot Topics


 How to install WinNTSetup into Win11 system_How to install WinNTSetup into Win11 system
May 08, 2024 am 11:19 AM
How to install WinNTSetup into Win11 system_How to install WinNTSetup into Win11 system
May 08, 2024 am 11:19 AM
First download the latest Win11 system ISO image, and then in Win10 system, you can directly right-click on the downloaded ISO image file and select [Load]; if it is under WinPE, WinXP, or Win7 system, you need to use the virtual optical drive tool to load the ISO Image; or you can directly decompress the ISO image file without using a virtual optical drive. Then run WinNTSetup. The software interface is as shown in the figure: First locate the location of the install.wim file. You can find the install.wim file in the sources directory of the Win11 ISO image loaded or decompressed by the virtual optical drive. Then set the location of the boot disk and installation disk. Generally, you are going to put W
 What should I do if the Win7 taskbar does not display the icon? How to solve the problem of the computer taskbar icon disappearing
Jun 09, 2024 pm 01:49 PM
What should I do if the Win7 taskbar does not display the icon? How to solve the problem of the computer taskbar icon disappearing
Jun 09, 2024 pm 01:49 PM
Recently, many users using Win7 system have found that the icons in the taskbar suddenly disappeared, which makes the operation very inconvenient and they do not know how to solve the problem. This article will introduce to you how to solve the problem of disappearing taskbar icons in Win7 system. Bar! Cause Analysis When encountering such a situation, there are generally two situations: one is that the taskbar on the computer does not really disappear, but is just hidden, and the other is that the taskbar does disappear. Method 1: 1. There is a situation that you need to confirm first, that is, when the mouse is placed at the bottom of the screen, the taskbar will be displayed. You can directly click the mouse on the taskbar and select "Properties". 2. In the dialog box that opens, click & on the "Hide taskbar" option.
 How to clear all desktop background images in Win7? Tips for deleting personalized background images in Win7
Jun 02, 2024 am 09:01 AM
How to clear all desktop background images in Win7? Tips for deleting personalized background images in Win7
Jun 02, 2024 am 09:01 AM
In Win7 system, many users want to delete personalized desktop background images, but do not know how to delete them. This article will show you how to delete personalized background images in Win7 system. 1. First, open the control panel interface of the Win7 system and click to enter the "Appearance and Personalization" settings; 2. Then, in the opened interface, click the "Change Desktop Background" setting; 3. Then, click below "Desktop background" option; 4. Then, select Select all, and then click Clear all. Of course, you can also use it under "Customize", right-click the theme you want to delete, and then click &q on the shortcut menu
 How to recover diskgenius data diskgenius data recovery tutorial
May 08, 2024 pm 02:22 PM
How to recover diskgenius data diskgenius data recovery tutorial
May 08, 2024 pm 02:22 PM
Step 1: You can directly select the partition in the hard disk partition map above the main interface of DiskGenius, right-click, and then select the [Deleted or Formatted File Recovery] menu item in the pop-up shortcut menu (as shown in the picture) . Step 2: The recovery options window pops up, check the three options of [Recover Deleted Files], [Complete Recovery], and [Additional Scan for Known File Types] (as shown in the picture). Step 3: Click the [Select File Type] button on the right and specify the file type you need to recover in the pop-up window (as shown in the picture). Step 4: After setting the recovery options and clicking the [Start] button, the DiskGenius software will start scanning the data in the hard disk or partition. First, a scanning window will pop up (as shown in the figure)
 Where is the network discovery in Win7? Tips for enabling the network discovery function in Win7
Jun 04, 2024 am 09:02 AM
Where is the network discovery in Win7? Tips for enabling the network discovery function in Win7
Jun 04, 2024 am 09:02 AM
Many computer users know that network discovery is a network setting. This setting will affect whether the computer can find other computers and devices on the network and whether it can find the computer when other computers on the network are found. So how to enable network discovery in win7? The following computer System Home U Disk Installation will introduce you to the tutorial on how to enable network discovery in win7 system. 1. First, click the "Start Menu" icon on the desktop taskbar and choose to open the "Control Panel" interface. 2. Then, in the interface that opens, set "View by" to "Category", and then choose to enter "Network and Internet"
 How to recover files with the partition tool diskgenius How to recover files with the partition tool diskgenius
May 08, 2024 pm 02:25 PM
How to recover files with the partition tool diskgenius How to recover files with the partition tool diskgenius
May 08, 2024 pm 02:25 PM
1. You can directly select the partition in the hard disk partition map above the main interface of DiskGenius, right-click, and then select the [Deleted or Formatted File Recovery] menu item in the pop-up shortcut menu, as shown in the figure below. 2. The recovery options window pops up, check the three options of [Recover Deleted Files], [Complete Recovery], and [Additional Scan for Known File Types], as shown in the figure below. 3. Click the [Select File Type] button on the right and specify the file type you need to recover in the pop-up window, as shown in the figure below. 4. After setting the recovery options and clicking the [Start] button, the DiskGenius software will start scanning the data in the hard disk or partition. First, a scanning window will pop up, as shown in the figure below. 5. After the scan is completed,
 How to recover deleted files with Scanner Almighty King_How to recover deleted files with Scanner Almighty King
May 07, 2024 am 10:22 AM
How to recover deleted files with Scanner Almighty King_How to recover deleted files with Scanner Almighty King
May 07, 2024 am 10:22 AM
1. First open Scanner, click the button in the upper left corner to display the personal interface, as shown in the figure below. 2. Then click Settings and slide the interface to find the help interface button, as shown in the figure below. 3. Then find the help button and click to enter, as shown in the figure below. 4. Then find [I deleted a document by mistake, how do I restore it? 】, click to enter, as shown in the figure below. 5. We can see that there is a URL, follow the instructions to log in to the URL to restore (unsynchronized files cannot be restored, be sure to synchronize important files after scanning), as shown in the figure below. 6. After logging in, you can view your synchronized files and find the files you accidentally deleted, as shown in the figure below.
 How long does the motherboard battery last?
May 08, 2024 pm 09:04 PM
How long does the motherboard battery last?
May 08, 2024 pm 09:04 PM
How often should you replace a computer motherboard battery? Generally speaking, the service life of a motherboard battery is 3-5 years, but it may be shorter or longer. If the computer has problems such as inaccurate clock and incorrect system settings, it may be caused by damage to the motherboard battery. The motherboard battery should be replaced every 2 to 3 years. The motherboard battery is used to record the time of the computer system, that is, to maintain the accuracy of the system clock. When the battery is insufficient, the time will return to the factory date. When CMOS errors occur frequently when starting the computer, and the date and time are incorrect, it is time to replace the battery. The battery life of the motherboard is very long, usually about 5 years. The battery is in a charging state when the computer is turned on, and the BIOS is discharged after the computer is shut down to maintain the associated information in the BIOS (such as
