
 Computer Tutorials
Computer Knowledge
Containerd Kubernetes tutorial for building a k8s cluster.
Computer Tutorials
Computer Knowledge
Containerd Kubernetes tutorial for building a k8s cluster.
Containerd Kubernetes tutorial for building a k8s cluster.


Building a Kubernetes cluster is a common task, which can be achieved by using Containerd as the container runtime. An original tutorial that complies with Baidu SEO standards is provided below, demonstrating in detail how to use Containerd and Kubernetes to build a Kubernetes cluster.
Step 1: Install Docker and Containerd
First, we need to install Docker and Containerd on the server. These two tools will assume the management and running tasks of the container. You can complete the installation by following these steps:
- Update the package manager on the server:
$ sudo apt update
- Install Docker:
$ sudo apt install docker.io
- Install Containerd:
$ sudo apt install containerd
Step 2: Configure Containerd
Once the installation is complete, we need to configure Containerd to integrate with Kubernetes. Please follow the steps below to configure:
- Create and edit the Containerd configuration file:
$ sudo nano /etc/containerd/config.toml
- In the configuration file, find the following line and uncomment it (remove the # symbol before the line):
[plugins."io.containerd.grpc.v1.cri".containerd.runtimes.runc]
...
[plugins."io.containerd.grpc.v1.cri".containerd.runtimes.runc.options]
SystemdCgroup = true
- Save and close the file.
- Restart Containerd to apply configuration changes:
$ sudo systemctl restart containerd
Step 3: Install the Kubernetes control plane
Now, we will install the control plane components of Kubernetes. These components will manage the state and configuration of the entire cluster.
- Install Kubeadm, Kubelet and Kubectl using the package manager:
$ sudo apt install kubeadm kubelet kubectl
Step 4: Initialize Master node
The Master node is the control center of the Kubernetes cluster. We will use Kubeadm to initialize the Master node.
- Run the following command on the Master node:
$ sudo kubeadm init --pod-network-cidr=192.168.0.0/16
- After the initialization is completed, copy the kubeconfig command in the output to the user directory:
$ mkdir -p $HOME/.kube$ sudo cp -i /etc/kubernetes/admin.conf $HOME/.kube/config$ sudo chown $(id -u):$(id -g) $HOME /.kube/config
Step 5: Deploy network plug-in
Kubernetes clusters require network plug-ins to implement communication between containers. Here we use Flannel as a network plug-in.
- Run the following command on the Master node to deploy Flannel:
$ kubectl apply -f https://raw.githubusercontent.com/coreos/flannel/master/Documentation/kube-flannel.yml
Step 6: Join Worker node
Now, we need to add the Worker node to the Kubernetes cluster. Execute the following command on the Worker node:
- Run the Kubeadm join command on the Worker node. This command
Commands are provided in the output in step 4:
$ sudo kubeadm join <Master node IP>:<Master node port> --token <Token value> --discovery-token-ca-cert-hash <Certificate hash value>
- Return to the Master node and run the following command on the Master node to view the nodes in the cluster:
$ kubectl get nodes
If everything goes well, you should be able to see the list of Master nodes and joined Worker nodes.
Congratulations! You have successfully set up a Kubernetes cluster based on Containerd and Kubernetes. Now you can start deploying and managing containerized applications on your cluster.
Please note that this tutorial provides basic building guidelines and can be customized and expanded according to actual needs. If you need more in-depth understanding and configuration, please refer to the official Kubernetes documentation or other authoritative resources.
The above is the detailed content of Containerd Kubernetes tutorial for building a k8s cluster.. For more information, please follow other related articles on the PHP Chinese website!

Hot AI Tools

Undresser.AI Undress
AI-powered app for creating realistic nude photos

AI Clothes Remover
Online AI tool for removing clothes from photos.

Undress AI Tool
Undress images for free

Clothoff.io
AI clothes remover

AI Hentai Generator
Generate AI Hentai for free.

Hot Article
Hot Tools

Notepad++7.3.1
Easy-to-use and free code editor

SublimeText3 Chinese version
Chinese version, very easy to use

Zend Studio 13.0.1
Powerful PHP integrated development environment

Dreamweaver CS6
Visual web development tools

SublimeText3 Mac version
God-level code editing software (SublimeText3)
Hot Topics


 How to package project with pycharm
Apr 25, 2024 am 03:54 AM
How to package project with pycharm
Apr 25, 2024 am 03:54 AM
There are four ways to package a project in PyCharm: Package as a separate executable file: Export to EXE single file format. Packaged as an installer: Generate Setuptools Makefile and build. Package as a Docker image: specify an image name, adjust build options, and build. Package as a container: Specify the image to build, adjust runtime options, and start the container.
 Pi Node Teaching: What is a Pi Node? How to install and set up Pi Node?
Mar 05, 2025 pm 05:57 PM
Pi Node Teaching: What is a Pi Node? How to install and set up Pi Node?
Mar 05, 2025 pm 05:57 PM
Detailed explanation and installation guide for PiNetwork nodes This article will introduce the PiNetwork ecosystem in detail - Pi nodes, a key role in the PiNetwork ecosystem, and provide complete steps for installation and configuration. After the launch of the PiNetwork blockchain test network, Pi nodes have become an important part of many pioneers actively participating in the testing, preparing for the upcoming main network release. If you don’t know PiNetwork yet, please refer to what is Picoin? What is the price for listing? Pi usage, mining and security analysis. What is PiNetwork? The PiNetwork project started in 2019 and owns its exclusive cryptocurrency Pi Coin. The project aims to create a one that everyone can participate
 Agile development and operation of PHP microservice containerization
May 08, 2024 pm 02:21 PM
Agile development and operation of PHP microservice containerization
May 08, 2024 pm 02:21 PM
Answer: PHP microservices are deployed with HelmCharts for agile development and containerized with DockerContainer for isolation and scalability. Detailed description: Use HelmCharts to automatically deploy PHP microservices to achieve agile development. Docker images allow for rapid iteration and version control of microservices. The DockerContainer standard isolates microservices, and Kubernetes manages the availability and scalability of the containers. Use Prometheus and Grafana to monitor microservice performance and health, and create alarms and automatic repair mechanisms.
 Docker completes local deployment of LLama3 open source large model in three minutes
Apr 26, 2024 am 10:19 AM
Docker completes local deployment of LLama3 open source large model in three minutes
Apr 26, 2024 am 10:19 AM
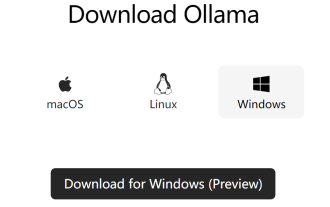
Overview LLaMA-3 (LargeLanguageModelMetaAI3) is a large-scale open source generative artificial intelligence model developed by Meta Company. It has no major changes in model structure compared with the previous generation LLaMA-2. The LLaMA-3 model is divided into different scale versions, including small, medium and large, to suit different application needs and computing resources. The parameter size of small models is 8B, the parameter size of medium models is 70B, and the parameter size of large models reaches 400B. However, during training, the goal is to achieve multi-modal and multi-language functionality, and the results are expected to be comparable to GPT4/GPT4V. Install OllamaOllama is an open source large language model (LL
 How to install deepseek
Feb 19, 2025 pm 05:48 PM
How to install deepseek
Feb 19, 2025 pm 05:48 PM
There are many ways to install DeepSeek, including: compile from source (for experienced developers) using precompiled packages (for Windows users) using Docker containers (for most convenient, no need to worry about compatibility) No matter which method you choose, Please read the official documents carefully and prepare them fully to avoid unnecessary trouble.
 PHP distributed system architecture and practice
May 04, 2024 am 10:33 AM
PHP distributed system architecture and practice
May 04, 2024 am 10:33 AM
PHP distributed system architecture achieves scalability, performance, and fault tolerance by distributing different components across network-connected machines. The architecture includes application servers, message queues, databases, caches, and load balancers. The steps for migrating PHP applications to a distributed architecture include: Identifying service boundaries Selecting a message queue system Adopting a microservices framework Deployment to container management Service discovery
 Deploy JavaEE applications using Docker Containers
Jun 05, 2024 pm 08:29 PM
Deploy JavaEE applications using Docker Containers
Jun 05, 2024 pm 08:29 PM
Deploy Java EE applications using Docker containers: Create a Dockerfile to define the image, build the image, run the container and map the port, and then access the application in the browser. Sample JavaEE application: REST API interacts with database, accessible on localhost after deployment via Docker.
 How to optimize the performance of Java functions through containerization?
Apr 29, 2024 pm 03:09 PM
How to optimize the performance of Java functions through containerization?
Apr 29, 2024 pm 03:09 PM
Containerization improves Java function performance in the following ways: Resource isolation - ensuring an isolated computing environment and avoiding resource contention. Lightweight - takes up less system resources and improves runtime performance. Fast startup - reduces function execution delays. Consistency - Decouple applications and infrastructure to ensure consistent behavior across environments.
