 Software Tutorial
 Computer Software
 How to activate Microsoft office? 2023 latest Microsoft office installation and activation tutorial
How to activate Microsoft office? 2023 latest Microsoft office installation and activation tutorial
Office is the office software that comes with our Windows system. Many users will use it directly, but they need to be activated before they can use all the functions. However, many users do not know the activation method. So in this issue, the editor will share with you the latest updates in 2023. Microsoft office installation and activation tutorial, let’s follow the editor’s steps and take a look at the steps.
2023 latest Microsoft office installation and activation tutorial:
1. Office includes three components: world, Excel, and PowerPoint. The first step is to open any of the components and click to enter.
2. After entering, find the "Account" button in the lower left corner and click it. On the right side, you can see that office needs to be activated. Click the "Activate Product" button.

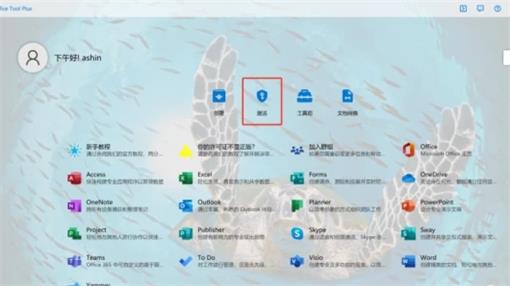
3. Then find the "Activate" button on the page and click it.
4. After entering the activation interface, you need to log in to your Microsoft account. If you do not have an account, select the "Create Account" button below. If you have an account, just enter the account number and click "Next".
5. After entering the next step, select "China" according to the prompt settings and select "Chinese" as the language.
6. Then the program will automatically read the serial number from the motherboard. Pay attention to saving the screenshot. After obtaining the activation code, click the "Online Redeem" button below.
7. Enter the Microsoft website, click the "Login" button again, and log in with the Microsoft account and password you just used.

8. Follow the prompts to complete the activation. You will see the activation code under the account. You need to save the activation code. You can also log in with other devices in the future.
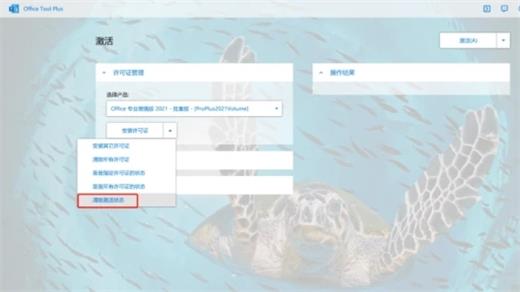
9. After completing the activation, return to the office activation page, click Complete Activation, and select the activation code generated in the Microsoft account.
The above is the detailed content of How to activate Microsoft office? 2023 latest Microsoft office installation and activation tutorial. For more information, please follow other related articles on the PHP Chinese website!

Hot AI Tools

Undresser.AI Undress
AI-powered app for creating realistic nude photos

AI Clothes Remover
Online AI tool for removing clothes from photos.

Undress AI Tool
Undress images for free

Clothoff.io
AI clothes remover

AI Hentai Generator
Generate AI Hentai for free.

Hot Article

Hot Tools

Notepad++7.3.1
Easy-to-use and free code editor

SublimeText3 Chinese version
Chinese version, very easy to use

Zend Studio 13.0.1
Powerful PHP integrated development environment

Dreamweaver CS6
Visual web development tools

SublimeText3 Mac version
God-level code editing software (SublimeText3)

Hot Topics
 How to convert deepseek pdf
Feb 19, 2025 pm 05:24 PM
DeepSeek cannot convert files directly to PDF. Depending on the file type, you can use different methods: Common documents (Word, Excel, PowerPoint): Use Microsoft Office, LibreOffice and other software to export as PDF. Image: Save as PDF using image viewer or image processing software. Web pages: Use the browser's "Print into PDF" function or the dedicated web page to PDF tool. Uncommon formats: Find the right converter and convert it to PDF. It is crucial to choose the right tools and develop a plan based on the actual situation.
 Break or return from Java 8 stream forEach?
Feb 07, 2025 pm 12:09 PM
Java 8 introduces the Stream API, providing a powerful and expressive way to process data collections. However, a common question when using Stream is: How to break or return from a forEach operation? Traditional loops allow for early interruption or return, but Stream's forEach method does not directly support this method. This article will explain the reasons and explore alternative methods for implementing premature termination in Stream processing systems. Further reading: Java Stream API improvements Understand Stream forEach The forEach method is a terminal operation that performs one operation on each element in the Stream. Its design intention is
 The Key to Coding: Unlocking the Power of Python for Beginners
Oct 11, 2024 pm 12:17 PM
Python is an ideal programming introduction language for beginners through its ease of learning and powerful features. Its basics include: Variables: used to store data (numbers, strings, lists, etc.). Data type: Defines the type of data in the variable (integer, floating point, etc.). Operators: used for mathematical operations and comparisons. Control flow: Control the flow of code execution (conditional statements, loops).
 Download ppt finished product. Easy to use ppt finished product website for free
Mar 11, 2025 am 10:24 AM
Still worried about finding high-quality PPT templates? This article recommends 15 excellent websites that provide PPT template downloads, including Microsoft Office Template Library, Canva, Slidesgo, Envato Elements, etc. These websites provide templates with diverse styles, strong compatibility, exquisite design and suitable for different scenarios (business, education, creative display, etc.), covering free and paid resources. Some websites also provide online editing and collaboration functions to meet your various PPT production needs and help you easily create amazing presentations. Click to view the detailed introduction and find your favorite template!
 Problem-Solving with Python: Unlock Powerful Solutions as a Beginner Coder
Oct 11, 2024 pm 08:58 PM
Pythonempowersbeginnersinproblem-solving.Itsuser-friendlysyntax,extensivelibrary,andfeaturessuchasvariables,conditionalstatements,andloopsenableefficientcodedevelopment.Frommanagingdatatocontrollingprogramflowandperformingrepetitivetasks,Pythonprovid
 Java Made Simple: A Beginner's Guide to Programming Power
Oct 11, 2024 pm 06:30 PM
Java Made Simple: A Beginner's Guide to Programming Power Introduction Java is a powerful programming language used in everything from mobile applications to enterprise-level systems. For beginners, Java's syntax is simple and easy to understand, making it an ideal choice for learning programming. Basic Syntax Java uses a class-based object-oriented programming paradigm. Classes are templates that organize related data and behavior together. Here is a simple Java class example: publicclassPerson{privateStringname;privateintage;
 Demystifying C: A Clear and Simple Path for New Programmers
Oct 11, 2024 pm 10:47 PM
C is an ideal choice for beginners to learn system programming. It contains the following components: header files, functions and main functions. A simple C program that can print "HelloWorld" needs a header file containing the standard input/output function declaration and uses the printf function in the main function to print. C programs can be compiled and run by using the GCC compiler. After you master the basics, you can move on to topics such as data types, functions, arrays, and file handling to become a proficient C programmer.
 Create the Future: Java Programming for Absolute Beginners
Oct 13, 2024 pm 01:32 PM
Java is a popular programming language that can be learned by both beginners and experienced developers. This tutorial starts with basic concepts and progresses through advanced topics. After installing the Java Development Kit, you can practice programming by creating a simple "Hello, World!" program. After you understand the code, use the command prompt to compile and run the program, and "Hello, World!" will be output on the console. Learning Java starts your programming journey, and as your mastery deepens, you can create more complex applications.


