

php editor Xinyi introduces you to the system repair tool after blue screen. Blue screen is one of the common faults in Windows systems, which may be caused by software, hardware or system problems. When you encounter a blue screen, system repair tools can help you quickly diagnose and solve the problem and restore the normal operation of the system. This article will recommend several commonly used system repair tools to help you deal with blue screen failures and ensure computer stability and data security.
Blue screen repair tool usage tutorial:
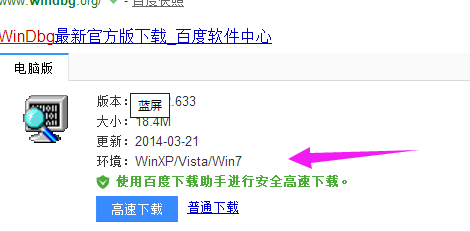
1. Open the web search engine, search for "Windbg" and download it from the official website to the desktop.
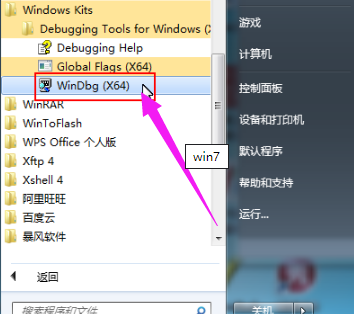
#2. After the installation is complete, click the "Start Menu" in the lower left corner of the desktop, find and start "Windbg".
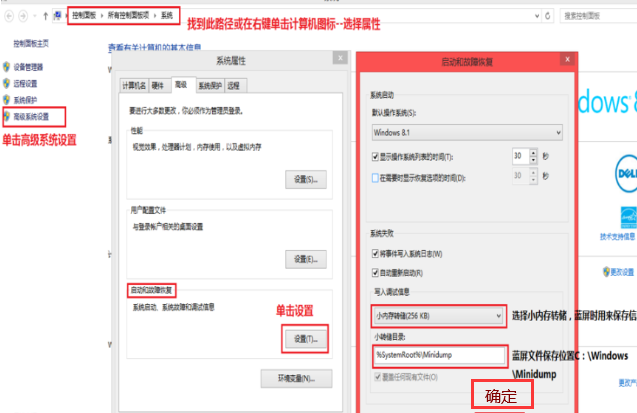
3. First, we need to ensure that a blue screen dump has been set up, so that when the computer blue screens, the system will retain the cause of the blue screen failure in a .DMP file. You need to check whether Set the memory dump and blue screen file storage location. Right-click "Computer" -> "Properties" -> "Advanced System Settings", click Settings in the Startup and Recovery column, and select Small Memory Dump in the Write Debug Information column (if it has been set, you can Ignore this step), the minidump directory is %SystemRoot%\Minidump (the location where blue screen files are stored), which is the C:\Windows\Minidump folder.
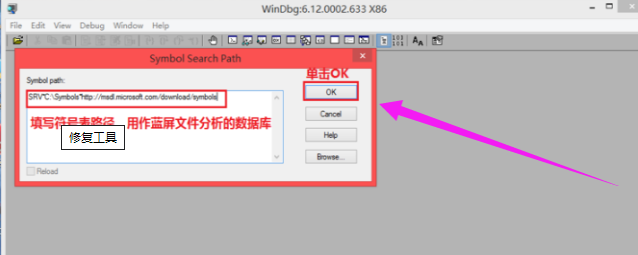
After checking the completeness, when starting the Windbg software, you first need to set the symbol table path as the database for blue screen cause analysis, otherwise the software will not run normally. You can complete this step by clicking the File menu and selecting Symbol File Path. After setting the symbol table path in this way, the Windbg software can correctly parse and analyze the cause of the blue screen error. Make sure the symbol table path is set correctly so that you can more accurately locate the problem when performing blue screen analysis and help you solve system problems more effectively.
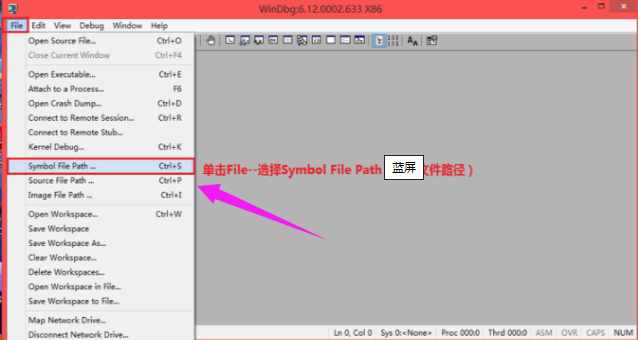
5, enter SRV*C:\Symbols*http://msdl.microsoft.com/download/symbols in the Symbol Path text box of the pop-up dialog box, single Click OK.
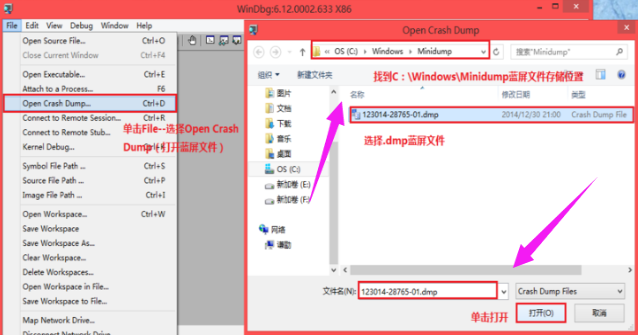
6. After setting up, click File——>Select Open Crash Dump to open the blue screen file, and click C:\Windows\Minidump in the pop-up dialog box folder, click on the blue screen file we want to analyze, and click "Open".
#7, Save Information for workspace in the pop-up dialog box? (Whether to save the information to the workspace), click Yes. (If you don't want to be prompted again next time, you can check Don't ask again in the WinDbg session).
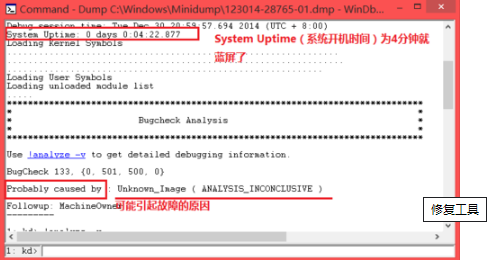
#8, the next step is to analyze the file, which requires certain experience and knowledge. Here we can focus on the System Uptime (boot time) and Probably Caused By (the possible cause of the failure).
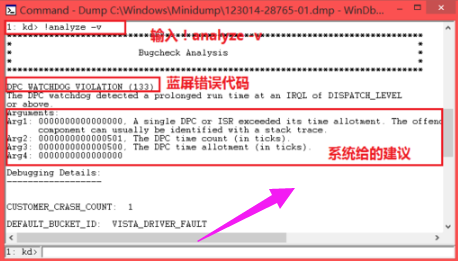
9, if you need further analysis, you can click !analyze -v,
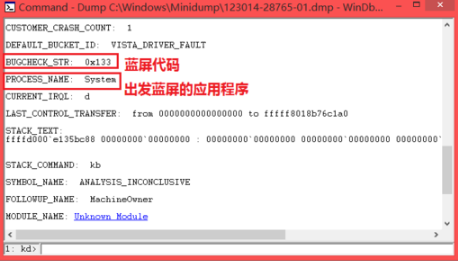
We can extract the blue screen error code and the name of the program that caused the blue screen, and find out the cause by searching these program names and codes on the Internet.
The editor introduces the steps for using the blue screen repair tool here.
The above is the detailed content of How to use system repair tool after blue screen. For more information, please follow other related articles on the PHP Chinese website!


