
Excel tables contain a large amount of sensitive information. To ensure data security, encryption is an essential operation. PHP editor Apple will introduce to you how to perform encryption operations in Excel. By studying this article, you will learn how to set password protection for Excel workbooks or worksheets to ensure that data cannot be viewed or modified by unauthorized persons. Let us learn how to encrypt Excel and comprehensively improve data security!
First, open the Excel program and enter the data to be encrypted, or insert the information that needs to be encrypted. Next, open the Excel document you want to encrypt, click "File", and then select "Excel Workbook" in "Save As".
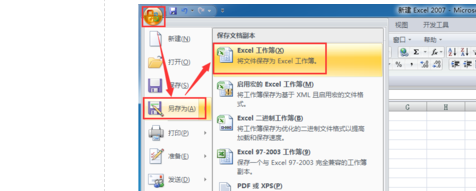
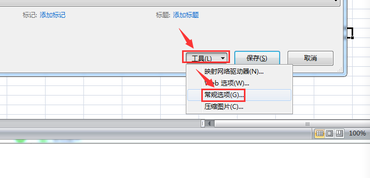
Step 2: As shown in the picture, in the "Save as Excel Workbook" panel, find the tool, select "General Options" and click to enter.
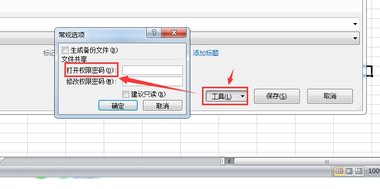
Step 3: As shown in the picture below, after entering the "General Options", you can see several options. Here we choose the one we need. Open permission password (0)" to fill in the password. Remember the password.
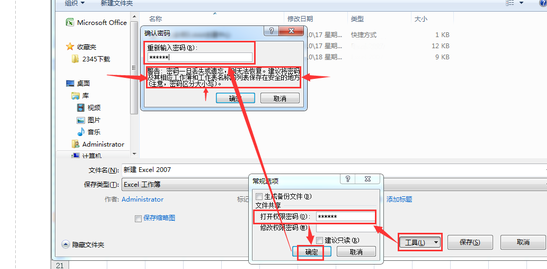
#Step 4: After clicking OK, you will be asked to re-enter your password, which is the password you just set.
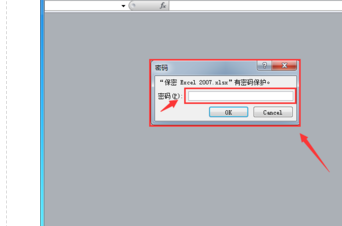
Step 5: Let’s reopen the file and click to open the encrypted Excel document we just saved. A password box will pop up asking you to enter the password. You enter the set password. You can see your encrypted Excel document by entering the password.
The above is the detailed content of How to encrypt Excel. For more information, please follow other related articles on the PHP Chinese website!
 Compare the similarities and differences between two columns of data in excel
 excel duplicate item filter color
 How to copy an Excel table to make it the same size as the original
 Excel table slash divided into two
 Excel diagonal header is divided into two
 Absolute reference input method
 java export excel
 Excel input value is illegal


