

How to design the end page of ppt to be attractive enough

php editor Baicao teaches you how to design an attractive PPT end page. The closing page is the end of the presentation and is key to the design. Captivate your audience's attention and enhance your presentation by choosing the right colors, fonts, and layout, along with eye-catching images or graphics. Making the end page concise and clear, highlighting key information and leaving a deep impression are important aspects that cannot be ignored when designing PPT.
The design of the ppt end page can be adjusted in terms of text and animation, and you can choose a simple or dazzling style according to your needs. Next, we will focus on how to use innovative expression methods to create a ppt end page that meets the requirements.
Let’s start today’s tutorial.
1. For the production of the end page, any text in the picture can be used. The important thing about the end page is that my presentation is over.

#2. In addition to these words, the teacher will take the students to look at some case documents.

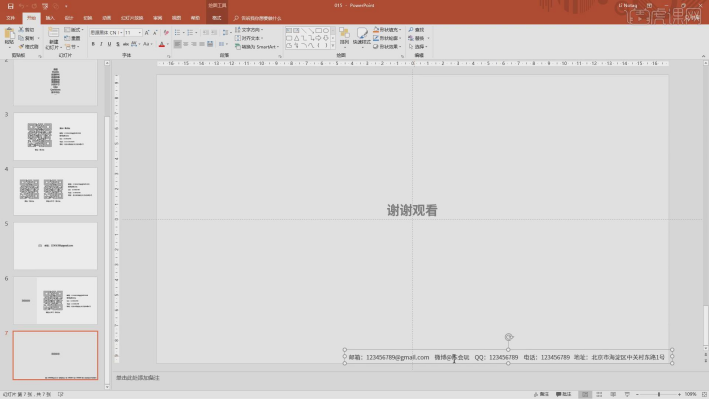
3. Some people will add a QR code on the end page. We can add text below the QR code to indicate what the QR code scanned out. .
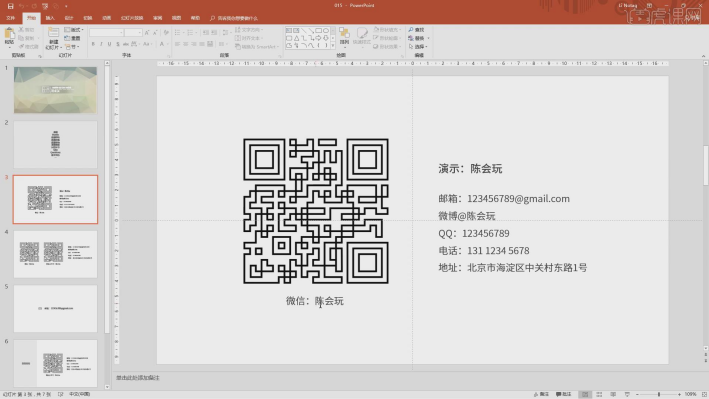
#4. We can enlarge this QR code, make it very large or move it directly to the middle position, because we are sitting too far away at the venue and cannot scan it. Your QR code.

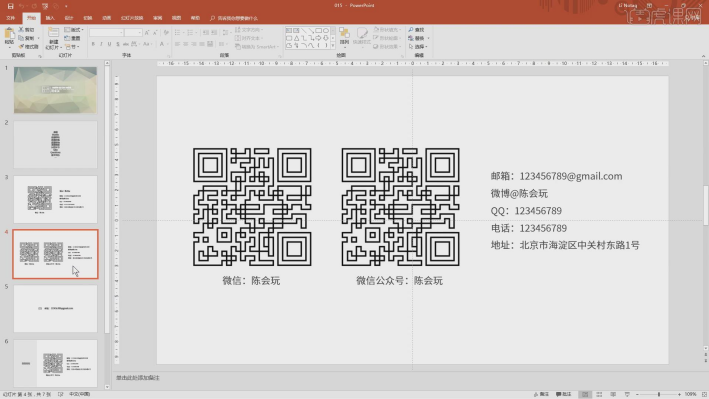
5. In another case, multiple QR codes are added to the end page, so that the audience does not know which one to scan after seeing it, or is disturbed. Can't even be swept out.
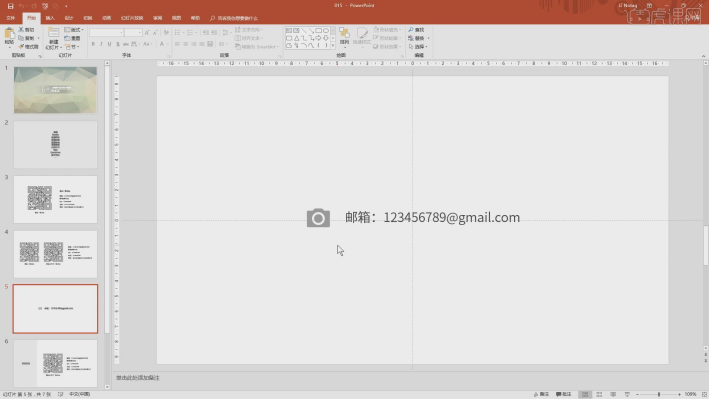
#6. Or place a mailbox at the back, and then use a small icon. Here, a camera is used, which can also imply shooting and saving.
#7. There is another way to place the sections separately. You can see that thank you for watching and QR code and other information are placed on the left side.
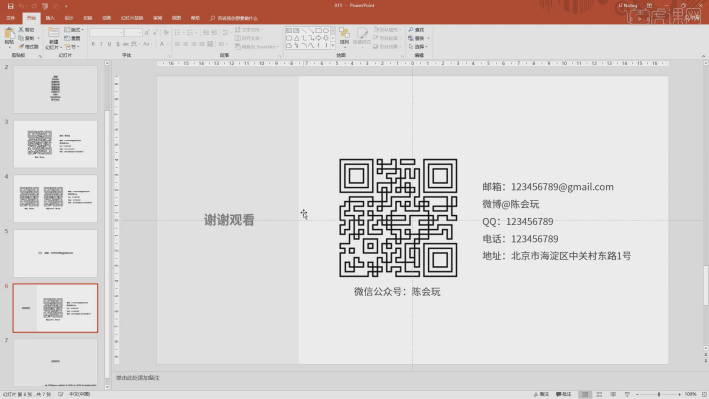
#8. In this way, the contact content is placed in the lower right corner, and the font is not too conspicuous. This may be to allow interested people to see this.

#9. Review the content explained in this lesson and analyze the method of making the end page. Here the teacher will review the difficult points in these contents.
10. Thank you for watching.
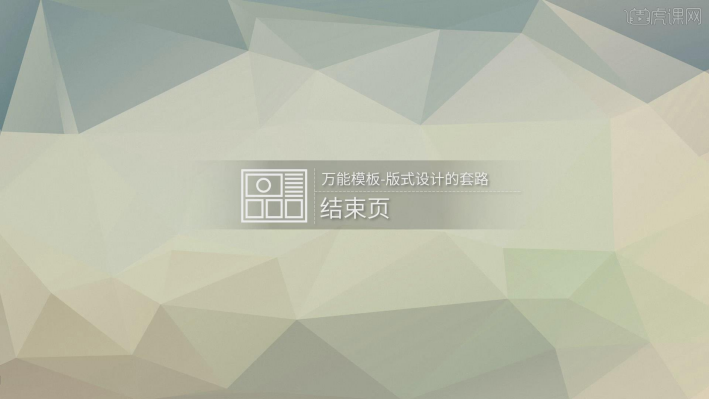
#End page of ppt Try to give up the "thank you" that causes visual fatigue. You can try changing it, which may bring you unexpected good results.
The above is the detailed content of How to design the end page of ppt to be attractive enough. For more information, please follow other related articles on the PHP Chinese website!

Hot AI Tools

Undresser.AI Undress
AI-powered app for creating realistic nude photos

AI Clothes Remover
Online AI tool for removing clothes from photos.

Undress AI Tool
Undress images for free

Clothoff.io
AI clothes remover

AI Hentai Generator
Generate AI Hentai for free.

Hot Article
Hot Tools

Notepad++7.3.1
Easy-to-use and free code editor

SublimeText3 Chinese version
Chinese version, very easy to use

Zend Studio 13.0.1
Powerful PHP integrated development environment

Dreamweaver CS6
Visual web development tools

SublimeText3 Mac version
God-level code editing software (SublimeText3)
Hot Topics
 1378
1378
 52
52

 How to remove the date that appears automatically when printing from PPT handouts
Mar 26, 2024 pm 08:16 PM
How to remove the date that appears automatically when printing from PPT handouts
Mar 26, 2024 pm 08:16 PM
1. Let me first talk about the method I used at the beginning, maybe everyone is using it too. First, open [View]——]Remarks Template[. 2. A place where you can actually see the date after opening it. 3. Select it first and delete it. 4. After deleting, click [Close Master View]. 5. Open the print preview again and find that the date is still there. 6. In fact, this date was not deleted here. It should be in the [Handout Master]. Look at the picture below. 7. Delete the date after you find it. 8. Now when you open the preview and take a look, the date is no longer there. Note: In fact, this method is also very easy to remember, because the printed handouts are handouts, so you should look for the [Handout Master].
 ZTE 5G portable Wi-Fi U50S goes on sale for NT$899 at first launch: top speed 500Mbps
Apr 26, 2024 pm 03:46 PM
ZTE 5G portable Wi-Fi U50S goes on sale for NT$899 at first launch: top speed 500Mbps
Apr 26, 2024 pm 03:46 PM
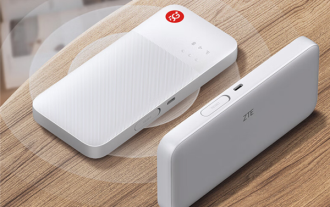
According to news on April 26, ZTE’s 5G portable Wi-Fi U50S is now officially on sale, starting at 899 yuan. In terms of appearance design, ZTE U50S Portable Wi-Fi is simple and stylish, easy to hold and pack. Its size is 159/73/18mm and is easy to carry, allowing you to enjoy 5G high-speed network anytime and anywhere, achieving an unimpeded mobile office and entertainment experience. ZTE 5G portable Wi-Fi U50S supports the advanced Wi-Fi 6 protocol with a peak rate of up to 1800Mbps. It relies on the Snapdragon X55 high-performance 5G platform to provide users with an extremely fast network experience. Not only does it support the 5G dual-mode SA+NSA network environment and Sub-6GHz frequency band, the measured network speed can even reach an astonishing 500Mbps, which is easily satisfactory.
 Introduction to the method of inserting heptagons into PPT slides
Mar 26, 2024 pm 07:46 PM
Introduction to the method of inserting heptagons into PPT slides
Mar 26, 2024 pm 07:46 PM
1. Open the PPT slide document, and in the [Outline, Slide] column on the left side of the PPT, click to select the slide where you want to insert the basic [shape]. 2. After selecting, select the [Insert] menu in the function menu bar above the PPT and click. 3. After clicking the [Insert] menu, the [Insert] submenu bar pops up below the function menu bar. Select the [Shape] menu in the [Insert] submenu bar. 4. Click the [Shape] menu to pop up the preset shape type selection page. 5. In the shape type selection page, select the [Heptagon] shape and click. 6. After clicking, move the mouse to the slide editing interface, press the mouse to draw, and release the mouse after the drawing is completed. Complete the insertion of the [heptagon] shape.
 How to deal with blanks when playing PPT slides
Mar 26, 2024 pm 07:51 PM
How to deal with blanks when playing PPT slides
Mar 26, 2024 pm 07:51 PM
1. Open the PPT file you created and select the second slide. 2. On the second slide, select one of the pictures, and then select [Animation] to add any animation effect. 3. In the start column of the animation bar, change [While Standalone] to [After Previous Animation], and you will see that the picture animation label [1] will change to [0]. Do the same for subsequent slides, and you can see the effect by playing the slide at the end.
 Retro trend! HMD and Heineken jointly launch flip phone: transparent shell design
Apr 17, 2024 pm 06:50 PM
Retro trend! HMD and Heineken jointly launch flip phone: transparent shell design
Apr 17, 2024 pm 06:50 PM
According to news on April 17, HMD teamed up with the well-known beer brand Heineken and the creative company Bodega to launch a unique flip phone - The Boring Phone. This phone is not only full of innovation in design, but also returns to nature in terms of functionality, aiming to lead people back to real interpersonal interactions and enjoy the pure time of drinking with friends. Boring mobile phone adopts a unique transparent flip design, showing a simple yet elegant aesthetic. It is equipped with a 2.8-inch QVGA display inside and a 1.77-inch display outside, providing users with a basic visual interaction experience. In terms of photography, although it is only equipped with a 30-megapixel camera, it is enough to handle simple daily tasks.
 Detailed steps for designing a light bulb icon in PPT
Mar 26, 2024 pm 08:36 PM
Detailed steps for designing a light bulb icon in PPT
Mar 26, 2024 pm 08:36 PM
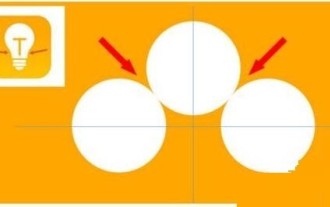
1. Hold down the shift key to draw a perfect circle in PPT, then copy the perfect circle twice, and stick it together as shown below. Notice in the picture below that the blue guide line exactly crosses the diameters of the three circles. (Pay attention to the arrow in the picture below). 2. The next step is very important. Insert an inverted trapezoid in the middle of the three circles. The long side of the trapezoid is at the diameter of the middle circle. (arrow in the picture below). 3. If you view the perspective version, please pay attention to the position pointed by the arrow in the picture below. Exactly tangent to both circles. 4. Next, adjust the remaining details. For example, the rounded corners at the bottom of the light bulb are actually completed with a rounded rectangle. The effect is as follows. Especially the small semicircle at the bottom is solved by arc graphics. 2 points in the picture below. 5. After using the direction arrows to fine-tune the distance between the graphics, add a T shape in the middle.
 How to create underline animation when mouse clicks text in PPT
Mar 26, 2024 pm 06:40 PM
How to create underline animation when mouse clicks text in PPT
Mar 26, 2024 pm 06:40 PM
1. Enter text. 2. Select the shape under Insert and select Line within it. 3. Draw a straight line below the word love. 4. Select the straight line, then select the animation menu, and choose an animation effect from it. 5. Play the animation. At this time, there are no horizontal lines under the text. 6. Click the mouse, and a horizontal line will appear under the text.
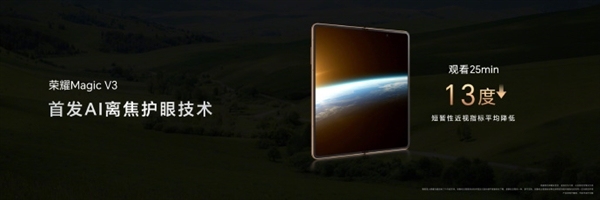 Honor Magic V3 debuts AI defocus eye protection technology: effectively alleviates the development of myopia
Jul 18, 2024 am 09:27 AM
Honor Magic V3 debuts AI defocus eye protection technology: effectively alleviates the development of myopia
Jul 18, 2024 am 09:27 AM
According to news on July 12, the Honor Magic V3 series was officially released today, equipped with the new Honor Vision Soothing Oasis eye protection screen. While the screen itself has high specifications and high quality, it also pioneered the introduction of AI active eye protection technology. It is reported that the traditional way to alleviate myopia is "myopia glasses". The power of myopia glasses is evenly distributed to ensure that the central area of sight is imaged on the retina, but the peripheral area is imaged behind the retina. The retina senses that the image is behind, promoting the eye axis direction. grow later, thereby deepening the degree. At present, one of the main ways to alleviate the development of myopia is the "defocus lens". The central area has a normal power, and the peripheral area is adjusted through optical design partitions, so that the image in the peripheral area falls in front of the retina.
