Windows 11 PE creation tool Win10XPE
The Windows 11 PE production tool Win10XPE, carefully recommended by php editor Yuzai, can help users quickly create personalized Windows 11 PE systems. This tool integrates a variety of practical tools and functions to provide users with convenient system maintenance and fault repair functions. Through Win10XPE, users can easily create a portable and efficient Windows 11 PE system to respond to various system problems and emergencies conveniently and quickly. Let us learn how to use this powerful tool to create your own Windows 11 PE system!
The Windows 11 PE produced using this program on my computer does not have Chinese input method and network driver. If you need these functions, please see: Win10XPE New Chinese Input Method, Win10XPE Installation Driver.
1. Link to the download website and click "Win10XPE_2022-01-07 Package".
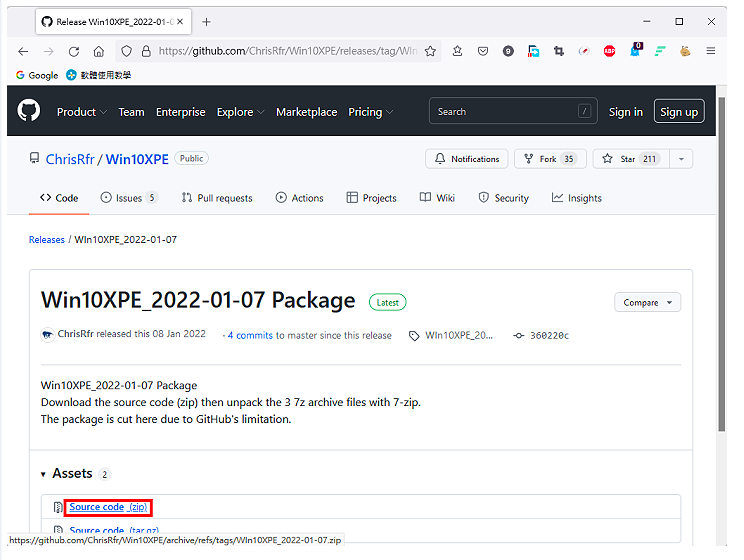
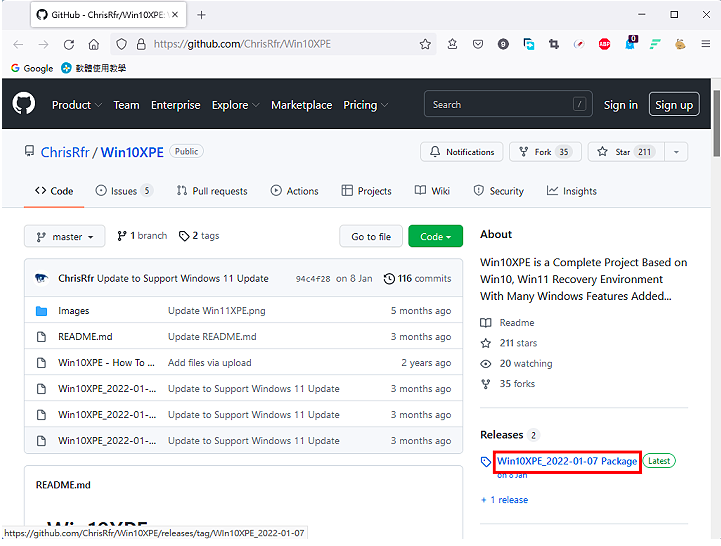 2. Click "Source code (zip)".
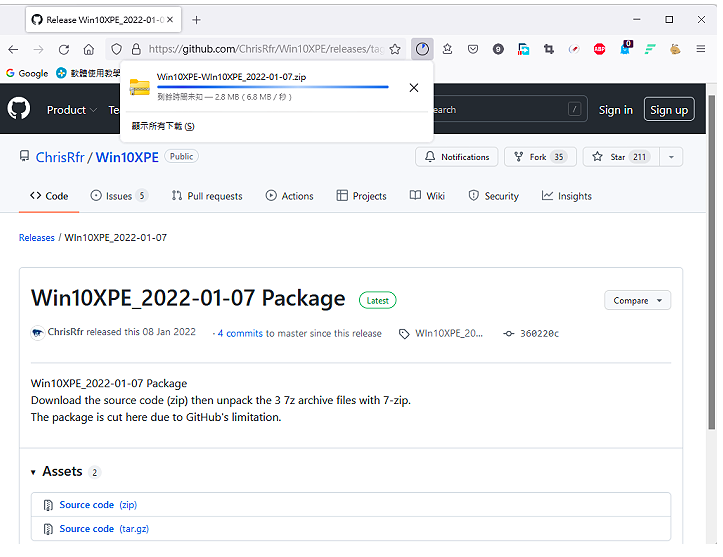
3. The file is being downloaded, as shown in the picture below.
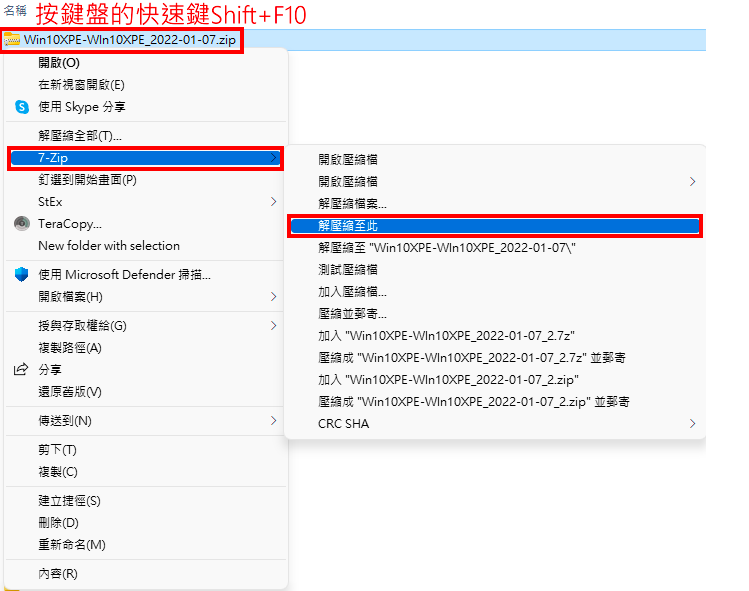
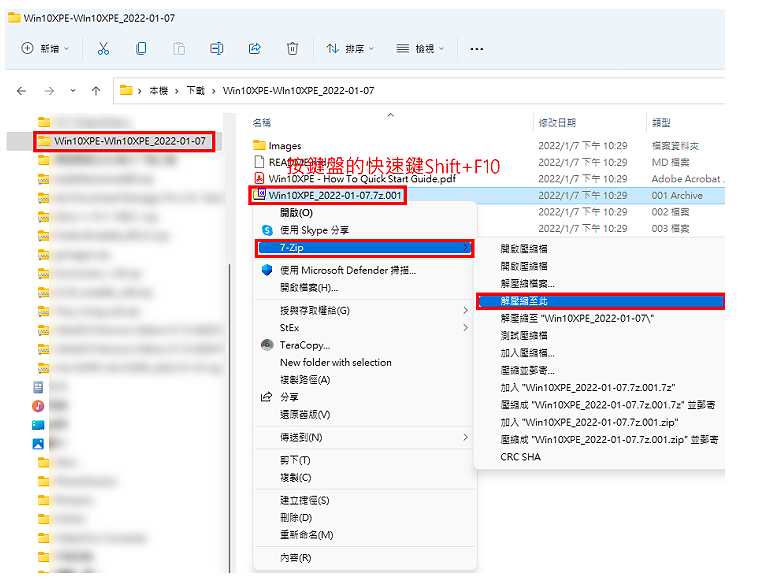
#4. After the download is completed, open File Explorer, select the file, and press the keyboard shortcut Shift F10 to display the quick menu (Windows 10 can also right-click the mouse) ), click "7-Zip", select "Extract here" to decompress the file. For details on the installation and use of the compression and decompression software 7-Zip, please refer to the free compression and decompression software 7-Zip download, installation and settings, and use 7-Zip to compress and decompress files.
5. After decompression is complete, select the file Win10XPE_202-01-07.7z.001 and press the keyboard shortcut Shift F10 to display the quick menu (Windows 10 also You can right-click the mouse and click "7-Zip\Extract here" to decompress the file.
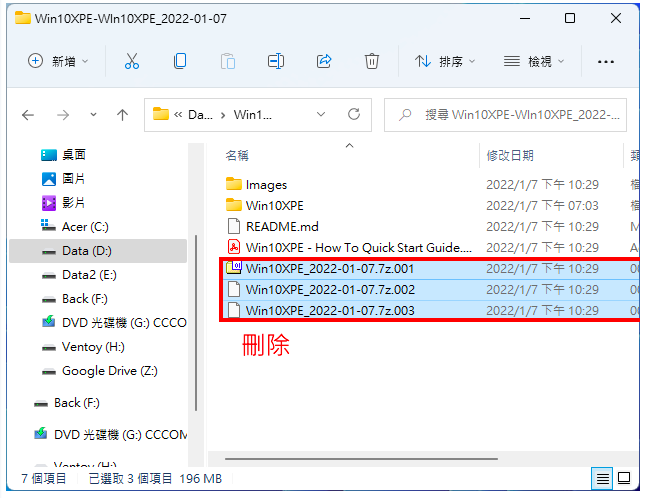
6. After decompression is complete, select and delete "Win10XPE_202-01-07.7z.001- Win10XPE_202-01-07.7z.003" to save hard disk space .
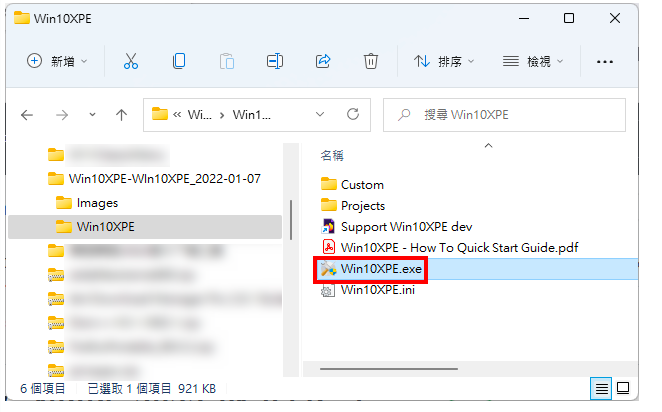
7. Click the left mouse button twice on the file Win10XPE.exe in the Win10XPE folder to open the Windows 10 PE creation program.
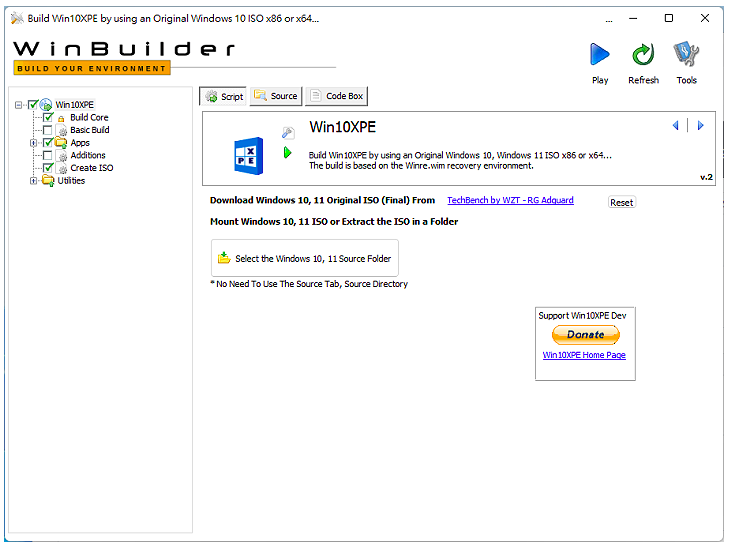
#8. The opened program is as shown below.
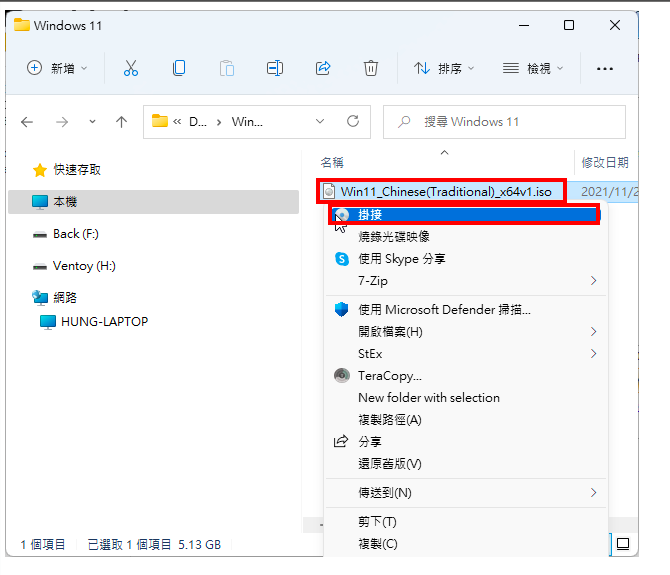
9. Right-click the Windows 11 disc image file in File Explorer and click "Mount" to mount the image file as a virtual disc. For details on downloading disc image files, see: Microsoft Windows and Office ISO Download Tool.
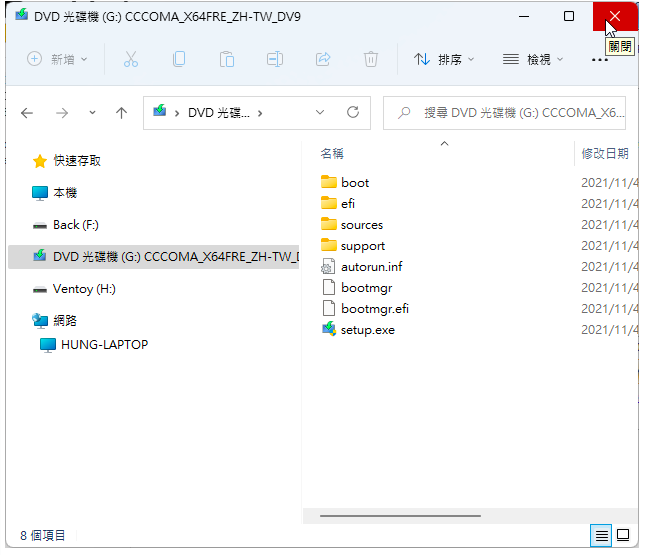
#10. The CD image file has been mounted, as shown in the figure below.
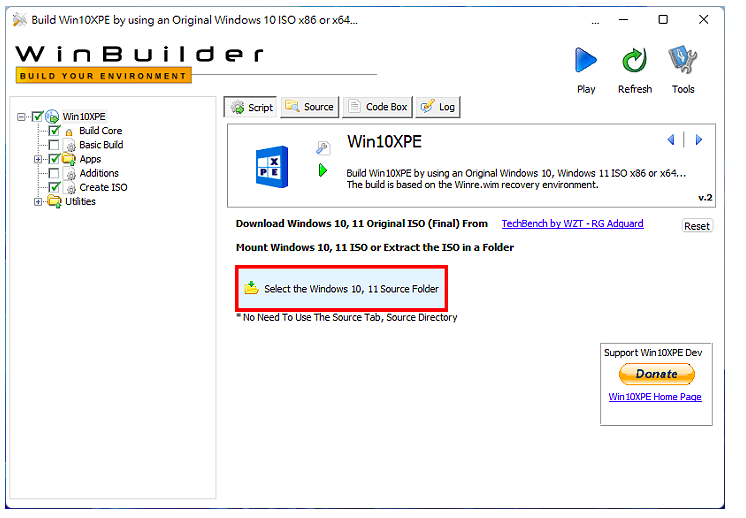
11. Click "Select the Windows 10, 11 Source Folder".
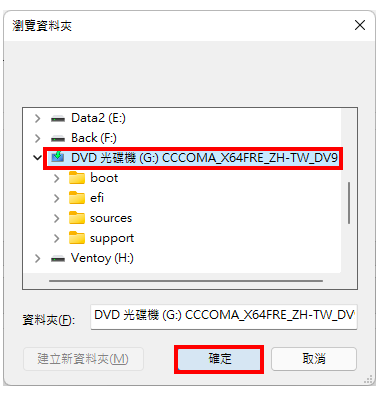
12. Select the Windows 11 virtual disc and click "OK".
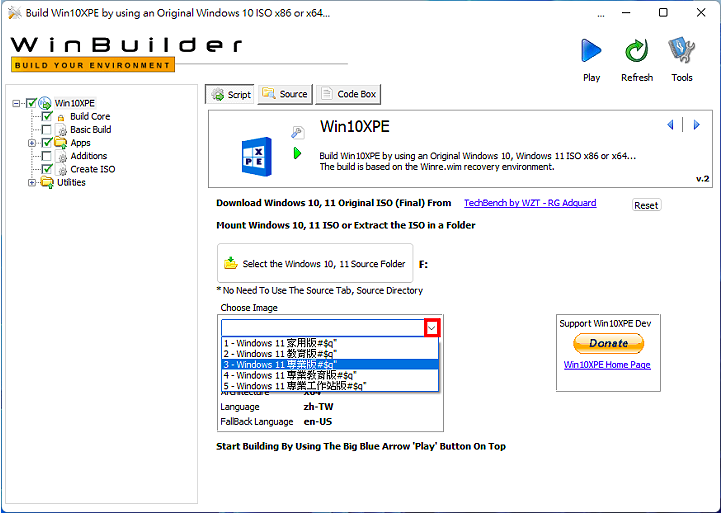
#13. Choose the version of Windows 11 according to your personal needs.
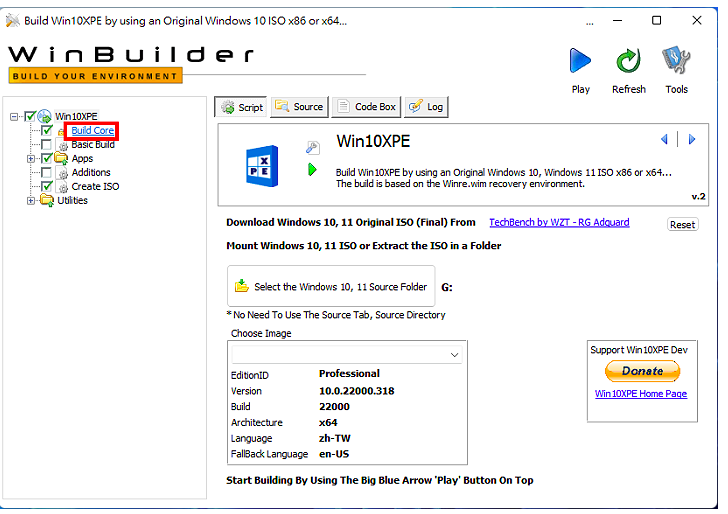
14. Click "Build Core".
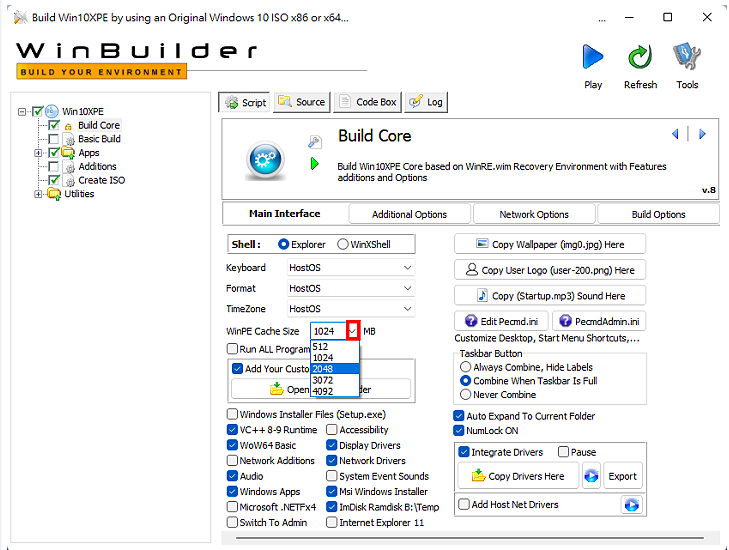
#15. Select the cache size according to your own needs.
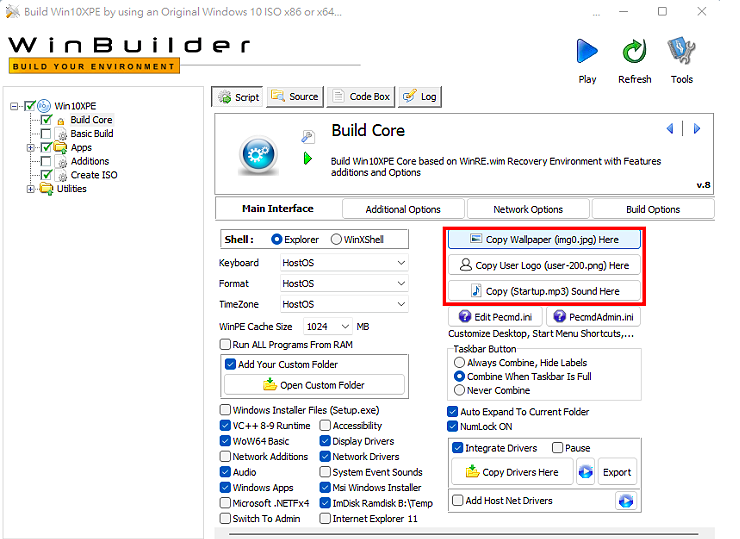
#16. According to personal needs, you can choose desktop background, personal logo and startup music.
17. Expand Apps.
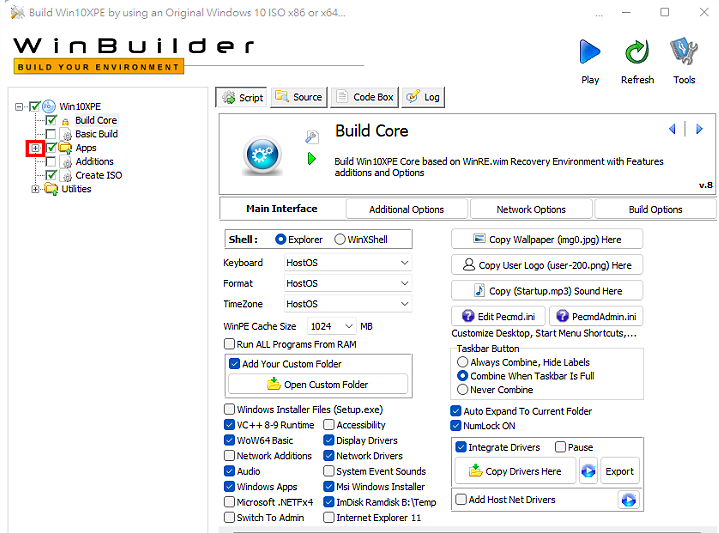
#18. According to your own needs, check the required program. If there is a language option, select Chinese Traditional. Click "Download" to download the Traditional Chinese version. The same is true if you want to use Google Chrome browser settings.
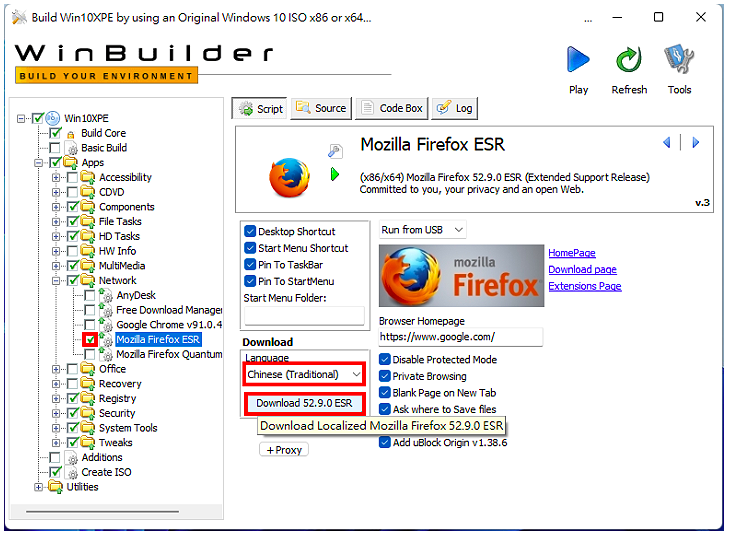
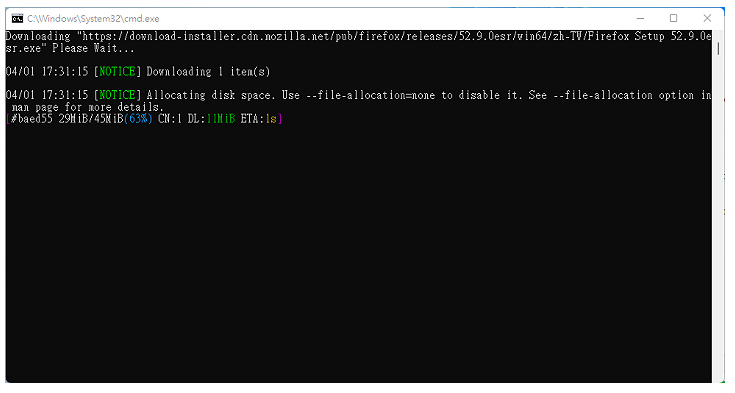
19. Downloading the Traditional Chinese version of Firefox.
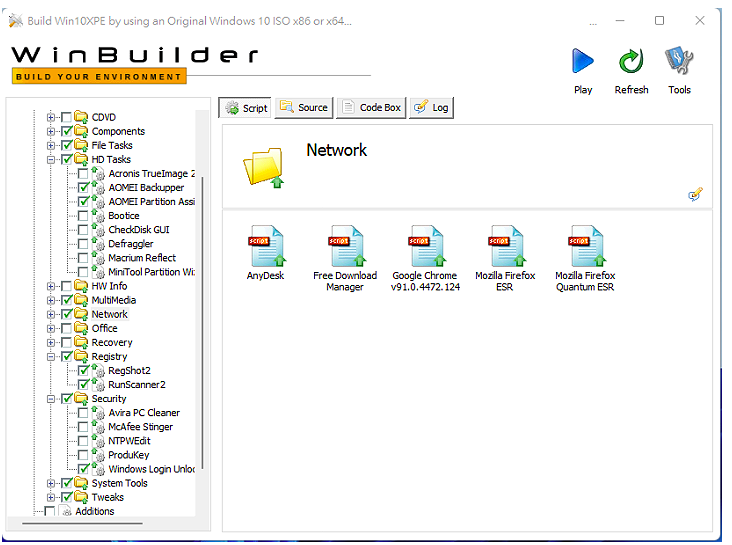
20. Continue to check other applications.
21. Check "Create ISO" and select "Create boot.wim and ISO".
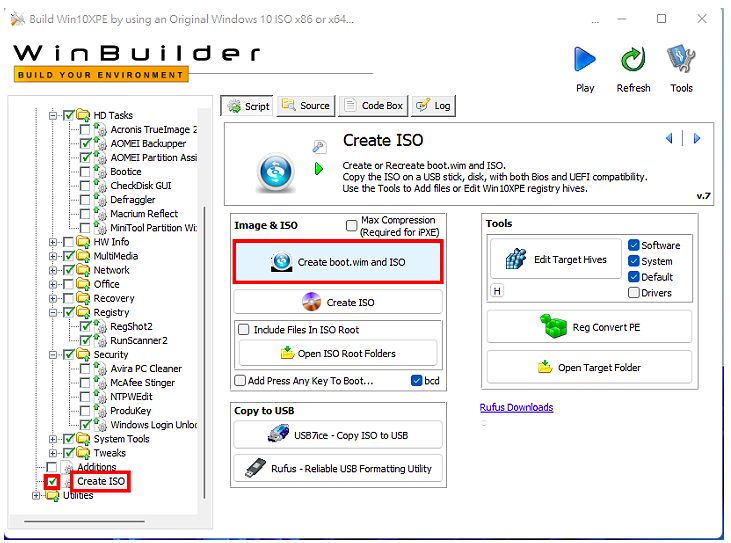
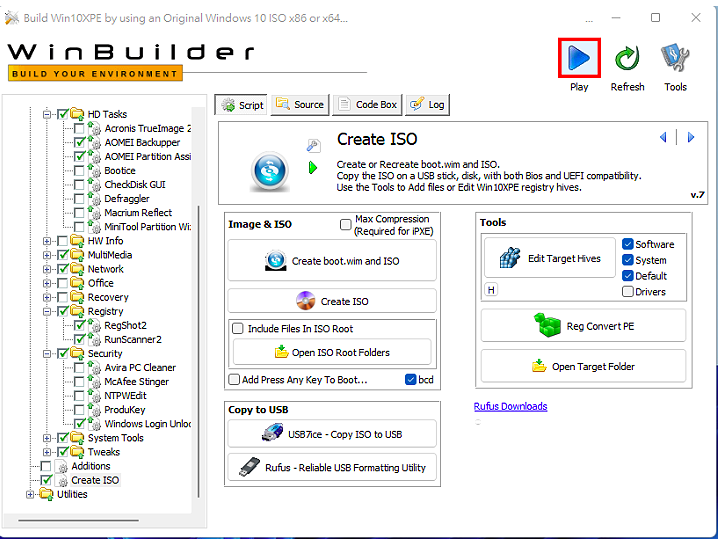
22. Click "Play" to start production.
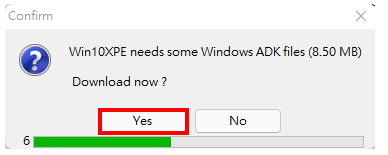
#23. Click "Yes" to download Windows ADK.
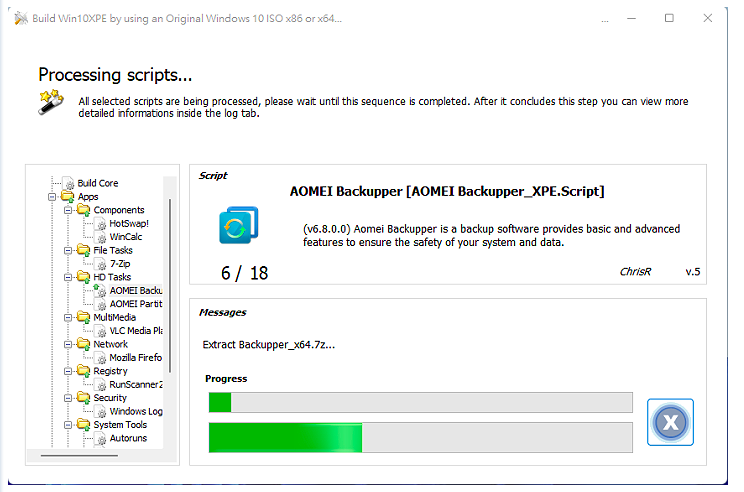
24. Windows 11 PE is being made.
25. The Windows 11 PE disc image file is created, close the program.
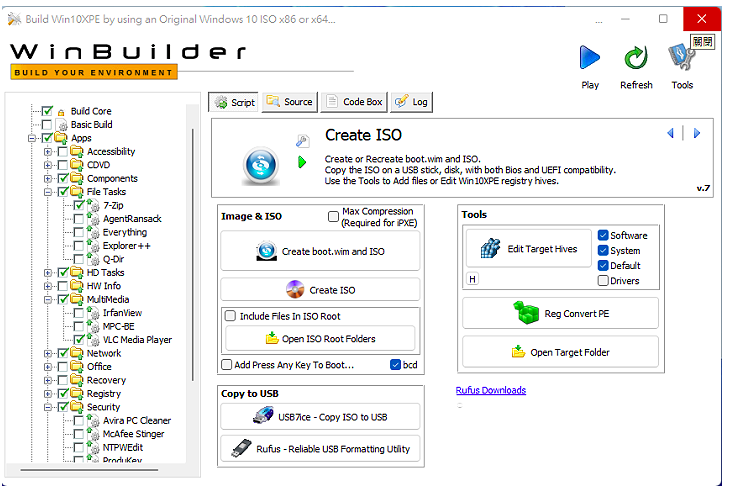
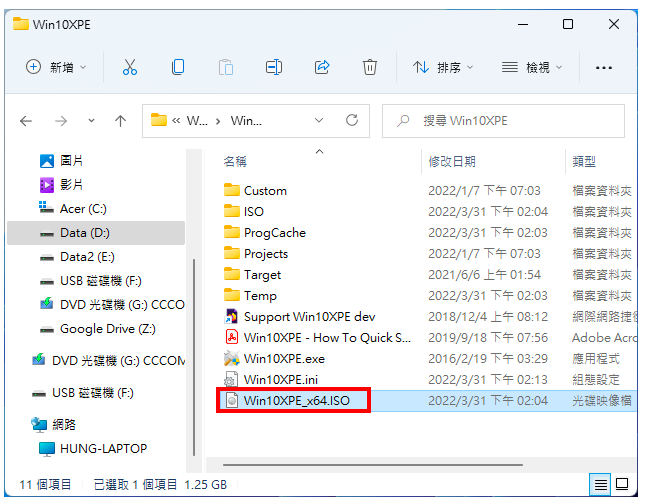
26. Open the file manager. The created ISO disc image file is as shown in the figure below. Change the file name by yourself, for example: Win11PE_x64.ISO. Use the USB bootable flash drive creation software Rufus to create an ISO file into a USB bootable flash drive, or copy the ISO file to a USB multi-bootable flash drive created with Ventoy.
27. Insert the Windows 11 PE or Ventoy bootable flash drive into the USB slot of the computer, and set the BIOS to boot from the flash drive. For details, see: Set the BIOS boot order to disk priority. 
The above is the detailed content of Windows 11 PE creation tool Win10XPE. For more information, please follow other related articles on the PHP Chinese website!

Hot AI Tools

Undresser.AI Undress
AI-powered app for creating realistic nude photos

AI Clothes Remover
Online AI tool for removing clothes from photos.

Undress AI Tool
Undress images for free

Clothoff.io
AI clothes remover

AI Hentai Generator
Generate AI Hentai for free.

Hot Article

Hot Tools

Notepad++7.3.1
Easy-to-use and free code editor

SublimeText3 Chinese version
Chinese version, very easy to use

Zend Studio 13.0.1
Powerful PHP integrated development environment

Dreamweaver CS6
Visual web development tools

SublimeText3 Mac version
God-level code editing software (SublimeText3)

Hot Topics
 Is Win11 LTSC not suitable for individual users at all? Analysis of the advantages and disadvantages of the LTSC version
Jun 25, 2024 pm 10:35 PM
Microsoft provides multiple versions of Windows systems, each targeting different usage scenarios. In addition to the Home, Professional, Education and Enterprise editions, there is also a special LTSC edition designed for the specific needs of large businesses and organizations. Although Windows 11 LTSC has become quite popular recently, it lacks commonly used functions and is not suitable for individual users. And this version has not yet been officially launched, and is expected to be released around September in the second half of 2024. Interesting thing: From Windows 1.0 to 11, the evolution of Windows versions. What is Windows 11 LTSC? Windows11LTSC is a feature of Windows11 operating system
 Win11 24H2 will adjust security rules and NAS user access may fail
Jun 25, 2024 pm 05:23 PM
Digital enthusiasts all know that Microsoft has released a preview version of Windows 1124H2, and the official version of Windows 1124H2 will be coming soon. This is a very important version update, and many friends are paying close attention to it. Of course, the most noteworthy thing about Windows 1124H2 is the new features and improvements in AI. It is said that Microsoft will deeply integrate Copliot. However, AI is not the subject of this article. The subject of this article is to introduce readers to two new security rule changes in the Windows 1124H2 version, which may affect some NAS users. Specifically, in the Windows 1124H2 version, Microsoft will make changes to two important network access rules:
 What should I do if the win11 dual-screen calendar does not exist on the second monitor?
Jun 12, 2024 pm 05:47 PM
An important tool for organizing your daily work and routine in Windows 11 is the display of time and date in the taskbar. This feature is usually located in the lower right corner of the screen and gives you instant access to the time and date. By clicking this area, you can bring up your calendar, making it easier to check upcoming appointments and dates without having to open a separate app. However, if you use multiple monitors, you may run into issues with this feature. Specifically, while the clock and date appear on the taskbar on all connected monitors, the ability to click the date and time on a second monitor to display the calendar is unavailable. As of now, this feature only works on the main display - it's unlike Windows 10, where clicking on any
 System Restore prompts that you must enable system protection on this drive
Jun 19, 2024 pm 12:23 PM
The computer has a restore point, and when the system is restored, it prompts "You must enable system protection on this drive." This usually means that the system protection function is not turned on. System protection is a feature provided by the Windows operating system that can create system restore points to back up system files and settings. That way, if something goes wrong, you can revert to a previous state. When the system fails and you cannot enter the desktop to start it, you can only try the following method: Troubleshooting-Advanced Options-Command Prompt Command 1 netstartvssrstrui.exe/offline:C:\windows=active Command 2 cd%windir%\system32 \configrenSYSTEMsy
 WPS and Office do not have Chinese fonts, and Chinese font names are displayed in English.
Jun 19, 2024 am 06:56 AM
My friend's computer, all Chinese fonts such as imitation Song, Kai style, Xing Kai, Microsoft Yahei, etc. cannot be found in WPS and OFFICE. The editor below will tell you how to solve this problem. The fonts in the system are normal, but all fonts in the WPS font options are not available, only cloud fonts. OFFICE only has English fonts, not any Chinese fonts. After installing different versions of WPS, English fonts are available, but there is also no Chinese font. Solution: Control Panel → Categories → Clock, Language, and Region → Change Display Language → (Region and Language) Management → (Language for Non-Unicode Programs) Change System Regional Settings → Chinese (Simplified, China) → Restart. Control Panel, change the view mode in the upper right corner to "Category", Clock, Language and Region, change
 What should I do if win10 does not switch users? Win10 login interface does not have the option to switch users. Solution
Jun 25, 2024 pm 05:21 PM
A problem that Windows 10 users may encounter is that they cannot find the switch user option on the login interface. So what should I do if there is no switch user option on the win10 login interface? Let this site give users a detailed explanation of the problem of not switching user options in the win10 login interface. Detailed solution to the problem of switching user options on the Win10 login interface: Check user account settings: First, make sure you have multiple user accounts on your computer and that these accounts are enabled. You can check and enable the account by following these steps: a. Press Win+I keys to open Settings and select "Accounts". b. Select "Family & Others" or &ld in the left navigation bar
 Is win11 24h2 worth installing? Comparison of the differences between Win11 24H2 and 23H2
Jun 11, 2024 pm 03:17 PM
The win1124h2 version is a version that many users are looking forward to. Now that the small update of Win1124H2 has been completed, it will welcome a larger Moment update. However, many users are asking whether win1124h2 is easy to use? What is the difference between Win1124H2 and 23H2? Let this site carefully introduce to users the differences between Win1124H2 and 23H2. What is the difference between Win1124H2 and 23H2? The Windows 1124H2 update brings many adjustments and new features to the Settings application, and accelerates the migration of Control Panel-related functions/features. Improved accessibility Windows 1124H2 includes several accessibility improvements: including color filters
 MHz is history! Microsoft Windows 11 memory speed unit switches to MT/s
Jun 25, 2024 pm 05:10 PM
Digital hardware enthusiasts all know that in recent years there have been two memory parameter marking units, namely "MHz" and "MT/s", which may be confusing to digital novices. "MHz" and "MT/s" are both measures of memory transfer performance, but they still have significant differences. MHz represents how many millions of cycles a memory module can perform per second, and each cycle is an operation performed on the memory module, such as storing and retrieving data. But due to the rapid development of current technology, new technology allows DDR memory to increase data transfer rate without increasing clock speed, and the old memory measurement method has also


