

Win2K下安装IIS 配置asp+cgi+php+mysql_MySQL

安装win2K,安装IIS ,其中Indexing Service, FrontPage 2000 Server Extensions, Internet Service Manager (HTML) 这几个别装,还有其它的一些,总之不用的都别装。(根据安全原则,最少的服务+最小的权限=最大的安全。)
首先,打开internet管理器(开始-->程序-->管理-->Internet服务管理)如果照上面所安装的,里面有一个默认站点和一个smtp的服务项选默认站点,删除其下面的所有目录。(按你键盘上的delete键)停掉iis,最简单的方法:开始-->运行-->打入net stop iisadmin 选择Y回车 (启动的命令是:net start w3svc)把C盘的Inetpub目录彻底删掉(停掉iis后才能删),在其它盘新建一个目录在IIS管理器中将默认站点的主目录指向刚才新建的目录如果你需要什么权限的目录可以自己慢慢建,需要什么权限开什么。
(特别注意写权限和执行程序的权限,没有绝对的必要千万不要给,默认是没给的,所以你不用研究,呵呵..)
应用程序配置:在IIS管理器中删除必须之外的任何无用映射,留下ASP, ASA和其他你确实需要用到的文件类型,(除了cgi,php,其它的我想你都没用,删除htw, htr, idq, ida……)不知道在哪删吗??方法:打开Internet服务管理->选择站点->属性->WWW服务->编辑->主目录->配置->应用程序映射,然后就开始一个个删吧(没有全选的,真麻烦)。接着在刚刚那个窗口的应用程序调试书签内将脚本错误消息改为发送文本(除非你想ASP出错的时候用户知道你的程序/网络/数据库结构)错误文本写什么?随便你喜欢,自己看着办。点击确定退出时别忘了让虚拟目录继承你设定的属性。
为了对付日益增多的cgi漏洞扫描器,还有一个小技巧可以参考,在IIS中将HTTP404 Object Not Found出错页面通过URL重定向到一个定制HTM文件,可以让目前绝大多数CGI漏洞扫描器失灵。其实原因很简单,大多数CGI扫描器在编写时为了方便,都是通过查看返回页面的HTTP代码来判断漏洞是否存在的,例如,着名的IDQ漏洞一般都是通过取1.idq来检验,如果返回HTTP200,就认为是有这个漏洞,反之如果返回HTTP404就认为没有,如果你通过URL将HTTP404出错信息重定向到HTTP404.htm文件,那么所有的扫描无论存不存在漏洞都会返回HTTP200,90%的CGI扫描器会认为你什么漏洞都有,结果反而掩盖了你真正的漏洞,让入侵者茫然无处下手,不过从个人角度来说,我还是认为扎扎实实做好安全设置比这样的小技巧重要的多。
Win2000的账号安全是另一个重点,首先,Win2000的默认安装允许任何用户通过空用户得到系统所有账号/共享列表,这个本来是为了方便局域网用户共享文件的,但是一个远程用户也可以得到你的用户列表并使用暴力法破解用户密码。很多朋友都知道可以通过更改注册表Local_Machine/System/CurrentControlSet/Control/LSA-RestrictAnonymous = 1来禁止139空连接,实际上win2000的本地安全策略(如果是域服务器就是在域服务器安全和域安全策略中)就有这样的选项RestrictAnonymous(匿名连接的额外限制),这个选项有三个值:
0:None. Rely on default permissions(无,取决于默认的权限)
1:Do not allow enumeration of SAM accounts and shares(不允许枚举SAM帐号和共享)
2:No access without explicit anonymous permissions(没有显式匿名权限就不允许访问)
0这个值是系统默认的,什么限制都没有,远程用户可以知道你机器上所有的账号、组信息、共享目录、网络传输列表(NetServerTransportEnum等等,对服务器来说这样的设置非常危险。
1这个值是只允许非NULL用户存取SAM账号信息和共享信息。
2这个值是在win2000中才支持的,需要注意的是,如果你一旦使用了这个值,你的共享估计就全部完蛋了,所以我推荐你还是设为1比较好。
好了,入侵者现在没有办法拿到我们的用户列表,我们的账户安全了……慢着,至少还有一个账户是可以跑密码的,这就是系统内建的administrator,怎么办?我改改改,在计算机管理->用户账号中右击administrator然后改名,改成什么随便你,只要能记得就行了。改了超管理用户名后,在Terminal Service的登录界面还是可以看到的(你登录过就自已记住啦),修改方法:运行regedit,找到HKEY_LOCAL_MACHINE/SOFTWARE/Microsoft/WindowsNT/CurrentVersion/winlogon项中的Don't Display Last User Name串数据改成1,这样系统不会自动显示上次的登录用户名。
为了安全,你还可以打开TCP/IP筛选,桌面上右击网上邻居->属性->右击你要配置的网卡->属性->TCP/IP->高级->选项->TCP/IP过滤,这里有三个过滤器,分别为:TCP端口、UDP端口和IP协议TCP端口,点击"只允许",然后在下面加上你需要开的端口,一般来说WEB服务器只需要开80(www),FTP服务器需要开20(FTP Data),21(FTP Control),3306(Mysql),3389(远程终端控制,如果你的主机托管在别人机房里,不能直接*作,就需要这个)邮件服务器可能需要打开25(SMTP),110(POP3),我对端口没研究,但如果照本文所提供的服务,你只要开以上几个就行了。(80,20,21,25,3306,3389)
--cgi支持
下载activeperl (可到www.perl.com下载最新版)
1、解压,运行install.exe,默认是安装在 C:/PERL 下,不过为了方便,请最好安装到 C:/USR 目录下,(这样写 Perl 解释器的路径就可以直接用 #!/usr/bin/perl 了,可以保持单机环境和网络环境路径一致。 安装时一路按Y即可。)
2、安装好后,按照下面三步来修改注册表: 运行 RegEdit,搜寻: HKEY_LOCAL_MACHINE/System/Currentcontrlset/Services/W3svc/Parameters/scriptMap/ 键名,
然后增加键名:".cgi",键值:"C:/USR/BIN/perl.exe %s %s" 和键名:".pl",键值:"C:/USR/BIN/perl.exe %s %s"
(不懂得建?那么:在右边的框内--->点右键--->新建-->字符串值 名称改为.cgi,双击该键即可输入数值数据,也就是上面说的键值)
因为要让这台主机支持php,所以顺便在这里添加上php和php3的支持(以后新建站点时可省事)
增加键名".php",键值:"C:/php/php.exe %s %s"
增加键名".php3",键值:"C:/php/php.exe %s %s"
OK,重启后即生效!cgi支持搞定!以后新建站点后,在应用程序配置里面默认就会加上php和cgi的支持(不给这个权限的话删掉就是了)。
cgi支持搞定!
--mysql支持
下载mysql (可到www.mysql.com下载最新版本)
1、解压,运行setup.exe完全安装,默认安装路径为:c:/mysql;
2、安装完成后,打开“开始”按钮中的“运行”,输入命令:C:/mysql/bin/mysqld-nt.exe --install,并执行;
3、开始-->程序-->管理工具-->服务-->找到mysql-->启动它;
4、mysql安装完成,重启win2000
5、重启后打开C:/mysql/bin/winmysqladmin.exe,在第一次用它时,需要建立管理员名及密码,分别设置用户名和密码,设定后,系统托盘会出现一个“红绿灯”的小图标(以后系统启动时均会自动加载)。
6、OK,mysql支持搞定!
--php支持
下载PHP (可到www.php.com下载最新版本)
1、将 php 4.0.4 解压到 c:/php;
2、将PHP目录内的 php.ini-dist 文件拷贝到WinNT目录内,改名为 php.ini; (这是php的配置文件,无需更改即可运行,我没仔细研究)
3、根据需要修改 php.ini 文件内容,如要使用 session 功能,请建立 c:/tmp 目录,并将 php.ini 文档内 session.save_path 的值设置成为绝对路径:c:/tmp;
4、将PHP目录内的 Php4ts.dll 文件复制到 WinNt/System32 目录内;
5、在控制面板中的管理工具里启动“Internet 服务管理器”(IIS);
6、打开站点属性,在 'ISAPI 筛选器'选项中, 增加新的筛选器,用 'PHP' 作为筛选器名称,在“可执行文件”栏中填入php4isapi.dll及其路径 (c:/php/sapi/php4isapi.dll)。
7、在属性的"文档"选项中"启用默认文档"加入"index.php";

Hot AI Tools

Undresser.AI Undress
AI-powered app for creating realistic nude photos

AI Clothes Remover
Online AI tool for removing clothes from photos.

Undress AI Tool
Undress images for free

Clothoff.io
AI clothes remover

AI Hentai Generator
Generate AI Hentai for free.

Hot Article
Hot Tools

Notepad++7.3.1
Easy-to-use and free code editor

SublimeText3 Chinese version
Chinese version, very easy to use

Zend Studio 13.0.1
Powerful PHP integrated development environment

Dreamweaver CS6
Visual web development tools

SublimeText3 Mac version
God-level code editing software (SublimeText3)
Hot Topics
 1376
1376
 52
52

 Solution to the problem that Win11 system cannot install Chinese language pack
Mar 09, 2024 am 09:48 AM
Solution to the problem that Win11 system cannot install Chinese language pack
Mar 09, 2024 am 09:48 AM
Solution to the problem that Win11 system cannot install Chinese language pack With the launch of Windows 11 system, many users began to upgrade their operating system to experience new functions and interfaces. However, some users found that they were unable to install the Chinese language pack after upgrading, which troubled their experience. In this article, we will discuss the reasons why Win11 system cannot install the Chinese language pack and provide some solutions to help users solve this problem. Cause Analysis First, let us analyze the inability of Win11 system to
 Unable to install guest additions in VirtualBox
Mar 10, 2024 am 09:34 AM
Unable to install guest additions in VirtualBox
Mar 10, 2024 am 09:34 AM
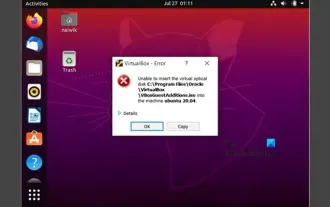
You may not be able to install guest additions to a virtual machine in OracleVirtualBox. When we click on Devices>InstallGuestAdditionsCDImage, it just throws an error as shown below: VirtualBox - Error: Unable to insert virtual disc C: Programming FilesOracleVirtualBoxVBoxGuestAdditions.iso into ubuntu machine In this post we will understand what happens when you What to do when you can't install guest additions in VirtualBox. Unable to install guest additions in VirtualBox If you can't install it in Virtua
 What should I do if Baidu Netdisk is downloaded successfully but cannot be installed?
Mar 13, 2024 pm 10:22 PM
What should I do if Baidu Netdisk is downloaded successfully but cannot be installed?
Mar 13, 2024 pm 10:22 PM
If you have successfully downloaded the installation file of Baidu Netdisk, but cannot install it normally, it may be that there is an error in the integrity of the software file or there is a problem with the residual files and registry entries. Let this site take care of it for users. Let’s introduce the analysis of the problem that Baidu Netdisk is successfully downloaded but cannot be installed. Analysis of the problem that Baidu Netdisk downloaded successfully but could not be installed 1. Check the integrity of the installation file: Make sure that the downloaded installation file is complete and not damaged. You can download it again, or try to download the installation file from another trusted source. 2. Turn off anti-virus software and firewall: Some anti-virus software or firewall programs may prevent the installation program from running properly. Try disabling or exiting the anti-virus software and firewall, then re-run the installation
 How to install Android apps on Linux?
Mar 19, 2024 am 11:15 AM
How to install Android apps on Linux?
Mar 19, 2024 am 11:15 AM
Installing Android applications on Linux has always been a concern for many users. Especially for Linux users who like to use Android applications, it is very important to master how to install Android applications on Linux systems. Although running Android applications directly on Linux is not as simple as on the Android platform, by using emulators or third-party tools, we can still happily enjoy Android applications on Linux. The following will introduce how to install Android applications on Linux systems.
 How to install creo-creo installation tutorial
Mar 04, 2024 pm 10:30 PM
How to install creo-creo installation tutorial
Mar 04, 2024 pm 10:30 PM
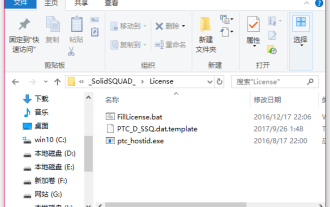
Many novice friends still don’t know how to install creo, so the editor below brings relevant tutorials on creo installation. Friends in need should take a look at it. I hope it can help you. 1. Open the downloaded installation package and find the License folder, as shown in the figure below: 2. Then copy it to the directory on the C drive, as shown in the figure below: 3. Double-click to enter and see if there is a license file, as shown below As shown in the picture: 4. Then copy the license file to this file, as shown in the following picture: 5. In the PROGRAMFILES file of the C drive, create a new PLC folder, as shown in the following picture: 6. Copy the license file as well Click in, as shown in the figure below: 7. Double-click the installation file of the main program. To install, check the box to install new software.
 How to install Podman on Ubuntu 24.04
Mar 22, 2024 am 11:26 AM
How to install Podman on Ubuntu 24.04
Mar 22, 2024 am 11:26 AM
If you have used Docker, you must understand daemons, containers, and their functions. A daemon is a service that runs in the background when a container is already in use in any system. Podman is a free management tool for managing and creating containers without relying on any daemon such as Docker. Therefore, it has advantages in managing containers without the need for long-term backend services. Additionally, Podman does not require root-level permissions to be used. This guide discusses in detail how to install Podman on Ubuntu24. To update the system, we first need to update the system and open the Terminal shell of Ubuntu24. During both installation and upgrade processes, we need to use the command line. a simple
 How to Install and Run the Ubuntu Notes App on Ubuntu 24.04
Mar 22, 2024 pm 04:40 PM
How to Install and Run the Ubuntu Notes App on Ubuntu 24.04
Mar 22, 2024 pm 04:40 PM
While studying in high school, some students take very clear and accurate notes, taking more notes than others in the same class. For some, note-taking is a hobby, while for others, it is a necessity when they easily forget small information about anything important. Microsoft's NTFS application is particularly useful for students who wish to save important notes beyond regular lectures. In this article, we will describe the installation of Ubuntu applications on Ubuntu24. Updating the Ubuntu System Before installing the Ubuntu installer, on Ubuntu24 we need to ensure that the newly configured system has been updated. We can use the most famous "a" in Ubuntu system
 Detailed steps to install Go language on Win7 computer
Mar 27, 2024 pm 02:00 PM
Detailed steps to install Go language on Win7 computer
Mar 27, 2024 pm 02:00 PM
Detailed steps to install Go language on Win7 computer Go (also known as Golang) is an open source programming language developed by Google. It is simple, efficient and has excellent concurrency performance. It is suitable for the development of cloud services, network applications and back-end systems. . Installing the Go language on a Win7 computer allows you to quickly get started with the language and start writing Go programs. The following will introduce in detail the steps to install the Go language on a Win7 computer, and attach specific code examples. Step 1: Download the Go language installation package and visit the Go official website
