
 Mobile Tutorial
Android Phone
How to take rectangular screenshot of vivox60 vivox60 rectangular screenshot tutorial
Mobile Tutorial
Android Phone
How to take rectangular screenshot of vivox60 vivox60 rectangular screenshot tutorial
How to take rectangular screenshot of vivox60 vivox60 rectangular screenshot tutorial

php editor Xinyi will introduce to you in detail how to use the rectangular screenshot function of vivox60. The rectangular screenshot function of vivox60 can help users accurately capture the content of any area on the screen, which is very practical and convenient. Through this tutorial, you will learn how to use the rectangular screenshot function on vivox60 mobile phone, allowing you to easily realize your screenshot needs. Follow the editor's steps to quickly master the rectangular screenshot technique of vivox60 and improve the efficiency of mobile phone screenshots!
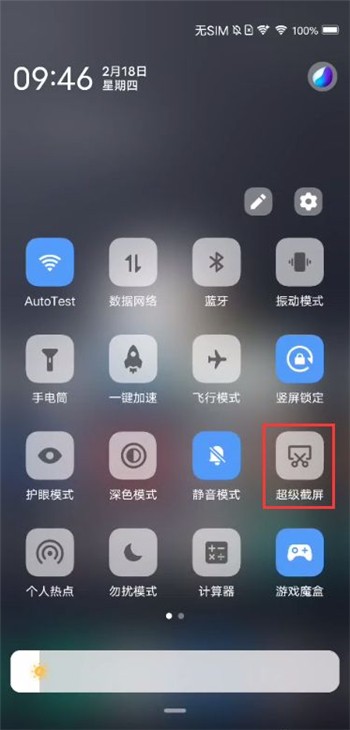
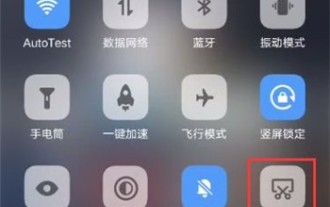
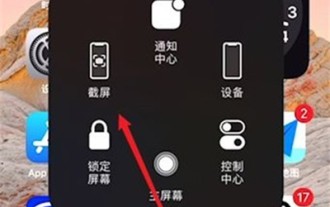
1. Swipe down from the top of the phone screen to call out the shortcut center, and click the [Super Screenshot] icon.
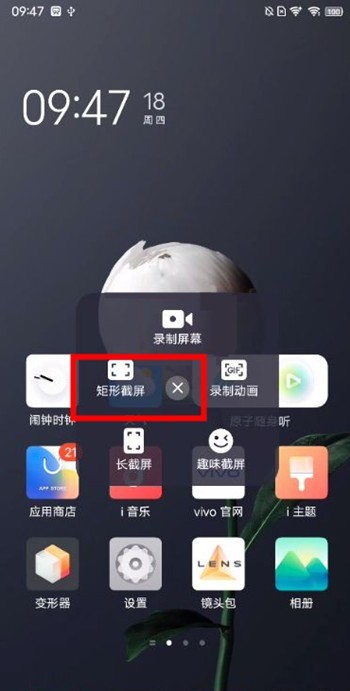
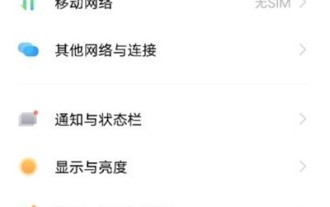
2. Click to select the [Rectangular Screenshot] option, and click [Save] after taking the screenshot.
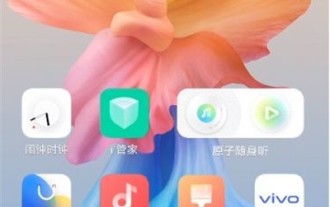
3. Adjust the upper border of the screenshot selection box to select the starting position of the long screenshot - slide up to capture, and wait until the screen capture is completed.
The above is the detailed content of How to take rectangular screenshot of vivox60 vivox60 rectangular screenshot tutorial. For more information, please follow other related articles on the PHP Chinese website!

Hot AI Tools

Undresser.AI Undress
AI-powered app for creating realistic nude photos

AI Clothes Remover
Online AI tool for removing clothes from photos.

Undress AI Tool
Undress images for free

Clothoff.io
AI clothes remover

Video Face Swap
Swap faces in any video effortlessly with our completely free AI face swap tool!

Hot Article
Hot Tools

Notepad++7.3.1
Easy-to-use and free code editor

SublimeText3 Chinese version
Chinese version, very easy to use

Zend Studio 13.0.1
Powerful PHP integrated development environment

Dreamweaver CS6
Visual web development tools

SublimeText3 Mac version
God-level code editing software (SublimeText3)
Hot Topics
 1387
1387
 52
52

 How to set up quick startup application in vivox60 Tutorial on how to enable quick startup application in vivox60
Mar 23, 2024 am 11:31 AM
How to set up quick startup application in vivox60 Tutorial on how to enable quick startup application in vivox60
Mar 23, 2024 am 11:31 AM
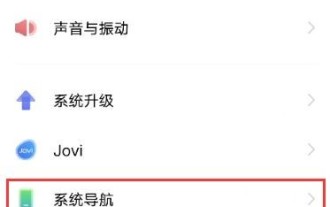
1. Click [System Navigation] in the phone settings menu. 2. Check [Full screen gestures]. 3. Click [Quick Launch Application]. 4. Turn on the switch on the right side of [Quick Launch Application].
 How to take rectangular screenshot of vivox60 vivox60 rectangular screenshot tutorial
Mar 23, 2024 am 08:46 AM
How to take rectangular screenshot of vivox60 vivox60 rectangular screenshot tutorial
Mar 23, 2024 am 08:46 AM
1. Swipe down from the top of the phone screen to call out the shortcut center, and click the [Super Screenshot] icon. 2. Click to select the [Rectangular Screenshot] option, and click [Save] after taking the screenshot. 3. Adjust the upper border of the screenshot selection box to select the starting position of the long screenshot - slide up to capture, and wait until the screen capture is completed.
 How to set up the screen on vivox60 animation tutorial
Mar 22, 2024 pm 04:20 PM
How to set up the screen on vivox60 animation tutorial
Mar 22, 2024 pm 04:20 PM
1. Click [Dynamic Effects] in the phone settings menu. 2. Click [On and off screen animation]. 3. Select the animation style you want to set.
 How to take a rectangular screenshot on an Apple phone_How to take a rectangular screenshot on an Apple phone
Mar 22, 2024 pm 09:46 PM
How to take a rectangular screenshot on an Apple phone_How to take a rectangular screenshot on an Apple phone
Mar 22, 2024 pm 09:46 PM
1. Enter the home screen of your Apple phone, click the auxiliary dot, and click to take a screenshot. 2. Click the screenshot thumbnail in the lower left corner to enter the screenshot editing interface. 3. Drag the four corners of the picture area and drag the screenshot area into a rectangle. This article takes Apple 12 as an example and is applicable to iOS14.7 system
 Where to change the fingerprint recognition animation on vivox60 How to change the fingerprint recognition animation on vivox60
Mar 22, 2024 pm 08:21 PM
Where to change the fingerprint recognition animation on vivox60 How to change the fingerprint recognition animation on vivox60
Mar 22, 2024 pm 08:21 PM
1. Open the phone settings and click Dynamic Effects. 2. Select the [Fingerprint Recognition Animation] option. 3. Click to select the fingerprint recognition animation setting you like.
 Where to turn on the marquee on vivox60 and how to set the light effect for incoming calls on vivox60
Mar 22, 2024 pm 04:11 PM
Where to turn on the marquee on vivox60 and how to set the light effect for incoming calls on vivox60
Mar 22, 2024 pm 04:11 PM
1. Click [Dynamic Effects] in the phone settings. 2. Click [Ambient Light Effect]. 3. Turn on the [Incoming Call] switch and click [Incoming Call Light Effect]. 4. Set up the marquee effect.
 How to restore factory settings of vivox60 vivox60 restore factory settings tutorial
Mar 22, 2024 pm 09:00 PM
How to restore factory settings of vivox60 vivox60 restore factory settings tutorial
Mar 22, 2024 pm 09:00 PM
1. Click on the desktop settings to open 2. Select in 3. Friends can choose according to their own needs. Method 2: If the phone has a black screen or freezes, friends who want to restore factory settings can perform the following steps. : 1. Press and hold the power button and volume up button to enter recovery mode and perform dual clear operation; 2. Select wipedata/factoryreset to clear all data/restore factory settings (Chinese recovery selects clear data); 3. Wait for the interface to jump, and then Select rebootsyst
 How to set red envelope reminder in vivox60 Tutorial on how to enable red envelope reminder in vivox60
Mar 22, 2024 pm 03:42 PM
How to set red envelope reminder in vivox60 Tutorial on how to enable red envelope reminder in vivox60
Mar 22, 2024 pm 03:42 PM
1. Open the [Settings] icon on your phone. 2. After entering the settings page, click the [Jovi] option. 3. Click the [Scene Service] option in Jovi. 4. After entering the scene service setting page, click the [Red Packet Assistant] option. 5. Turn on the [Red Envelope Assistant] and [Red Envelope Alert Sound] switches.
