
 Mobile Tutorial
Android Phone
How to import and export contacts in vivos9 Tutorial on how to import and export contacts in vivos9
Mobile Tutorial
Android Phone
How to import and export contacts in vivos9 Tutorial on how to import and export contacts in vivos9
How to import and export contacts in vivos9 Tutorial on how to import and export contacts in vivos9

php Xiaobian Yuzai will introduce to you a detailed tutorial on how to import and export contacts on vivos9 mobile phone. As a powerful smartphone, vivos9 imports and exports contacts is a common operation during use. Through this tutorial, you can easily learn how to import and export contacts on vivos9 mobile phone, making your address book management more convenient!
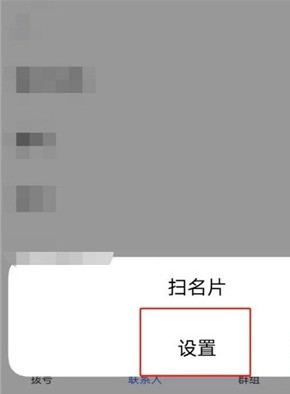
1. Find and open [Contacts] on the desktop and click the three dots in the upper right corner.
2. Click [Settings].
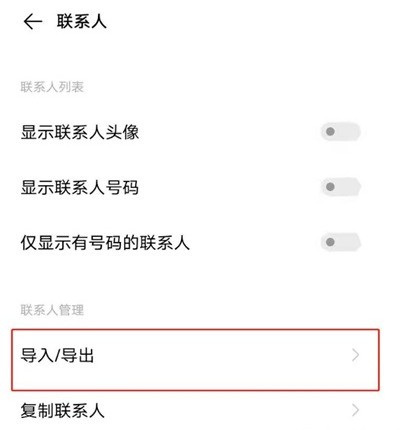
3. Click [Import/Export].
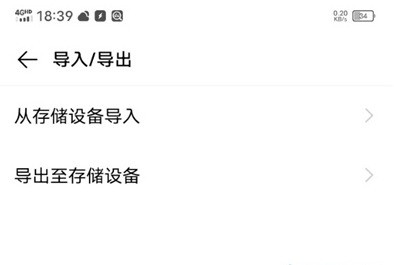
4. Select [Import from storage device].
The above is the detailed content of How to import and export contacts in vivos9 Tutorial on how to import and export contacts in vivos9. For more information, please follow other related articles on the PHP Chinese website!

Hot AI Tools

Undresser.AI Undress
AI-powered app for creating realistic nude photos

AI Clothes Remover
Online AI tool for removing clothes from photos.

Undress AI Tool
Undress images for free

Clothoff.io
AI clothes remover

Video Face Swap
Swap faces in any video effortlessly with our completely free AI face swap tool!

Hot Article
Hot Tools

Notepad++7.3.1
Easy-to-use and free code editor

SublimeText3 Chinese version
Chinese version, very easy to use

Zend Studio 13.0.1
Powerful PHP integrated development environment

Dreamweaver CS6
Visual web development tools

SublimeText3 Mac version
God-level code editing software (SublimeText3)
Hot Topics
 1386
1386
 52
52

 Does vivos9 support wireless charging function?
Dec 09, 2022 am 10:46 AM
Does vivos9 support wireless charging function?
Dec 09, 2022 am 10:46 AM
vivos9 does not support wireless charging. This model is equipped with a 4000 mAh capacity non-removable battery and supports 33W wired charging; vivo S9 is a mobile phone product released by vivo on March 3, 2021, using a 6.44-inch AMOLED notch screen; It comes in three colors: Impression Light, Midnight Blue, and Morning Dew White.
 How to switch the input method in vivos9 How to switch the input method in vivos9
Mar 22, 2024 pm 08:41 PM
How to switch the input method in vivos9 How to switch the input method in vivos9
Mar 22, 2024 pm 08:41 PM
1. Open system settings and click [System Management]. 2. Click [Input Method]. 3. Click [Default Input Method] to switch to the input method you want to set.
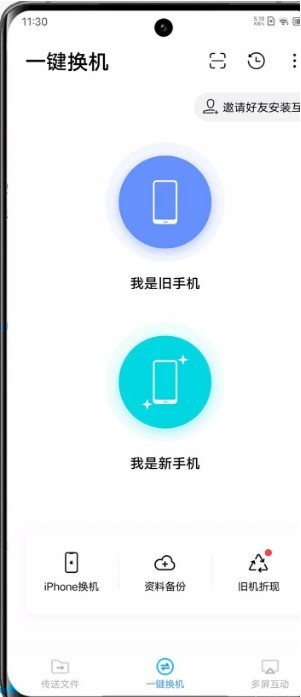 How to change phones with vivos9 with one click vivos9 one-click phone change tutorial
Mar 22, 2024 pm 07:21 PM
How to change phones with vivos9 with one click vivos9 one-click phone change tutorial
Mar 22, 2024 pm 07:21 PM
1. Open one-click phone replacement on the desktop, click "I am a new phone" on the new phone, and click "I am an old phone" on the old phone. 2. The code scanning interface will appear on the new phone. Use the new phone to scan the QR code on the old phone. 3. Select the content in the old phone and click to start switching.
 Where to enter the vivos9 safe and share the location of the vivos9 safe
Mar 22, 2024 pm 08:36 PM
Where to enter the vivos9 safe and share the location of the vivos9 safe
Mar 22, 2024 pm 08:36 PM
1. Open the file management on the mobile phone desktop. 2. Click [Security Cabinet], enter a secret password or verify your face/fingerprint. 3. After clicking to enter, you can view the pictures, videos, audio and other files in the safe. 4. The photo album's "View Safe" function allows you to quickly encrypt pictures or videos in the photo album. After encryption, you can enter the photo album--Settings--View Safe.
 How to cast vivos9 screen How to cast vivos9 screen to TV
Mar 23, 2024 am 10:50 AM
How to cast vivos9 screen How to cast vivos9 screen to TV
Mar 23, 2024 am 10:50 AM
1. Find the settings icon on the mobile phone system desktop and click to open it. 2. Find the multi-screen interaction option on the settings page and click to enter. 3. Then find the switch button on the right side of the multi-screen interaction option and turn on this function. 4. After opening, it will automatically search for devices that can cast the screen. Click on the device list to select the TV you want to cast the screen to.
 How to enable mutual transfer in vivos9 Steps to enable mutual transfer in vivos9
Mar 23, 2024 am 09:51 AM
How to enable mutual transfer in vivos9 Steps to enable mutual transfer in vivos9
Mar 23, 2024 am 09:51 AM
1. Swipe down from the top right side of the phone screen to call out the shortcut center, and light up the [vivo mutual transfer] icon. 2. Or click [Other networks and connections] in the phone settings menu. 3. Click [vivo mutual transmission] and turn on the switch. 4. Then enter the photo album or file management, select/check the picture or file, click Share, and then you will enter the pop-up interface, select the other party's device to send, and the other party can choose to receive.
 How to remove watermark in vivos9 Steps and methods to remove watermark in vivos9
Mar 22, 2024 pm 09:06 PM
How to remove watermark in vivos9 Steps and methods to remove watermark in vivos9
Mar 22, 2024 pm 09:06 PM
1. Open the phone camera and click [three] in the upper right corner to enter settings. 2. Click [Watermark]. 3. Just turn off the watermark inside.
 How to set up rechargeable battery protection on vivos9 Tutorial on setting up rechargeable battery protection on vivos9
Mar 22, 2024 pm 04:41 PM
How to set up rechargeable battery protection on vivos9 Tutorial on setting up rechargeable battery protection on vivos9
Mar 22, 2024 pm 04:41 PM
1. Open the phone settings and click [Battery]. 2. After entering, you can set the charging mode. You can set the balanced charging mode or high-speed charging mode. Just move the small dot left and right. This article takes vivos9 as an example and is applicable to the OriginOS1.0 system.
