
 Mobile Tutorial
iPhone
How to disable the display of location information when taking photos on an Apple mobile phone How to disable the display of location information when taking photos on a mobile phone
Mobile Tutorial
iPhone
How to disable the display of location information when taking photos on an Apple mobile phone How to disable the display of location information when taking photos on a mobile phone
How to disable the display of location information when taking photos on an Apple mobile phone How to disable the display of location information when taking photos on a mobile phone

php editor Zimo will introduce to you how to disable the display of location information when taking photos on an Apple mobile phone. When you share a photo, you may not want your location information to be leaked, so it's important to prevent location information from being displayed when taking photos. On Apple phones, you can achieve this goal through simple settings and protect your privacy. Next, let’s learn about the specific steps.
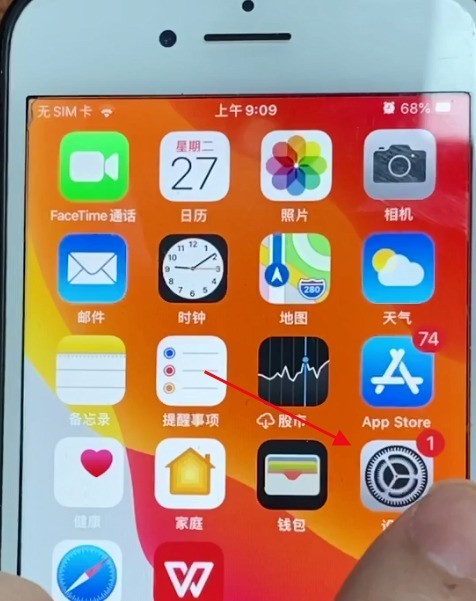
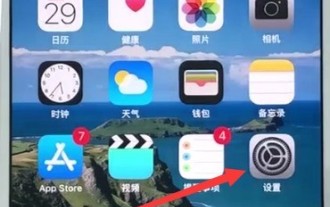
1. Open the settings of your Apple phone.
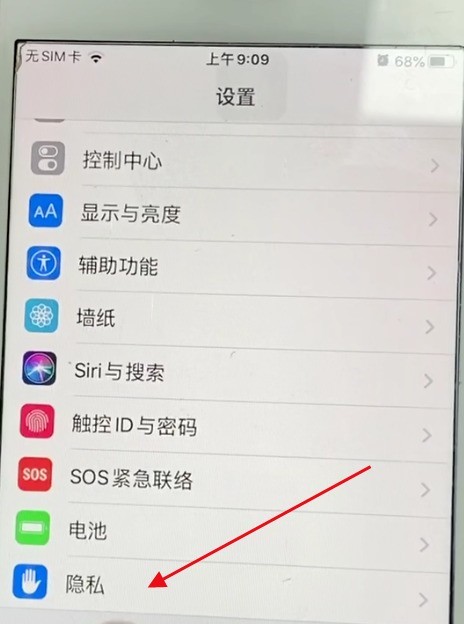
2. Find privacy in settings.
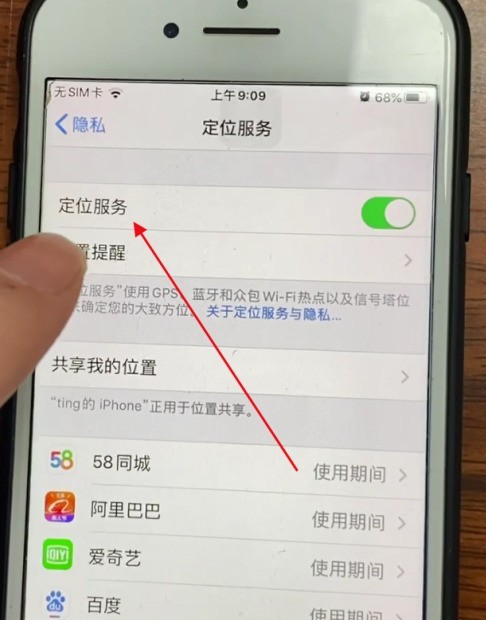
3. Find location services in privacy settings.
4. Find the camera in the location service.
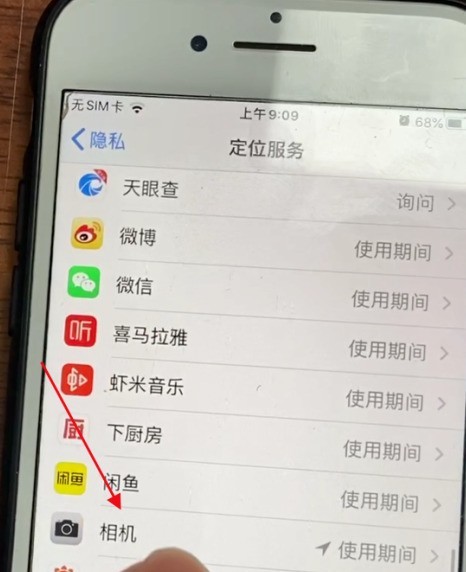
5. Change the camera's permission to access location information to Never, so that the location information will not be stored in the photos taken.

Okay, that’s it for today’s sharing. More exciting tutorials can be found on the PHP Chinese website!
The above is the detailed content of How to disable the display of location information when taking photos on an Apple mobile phone How to disable the display of location information when taking photos on a mobile phone. For more information, please follow other related articles on the PHP Chinese website!

Hot AI Tools

Undresser.AI Undress
AI-powered app for creating realistic nude photos

AI Clothes Remover
Online AI tool for removing clothes from photos.

Undress AI Tool
Undress images for free

Clothoff.io
AI clothes remover

AI Hentai Generator
Generate AI Hentai for free.

Hot Article
Hot Tools

Notepad++7.3.1
Easy-to-use and free code editor

SublimeText3 Chinese version
Chinese version, very easy to use

Zend Studio 13.0.1
Powerful PHP integrated development environment

Dreamweaver CS6
Visual web development tools

SublimeText3 Mac version
God-level code editing software (SublimeText3)
Hot Topics


 How to connect Xiaomi Bluetooth headset to Apple phone_Introduction to tutorial on pairing Xiaomi Bluetooth headset to iPhone
Mar 23, 2024 pm 03:01 PM
How to connect Xiaomi Bluetooth headset to Apple phone_Introduction to tutorial on pairing Xiaomi Bluetooth headset to iPhone
Mar 23, 2024 pm 03:01 PM
1. Place the earphones in the charging box and press and hold the button under the charging box for ten seconds. 2. Select Bluetooth in the phone settings menu. 3. Turn on the button on the right side of Bluetooth and connect the Xiaomi headphones.
 How to disable shake to jump on iPhone
Apr 02, 2024 am 08:23 AM
How to disable shake to jump on iPhone
Apr 02, 2024 am 08:23 AM
Apple will ban "Shake" jump ads, which has aroused praise. How can users turn it off? How can I turn off "Shake" ads? Enter Settings-Privacy-Other Privacy Settings-Enable automatic application jump reminder. Users currently using Honor, Huawei, and Xiaomi ThePaper can refer to the above method. 2. Close in the application: In the APP that jumps to the advertisement, find Settings-Privacy Settings-Advertising Settings-Power on and shake to perform related operations. Newly added app lock: [Apple] Settings - Screen Time - APP Limits - Add Limit - Set Time - Add; [Android] Settings - Permissions and Privacy - Privacy - App Lock.
 Steps to set up a blacklist on an Apple phone
Mar 26, 2024 pm 07:00 PM
Steps to set up a blacklist on an Apple phone
Mar 26, 2024 pm 07:00 PM
1. Click the dial button. 2. Click on the address book and select the blocked contact. 3. Click to block this caller number.
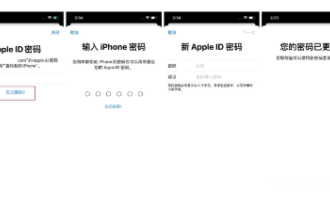 What to do if you forget your Apple ID password? Detailed explanation: How to reset the password on your Apple phone
Mar 29, 2024 am 10:46 AM
What to do if you forget your Apple ID password? Detailed explanation: How to reset the password on your Apple phone
Mar 29, 2024 am 10:46 AM
What should I do if I forget my Apple ID password? With the development of the information age, people have registered many personal accounts online, and the number of passwords corresponding to each account has also increased, which is very easy to confuse. Recently, a friend forgot his Apple ID password and doesn't know how to retrieve it. Below, Zhao Wenting will teach you how to retrieve your Apple ID password. Tools/Materials System version: iOS15.6 Brand model: iphone11 Method/step: Method one: Reset ID password 1. If your iPhone can be used normally, but you just forgot the password for logged in appleid, you only need to log in to appleid Click [Log Out] at the login page, then click [Forgot Password], enter the iPhone lock screen password to reset the iPhone
 Simple steps to copy and paste on iPhone
Mar 26, 2024 pm 07:00 PM
Simple steps to copy and paste on iPhone
Mar 26, 2024 pm 07:00 PM
1. First, we press and hold the text that needs to be copied. After a vertical bar appears on the text, pull the vertical bar to select the text that needs to be copied. 2. After selecting, click [Copy]. 3. Then go to the place where you need to paste, click or long press in the input box, and click [Paste].
 Simple steps to set an alarm ringtone on your iPhone
Mar 26, 2024 pm 09:20 PM
Simple steps to set an alarm ringtone on your iPhone
Mar 26, 2024 pm 09:20 PM
1. Enter the clock. 2. Click the alarm clock and click Add. 3. After setting the time, click the ringtone. 4. Now click Return to the ringtone you like and click Save.
 An easy way to set up call forwarding on your Apple phone
Mar 23, 2024 am 11:26 AM
An easy way to set up call forwarding on your Apple phone
Mar 23, 2024 am 11:26 AM
1. After turning on the phone, click the dial button. 2. Click to switch [Dial Keyboard] again. 3. Then we only need to dial and enter [**21*+phone number to be transferred+#] and click to dial. 4. Wait until the following page appears, click Close, which means the setting is successful. Because the input number in the example is not the correct number, it will show failure. Under normal circumstances, it will show success. 5. When we need to cancel call transfer, we only need to dial [##21] and click to dial. 6. The following page appears, indicating that the call transfer has been cancelled. Click to close.
 Tutorial on how to open the floating ball on your iPhone
Mar 23, 2024 pm 05:00 PM
Tutorial on how to open the floating ball on your iPhone
Mar 23, 2024 pm 05:00 PM
1. First click to open [Settings]. 2. Click [General]. 2. Click to turn on [Accessibility], 3. Click to turn on the switch on the right side of [Assistive Touch].
