
 Mobile Tutorial
Android Phone
How to enable payment protection on OnePlus 9pro_Steps to enable payment protection on OnePlus 9pro
Mobile Tutorial
Android Phone
How to enable payment protection on OnePlus 9pro_Steps to enable payment protection on OnePlus 9pro
How to enable payment protection on OnePlus 9pro_Steps to enable payment protection on OnePlus 9pro

php editor Xiaoxin will introduce you in detail the steps to enable the payment protection function of OnePlus 9 Pro. Payment protection is an important security feature that can effectively protect users’ payment information and account security. With simple settings, you can easily turn on payment protection to ensure safer and more reliable payments when using OnePlus 9 Pro. Next, let us learn about the steps to enable the payment protection function of OnePlus 9 Pro!
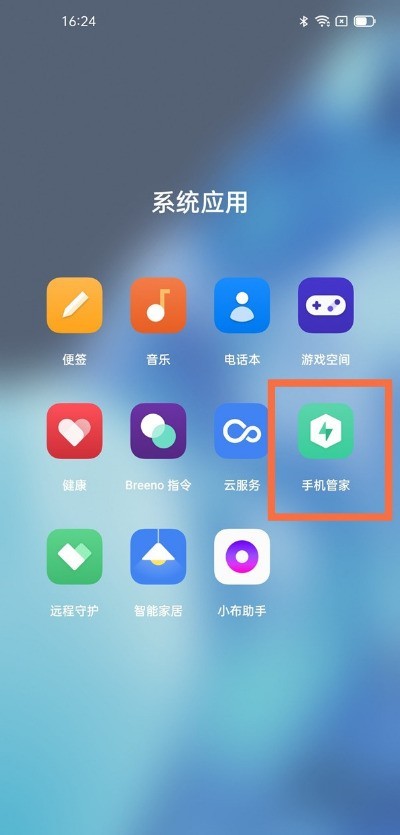
1. Click on the Mobile Manager app on the desktop.
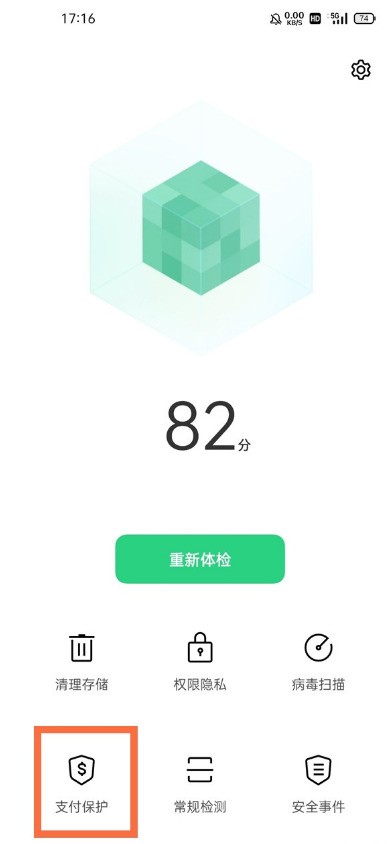
2. Click [Payment Protection].
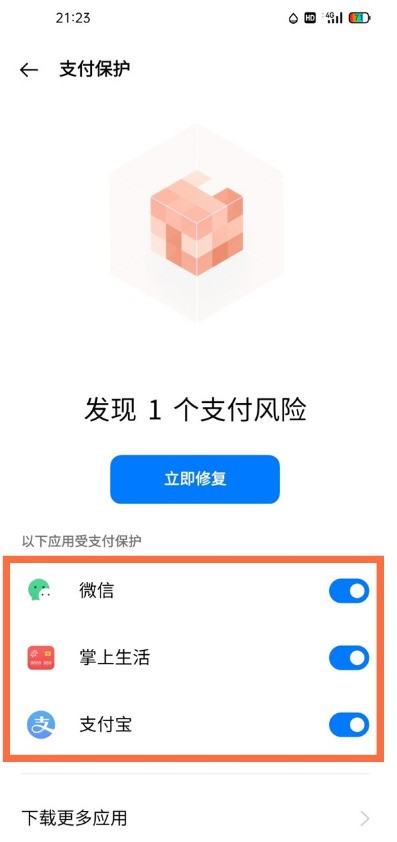
3. Turn on the switch on the right side of the application you want to open.
The above is the detailed content of How to enable payment protection on OnePlus 9pro_Steps to enable payment protection on OnePlus 9pro. For more information, please follow other related articles on the PHP Chinese website!

Hot AI Tools

Undresser.AI Undress
AI-powered app for creating realistic nude photos

AI Clothes Remover
Online AI tool for removing clothes from photos.

Undress AI Tool
Undress images for free

Clothoff.io
AI clothes remover

Video Face Swap
Swap faces in any video effortlessly with our completely free AI face swap tool!

Hot Article
Hot Tools

Notepad++7.3.1
Easy-to-use and free code editor

SublimeText3 Chinese version
Chinese version, very easy to use

Zend Studio 13.0.1
Powerful PHP integrated development environment

Dreamweaver CS6
Visual web development tools

SublimeText3 Mac version
God-level code editing software (SublimeText3)
Hot Topics
 1389
1389
 52
52

 How to enable wide-angle mode on OnePlus 9pro_How to enable wide-angle mode on OnePlus 9pro
Mar 23, 2024 pm 01:20 PM
How to enable wide-angle mode on OnePlus 9pro_How to enable wide-angle mode on OnePlus 9pro
Mar 23, 2024 pm 01:20 PM
1. Find and open the camera icon on the desktop. 2. Click the three-number icon at the top of the photo page to enter the ultra-wide-angle interface. 3. You can also adjust the wide-angle range independently.
 How to set up dual wifi network acceleration on OnePlus 9pro_How to set up dual wifi network acceleration on OnePlus 9pro
Mar 23, 2024 am 09:16 AM
How to set up dual wifi network acceleration on OnePlus 9pro_How to set up dual wifi network acceleration on OnePlus 9pro
Mar 23, 2024 am 09:16 AM
1. Click [WLAN] in the phone settings menu. 2. Click [Dual WiFi Network Acceleration]. 3. Turn on the switch on the right side of [Smart Start Dual WiFi Network Acceleration].
 How to turn on the Bluetooth audio codec on OnePlus 9pro_Steps to turn on the Bluetooth audio codec on OnePlus 9pro
Mar 22, 2024 pm 06:21 PM
How to turn on the Bluetooth audio codec on OnePlus 9pro_Steps to turn on the Bluetooth audio codec on OnePlus 9pro
Mar 22, 2024 pm 06:21 PM
1. Click [Other Settings] in the phone settings menu. 2. Click [Developer Options]. 3. Click [Bluetooth Audio Codec]. 4. Check [LHDC]. Editor’s tip: This function requires the Bluetooth headset to also support the LHDC codec format.
 How to enable Bluetooth on OnePlus 9pro_How to enable Bluetooth on OnePlus 9pro
Mar 23, 2024 pm 02:06 PM
How to enable Bluetooth on OnePlus 9pro_How to enable Bluetooth on OnePlus 9pro
Mar 23, 2024 pm 02:06 PM
1. Click [Bluetooth] in the phone settings menu. 2. Turn on the Bluetooth switch, and the phone will automatically search for connectable devices. Click on the device name and wait for successful pairing. 3. You can also pull down the status bar from the top of the screen and click the [Bluetooth] icon.
 How to set the flash reminder function on OnePlus 9pro_How to set the flash reminder function on OnePlus 9pro
Mar 23, 2024 pm 02:51 PM
How to set the flash reminder function on OnePlus 9pro_How to set the flash reminder function on OnePlus 9pro
Mar 23, 2024 pm 02:51 PM
1. Find and open the phone on the desktop, click the three dots in the upper right corner. 2. Click the [Settings] option. 3. Turn on the switch on the right side of [Incoming Call Flash].
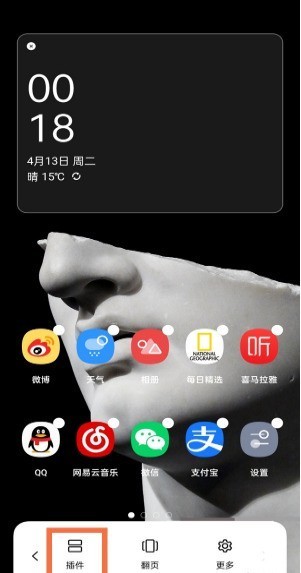 How to add desktop plug-ins to OnePlus 9pro_How to add desktop plug-ins to OnePlus 9pro
Mar 23, 2024 am 08:11 AM
How to add desktop plug-ins to OnePlus 9pro_How to add desktop plug-ins to OnePlus 9pro
Mar 23, 2024 am 08:11 AM
1. Press and hold a blank space on the desktop to enter the desktop editing interface, and click [Plug-ins]. 2. Select the plug-in to be set. After the addition is completed, it will be displayed on the desktop.
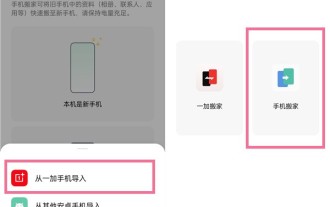 How to migrate data on OnePlus 9pro_Tutorial on data migration on OnePlus 9pro
Mar 22, 2024 pm 09:40 PM
How to migrate data on OnePlus 9pro_Tutorial on data migration on OnePlus 9pro
Mar 22, 2024 pm 09:40 PM
1. Download "OnePlus Moving" and "Mobile Phone Moving" from the OnePlus Store on your old phone. After installation, open "OnePlus Moving" on your old phone. If a pop-up pops up [Do you want to allow OnePlus Moving to obtain storage permissions for this device? ] Please select [Always allow]. 2. Open "Mobile Phone" on the new phone, select "This is a new phone" > select "Import from OnePlus Phone" > select "Mobile Phone". 3. Use the "Mobile Moving" function of the old phone to scan the QR code of the new phone > select the data to be moved > start moving > complete.
 How to hide the app name on OnePlus 9pro_How to hide the app name on OnePlus 9pro
Mar 23, 2024 pm 06:10 PM
How to hide the app name on OnePlus 9pro_How to hide the app name on OnePlus 9pro
Mar 23, 2024 pm 06:10 PM
1. Press and hold a blank space on the desktop to enter the desktop editing interface, and click [More]. 2. Click the [Icon] option. 3. Slide the button under [Application Name Size] to the far left.
