
This article will guide you on how to set up an Internet disconnect switch on your Windows 11/10 system. This function is mainly used to quickly cut off the network connection in emergency situations. Therefore, it is called a panic button.

In Windows systems, "Kill Switch" is a function or mechanism that allows users to immediately and effectively cut off the computer's connection to the Internet, or disconnect from the network. This feature is widely viewed as an important security measure that helps protect an individual's sensitive data, maintain privacy, and prevent unauthorized access. By using Kill Switch, users can quickly respond to cybersecurity threats and ensure their systems and data are safe. The existence of this feature provides users with a convenient and effective way to control their Internet connection, thereby reducing the risk of cyber attacks or data leaks. Therefore, the "Kill Switch" function on Windows systems can provide users with additional security protection when browsing the Internet, allowing them to be more confident
Open settings.
First, open the Settings app by pressing the Win I hotkey and then move to the Network & Internet tab from the left pane.
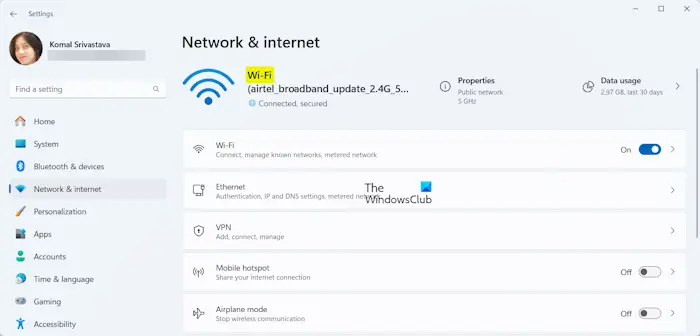
After entering the name of the adapter, right-click on a blank space on the desktop. Select "New" and then click "Shortcut" to create a new desktop shortcut.
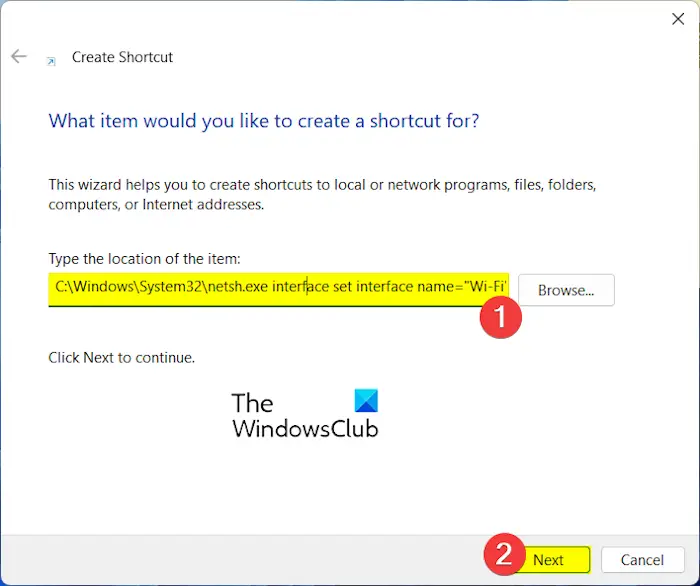
C:WindowsSystem32netsh.exe interface set interface name=”NET”admin=disabled
C:WindowsSystem32netsh.exe interface set interface name="WiFi_Name" admin = disabled
For example, in my case, the command is:
C:WindowsSystem32netsh.exe interface set interface name="Wi-Fi" admin = disabled
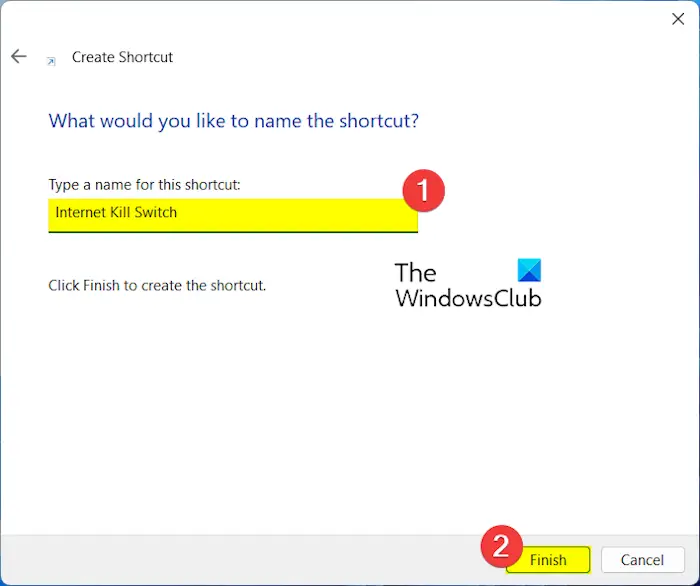
After creating the shortcut, right-click on it and select the Properties option from the context menu.
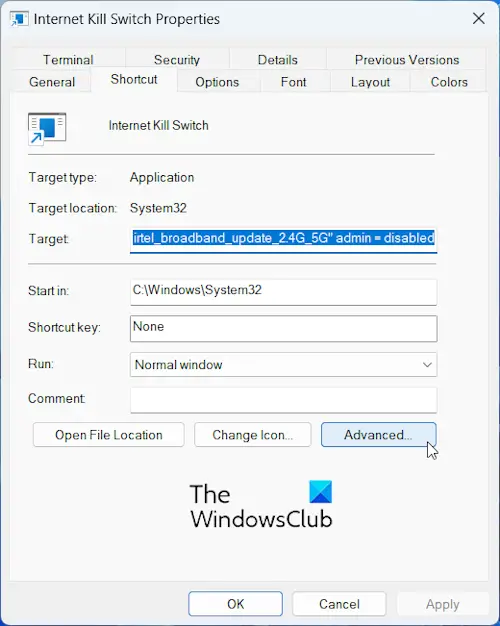
Now, click on the Advanced button.
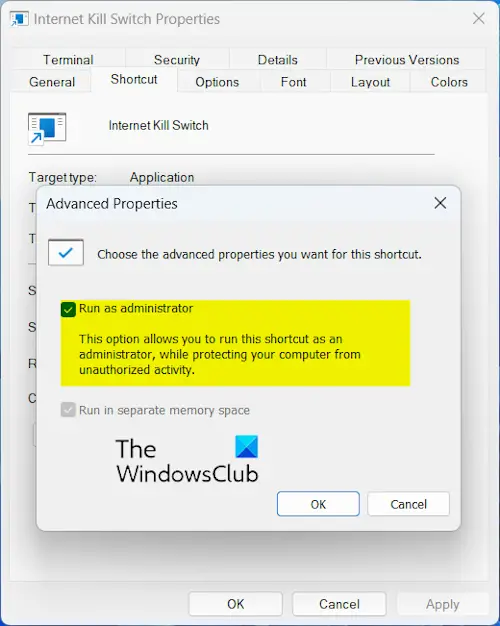
Then, select the Run as administrator checkbox in the prompt that opens. Then, click the OK button.
Next, click the Apply>OK button to save the changes.
You can now double-click this newly created shortcut, Internet Kill Switch, to run a command and quickly disconnect your computer from the Internet.
If you want to reconnect to the Internet, you can create another switch to connect to the Internet immediately. To do this, follow the steps mentioned above to create a shortcut. However, when entering the location of the shortcut, enter the following command:
C:WindowsSystem32netsh.exe interface set interface name="Wi-Fi" admin = enabled
Once the shortcut is created, you can run it at any time to quickly reconnect to the Internet.
The above is the detailed content of How to create an Internet kill switch on Windows 11/10?. For more information, please follow other related articles on the PHP Chinese website!


