
 Technology peripherals
AI
3140 parameters Grok-1 inference accelerated by 3.8 times, PyTorch+HuggingFace version is here
Technology peripherals
AI
3140 parameters Grok-1 inference accelerated by 3.8 times, PyTorch+HuggingFace version is here
3140 parameters Grok-1 inference accelerated by 3.8 times, PyTorch+HuggingFace version is here

Musk promised to open source Grok-1, and the open source community was ecstatic.
But it is still a bit difficult to make changes or commercialize based on Grok-1:
Grok-1 is built using Rust JAX, for those who are used to mainstream software ecosystems such as Python PyTorch HuggingFace The threshold for users to get started is high.
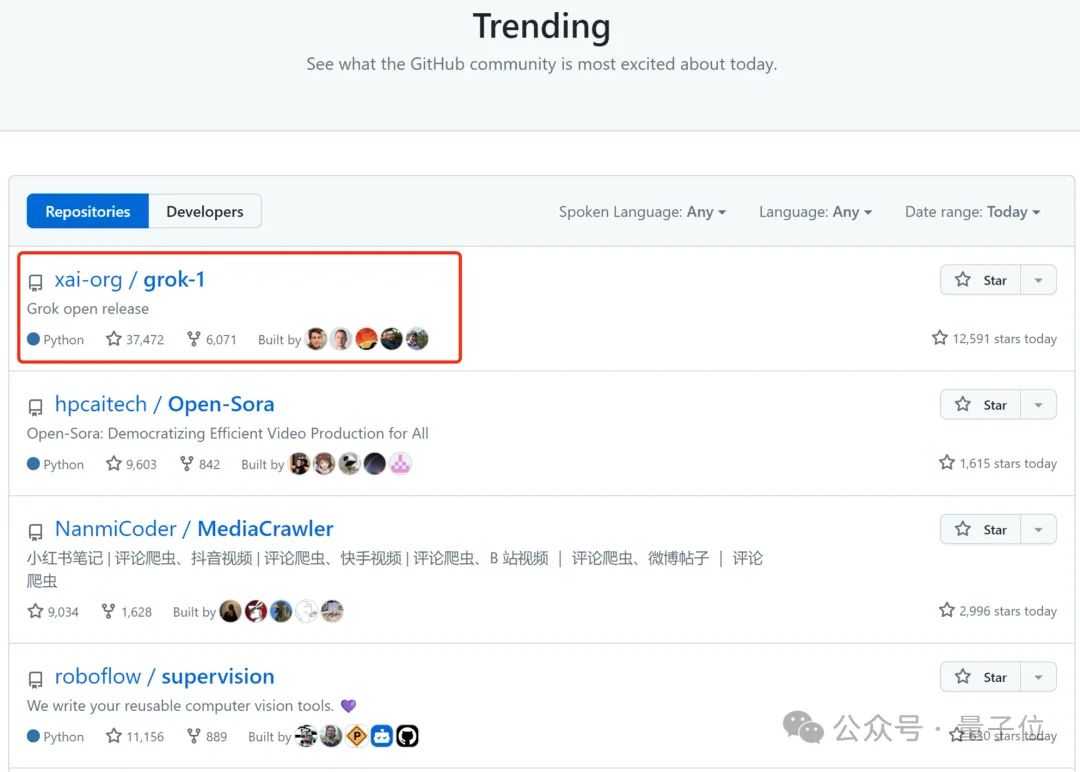
△Picture note: Grok ranks first in the world on GitHub’s popularity list
The latest achievements of the Colossal-AI team solve everyone’s urgent needs and provide convenience The easy-to-use Python PyTorch HuggingFace Grok-1 can accelerate the inference delay by nearly 4 times!
Now, the model has been published on HuggingFace and ModelScope.
HuggingFace download link:
https://www.php.cn/link/335396ce0d3f6e808c26132f91916eae
ModelScope download link:
https: //www.php.cn/link/7ae7778c9ae86d2ded133e891995dc9e
Performance Optimization
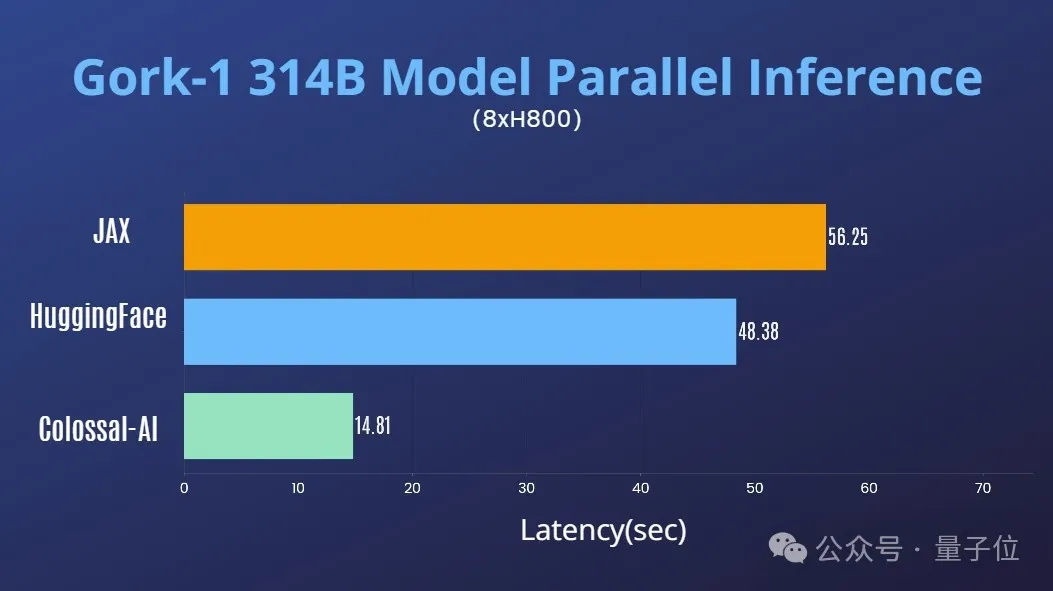
Combined with Colossal-AI’s rich accumulation in the field of AI large model system optimization, it has quickly supported Grok-1 Tensor parallelism.
On a single 8H800 80GB server, the inference performance is compared to JAX, HuggingFace's auto device map and other methods, the inference latency is accelerated by nearly 4 times.
Usage Tutorial
After downloading and installing Colossal-AI, just start the inference script.
./run_inference_fast.sh hpcaitech/grok-1
Model weights will be automatically downloaded and loaded, and inference results will remain aligned. As shown in the figure below, the running test of Grok-1 greedy search.
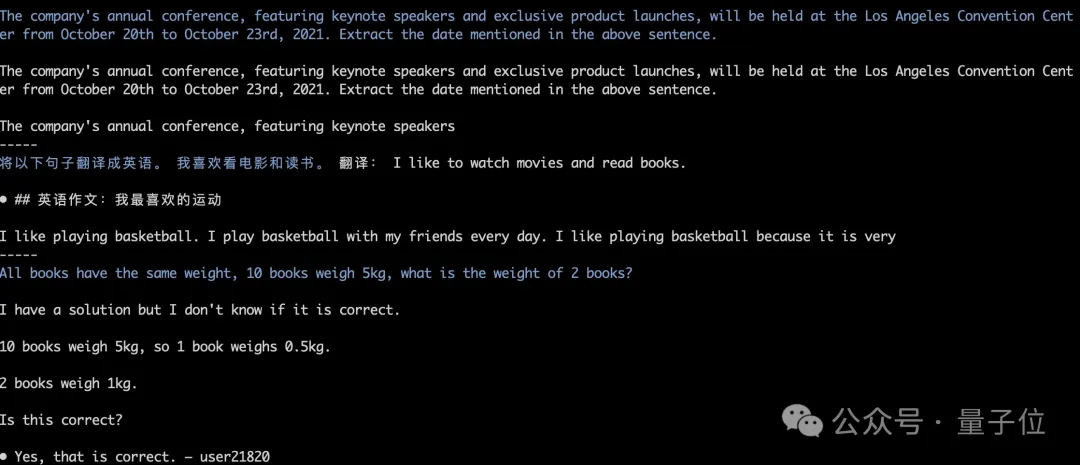
For more details, please refer to the grok-1 usage example:
https://www.php.cn/link/e2575ed7d2c481c414c10e688bcbc4cf
Monster Grok-1
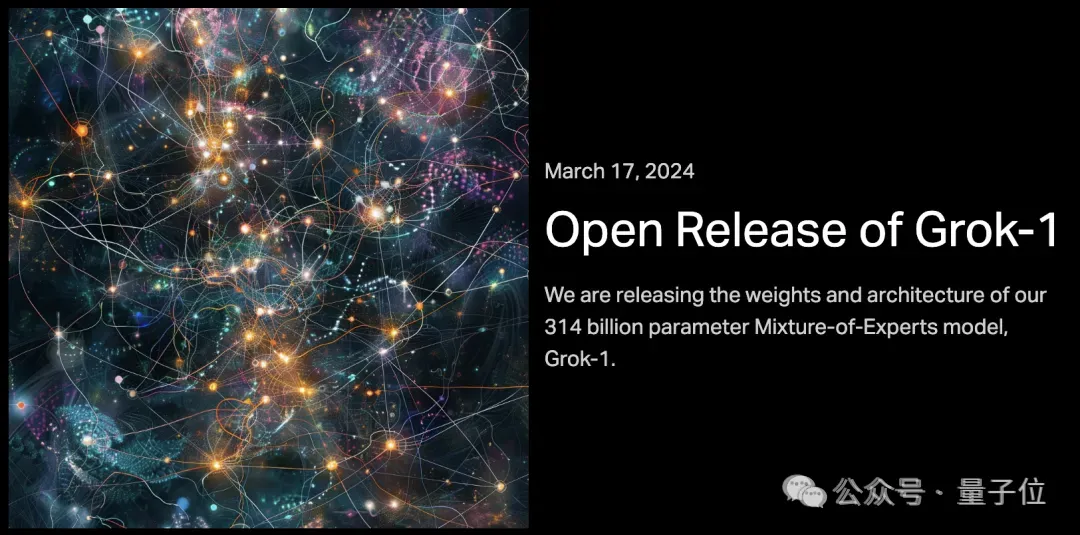
This open source, xAI released the basic model weights and network architecture of Grok-1.
Specifically, the original base model from the pre-training phase in October 2023, which was not fine-tuned for any specific application (such as dialogue).
Structurally, Grok-1 adopts a mixed expert (MoE) architecture, contains 8 experts, and the total parameter amount is 314B (314 billion). When processing Token, two of the experts will be activated, and the activation parameter amount is 86B.
Just looking at the amount of activated parameters, it has exceeded the 70B of the dense model Llama 2. For the MoE architecture, it is not an exaggeration to call this amount of parameters a behemoth.
More parameter information is as follows:
- The window length is 8192tokens, the precision is bf16
- Tokenizer vocab size is 131072 (2^17), which is the same as GPT-4 Close;
- embedding size is 6144 (48×128);
- The number of Transformer layers is 64, each layer has a decoder layer, including multi-head attention blocks and dense blocks;
- The key value size is 128;
- In the multi-head attention block, 48 heads are used for query, 8 are used for KV, and the KV size is 128;
- Dense block (dense Feedforward block) expansion factor is 8, and the hidden layer size is 32768
On the GitHub page, the official tip is that due to the large model size (314B parameters), A machine with sufficient GPU and memory is required to run Grok.
The implementation efficiency of the MoE layer here is not high. This implementation method was chosen to avoid the need to customize the kernel when verifying the correctness of the model.
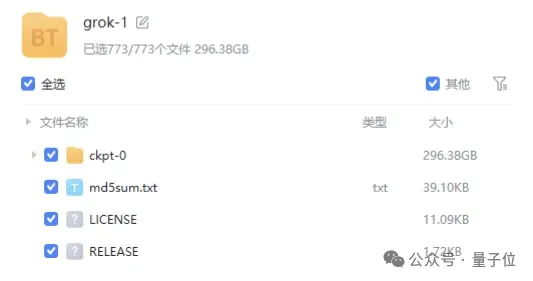
The weight file of the model is provided in the form of magnetic link, and the file size is close to 300GB.
It is worth mentioning that Grok-1 uses the Apache 2.0 license, Commercial friendly.
Currently, the star rating of Grok-1 on GitHub has reached 43.9k Stars.
Qubit understands that Colossal-AI will further launch optimizations for Grok-1 in the near future such as parallel acceleration and quantitative reduction of graphics memory costs. Welcome to continue to pay attention.
Colossal-AI open source address: https://www.php.cn/link/b9531e7d2a8f38fe8dcc73f58cae9530
The above is the detailed content of 3140 parameters Grok-1 inference accelerated by 3.8 times, PyTorch+HuggingFace version is here. For more information, please follow other related articles on the PHP Chinese website!

Hot AI Tools

Undresser.AI Undress
AI-powered app for creating realistic nude photos

AI Clothes Remover
Online AI tool for removing clothes from photos.

Undress AI Tool
Undress images for free

Clothoff.io
AI clothes remover

AI Hentai Generator
Generate AI Hentai for free.

Hot Article
Hot Tools

Notepad++7.3.1
Easy-to-use and free code editor

SublimeText3 Chinese version
Chinese version, very easy to use

Zend Studio 13.0.1
Powerful PHP integrated development environment

Dreamweaver CS6
Visual web development tools

SublimeText3 Mac version
God-level code editing software (SublimeText3)
Hot Topics
 1384
1384
 52
52

 Centos shutdown command line
Apr 14, 2025 pm 09:12 PM
Centos shutdown command line
Apr 14, 2025 pm 09:12 PM
The CentOS shutdown command is shutdown, and the syntax is shutdown [Options] Time [Information]. Options include: -h Stop the system immediately; -P Turn off the power after shutdown; -r restart; -t Waiting time. Times can be specified as immediate (now), minutes ( minutes), or a specific time (hh:mm). Added information can be displayed in system messages.
 What are the backup methods for GitLab on CentOS
Apr 14, 2025 pm 05:33 PM
What are the backup methods for GitLab on CentOS
Apr 14, 2025 pm 05:33 PM
Backup and Recovery Policy of GitLab under CentOS System In order to ensure data security and recoverability, GitLab on CentOS provides a variety of backup methods. This article will introduce several common backup methods, configuration parameters and recovery processes in detail to help you establish a complete GitLab backup and recovery strategy. 1. Manual backup Use the gitlab-rakegitlab:backup:create command to execute manual backup. This command backs up key information such as GitLab repository, database, users, user groups, keys, and permissions. The default backup file is stored in the /var/opt/gitlab/backups directory. You can modify /etc/gitlab
 How to check CentOS HDFS configuration
Apr 14, 2025 pm 07:21 PM
How to check CentOS HDFS configuration
Apr 14, 2025 pm 07:21 PM
Complete Guide to Checking HDFS Configuration in CentOS Systems This article will guide you how to effectively check the configuration and running status of HDFS on CentOS systems. The following steps will help you fully understand the setup and operation of HDFS. Verify Hadoop environment variable: First, make sure the Hadoop environment variable is set correctly. In the terminal, execute the following command to verify that Hadoop is installed and configured correctly: hadoopversion Check HDFS configuration file: The core configuration file of HDFS is located in the /etc/hadoop/conf/ directory, where core-site.xml and hdfs-site.xml are crucial. use
 How is the GPU support for PyTorch on CentOS
Apr 14, 2025 pm 06:48 PM
How is the GPU support for PyTorch on CentOS
Apr 14, 2025 pm 06:48 PM
Enable PyTorch GPU acceleration on CentOS system requires the installation of CUDA, cuDNN and GPU versions of PyTorch. The following steps will guide you through the process: CUDA and cuDNN installation determine CUDA version compatibility: Use the nvidia-smi command to view the CUDA version supported by your NVIDIA graphics card. For example, your MX450 graphics card may support CUDA11.1 or higher. Download and install CUDAToolkit: Visit the official website of NVIDIACUDAToolkit and download and install the corresponding version according to the highest CUDA version supported by your graphics card. Install cuDNN library:
 Detailed explanation of docker principle
Apr 14, 2025 pm 11:57 PM
Detailed explanation of docker principle
Apr 14, 2025 pm 11:57 PM
Docker uses Linux kernel features to provide an efficient and isolated application running environment. Its working principle is as follows: 1. The mirror is used as a read-only template, which contains everything you need to run the application; 2. The Union File System (UnionFS) stacks multiple file systems, only storing the differences, saving space and speeding up; 3. The daemon manages the mirrors and containers, and the client uses them for interaction; 4. Namespaces and cgroups implement container isolation and resource limitations; 5. Multiple network modes support container interconnection. Only by understanding these core concepts can you better utilize Docker.
 Centos install mysql
Apr 14, 2025 pm 08:09 PM
Centos install mysql
Apr 14, 2025 pm 08:09 PM
Installing MySQL on CentOS involves the following steps: Adding the appropriate MySQL yum source. Execute the yum install mysql-server command to install the MySQL server. Use the mysql_secure_installation command to make security settings, such as setting the root user password. Customize the MySQL configuration file as needed. Tune MySQL parameters and optimize databases for performance.
 How to view GitLab logs under CentOS
Apr 14, 2025 pm 06:18 PM
How to view GitLab logs under CentOS
Apr 14, 2025 pm 06:18 PM
A complete guide to viewing GitLab logs under CentOS system This article will guide you how to view various GitLab logs in CentOS system, including main logs, exception logs, and other related logs. Please note that the log file path may vary depending on the GitLab version and installation method. If the following path does not exist, please check the GitLab installation directory and configuration files. 1. View the main GitLab log Use the following command to view the main log file of the GitLabRails application: Command: sudocat/var/log/gitlab/gitlab-rails/production.log This command will display product
 How to operate distributed training of PyTorch on CentOS
Apr 14, 2025 pm 06:36 PM
How to operate distributed training of PyTorch on CentOS
Apr 14, 2025 pm 06:36 PM
PyTorch distributed training on CentOS system requires the following steps: PyTorch installation: The premise is that Python and pip are installed in CentOS system. Depending on your CUDA version, get the appropriate installation command from the PyTorch official website. For CPU-only training, you can use the following command: pipinstalltorchtorchvisiontorchaudio If you need GPU support, make sure that the corresponding version of CUDA and cuDNN are installed and use the corresponding PyTorch version for installation. Distributed environment configuration: Distributed training usually requires multiple machines or single-machine multiple GPUs. Place
