


Tips to solve the problem that WIN7 cannot modify the USB disk volume label
php editor Xinyi today will introduce to you how to solve the problem of being unable to modify the U disk volume label under WIN7 system. WIN7 system does not provide the option to modify the U disk volume label by default, but it can be achieved through the registry editor. First, press the Win R key to open the "Run" window, enter regedit and press Enter to open the Registry Editor. Then find the path HKEY_LOCAL_MACHINE\SYSTEM\CurrentControlSet\Control\StorageDevicePolicies, create a new DWORD (32-bit) value, name it WriteProtect, and change the numerical data to 0. Finally, restart the computer to successfully modify the USB disk volume label.
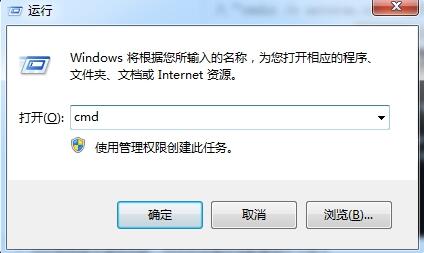
1. After entering the system, insert the USB disk, use the [Win R] shortcut key to open the run window, enter [cmd] and press Enter.
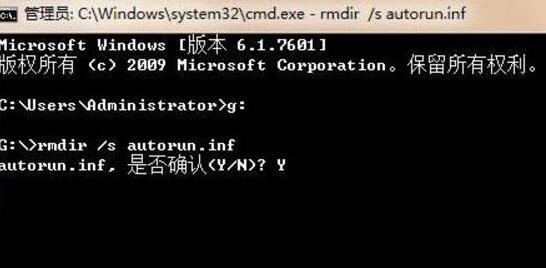
2. Enter [g:] in the command prompt (g is the U disk volume label that failed to be modified, please enter it according to your own situation), press Enter, and then continue Enter [rmdir /s autorun.inf] and press [Y] to confirm deletion.
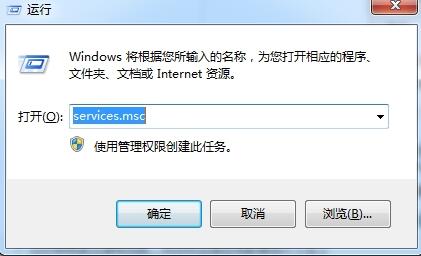
3. Open the run window again, enter the [services.msc] command and press Enter.
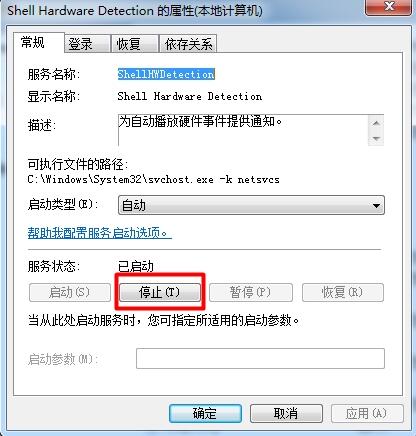
4. After entering the service window, find the [Shell Hardware Detection] service in the list and double-click to open it. Click the [Stop] button in the properties window, and then click OK.
The above is the detailed content of Tips to solve the problem that WIN7 cannot modify the USB disk volume label. For more information, please follow other related articles on the PHP Chinese website!

Hot AI Tools

Undresser.AI Undress
AI-powered app for creating realistic nude photos

AI Clothes Remover
Online AI tool for removing clothes from photos.

Undress AI Tool
Undress images for free

Clothoff.io
AI clothes remover

AI Hentai Generator
Generate AI Hentai for free.

Hot Article

Hot Tools

Notepad++7.3.1
Easy-to-use and free code editor

SublimeText3 Chinese version
Chinese version, very easy to use

Zend Studio 13.0.1
Powerful PHP integrated development environment

Dreamweaver CS6
Visual web development tools

SublimeText3 Mac version
God-level code editing software (SublimeText3)

Hot Topics


Ventoy is a USB boot tool that can directly boot ISO/WIM/IMG/VHD(x)/EFI and other types of files in the USB flash drive. It is very easy to use. Laptops have secure boot turned on by default. If they are not turned off or cannot be turned off, they cannot be booted from a USB device. Ventoy also supports secure boot. The principle is to inject a GRUB installation certificate into the current computer. As long as your computer After being injected once, any USB disk PE booted based on grub can pass. The official description of Ventoy is a GIF image. The playback speed is too fast and you may not be able to remember it. The editor has divided the GIF image to make it easier to understand. Ventoy secure boot has EnrollKey and Enro

First download the latest Win11 system ISO image, and then in Win10 system, you can directly right-click on the downloaded ISO image file and select [Load]; if it is under WinPE, WinXP, or Win7 system, you need to use the virtual optical drive tool to load the ISO Image; or you can directly decompress the ISO image file without using a virtual optical drive. Then run WinNTSetup. The software interface is as shown in the figure: First locate the location of the install.wim file. You can find the install.wim file in the sources directory of the Win11 ISO image loaded or decompressed by the virtual optical drive. Then set the location of the boot disk and installation disk. Generally, you are going to put W

When I turn on the computer, it always stops at the motherboard logo screen. Nothing happens when I press anything, and I can't enter the bios? This is usually because the BIOS battery voltage is too low, and the system time has returned to the BIOS preset time, such as 2000.1.1, 00:00. You can use it after pressing F1 to enter the bios and set the time. Do not turn off the AC power after shutting down at night. Generally, the system time will not be lost when you turn on the computer the next day, and you can still enter the system normally. If the AC power is cut off, the battery voltage cannot sustain the power consumption of the bios, and the computer will be in the same state again the next day when it is turned on. Replacing the bios battery is the ultimate solution. Win11 is stuck on the motherboard logo interface when booting? 1. It is a problem with bios settings. We only need to find the corresponding setting items.

Recently, many users using Win7 system have found that the icons in the taskbar suddenly disappeared, which makes the operation very inconvenient and they do not know how to solve the problem. This article will introduce to you how to solve the problem of disappearing taskbar icons in Win7 system. Bar! Cause Analysis When encountering such a situation, there are generally two situations: one is that the taskbar on the computer does not really disappear, but is just hidden, and the other is that the taskbar does disappear. Method 1: 1. There is a situation that you need to confirm first, that is, when the mouse is placed at the bottom of the screen, the taskbar will be displayed. You can directly click the mouse on the taskbar and select "Properties". 2. In the dialog box that opens, click & on the "Hide taskbar" option.

In Win7 system, many users want to delete personalized desktop background images, but do not know how to delete them. This article will show you how to delete personalized background images in Win7 system. 1. First, open the control panel interface of the Win7 system and click to enter the "Appearance and Personalization" settings; 2. Then, in the opened interface, click the "Change Desktop Background" setting; 3. Then, click below "Desktop background" option; 4. Then, select Select all, and then click Clear all. Of course, you can also use it under "Customize", right-click the theme you want to delete, and then click &q on the shortcut menu

To connect Windows 7 to a Cellular Hotspot, follow these steps: Open the Wireless Network Connections panel and find the Cellular Hotspot network. Right-click on the hotspot network and select Connect. Verify connection.

Many computer users know that network discovery is a network setting. This setting will affect whether the computer can find other computers and devices on the network and whether it can find the computer when other computers on the network are found. So how to enable network discovery in win7? The following computer System Home U Disk Installation will introduce you to the tutorial on how to enable network discovery in win7 system. 1. First, click the "Start Menu" icon on the desktop taskbar and choose to open the "Control Panel" interface. 2. Then, in the interface that opens, set "View by" to "Category", and then choose to enter "Network and Internet"

But sometimes users may encounter the problem that the network adapter suddenly disappears. Win7 operating system is a widely used operating system, which brings great troubles to network connection and use. To help users quickly solve network connection problems, this article will introduce the methods and steps on how to restore the Win7 network adapter. 1. Check the network adapter in the device manager 2. Uninstall and reinstall the network adapter driver. Select, right-click the network adapter and "Uninstall Device" and then restart the computer and install the driver automatically, or go to the official website to download the latest driver and install it manually. . 3. Check whether the device is disabled. Search for "Network Connections" in the start menu, open it, right-click the wireless connection or Ethernet connection, and select "Enable" to ensure that the device has not been disabled.
