

Operation process of designing wrench tool icon in PPT

The operation process of the wrench tool icon in PPT design is a problem that many people often encounter when making presentations. PHP editor Baicao will introduce you in detail how to add and adjust the wrench tool icon in PPT to make your presentation more attractive and professional. Following the guidance of this article, you will easily master the operation skills and make your PPT design even better!
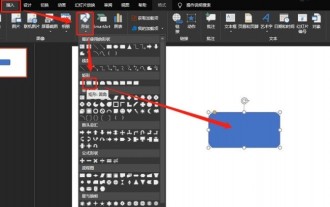
1. Insert triangle. As shown in the picture:.
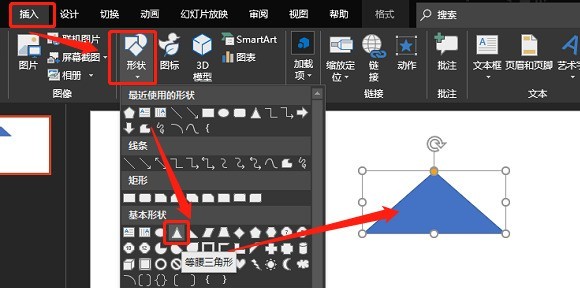
2. Insert a rectangle. As shown in the picture:
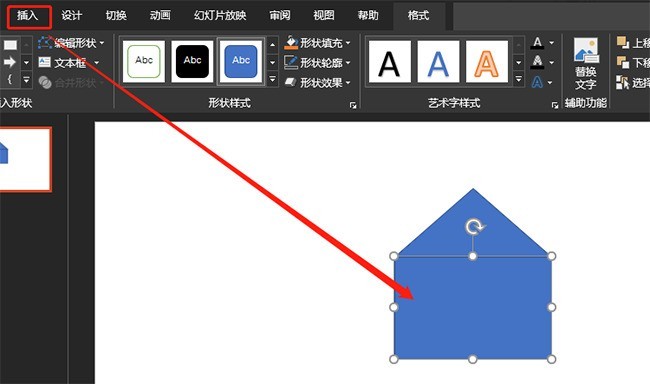
3. Combine graphics. As shown in the picture:
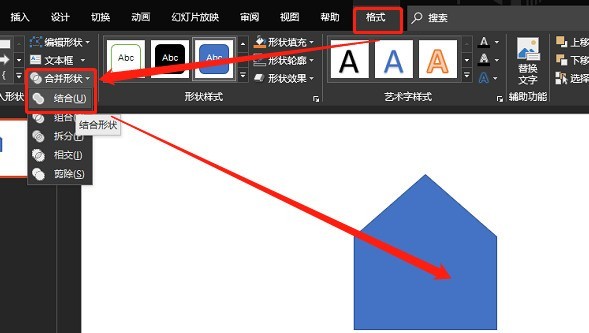
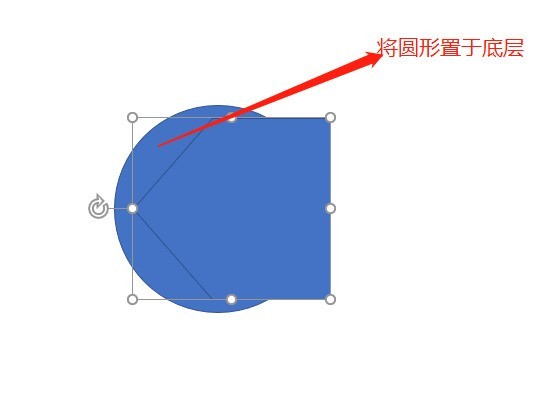
4. Insert a circle. As shown in the picture:
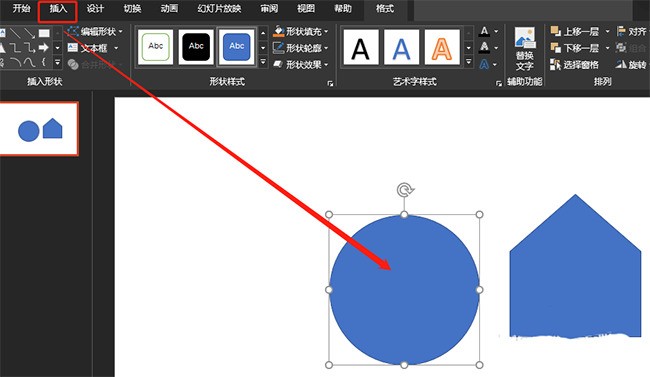
5. Overlay two graphics as shown in the picture:
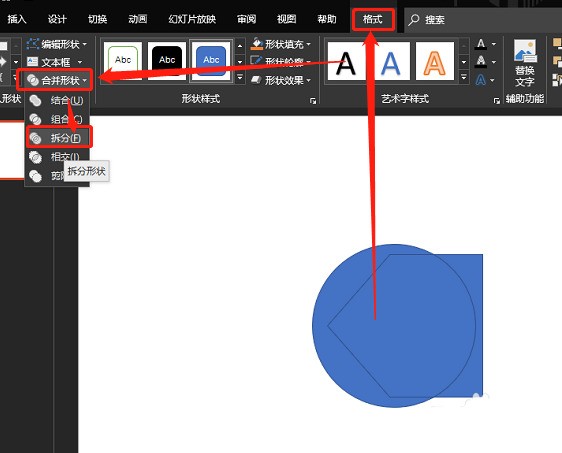
6. Split the graphics. As shown in the picture:
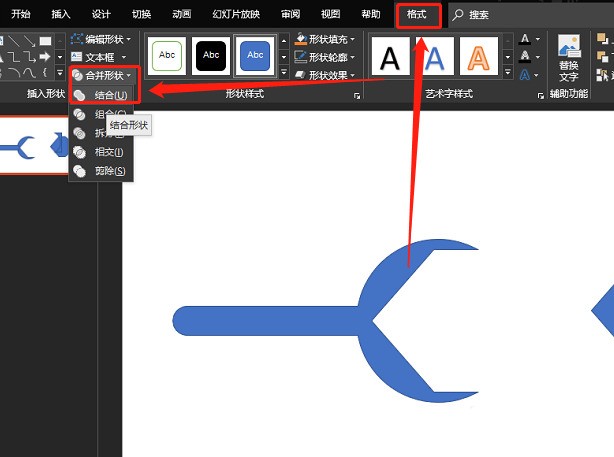
7. Insert a rounded rectangle and combine it. As shown in the picture:
The above is the detailed content of Operation process of designing wrench tool icon in PPT. For more information, please follow other related articles on the PHP Chinese website!

Hot AI Tools

Undresser.AI Undress
AI-powered app for creating realistic nude photos

AI Clothes Remover
Online AI tool for removing clothes from photos.

Undress AI Tool
Undress images for free

Clothoff.io
AI clothes remover

AI Hentai Generator
Generate AI Hentai for free.

Hot Article
Hot Tools

Notepad++7.3.1
Easy-to-use and free code editor

SublimeText3 Chinese version
Chinese version, very easy to use

Zend Studio 13.0.1
Powerful PHP integrated development environment

Dreamweaver CS6
Visual web development tools

SublimeText3 Mac version
God-level code editing software (SublimeText3)
Hot Topics
 1379
1379
 52
52

 How to shut down keyboard shortcuts in Windows 10
Jul 12, 2023 pm 02:09 PM
How to shut down keyboard shortcuts in Windows 10
Jul 12, 2023 pm 02:09 PM
In daily work and life, shutting down the computer is a common operation, but many friends don’t know that the keyboard can also be shut down quickly. So what is the shortcut key for shutting down the win10 keyboard? Next, the editor will tell you how to shut down the win10 shortcut keyboard. Share it with everyone. Win10 shutdown shortcut keyboard: 1. First, we can press "alt+F4" on the keyboard to bring up the shutdown interface. 2. Then press the Enter key to shut down. 3. We can also press and hold the power button to shut down. However, long pressing the power button is a forced shutdown and can easily cause damage to the hard disk. Just press and hold it for less than 2 seconds to automatically shut down. 4. Press and hold "win+x" on the keyboard and then press "u&q" twice
 Windows 7 disabling microphone operation process
Jul 16, 2023 pm 09:53 PM
Windows 7 disabling microphone operation process
Jul 16, 2023 pm 09:53 PM
Microphone is one of the commonly used functions of computers. Some Windows 7 customers want to completely block the sound of their office computers. So how should they disable the microphone? The operation steps are very simple. You first click on the sound icon, then right-click to select the recording device, then switch to the recording menu bar in the open window, select the microphone, and right-click to disable it. If you want to enable it again in the future, the same method is used. Just right click to enable it. How to disable the microphone in Windows 7: 1. First, right-click the sound icon in the taskbar in the lower right corner of the computer desktop and select "Recording Device" in the menu; 2. Then in the pop-up sound characteristics prompt box, switch to the "Recording" menu bar. Then right-click and select "Disable"; 3. In this way, it will not affect the sound card.
 How to record the internal sound of the computer in win10? The operation process of recording the internal sound of the computer in win10
Jul 10, 2023 am 08:02 AM
How to record the internal sound of the computer in win10? The operation process of recording the internal sound of the computer in win10
Jul 10, 2023 am 08:02 AM
Sometimes we have the need for audio. If we want to record the sound inside the computer, how do we do it? Taking win10 as an example, first click the sound icon to open the sound control panel, then switch to the recording menu bar, then right-click to select the device that indicates that it is prohibited to use, then right-click to open the stereo mix, then open its properties dialog box, and switch Go to the level menu bar and adjust the volume. You need to use a radio to record the internal sound of the computer. How to record the internal sound of the computer in win10: 1. On the Windows 10 desktop, right-click the volume icon in the lower right corner of the mouse and select the "Sound" menu item in the pop-up menu; 2. Then the sound setting dialog box will pop up. Click "Record" above
 How to use PPT design poster size
Mar 26, 2024 pm 09:46 PM
How to use PPT design poster size
Mar 26, 2024 pm 09:46 PM
1. Open PPT, click New Slide, and after creating a new slide document, select Page Settings in the Design column of the menu bar. In the pop-up dialog box, set the Slide Size to A4 size, and then set the Slide Orientation to Portrait. Click OK. 2. Select [Background] in [Design] in the menu bar, and select [Background...] in the drop-down menu to open the background setting interface. Click the inverted triangle of [Background Fill], select [Fill Effect], click [Picture] in the pop-up window, then [Select Picture], and click OK. 3. You can add some elements to the poster. Menu bar [Insert] → [Shape]/[Picture], and then you can select some appropriate graphics to add to the poster. 4. We can give the inserted element
 Insurance ppt layout design principles: principles of intimacy and hierarchy
Mar 19, 2024 pm 08:25 PM
Insurance ppt layout design principles: principles of intimacy and hierarchy
Mar 19, 2024 pm 08:25 PM
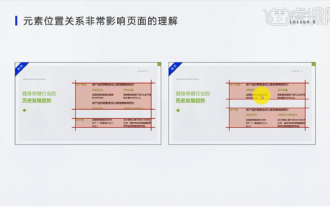
The design of ppt layout is directly related to the presentation of ppt content, especially the layout design of intimate and hierarchical relationships, which can well highlight the key content of ppt, making the relationship clear and focused. Insurance ppt especially needs to master and use this layout design principle. Below, we will take a look at how to understand and use this principle. The first part emphasizes the importance of intimacy to the understanding of copywriting, analyzes the ppt of the case, and points out existing problems: improper placement and deviations caused by different intimacy relationships. 2. The second part [Two hierarchical relationships that affect intimacy in PPT] By analyzing this case, the size of the font, the white space and the color of the font are often used to highlight the hierarchical relationship. 3. Two hierarchical relationships in the PPT page:
 How to use PPT to design a colored pencil
Mar 26, 2024 pm 05:56 PM
How to use PPT to design a colored pencil
Mar 26, 2024 pm 05:56 PM
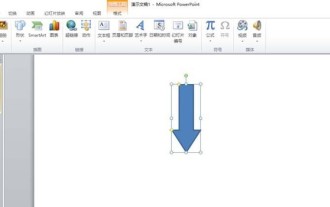
1. Open PPT, click the [Insert] tab, and click the [Shape] button in the [Illustration] group. Click [Down Arrow] in [Arrow Summary] in the open drop-down list to draw a downward arrow in the slide pane. 2. Right-click the down arrow and select [Edit Vertices] in the pop-up shortcut menu. 3. At this time, some editable vertices appear on the down arrow. 4. Use the mouse to drag the two upper vertices of the arrow inverted triangle inward, so that these two vertices coincide with the two adjacent editable vertices inside. 5. A simpler method is to insert a [Pentagon] from [Shape] and use the yellow control points on the pentagon to adjust the angle on the right side. 6. Rotate the adjusted pentagon and set the gradient fill as needed.
 Operation steps for PPT design to play animation of beautiful ancient poems
Mar 26, 2024 pm 04:51 PM
Operation steps for PPT design to play animation of beautiful ancient poems
Mar 26, 2024 pm 04:51 PM
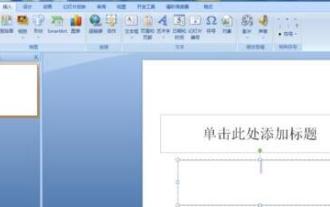
1. Start PPT and create a new blank slide. 2. Click the [Insert] tab in the menu bar, select [Rounded Rectangle] in the [Shape] group, and insert it into the page. 3. After drawing the rounded rectangle, adjust the size of the rounded rectangle appropriately, and then click the [Format] tab in the menu bar. A color style option will appear on the right side of the [Shape Style] area. Click the Use the drop-down triangle of the line to adjust the fill color of the rectangle. Because you want to add text, it is recommended to choose a lighter color. 4. Right-click a blank space on the page and select [Format Background] in the pop-up menu. 5. In the pop-up [Set Background Format] property box, check [Picture or Texture Fill], then click the drop-down triangle on the right side of [Texture] and select a fill you like.
 How to design printer icons using PPT
Mar 26, 2024 pm 08:46 PM
How to design printer icons using PPT
Mar 26, 2024 pm 08:46 PM
1. Insert a rounded rectangle. 2. Adjust the arc of the rounded rectangle. 3. Insert a rectangle. 4. Copy another rectangle. 5. Adjust the relationship between upper and lower levels. 6. Adjust the format: white fill, black border. 7. Add a black circle in the upper right corner.
