Home > Software Tutorial > Office Software > How to add a wavy border to text in wps2019_Detailed steps to add a wavy border to text in wps2019

How to add a wavy border to text in wps2019_Detailed steps to add a wavy border to text in wps2019

王林
Release: 2024-03-27 15:41:39
forward
788 people have browsed it

php editor Youzi teaches you how to add a wavy border to WPS2019 text. This special effect can add a unique style to your document. Next, we will introduce in detail the steps to add a wavy line border, allowing you to easily personalize your document.

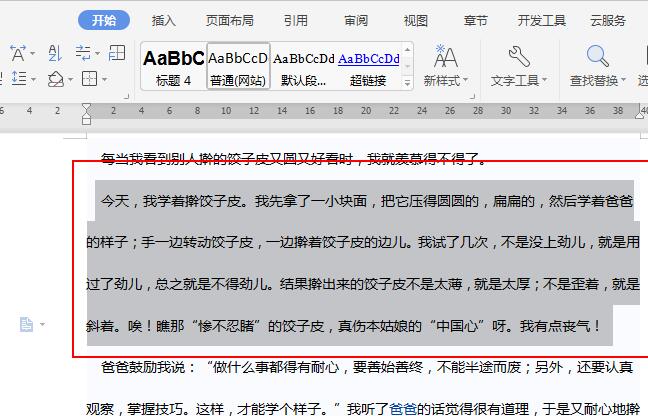
1. Select the required text in the text document.
How to add a wavy border to text in wps2019_Detailed steps to add a wavy border to text in wps2019

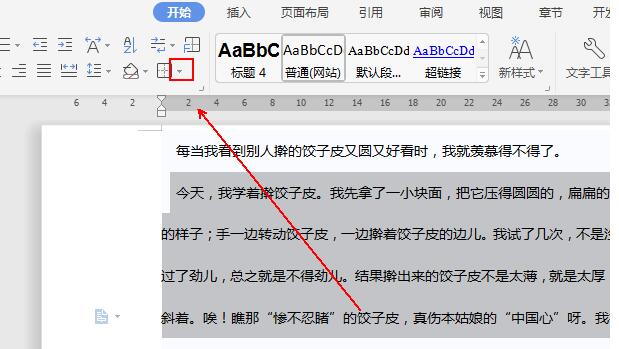
2. Click the inverted triangle next to the [Border] tool in the [Start] tool list.
How to add a wavy border to text in wps2019_Detailed steps to add a wavy border to text in wps2019

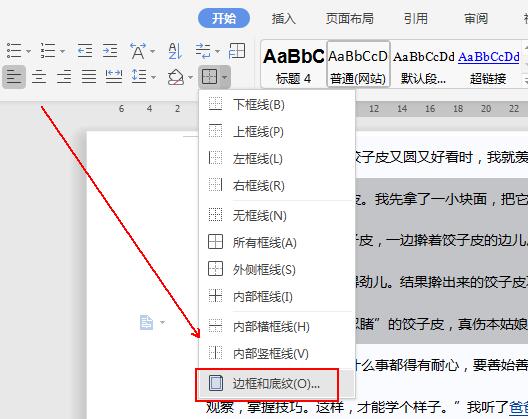
3. Click the [Border and Shading] option in the pop-up menu list.
How to add a wavy border to text in wps2019_Detailed steps to add a wavy border to text in wps2019

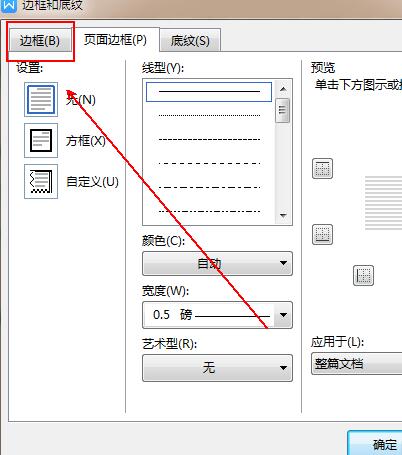
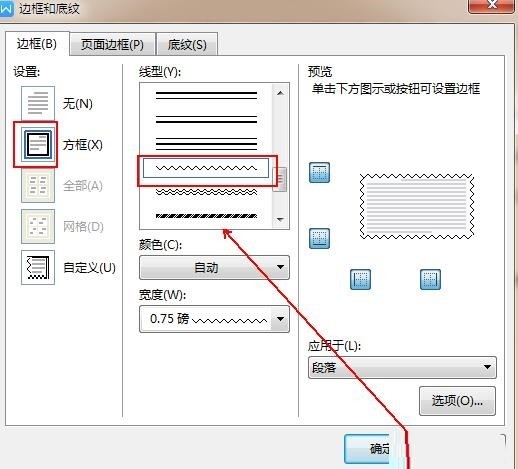
4. Click the [Border] option in the [Border and Shading] window.
How to add a wavy border to text in wps2019_Detailed steps to add a wavy border to text in wps2019

5. Select the [Box] on the left and select the wavy line in [Line Style].
How to add a wavy border to text in wps2019_Detailed steps to add a wavy border to text in wps2019

6. Set the color of the wavy line in [Color] below.
How to add a wavy border to text in wps2019_Detailed steps to add a wavy border to text in wps2019

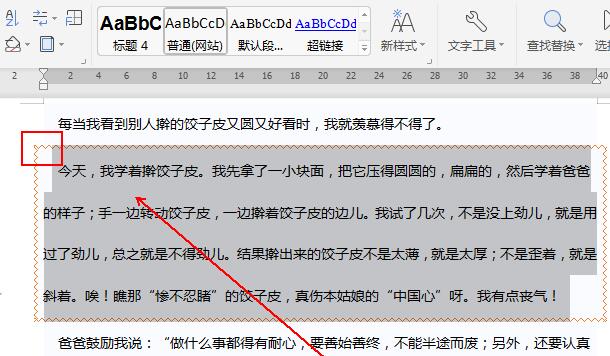
7. The final result is as shown in the figure.

How to add a wavy border to text in wps2019_Detailed steps to add a wavy border to text in wps2019

The above is the detailed content of How to add a wavy border to text in wps2019_Detailed steps to add a wavy border to text in wps2019. For more information, please follow other related articles on the PHP Chinese website!

Related labels:
source:zol.com.cn
Statement of this Website
The content of this article is voluntarily contributed by netizens, and the copyright belongs to the original author. This site does not assume corresponding legal responsibility. If you find any content suspected of plagiarism or infringement, please contact admin@php.cn
Popular Tutorials
More>
Latest Downloads
More>
Web Effects
Website Source Code
Website Materials
Front End Template