How to draw free curves in wps
The editor of PHP, Strawberry, will introduce to you the operation method of drawing free curves with WPS. In WPS documents, drawing free curves allows you to draw various shapes freely to achieve more personalized effects. The operation is simple and clear, just follow the instructions and you can easily complete it. Let’s learn about this practical function together!
1. Create a new blank document with a widescreen 16:9 ratio, which can automatically draw various text boxes and write different copywriting content. In the PPT software, you can automatically add multiple blank documents, insert multiple pictures for layout, add different text to the pictures, and add animation effects to the pictures.
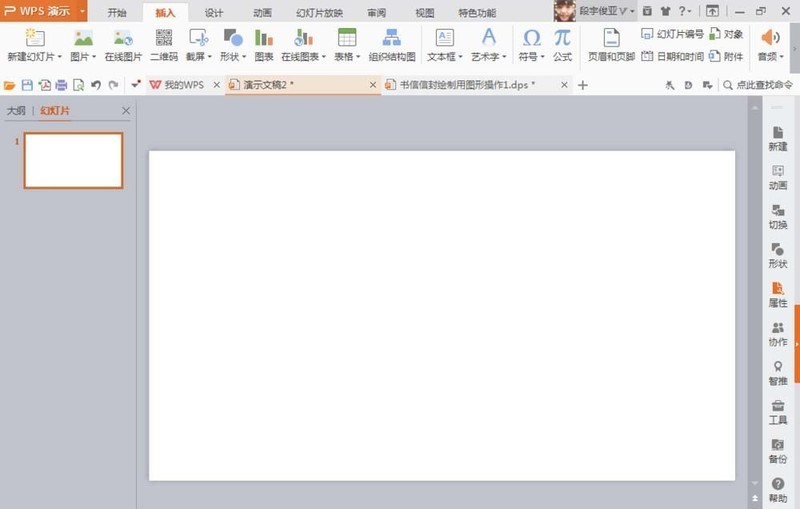
2. Select the insert option, select the shape tool, find the S shape of the free curve tool, and press the left mouse button to automatically draw different regular graphic shapes. Select the right mouse button to add an outline color to the curve. You can freely set the width of the outline, which can be set to 10 points or automatically filled with color.
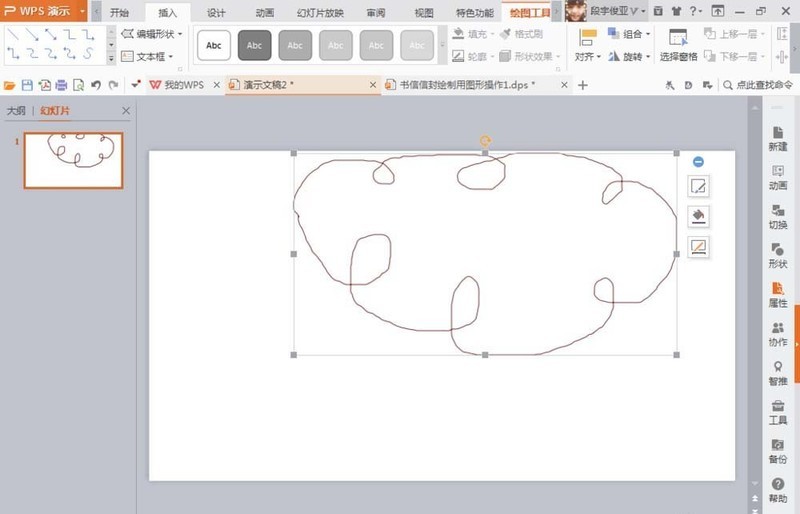
3. The right mouse button can automatically add colors and automatically edit vertices. It can be placed at the bottom or at the top. It can adjust the vertices of graphics in multiple directions and modify the shape of graphics. You can also draw fruits of different colors, modify the outline of the picture, etc.
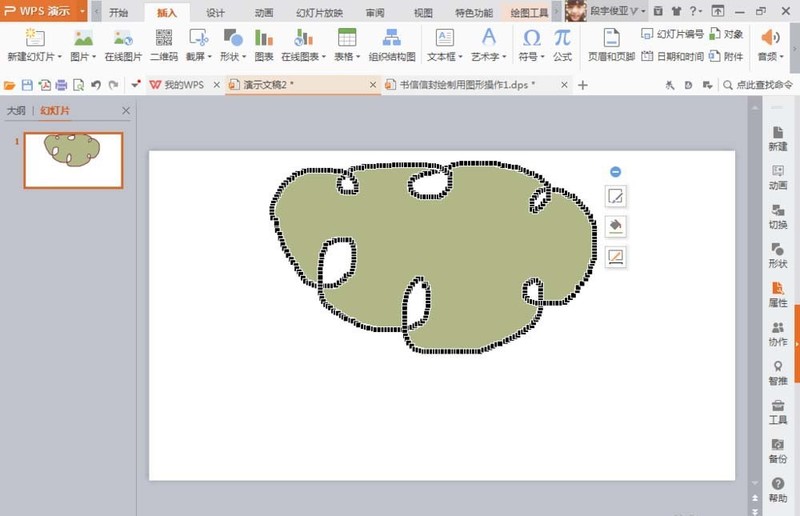
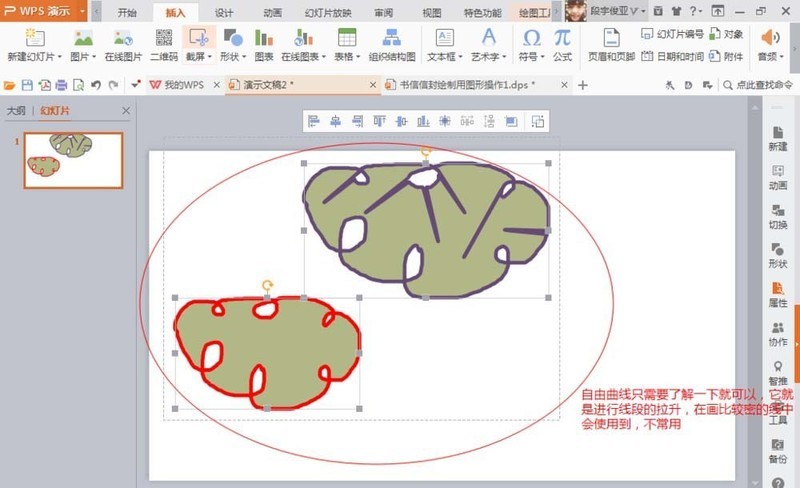
4. Select the image, press the crl key, and press the left mouse button at the same time to automatically draw multiple graphics. You can also press the shortcut key crl c to copy, and the shortcut key crl v to paste. Drawn shape icons can also be converted into pictures. Just press the right button of the mouse, select Paste Style, and Paste Special to convert it into pictures of different colors. As shown in the picture.
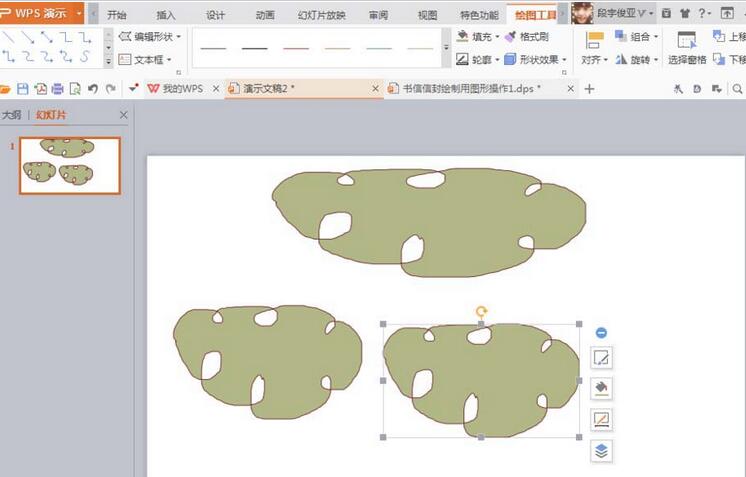
5. Select an irregular shape and press the right button of the mouse to automatically modify the color of the outline. Set the color to yellow, add 6 points to the outline, and bold the shape. contour lines, etc. As shown in the picture.
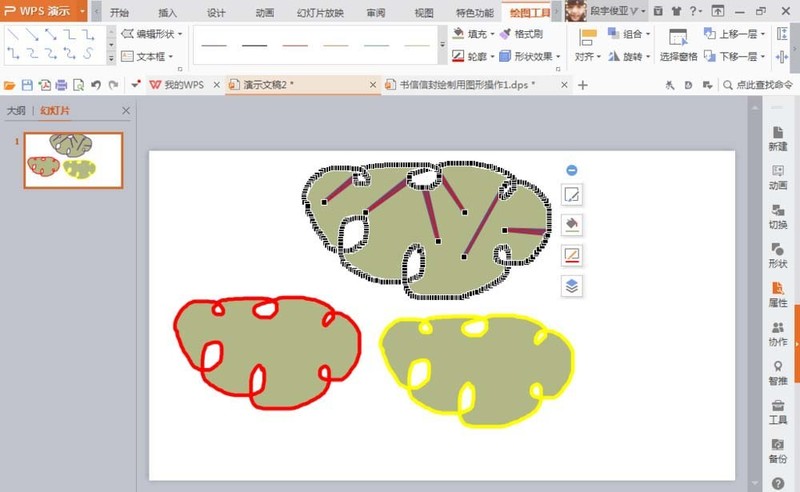
6. Select a graphic and press the right button of the mouse. You will find that when editing the vertices of the graphic, you can stretch the graphic outward at will. When drawing dense line graphics, you can use it flexibly. Edit vertex tools. In the vertex editing tool, you can automatically modify the vertices into corner vertices, smooth vertices, straight vertices, etc.
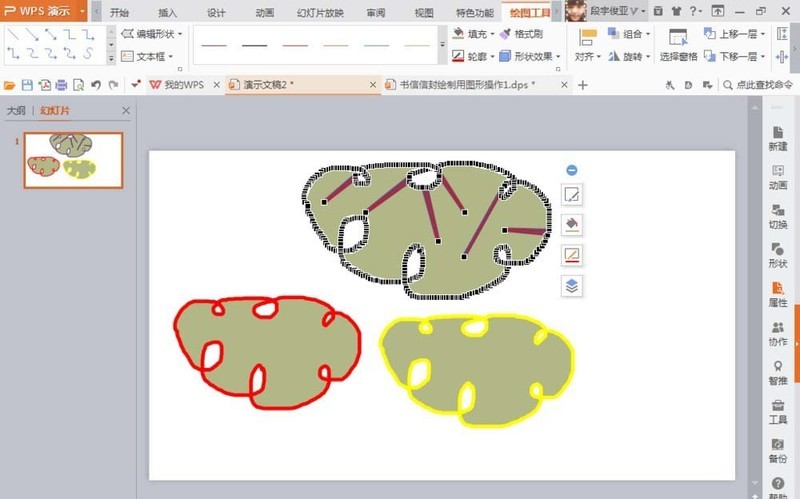
7. Edit the vertices and drag each vertex with the left mouse button to modify it into different shapes. Within the editing vertex range, there will be corner vertices. The control line vertices in the corner vertices can automatically control the control line in one direction. You can pull another control point to adjust the graphics at will. You can also modify it to a straight line vertex. The vertex's Both direction lines can be mainly horizontal lines and vertical lines. It can also be modified to smooth vertices, which is equivalent to automatically converting straight lines into smooth curves, etc.

8. If you feel that the picture is not beautiful enough, you can select the S free curve shape again, draw the shape again, press the left mouse button and click once to display a vertex, and click again to display the next vertex. , keep pressing the left mouse button and click to draw a graph composed of smooth curves.
The above is the detailed content of How to draw free curves in wps. For more information, please follow other related articles on the PHP Chinese website!

Hot AI Tools

Undresser.AI Undress
AI-powered app for creating realistic nude photos

AI Clothes Remover
Online AI tool for removing clothes from photos.

Undress AI Tool
Undress images for free

Clothoff.io
AI clothes remover

AI Hentai Generator
Generate AI Hentai for free.

Hot Article

Hot Tools

Notepad++7.3.1
Easy-to-use and free code editor

SublimeText3 Chinese version
Chinese version, very easy to use

Zend Studio 13.0.1
Powerful PHP integrated development environment

Dreamweaver CS6
Visual web development tools

SublimeText3 Mac version
God-level code editing software (SublimeText3)

Hot Topics
 1378
1378
 52
52
 WPS and Office do not have Chinese fonts, and Chinese font names are displayed in English.
Jun 19, 2024 am 06:56 AM
My friend's computer, all Chinese fonts such as imitation Song, Kai style, Xing Kai, Microsoft Yahei, etc. cannot be found in WPS and OFFICE. The editor below will tell you how to solve this problem. The fonts in the system are normal, but all fonts in the WPS font options are not available, only cloud fonts. OFFICE only has English fonts, not any Chinese fonts. After installing different versions of WPS, English fonts are available, but there is also no Chinese font. Solution: Control Panel → Categories → Clock, Language, and Region → Change Display Language → (Region and Language) Management → (Language for Non-Unicode Programs) Change System Regional Settings → Chinese (Simplified, China) → Restart. Control Panel, change the view mode in the upper right corner to "Category", Clock, Language and Region, change
 How to use wps translation function_How to use wps translation function
Mar 27, 2024 pm 04:46 PM
1. First, we open wpsoffice on the mobile phone. 2. Then click Apply. 3. Click the image to translate. Method 2 1. First, we open wpsoffice on the mobile phone. 2. Open the document that needs to be translated and click the tool in the lower left corner. 3. Click Review and Translate.
 How to center the WPS Word table
Mar 21, 2024 pm 02:21 PM
When using word in WPS, you often need to insert pictures, tables, etc., but if the inserted table is not centered, it will affect the beauty of the entire document. So how to set the centering of the WPS table? Today I will teach you how to make adjustments. The specific steps are as follows. Come and take a look! 1. The table in the picture is not in the middle of the page, which is not very beautiful. I want it to be centered. 2. First, right-click the mouse in the table (as shown in the picture). 3. Then click [Select All Tables] in the right-click menu (as shown by the red arrow in the figure). 4. After clicking, the table will be fully selected (as shown in the figure below). 5. At this time, click to open the [Start] tab of wps text (as shown by the red arrow in the figure). 6 o'clock
 What should I do if WPS cannot start the printer job?
Mar 20, 2024 am 08:20 AM
We can use office software to produce various electronic documents. Electronic documents greatly save the use of paper and are easier to save and read. However, sometimes according to work requirements, superiors require printing out paper documents for everyone to circulate. Document writing It's fine but unable to print. It's very difficult to encounter such a situation. The course we brought today can solve this problem. The following lesson is: What should I do if WPS cannot start the printer job? When trying to print a document using a LAN printer, a problem occurred, saying "WPSOffice cannot start the print job. Please check whether the printer is turned on and online." But in fact, the printer is powered on and online. 2. Click "OK", then click on the upper left corner of the title bar as shown in the picture
 How to create a QR code using wps
Mar 28, 2024 am 09:41 AM
1. Open the software and enter the wps text operation interface. 2. Find the insert option in this interface. 3. Click the Insert option and find the QR code option in its editing tool area. 4. Click the QR code option to pop up the QR code dialog box. 5. Select the text option on the left and enter our information in the text box. 6. On the right side, you can set the shape of the QR code and the color of the QR code.
 Why macros still cannot be enabled after wps installs vba
Mar 21, 2024 am 08:30 AM
wpsOffice is an office software suite independently developed by Kingsoft Software Co., Ltd., which can realize multiple functions such as text, forms, presentations, and PDF reading. It has the advantages of low memory usage, fast running speed, multiple cloud functions, powerful plug-in platform support, free massive online storage space and document templates. What the editor will introduce to you today is the "macro" function. In the past few days, friends have always asked me why I still can't enable macros after installing VBA. The "macro" function is still gray and cannot be opened, as shown below. What's going on? The editor will find out the reasons for you. There are three main reasons for this situation: 1. Does your wps support vba? Some versions do not support it. 2. Confirm that you have enabled macros and whether the operation
 Introduction to the method of editing watermark with WPS
Mar 27, 2024 pm 02:06 PM
1. We use WPS to open a document. There is a watermark in it. It looks messy. How to remove it? Look down. 2. Find the Insert tab in the menu bar, select the header and footer icons under this tab, and click on them with the left mouse button. 3. At this time, the text on the page becomes gray and cannot be edited, but the watermark on the back of the text can be edited at this time. 4. Click on the watermark, you can see that this is a picture watermark, because there are several small squares around the picture, and the picture can be edited at this time. 5. Use the delete key on the keyboard to delete the picture, and you can see that the watermark is gone. 6. Double-click the mouse on the page to exit the header and footer editing mode. The text on the page returns to normal color and can be edited, but at this time the watermark on the page has disappeared. 7.
 How to set WPS value to automatically change color according to conditions_Steps to set WPS table value to automatically change color according to condition
Mar 27, 2024 pm 07:30 PM
1. Open the worksheet and find the [Start]-[Conditional Formatting] button. 2. Click Column Selection and select the column to which conditional formatting will be added. 3. Click the [Conditional Formatting] button to bring up the option menu. 4. Select [Highlight conditional rules]-[Between]. 5. Fill in the rules: 20, 24, dark green text with dark fill color. 6. After confirmation, the data in the selected column will be colored with corresponding numbers, text, and cell boxes according to the settings. 7. Conditional rules without conflicts can be added repeatedly, but for conflicting rules WPS will replace the previously established conditional rules with the last added rule. 8. Repeatedly add the cell columns after [Between] rules 20-24 and [Less than] 20. 9. If you need to change the rules, you can just clear the rules and then reset the rules.


